Winter is upon us, and with it comes the joy of cozy sweaters, hot cocoa, and the magic of the holiday season. This time of year always reminds me of the beauty that blankets the world in white, sparking creativity and inspiration. If you’re someone who loves to express yourself through fashion and has an eye for detail, you’ll find this post particularly exciting. I’ve created a collection of simple winter nails ideas perfect for beginners who want to try their hand at stamping and painting.
Nail art can be a fun and fulfilling way to elevate your winter style without breaking the bank. If you’re looking to add a bit of sparkle to your holiday celebrations or simply want to keep your nails looking festive, these ideas are for you. I’ve gathered 12 easy nail designs that are not only gorgeous but also straightforward enough for anyone to try. Whether you want to rock a minimalist snowflake or go all out with glittering icicles, you’ll find the perfect winter nail art to suit your taste.
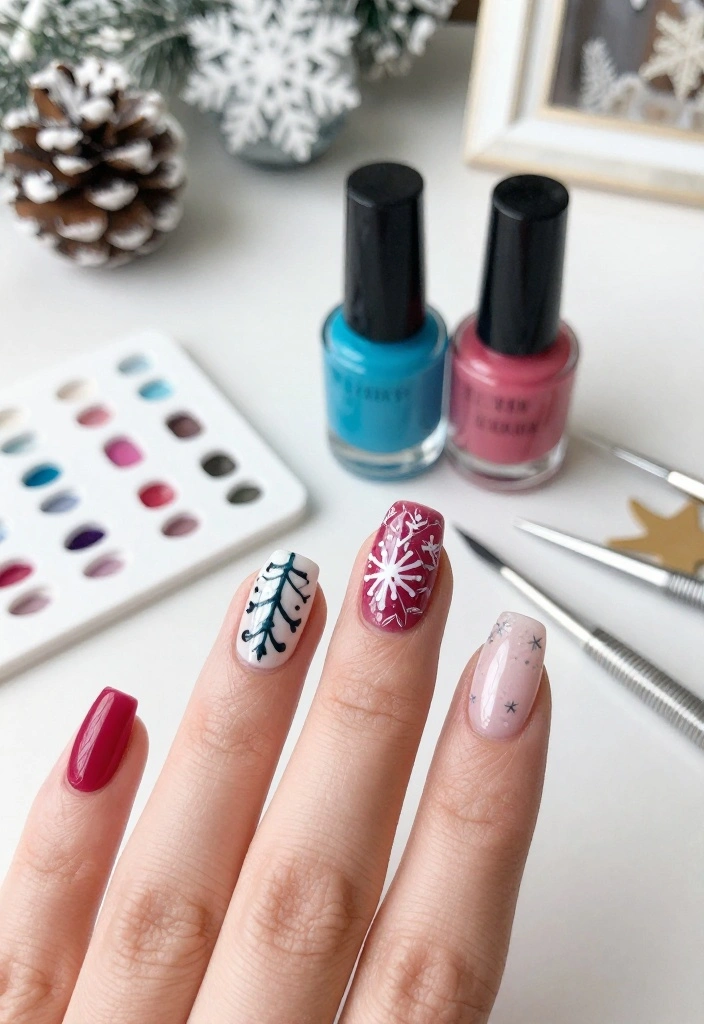
In this guide, you’ll uncover a variety of winter-themed designs that are stylish and easy to recreate at home. Perfect for beginners, these techniques will help you make your nails the star of the show this winter. So grab your favorite nail polishes and tools, and let’s dive into the world of winter nails!
Key Takeaways
– Discover 12 simple winter nail ideas that are perfect for beginners, focusing on both stamping and painting techniques.
– Each design embodies the charm of winter, from cozy sweater patterns to whimsical winter animals, catering to various tastes.
– Get step-by-step instructions for each nail art, making it easy for you to follow along and create stunning looks.
– Learn about essential tools and materials needed for successful nail art, ensuring you’re well-prepared for your creative journey.
– Enjoy the benefits of a fun and relaxing activity that can enhance your winter wardrobe and boost your mood.
Contents
- 1. Snowy Night Stamping
- 2. Frosty Ombre Nails
- 3. Glittering Icicles
- 4. Cozy Sweater Patterns
- 5. Winter Wonderland Water Marble
- 6. Christmas Tree Accent Nails
- 7. Minimalist Snowflake Design
- 8. Glamorous Glitter Snowflakes
- 9. Whimsical Winter Animals
- 10. Festive Stripes
- 11. Icy Blue French Tips
- 12. New Year’s Celebration Nails
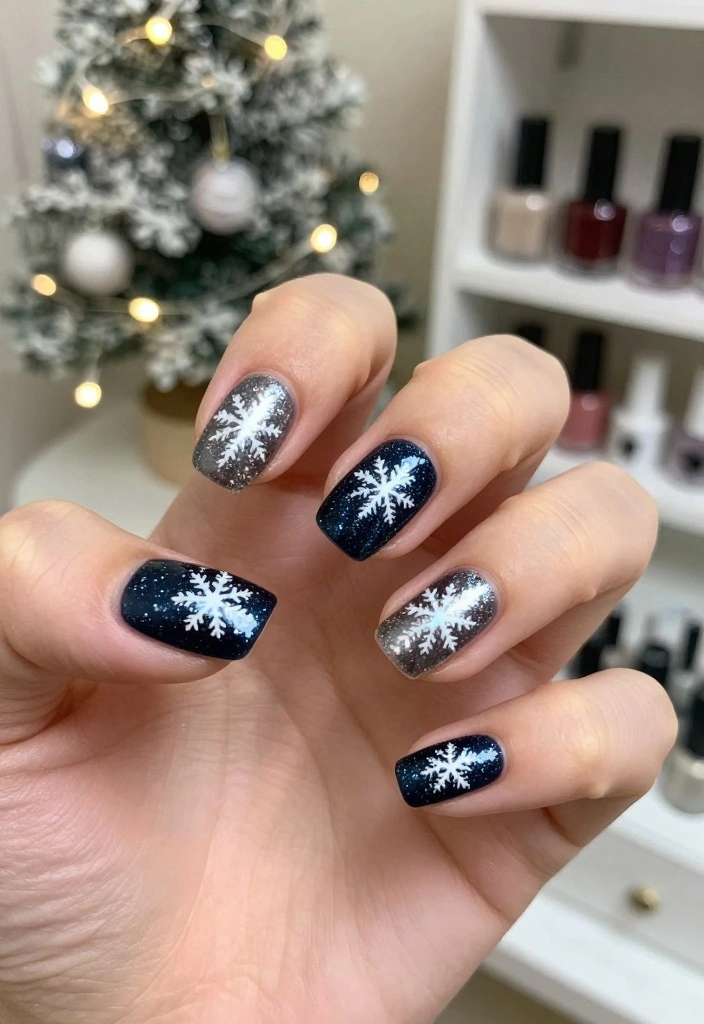
1. Snowy Night Stamping
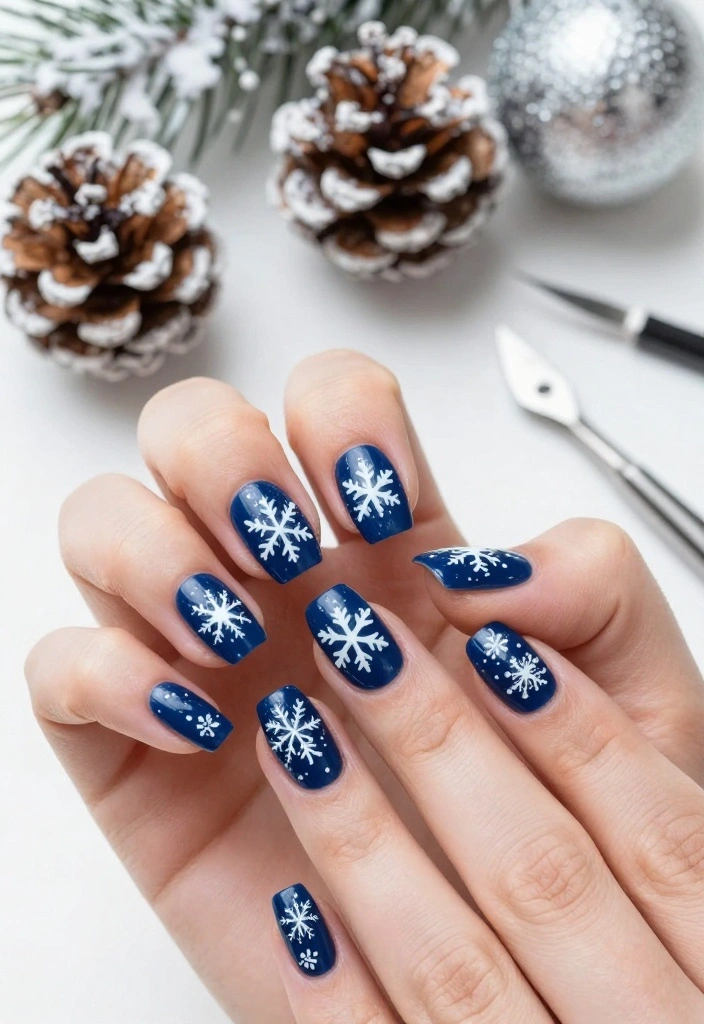
Imagine the tranquil beauty of a snowy night captured on your nails. This elegant stamping design features a deep navy base that beautifully contrasts with delicate white snowflakes, creating a stunning visual effect. It’s a chic choice for anyone wanting to add a touch of winter magic to their manicure.
Using this combination works wonders because the dark background enhances the brightness of the snowflakes. The stamp technique makes it easy to achieve intricate designs without requiring advanced skills, making it a perfect project for beginners.
This look is perfect for holiday parties, cozy nights in with loved ones, or simply to brighten up your winter days.
Outfit Pieces:
– Deep navy nail polish
– White stamping polish
– Snowflake stamping plate
– High-shine top coat
Styling Tips:
– Make sure your stamping plate is clean to get the best impressions.
– Practice your stamping technique on paper first to build confidence.
– Consider adding a matte top coat for a more understated finish.
This design is an eye-catching choice that can easily transition from casual outings to festive gatherings, ensuring your nails are always in style.
2. Frosty Ombre Nails
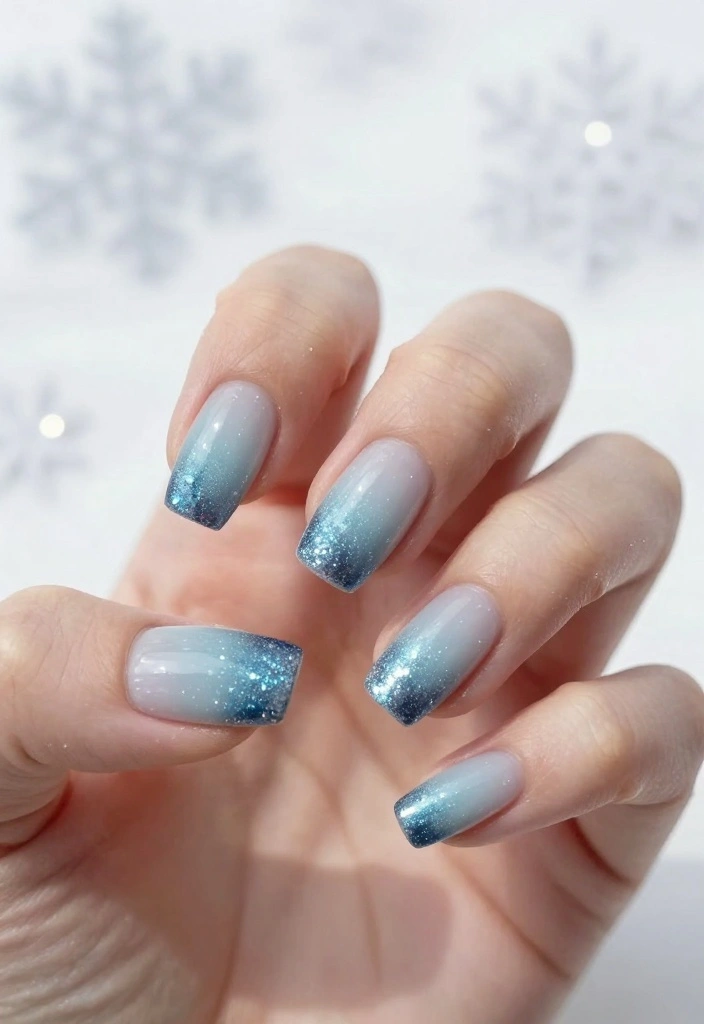
Ombre nails aren’t just for the summer months; they can shine just as brightly in winter! This frosty rendition blends icy blues and whites for a soft gradient effect that embodies the chill of the season. It’s a fresh take that’s both stylish and approachable.
The ombre technique works beautifully here because it mimics the soft transitions of winter skies. It’s versatile enough for everyday wear, yet stunning enough for special occasions, making it a fantastic option for beginners.
This look is perfect for casual brunches, holiday gatherings, or any day you want to feel extra polished.
Outfit Pieces:
– Light blue or white base coat
– Darker blue polish for the gradient
– Makeup sponge for blending
– Glitter top coat for added sparkle
Styling Tips:
– Apply the darker polish towards the tips, blending it gently with the base color.
– Use a sponge to dab on color, ensuring smooth transitions.
– Seal with a top coat to maintain the gradient and add shine.
This design is adaptable; swap in different colors for a unique seasonal look that can transition from day to night effortlessly.
💅 Nail Art Made Easy!
Transform your winter nails with our DIY guide, perfect for busy moms seeking quick, stylish designs.
3. Glittering Icicles
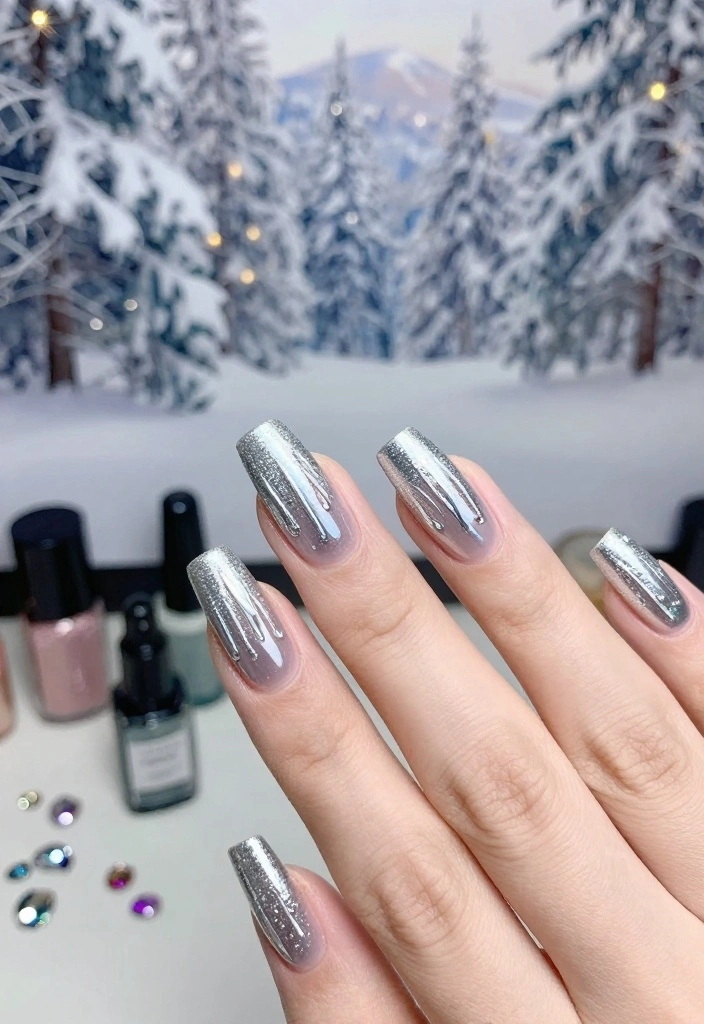
Capture the enchanting beauty of icicles with this striking glitter nail art design. This look combines sparkles and rich colors for a festive flair that’s sure to dazzle. It’s a great way to get into the winter spirit while expressing your creativity.
The icicle effect works well because it brings together the cold colors of winter with the warmth of sparkle, creating an eye-catching contrast. This design is simple yet impactful, making it a fantastic choice for beginners looking to try something new.
This style is ideal for winter parties, festive gatherings, or any occasion where you want to stand out.
Outfit Pieces:
– Metallic silver or icy blue base coat
– Fine glitter polish for the drips
– Tiny rhinestones for added sparkle
Styling Tips:
– Let each layer dry completely to prevent smudging.
– Use a gel top coat for extra shine and durability.
– Consider using different shades of glitter for a unique icicle effect.
This design will definitely turn heads and is a perfect way to celebrate the season while showcasing your style.
Fun fact: Glitter icicle nails come together in about 15 minutes, perfect for a quick, simple winter nails look. A sprinkle of sparkles over cool tones creates that wow factor without complexity. Try it: add thin silver lines to mimic frost and go!
4. Cozy Sweater Patterns
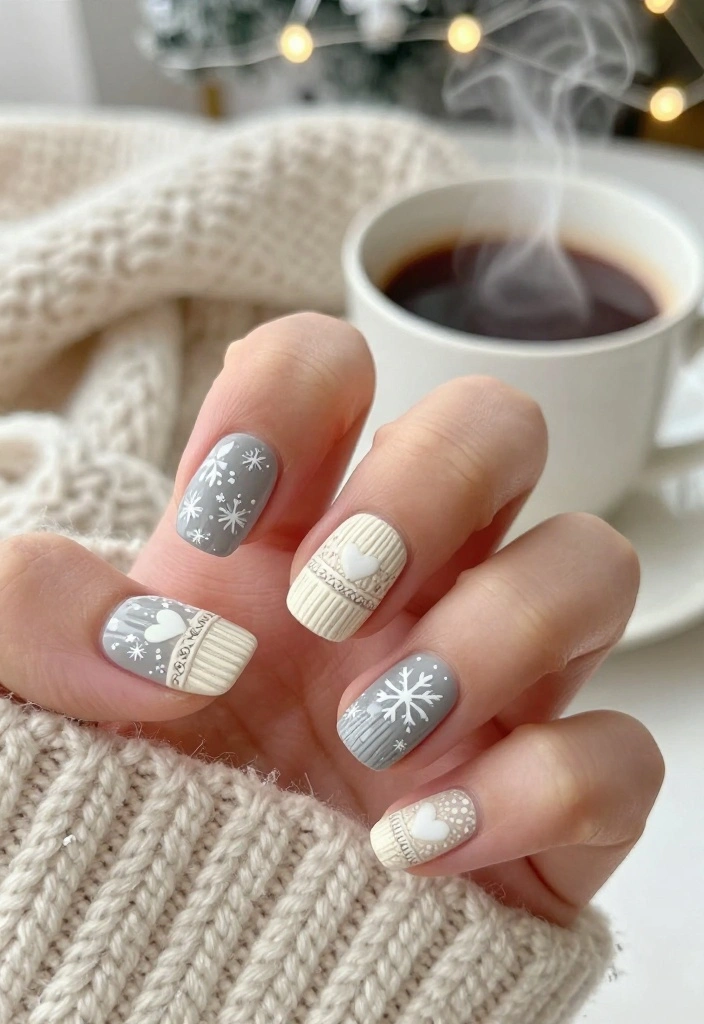
Nothing says winter like the warmth of a cozy sweater, and now you can wear that on your nails! This design features intricate sweater patterns that add a charming touch to your manicure. It captures the essence of winter while keeping your nails chic and stylish.
The sweater pattern works because it mimics the textures and coziness of knitwear, making it perfect for the season. It’s a delightful way to express your personality through nail art, especially for those who enjoy crafty designs.
This look is perfect for lazy winter days, movie nights, or any occasion where comfort meets style.
Outfit Pieces:
– Soft cream or pastel base coat
– Darker color like soft gray or light blue for the patterns
– Fine brush or dotting tool for details
Styling Tips:
– Use a light hand to create knit-like designs for a more delicate look.
– Experiment with small hearts or snowflakes between lines for added fun.
– A matte top coat can enhance the cozy feel of this design.
This cozy pattern is versatile, making it a perfect choice for both casual outings and festive gatherings, ensuring your nails reflect your winter spirit.
5. Winter Wonderland Water Marble
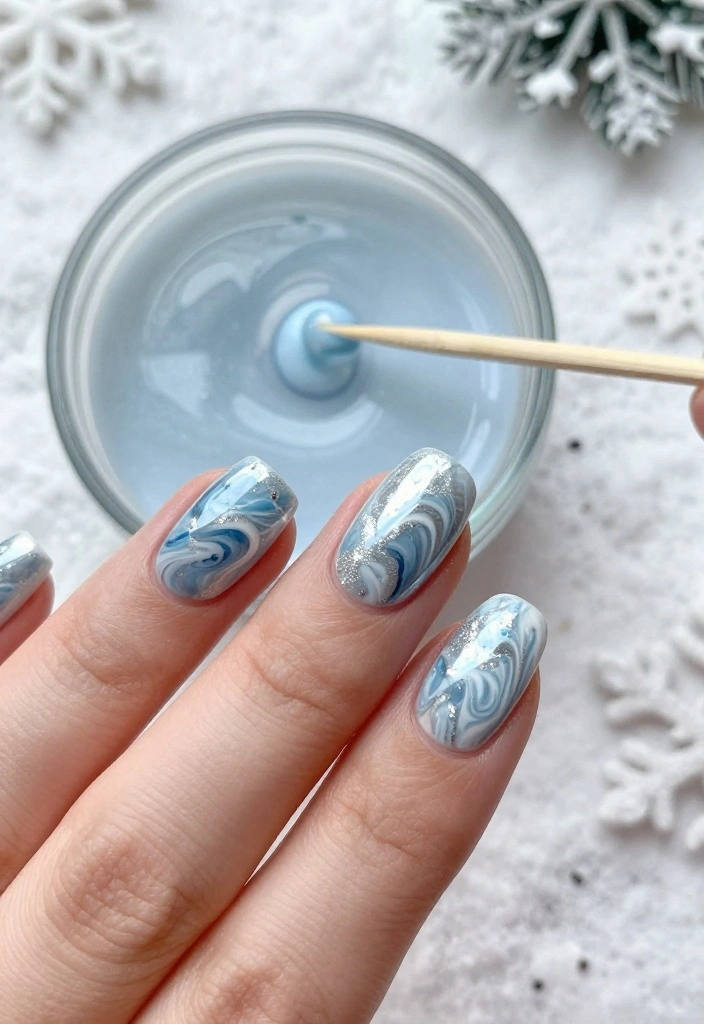
Water marble nail art is a fun way to create mesmerizing designs that reflect the beauty of winter. This technique allows you to swirl colors together to make unique patterns that are truly one-of-a-kind. It may seem challenging, but it’s worth the effort for stunning results.
The swirling patterns create a beautiful effect reminiscent of winter landscapes, making this design visually striking. It’s a great project for those who want to practice their skills while achieving professional-looking nails at home.
This style is excellent for parties, special events, or any day when you want to stand out with a unique manicure.
Outfit Pieces:
– Room temperature water in a bowl
– Various nail polish colors (icy blue, silver, white)
– Toothpick for swirling
Styling Tips:
– Tape off the skin around your nails to minimize mess.
– Experiment with different colors for a unique winter look.
– Practice swirling on paper first to get comfortable before applying to your nails.
Though it may take a bit of practice, the stunning results will leave you and others in awe, making it a fun winter project.
6. Christmas Tree Accent Nails
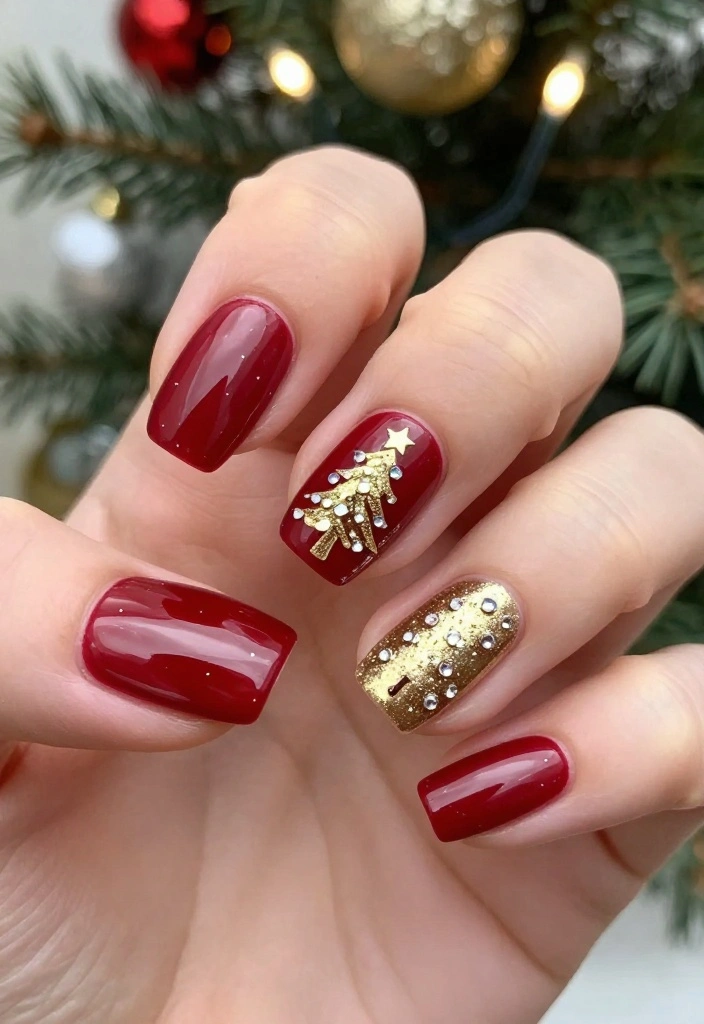
Embrace the festive spirit of Christmas with adorable Christmas tree accent designs on your nails! Using simple colors and a dotting tool, you can create delightful holiday vibes that spread cheer. It’s a perfect way to celebrate the season while keeping your nails looking fabulous.
This design works well because it combines traditional holiday colors with playful elements, making it fun and festive. It’s accessible for beginners, allowing you to express your creativity while getting into the holiday spirit.
This look is ideal for holiday parties, family gatherings, or any occasion where you want to showcase your festive flair.
Outfit Pieces:
– Deep red or green polish for primary nails
– Gold or silver base for accent nails
– Dotting tool for creating trees and ornaments
Styling Tips:
– Use the dotting tool to create tree shapes and add tiny rhinestones for ornaments.
– A star on top can be added with yellow polish for a festive touch.
– A glossy top coat will make your designs shine bright like holiday lights.
This playful design is perfect for anyone looking to add a touch of whimsy to their winter nails while celebrating the holiday season.
📹 Related Video: Christmas Tree Nail Art – Step by Step Tutorial
7. Minimalist Snowflake Design
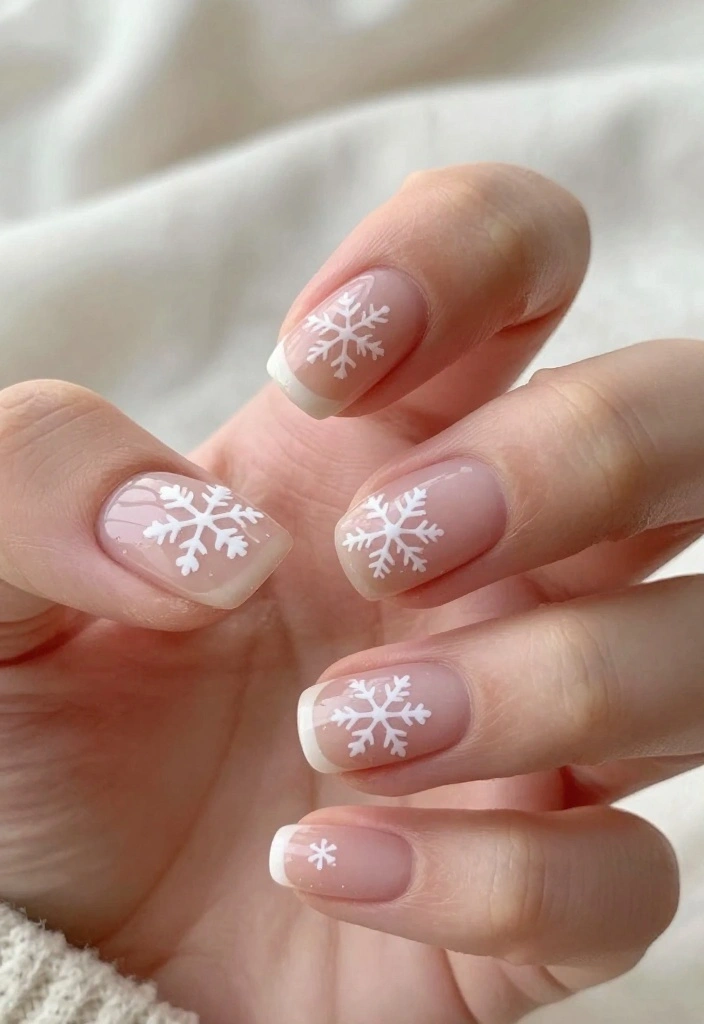
For those who appreciate simplicity, a minimalist snowflake design is a great choice. This technique embraces the less-is-more approach while still capturing the beauty of winter. It’s perfect for anyone wanting a chic and understated look.
The minimalist snowflake works well because it highlights the elegance of simple shapes, making it easy to wear for any occasion. This design is especially suited for those who enjoy a clean aesthetic while showcasing seasonal flair.
This look can transition seamlessly from day to night, making it suitable for work or evening outings.
Outfit Pieces:
– Nude or pale pink base coat
– White polish for snowflake outlines
– Fine nail art brush for details
Styling Tips:
– Focus on basic shapes to keep snowflakes simple and elegant.
– One statement snowflake per nail or several smaller ones for variety.
– A matte finish can enhance the minimalist style for a modern touch.
This design offers a sophisticated charm, ensuring your nails look effortlessly beautiful during the winter months.
How To Choose Simple Winter Nails Techniques
Choosing the right technique for your simple winter nails can make all the difference in achieving a beautiful and festive look. Here are some key factors to consider when selecting your winter nail art method:
1. Style Preference
What style do you gravitate towards? Whether you prefer elegant and minimalist designs like snowflakes or vibrant patterns like festive stripes, decide on a theme that resonates with you. Consider browsing social media platforms like Instagram or Pinterest for inspiration. This can help you identify specific designs you want to replicate.
2. Skill Level
Are you a beginner or more experienced with nail art? If you’re just starting out, you might want to stick with simpler techniques like basic painting or stamping. Advanced techniques like water marbling or intricate designs may require more practice. Assess your comfort level and choose techniques that match your skills, ensuring you enjoy the process.
3. Tools & Materials
Different techniques require different tools. For stamping, you’ll need a stamping plate, scraper, and a special stamping polish. For painting, standard nail polish and brushes will suffice. Make sure you have the right tools handy to avoid frustration. A well-stocked nail art kit can make experimentation more enjoyable and successful.
4. Time Commitment
How much time can you dedicate to your nail art? Some designs, like cozy sweater patterns or glittering icicles, may take longer to complete than others. If you’re short on time, opt for quicker techniques like minimalist designs or glitter accents. Plan your nail art session according to your schedule to prevent any last-minute rush.
5. Occasion
What’s the occasion for your winter nails? Whether it’s a holiday party, family gathering, or just a cozy night in, tailor your nail art to match the event. More festive and bold designs may be perfect for parties, while subtle styles are ideal for everyday wear. Consider the vibe you want to convey with your nails.
6. Color Palette
Winter nails often feature cool colors, but don’t be afraid to experiment! Classic shades like icy blue, white, and silver evoke winter vibes, while rich colors like deep red or emerald green add warmth. Choose a color palette that reflects your style and the current season. This will help your nails harmonize with your winter wardrobe.
Pro Tip: Experimenting is key! Try combining different techniques, such as stamping over a painted base or adding glitter to an ombre design. Don’t be afraid to get creative and make the designs your own!
Each of these factors will guide you in selecting the perfect technique for your winter nails. Whether you want to impress with intricate designs or keep it simple with elegant styles, the right approach will ensure your nails are festive and fun. Start planning your nail art today, and enjoy the creative process!
8. Glamorous Glitter Snowflakes
If you enjoy all things sparkly, this glamorous glitter snowflake design is perfect for you! It combines playful elements with elegant flair, creating a stunning winter wonderland look. This design is fun, catchy, and sure to draw attention.
The glitter snowflakes work beautifully because they add a festive and cheerful touch to your nails, making them perfect for winter celebrations. It’s an accessible design that allows you to play around with colors and textures while remaining chic.
This look is fantastic for holiday parties, festive events, or any occasion where you want to shine bright.
Outfit Pieces:
– Dark base coat (navy or black)
– White polish for snowflakes
– Fine glitter for added sparkle
– Clear top coat for sealing
Styling Tips:
– Sprinkle glitter while the polish is still wet for best adhesion.
– Ensure your base coat is completely dry before adding snowflakes to avoid smudging.
– Experiment with different glitter colors for a unique twist.
This design allows you to embrace the festive season while adding a touch of glamour to your nails, making them a standout feature of your winter look.
9. Whimsical Winter Animals
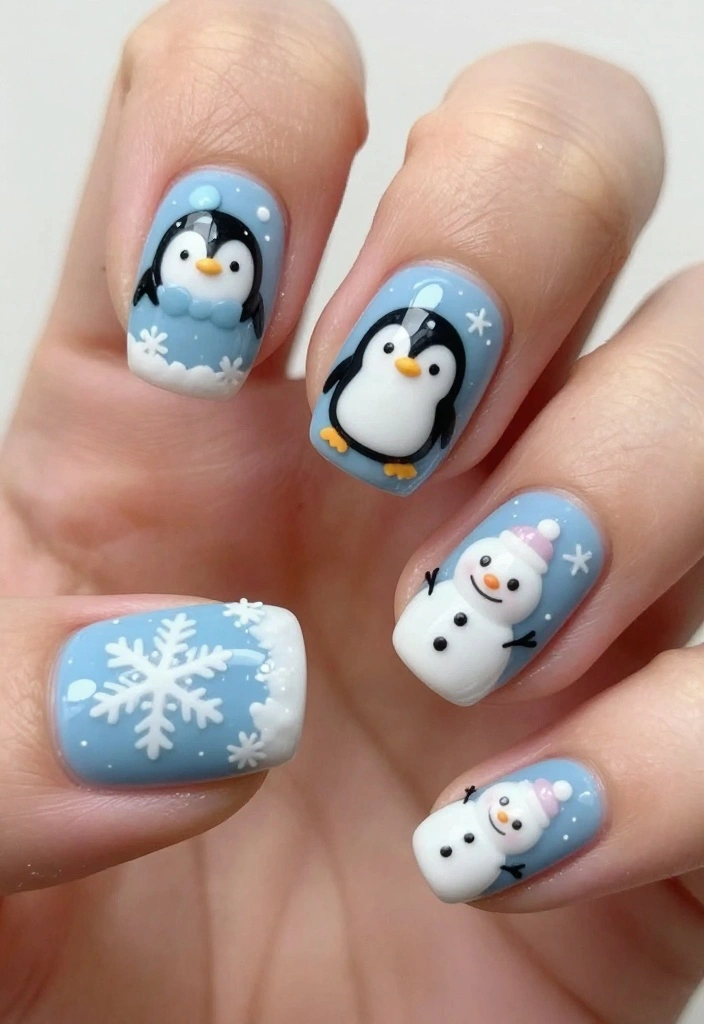
Get creative with adorable winter animal designs that bring joy to your nails! From cute penguins to fluffy snowmen, these whimsical characters are a playful nod to the magic of winter. They add a fun and cheerful element to your manicure that is sure to delight.
The animal designs work well because they evoke the playful spirit of the season, making it perfect for anyone looking to express their personality through nail art. This style is accessible for beginners, allowing for creative freedom without needing advanced skills.
This look is perfect for casual outings, parties, or any day when you want to spread a little cheer.
Outfit Pieces:
– Light blue or white base coat
– Black and white polishes for animals
– Fine brush for details
Styling Tips:
– Use a dotting tool for small details to enhance the characters.
– Mix and match different animals for a fun winter scene.
– Keep the designs simple for an easy, playful look.
This whimsical design brings a smile to your face and showcases your creativity, making it a delightful winter choice.
10. Festive Stripes
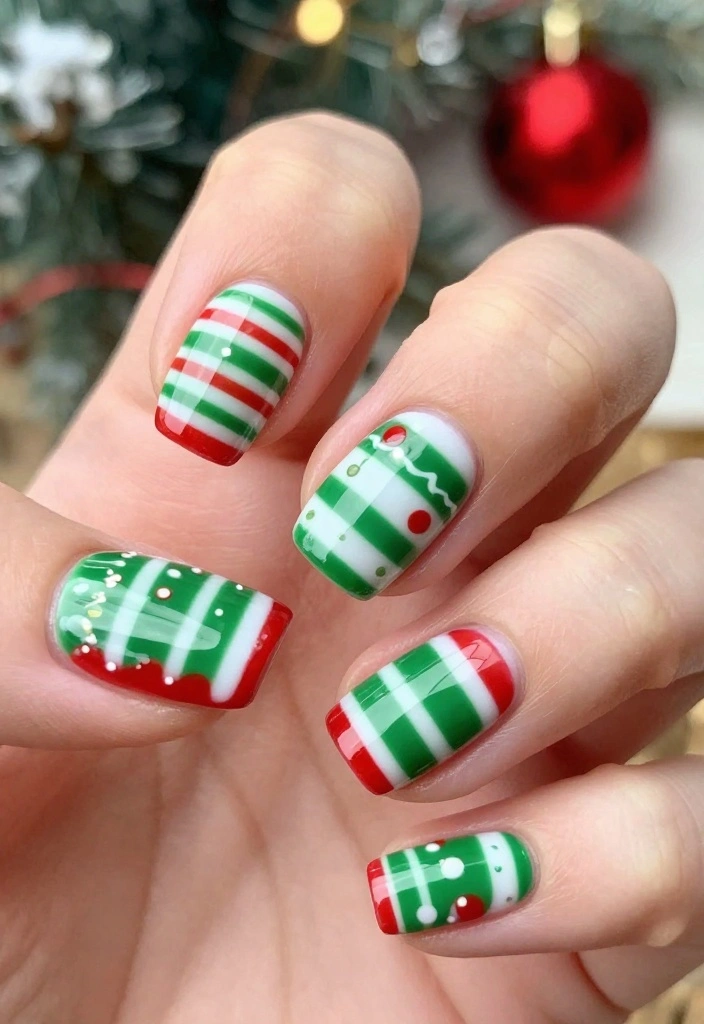
Stripes are a classic design that can easily be adapted for winter nail art. They can be colorful, simple, or even glittery, offering endless possibilities for creativity. This design is both festive and stylish, making it a great choice for the season.
The striped pattern works well because it can be customized to match any outfit or occasion. It’s a versatile look that can be dressed up or down, making it perfect for both casual and formal events.
This style is ideal for holiday parties, family gatherings, or any time you want to showcase your festive spirit.
Outfit Pieces:
– Base color (red or white)
– Contrasting colors for stripes (green or gold)
– Nail tape or fine brush for precise lines
Styling Tips:
– Use nail tape to ensure straight lines and crisp edges.
– Experiment with different stripe widths to create varied effects.
– Add glitter to some stripes for a bit of sparkle.
This design is adaptable and offers a fun way to celebrate the season while keeping your nails stylish and festive.
Fun fact: Stripes can go from simple to festive in under 5 minutes. Switch to metallics or add a glitter stripe for holiday flair, and your simple winter nails become instantly chic.
11. Icy Blue French Tips
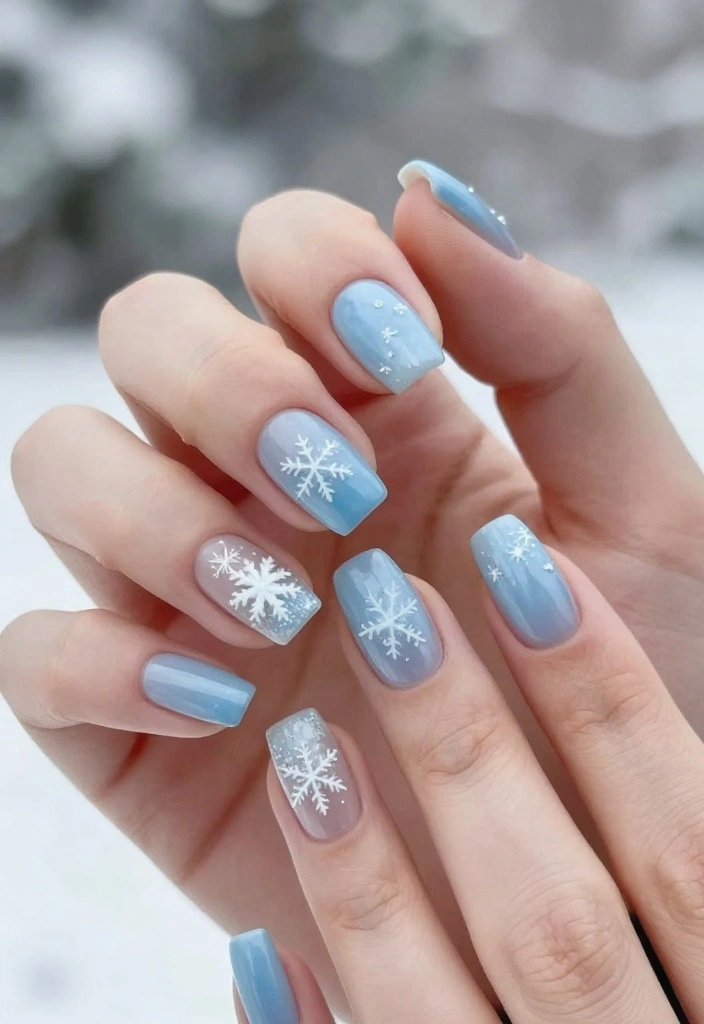
Add a winter twist to the classic French manicure with icy blue tips! This design combines elegance with seasonal flair, creating a refreshing look that’s perfect for winter. It’s a sophisticated choice that elevates your manicure while embracing the spirit of the season.
The icy blue tips work well because they offer a modern take on a timeless design. This style is suitable for any occasion, making it a versatile option for those who appreciate both classic and contemporary aesthetics.
This look is perfect for work, special events, or any time you want to look polished and chic.
Outfit Pieces:
– Pale blue base coat
– Darker blue or sparkly silver for tips
– Fine nail art brush for details
Styling Tips:
– Use striping tape to ensure straight lines for your tips.
– Consider adding tiny snowflakes on accent nails for added winter charm.
– Seal with a top coat for a smooth and durable finish.
This design beautifully balances classic elegance with seasonal charm, making it a delightful choice for winter.
12. New Year’s Celebration Nails
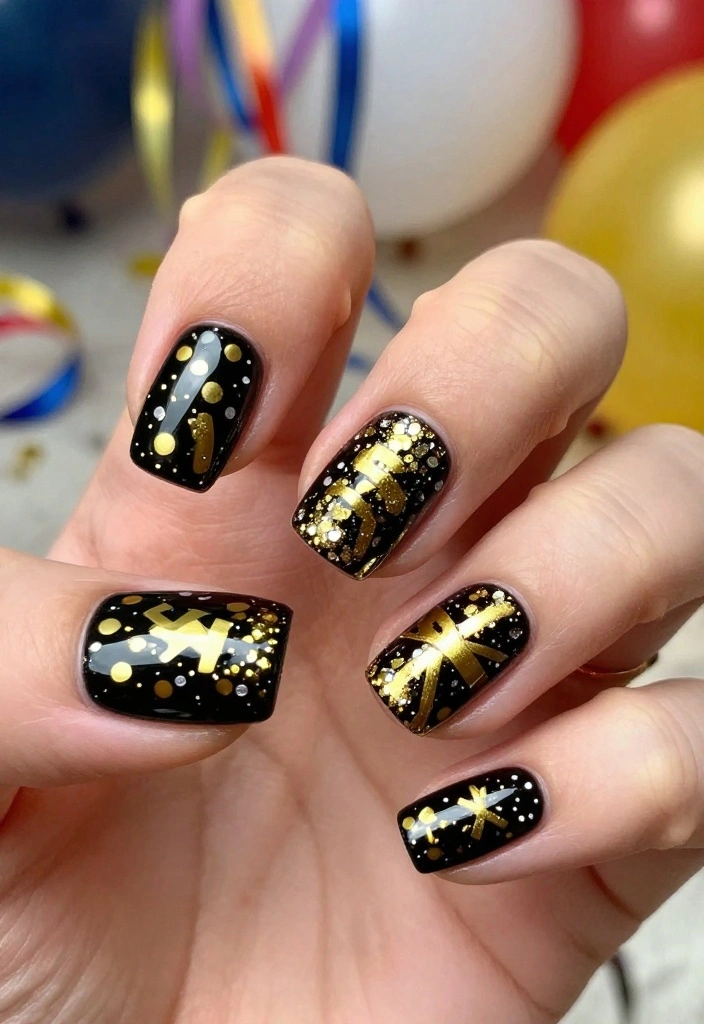
Ring in the new year with sparkling celebration nails that capture the festive spirit! This design combines gold and black elements, perfect for welcoming the new year in style. It’s a fun way to express your excitement for new beginnings while keeping your nails glamorous.
The celebration design works beautifully because it embodies the joy of the occasion while allowing for creativity. It’s a playful option that can easily be personalized to suit your style, making it ideal for New Year’s festivities.
This look is perfect for parties, gatherings, or any night out where you want to make a statement.
Outfit Pieces:
– Black base coat
– Gold polish for confetti-like designs
– Glitter for extra sparkle
– Optional: ‘2024’ on an accent nail
Styling Tips:
– Use a dotting tool for confetti designs or a small brush for precision.
– A gel top coat will provide extra shine and longevity.
– Feel free to mix in different colors to match your outfit or mood.
This festive design will make your nails the highlight of your New Year’s celebrations, ensuring you step into the new year with style.
New Year, new nails—simple winter nails that spark joy are all about celebrating with you. When you add gold and black accents, your celebration nails feel chic and wearable from party to afterglow. Personalize the look and let your nails say ‘here’s to new beginnings’.
Conclusion
Winter is a wonderful time to express your creativity through nail art. From cozy sweater designs to festive winter animals, there are countless ways to make your nails sparkle during the cold months.
Whether you’re trying stamping or painting for the first time or mastering a more intricate design, remember that practice and creativity are key. So grab your supplies, pick your favorite designs, and let your fingertips celebrate the beauty of winter!
Frequently Asked Questions
What are simple winter nails and how can beginners start with stamping and painting?
Simple winter nails are easy, festive designs you can achieve at home using stamping and painting. Here’s a beginner-friendly path:
Prep nails by filing, buffing, pushing back cuticles, and applying a base coat.
Choose a cozy base color like ivory, soft blue, or creamy red.
Stamp winter-inspired patterns (snowflakes, plaid, or stripes) using a light color on top of the base.
Add a tiny freehand detail if you like, then seal with a top coat.
Tips: keep layers thin, clean your plate and stamper between designs, and practice to improve your technique with stamping and painting for simple winter nails.
What essential tools do I need for stamping and painting simple winter nails, and how should I choose colors for a cozy look?
For stamping and painting simple winter nails, gather these basics: a stamping plate set (with snowflakes, plaid, or stripes), a silicone stamper, a scraper, a good base coat, a top coat, and a couple of polish colors. For a cozy winter vibe, start with a neutral base (cream, pale blue, or soft gray) and add stamping colors in white, silver, or metallic gold for contrast. Keep remover and lint-free wipes handy for clean edges. Optional: a fine cleanup brush for edging. Pro tips: test colors on a nail wheel, keep plates clean, and store polishes with similar brush widths to ensure clean transfers. This makes your stamping and painting look consistent.
How can I avoid common stamping mistakes and make winter nail art last longer?
Avoiding common stamping mistakes is all about prep and technique.
Ensure the base color is completely dry before stamping to prevent smudges.
Scrape the plate at a consistent 45-degree angle and roll the stamper straight onto the nail for clean transfers.
Keep the plate and stamper clean between designs, wipe away excess polish promptly, and work in thin layers.
Seal with a top coat after stamping is dry, and reapply a second coat if needed. For longevity in winter, use a nourishing base coat and apply a good top coat that resists chipping.
Can I mix stamping with freehand painting for a unique simple winter nails design?
Absolutely. Mixing stamping with freehand painting lets you create chic, cozy looks. Try stamping delicate snowflakes on a few nails, then add tiny holly leaves or red berry accents with a fine brush on others. Or paint a soft gradient base and stamp a crisp white pattern on top. Steps: paint base color and let dry; stamp chosen nails; use a fine brush to add extra details; finish with a sturdy top coat. Have fun and experiment—practice makes perfect.
How do I remove winter nail art safely and keep nails healthy?
When you’re ready to remove, use an acetone-based remover. Soak nails with cotton pads or use the foil method for 10-15 minutes to soften the polish. Gently wipe away the design and wash your hands. After removal, apply cuticle oil and a rich hand cream to hydrate. Give nails a break between designs, and if nails feel weakened, use a strengthening base coat next time. Keep nails trimmed, moisturized, and avoid picking at dry skin.
Related Topics
simple winter nails
nail art techniques
stamping nails
painting nails
beginner friendly
easy nail designs
winter nail trends
quick nail art
festive nails
DIY nail art
seasonal nail designs
nail art for beginners
I love these winter nail ideas! I tried a snowflake design last year, and let’s just say it looked more like a melted snowman. Do you have any tips for getting the stamping just right?
These ideas are so cute! I once tried to do a winter scene on my nails, but it turned into a disaster that looked like a toddler went wild with paint. Why did the nail never get the job? Because it couldn’t find its polish!
I had no idea nail stamping could be so easy! Fun fact: Did you know that the first nail polish was made in China over 3,000 years ago? Talk about a long history!
I remember my first attempt at nail art—it ended with me accidentally painting my cat’s paw while trying to do my own nails! Now I stick to simpler designs. Have you had any funny nail art mishaps?