Nail art has become a dazzling form of self-expression, especially when it comes to incorporating glittery star designs. With the fall season upon us and holiday celebrations on the horizon, the desire for eye-catching nail art is at an all-time high. If you’ve been searching for ways to elevate your nail game and make a lasting impression, you’re in the right place. This post is dedicated to bringing out your inner star with 14 stunning glittery star nail art styles that promise to make you shine bright.
If you’re someone who loves unique nail designs or is looking for fresh nail inspiration, this list is for you. Whether you’re preparing for a festive gathering or just want to treat yourself, you’ll find styles that cater to all tastes and occasions. From elegant to playful, these designs are not only visually appealing but also easy enough for you to try at home. Get ready to explore these 14 starry styles that will add sparkle and charm to your fingertips!
By the end of this post, you’ll have all the ideas you need to create your own dazzling nail art. You’ll discover new techniques and styles, ensuring your nails stand out wherever you go. Let’s dive in and find the perfect design that speaks to your style!
Key Takeaways
– Explore 14 unique glittery star nail art styles that cater to both bold and subtle preferences.
– Learn how to create Celestial Silver Stars and Galaxy Glitter Ombre for a cosmic vibe.
– Find ideas like Minimalistic Stars with Glitter Accents for a chic, understated look.
– Discover tips on how to achieve looks like Starry French Tip and Jewel Tone Stars at home.
– Get inspired by the playful designs of Glitter Bombed Stars and Twinkling Night Sky for festive gatherings.
Contents
- 1. Celestial Silver Stars
- 2. Galaxy Glitter Ombre
- 3. Neon Stars on Matte
- 4. Glittery Constellations
- 5. Starry French Tip
- 6. Starlit Glitter Watercolor
- 7. Glitter Bombed Stars
- 8. Minimalistic Stars with Glitter Accents
- 9. Dotted Stars on Gradient
- 10. Glittery Star Trails
- 11. Layered Star Glitter
- 12. Jewel Tone Stars
- 13. Starburst Glitter
- 14. Twinkling Night Sky
1. Celestial Silver Stars

Embark on a celestial journey with this stunning silver star design. Combining a classic silver base with dainty star stickers creates a refined look that catches the eye. It effortlessly adds a touch of glam, making it suitable for any event without being too flashy.
To achieve this stellar style, start by prepping your nails for a clean finish. Apply a thin layer of a quality base coat to shield your nails. Once dry, coat your nails with a silver nail lacquer. After the base is completely dry, carefully position the star stickers on each nail. Seal your masterpiece with a top coat for added shine and longevity!
– Nail Inspiration: Pair this design with a simple silver ring or minimalist jewelry.
– Pro Tip: Opt for a quick-dry top coat to prevent any smudging of the star stickers.
– Frequently Asked Question: How long will these stars last? With a top coat, they can last up to a week!
💅 Nail Art Made Easy!
Unlock your creativity with our DIY Nail Art Guide, perfect for busy moms who love to shine.
2. Galaxy Glitter Ombre

Take a cosmic trip with a beautiful galaxy glitter ombre design. This look captures the essence of the night sky transforming into a shimmering galaxy. Start with a dark blue or black base coat, then use a makeup sponge to dab on glittery purple and turquoise, blending downwards for a stunning ombre effect.
This technique not only looks captivating but also embraces a trendy gradient style that is perfect for any fashion lover. Finish with a clear gloss to ensure your nails shine bright!
– Nail Inspiration: Match your outfit with celestial-themed accessories for a cohesive look.
– Pro Tip: Choose fine glitter for a smooth gradient transition.
– Frequently Asked Question: Can I use regular polish instead of glitter? Yes, but glitter adds that special sparkle!
3. Neon Stars on Matte
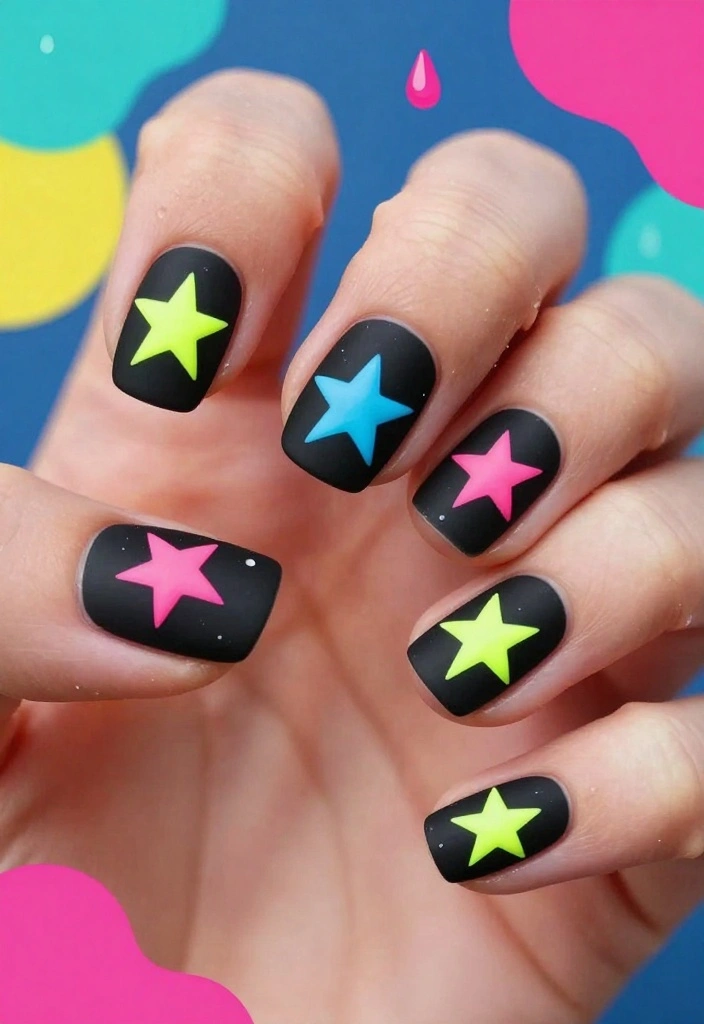
For a bold and funky twist, try neon stars on a matte base. This vibrant design pops with color, making it ideal for summer festivals or fun outings. Start with a matte black or white base coat to create a striking contrast that highlights the neon colors.
Once dry, use neon nail pens or brushes to craft playful star shapes on your nails. Mixing and matching colors adds a whimsical touch, while the matte finish offers a modern, edgy vibe. This style is not just playful but also makes a memorable statement!
– Nail Inspiration: Pair with bright accessories to enhance the neon theme.
– Pro Tip: Use a base coat formulated for matte polishes for the best results.
– Frequently Asked Question: Can I make it glossy? Absolutely! Just add a clear glossy top coat for a different look.
4. Glittery Constellations

Unlock the mysteries of the cosmos with a constellation-inspired nail art design. This intricate style uses fine glitter to illustrate various constellations against a night sky backdrop. Start by applying a deep navy or black polish as your base.
Once dried, use a thin nail brush or detailing tool to connect tiny glitter dots, creating the constellations. This design is not only visually stunning but also holds a special meaning for astronomy enthusiasts. Seal it with a top coat for a smooth finish, and you’ll have a design that’s truly out of this world!
– Nail Inspiration: Wear celestial-themed clothing to complement your nails.
– Pro Tip: For an extra pop, use a glow-in-the-dark top coat for nighttime visibility.
– Frequently Asked Question: Is it hard to create constellations? With practice, it’s totally achievable!
Fun fact: 72% of nail-art lovers say star nail art with a constellation design doubles the wow-factor with just fine glitter. Pro tip: start with a deep navy base and connect glitter stars for a ready-to-share look in minutes.
How To Choose Star Nail Art Styles
Choosing the perfect star nail art style can be a fun yet challenging task. With so many glittery designs available, you want to ensure that your choice matches your personality and fits the occasion. Here’s how to pick the right star nail art that will make you shine bright!
1. Consider Your Style
Your personal style plays a crucial role in selecting the right nail art. Are you someone who loves bold colors and flashy designs, or do you prefer subtle elegance? For a more dramatic look, opt for styles like Galaxy Glitter Ombre or Glitter Bombed Stars. If you enjoy minimalistic designs, try Minimalistic Stars with Glitter Accents. By reflecting your style, your nails will feel more authentic to you!
2. Think About the Occasion
Different events call for different nail art styles. For example, a sophisticated setting might be better suited for Starry French Tips, while a fun night out could be the perfect time to flaunt some Glittery Constellations. Consider the vibe of the event and choose a nail art style that complements it. This will ensure your nail art enhances your overall look and fits seamlessly with your outfit.
3. Evaluate Your Skill Level
If you’re doing your own nails, think about how comfortable you are with nail art techniques. Some styles, like Starlit Glitter Watercolor or Layered Star Glitter, may require a bit more skill and practice. If you’re a beginner, consider starting with simpler designs like Dotted Stars on Gradient. Once you master those, you can confidently move on to more complex styles. Don’t be afraid to practice – that’s how you’ll get better!
4. Choose the Right Colors
Colors play a vital role in how your nail art is perceived. Glittery star designs can shine in various color palettes, from bold neon hues to soft pastels. If you want your stars to pop, consider high-contrast colors, like neon stars on a matte background. Alternatively, jewel tones can create a rich and elegant look. Ensure that the colors you choose reflect the mood you want to convey. You can even use color theory to combine shades that complement each other beautifully!
5. Factor in the Season
Nail art can also be influenced by seasonal trends. In the summer, bright and playful designs like Twinkling Night Sky may be popular. During the winter months, darker shades with metallic glitter might be more appealing. Keep the season in mind when selecting your design, as it can enhance your overall look and keep your style trendy. You can also check seasonal color palettes for added inspiration!
6. Consider Maintenance
Some nail art styles require more upkeep than others. For instance, intricate designs like Glitter Trails may need more touch-ups and careful handling. If you have a busy lifestyle, you may want to opt for simpler styles that look great without requiring constant maintenance. Think about how much time you’re willing to dedicate to keeping your nails looking fabulous, and choose a style accordingly.
Pro Tip: Before committing to a design, try to visualize it using nail art apps or by drawing a quick sketch. This can help you narrow down your options and feel more confident in your final choice!
Choosing the right star nail art style is all about aligning your preferences with practical considerations. By thinking through your style, the occasion, your skill level, colors, seasonality, and maintenance, you’ll be able to select a design that resonates with you and keeps your nails looking stunning! Get ready to shine bright with your chosen star nail art!
5. Starry French Tip
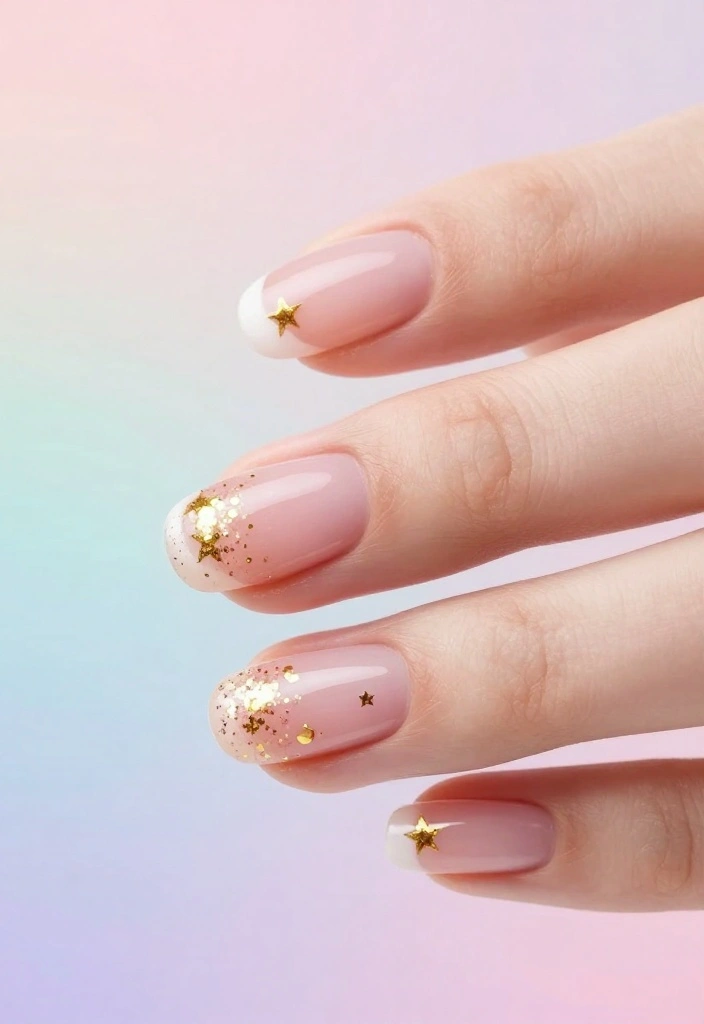
The classic French manicure gets a sparkling upgrade with tiny stars! This design maintains the elegance of the traditional look while adding a fun twist. Start with a nude or pale pink base coat.
Once dry, apply white polish to create the classic tips, then add fine gold or silver glitter for added shine. For the final touch, use a dotting tool to place small star stickers or draw them on the tips. This design is versatile, making it suitable for casual outings or formal events alike.
– Nail Inspiration: Pair with soft pastel outfits for a chic spring look.
– Pro Tip: Use a glitter top coat for a more consistent sparkle.
– Frequently Asked Question: Do I need a special tool for the stars? A toothpick works well too!
6. Starlit Glitter Watercolor

For those who love artistic flair, the starlit glitter watercolor technique is a must-try! This style combines watercolor painting with sparkly accents, creating a dreamy, artistic vibe. Start with a white base coat.
Using a watercolor technique, apply blue, purple, and pink shades with a soft brush to achieve a blended effect. After the colors dry, layer glitter polish on top to add a starlit finish. This design is visually striking and showcases your creativity and individuality!
– Nail Inspiration: Complement this bold style with neutral outfits.
– Pro Tip: Practice the watercolor technique on a separate sheet first for the best results.
– Frequently Asked Question: How do I create the watercolor effect? Use a damp brush and mix the polishes with a bit of water!
📹 Related Video: Easiest Watercolor Nail Art (great for beginners!)
7. Glitter Bombed Stars

If you adore all things glitzy, the glitter bombed star design is perfect for you! This eye-catching style features a vibrant base color completely covered in multicolored glitter, with bold star accents. Start with a bright base coat like hot pink or electric blue.
Once dry, generously layer on the glitter polish while the base is slightly tacky. For the stars, use a star stencil and fill it in with contrasting glitter. This statement look is ideal for parties and is sure to turn heads!
– Nail Inspiration: Combine with glittery outfits for a full glam effect.
– Pro Tip: Use a peel-off base coat for easier removal.
– Frequently Asked Question: Can I mix different glitter colors? Absolutely! Get creative!
8. Minimalistic Stars with Glitter Accents
This trend emphasizes simplicity and elegance while still embracing shimmering stars. Start with a clear or nude base coat for a clean look. Using a thin brush, create small star shapes on one or two accent nails, then sprinkle fine glitter over them while wet for a pop of sparkle.
This minimalist approach is perfect for everyday wear, adding a touch of glam without overwhelming your look. It’s all about the subtle sparkle that can brighten your day!
– Nail Inspiration: Match with a simple outfit for a chic vibe.
– Pro Tip: Use a fine brush for precise star shapes.
– Frequently Asked Question: Can I use regular glitter? Yes, but fine glitter works best for this design!
❝ Fun fact: 75% of nail art lovers say minimalist star designs with a subtle glitter accent look instantly chic on any day. It works especially well on a clear or nude base for everyday glam. ❞
9. Dotted Stars on Gradient
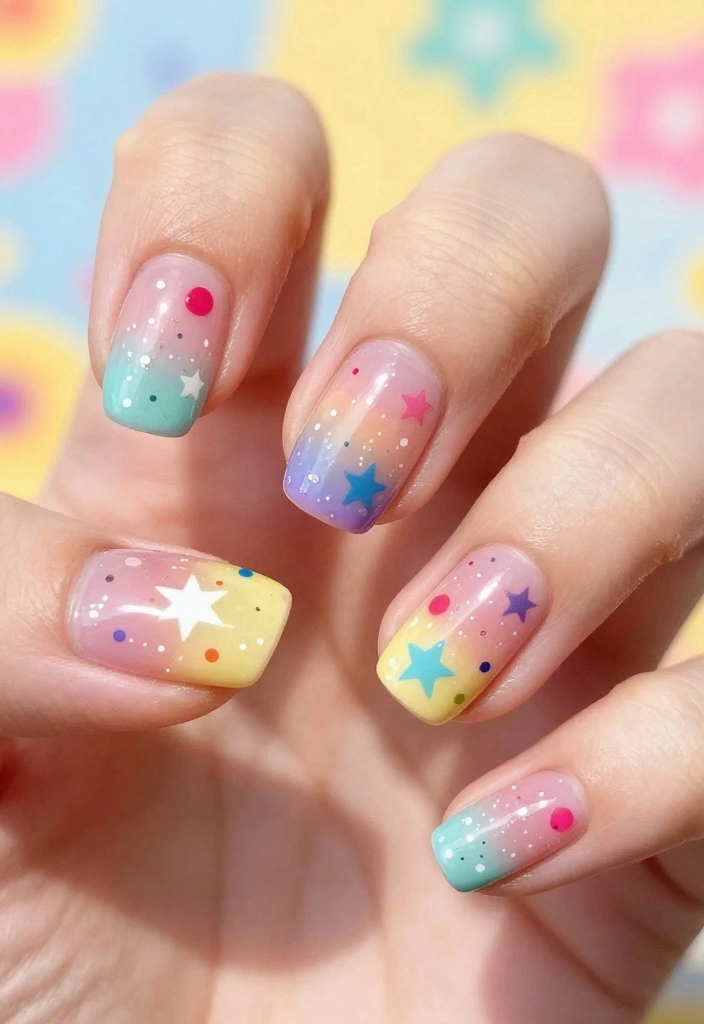
Gradient nail art paired with dotted star designs creates a unique and playful twist. Start by selecting two colors for your gradient—think soft pink fading into bright purple. Use a sponge to blend the colors on each nail for a seamless effect.
Once your gradient is dry, use a dotting tool to add glitter in star shapes across your nails. This design is versatile, making it perfect for both casual outings and formal events, as it strikes the right balance of flair!
– Nail Inspiration: Coordinate with gradient accessories for a cohesive appearance.
– Pro Tip: Ensure your gradient dries completely to avoid smudging.
– Frequently Asked Question: How do I achieve a smooth gradient? Use a sponge to stipple the polishes together!
10. Glittery Star Trails
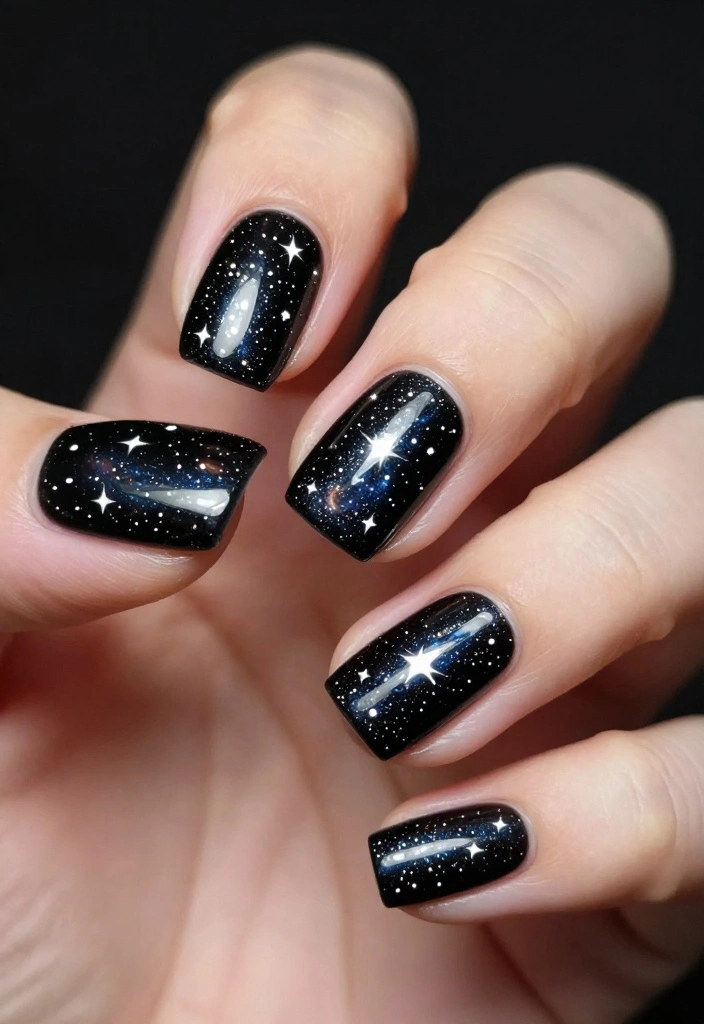
Channel your inner space explorer with glittery star trails! This design mimics the motion of shooting stars across your nails. Start with a deep black or indigo base coat.
After it dries, use a fine brush to create swooping lines across the nail, representing the star trails. Sprinkle glitter over the trails while wet for a dazzling starry effect. This design is dynamic and perfect for those who love to embrace flair in their style!
– Nail Inspiration: Pair with edgy outfits to match the cosmic theme.
– Pro Tip: Use a fast-drying top coat for quicker results.
– Frequently Asked Question: Can I use nail vinyls for the trails? Definitely! They help achieve clean lines!
Did you know that glittery star trails can look like shooting stars in under 20 minutes? On a deep black or indigo base, a fine brush and a little patience create motion and magic you’ll wear all week.
11. Layered Star Glitter

For the nail art enthusiast looking to make a bold statement, layered star glitter nails are a fun way to showcase creativity. Start with a base coat of your choice—pale pink or light lavender work beautifully.
Once dry, apply a layer of clear polish and sprinkle various sizes of star-shaped glitters over the nail. Seal it with another clear top coat for a long-lasting design. This layered approach adds depth, making your nails look 3D and captivating!
– Nail Inspiration: Wear with layered necklaces for a matching theme.
– Pro Tip: Use a fan brush to evenly distribute the glitter.
– Frequently Asked Question: How long does this design last? With a good top coat, it can last over a week!
12. Jewel Tone Stars
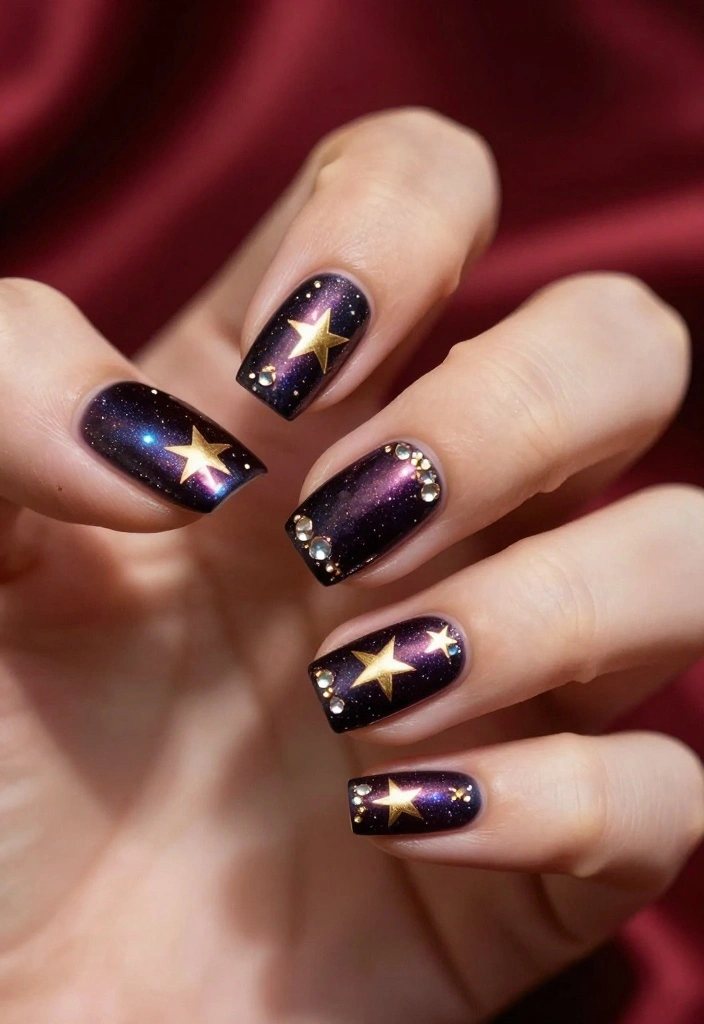
Dive into the richness of jewel tones with a star nail art design that exudes depth and elegance. Choose a base color like emerald green or sapphire blue. Once dry, create star shapes using gold or silver polish, adding a touch of luxury.
You can enhance the design with small rhinestones or crystal accents for extra sparkle! This look is perfect for evening wear or formal events, transforming your nails into a stunning statement piece.
– Nail Inspiration: Coordinate with jewel-tone jewelry for a polished appearance.
– Pro Tip: Use a strong top coat to keep the rhinestones secure.
– Frequently Asked Question: Are jewel tones suitable for summer? Absolutely! They work beautifully in any season!
13. Starburst Glitter

The starburst glitter design creates eye-catching bursts of star patterns across your nails. Begin with a neutral base coat. Once dry, use a nail art brush to draw starburst shapes radiating from the cuticle to the tip of the nail.
Mix large and small star glitters for an exciting visual effect. This design is perfect for those wanting to make a statement while keeping their look chic!
– Nail Inspiration: Balance this design with minimalist outfits to let your nails shine.
– Pro Tip: Work in sections, allowing each starburst to dry before starting the next.
– Frequently Asked Question: Can I choose different colors for the starbursts? Yes, mix and match glitter colors for a playful twist!
14. Twinkling Night Sky

Wrap up your star nail art exploration with an enchanting twinkling night sky design. This intricate nail art captures the universe’s magic beautifully. Start with a deep blue or black base coat, then use a sponging technique to add hints of purple and white polish, representing clouds.
Finally, use a dotting tool to add dots of glitter polish to mimic twinkling stars. This mesmerizing design is sure to attract compliments!
– Nail Inspiration: Wear with flowy, bohemian outfits for a perfect match.
– Pro Tip: Seal the design with a gel top coat for longevity.
– Frequently Asked Question: Is this design hard to do? It may take some practice, but the results are worth it!
Conclusion
There you have it—14 glittery star nail art styles designed to make you shine bright! Each unique design offers a way to express your personality and creativity while adding a touch of glamour to your look. Whether you prefer a subtle shimmer or a bold sparkle, there’s a design for every occasion. Grab your nail art supplies, unleash your inner artist, and try out these stunning styles. Your nails will thank you—and so will everyone who gets to see them!
Frequently Asked Questions
What is star nail art and why are glittery designs so popular?
Star nail art is a design that features tiny star shapes on your nails, often paired with glitter for extra sparkle.
To recreate the look, start with a clean base, choose a color that lets the stars pop, and apply star nail art decals or use a fine brush to paint small stars. Finish with a glossy top coat to keep the glitter nails shining all day. For a quick version, try a glitter nail with a single star accent on one or two nails to kick off your nail inspiration journey.
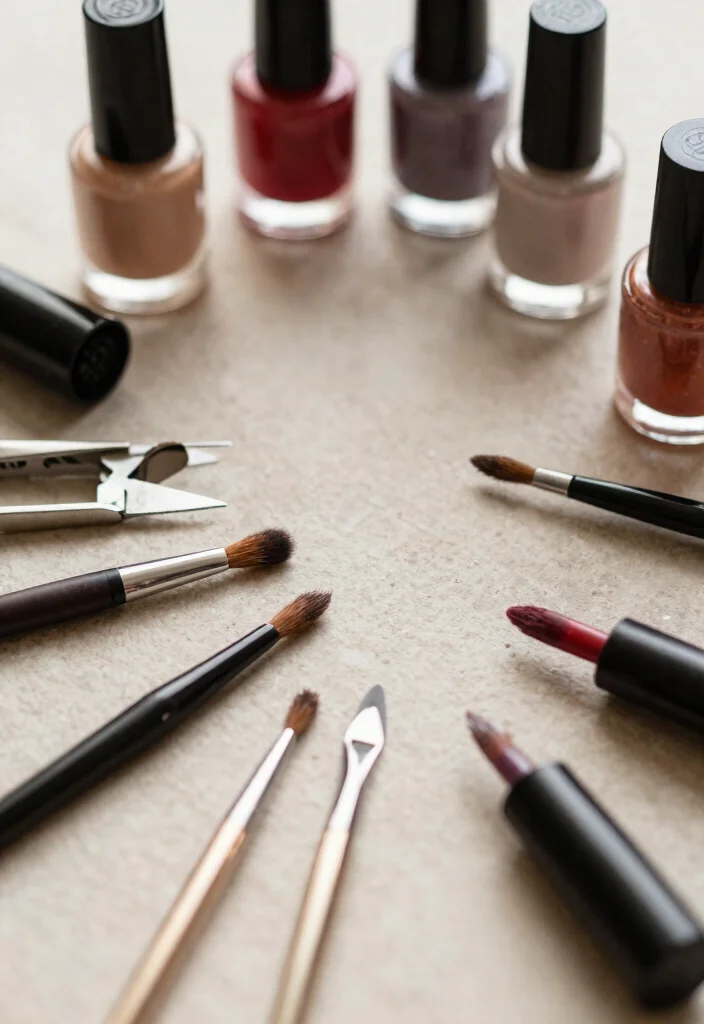
What supplies do I need to recreate glittery star nail art at home?
Here’s a practical setup you can grab:
Base coat, top coat, a sheer or pastel base color, one or more colors for the stars, a high-gloss glitter polish or fine glitter, star decals or a stamping plate with star designs, a slim nail-art brush or toothpick, a dotting tool, nail tape or stencils, cotton swabs and nail polish remover for clean edges.
Steps: 1) Prep nails with a clean file and cuticles push 2) Apply base coat and two coats of base color 3) Use decals or a fine brush to add stars 4) Add optional glitter accents 5) Seal with top coat and let dry.
Which colors and star placements look best for different occasions?
Neutral bases with silver or white stars create a polished work-appropriate look; deep blues or black bases with gold stars give a glam evening vibe; pastel bases with iridescent stars feel fresh and playful. For placement, try one small star at the corner of each nail, or cluster a few stars into a tiny constellation on an accent nail. Keep a cohesive vibe by mirroring star size and spacing across nails for a cohesive glitter nails aesthetic.
How long does glittery star nail art last and how can I extend its life?
With proper prep and sealing, glittery star nail art can last about 5–7 days or more. Tips: a solid base with edge-capped nails, a thick top coat to smooth glitter, reapply top coat every 2–3 days, avoid harsh acetone-heavy removers, and consider wearing gloves for chores that expose nails. This helps keep your star nail art looking fresh and your glitter nails sparkling.
Are there beginner-friendly methods to create star nail art without professional tools?
Absolutely! You can achieve pro-looking results with simple, beginner-friendly methods: use star nail art decals or stamping plates for clean edges, or apply nail tape to create a negative-space star and paint with a fine brush. Steps: 1) Paint base color 2) Apply decals or stamps 3) Clean up edges with a small brush 4) Seal with top coat. It’s a quick path to stylish nail inspiration you can try ASAP.
Related Topics
star nail art
glitter nails
nail inspiration
festive nail designs
easy nail art
trendy manicures
beginner friendly
glam nail styles
unique nail ideas
seasonal nail art
creative nail techniques
party-ready nails
I absolutely love nail art! The glittery styles you shared are so fun. Have you tried any of these designs yourself?
These nail styles are so shiny, I might just blind someone with my nails! 😂 What’s your favorite one to try?