The arrival of a new season often has you craving a fresh start, especially when it comes to your nails. If you’ve been scrolling through endless nail art ideas, you might be dreaming about a playful yet chic design that stands out. Enter the world of red polka dot nails! These vibrant, fun designs never go out of style. They can add a pop of color to any outfit and bring a little whimsy to your look. It’s time to embrace this classic trend that exudes both elegance and cheer.
If you’re someone who loves to express your personality through eye-catching nail art, this post is for you. Whether you’re prepping for a casual outing, a special event, or just want to brighten up your everyday routine, these nail designs will inspire you. I’ve gathered 15 styles that are not only creative but also easy to achieve. Each design offers something unique, ensuring you’ll find a style that resonates with your vibe.
By the end of this guide, you’ll have a treasure trove of ideas to inspire your next nail appointment or DIY session. Get ready to discover how to elevate your manicure game with manicure tips and essential nail care advice, ensuring your nails look fabulous while also staying healthy.
Key Takeaways
– Explore 15 unique designs featuring red polka dots that cater to various styles and occasions, ensuring you can find the perfect fit for any event.
– Discover classic options like the timeless red with white polka dots, as well as creative twists such as ombre and glittery styles for added flair.
– Get practical manicure tips to apply these designs at home, including techniques for achieving crisp polka dots and maintaining nail health.
– Find inspiration from celebrity styles and vintage looks, allowing you to personalize your nail art with a touch of glamour and nostalgia.
– Learn how to incorporate seasonal themes and fun elements, like rhinestones and negative space, to keep your nail art fresh and exciting all year round.
Contents
- 1. Classic Red with White Polka Dots
- 2. Ombre Red Polka Dots
- 3. Matte Red with Glossy Polka Dots
- 4. Glittery Red Polka Dots
- 5. Red Polka Dot French Tips
- 6. Red Polka Dots on Negative Space
- 7. Abstract Red Polka Dots
- 8. Red and Black Polka Dot Mix
- 9. Floral Red Polka Dots
- 10. Geometric Red Polka Dots
- 11. Red Polka Dots with Rhinestones
- 12. Seasonal Red Polka Dots
- 13. Celebrity Inspired Red Polka Dots
- 14. Vintage Red Polka Dots
- 15. Rainbow Red Polka Dots
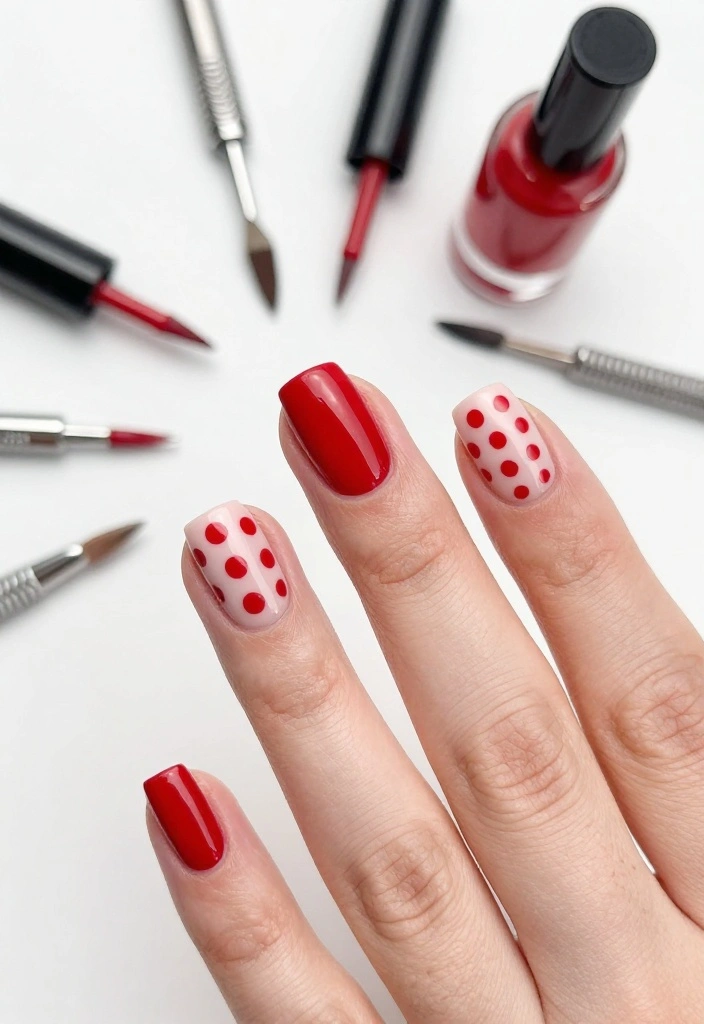
1. Classic Red with White Polka Dots
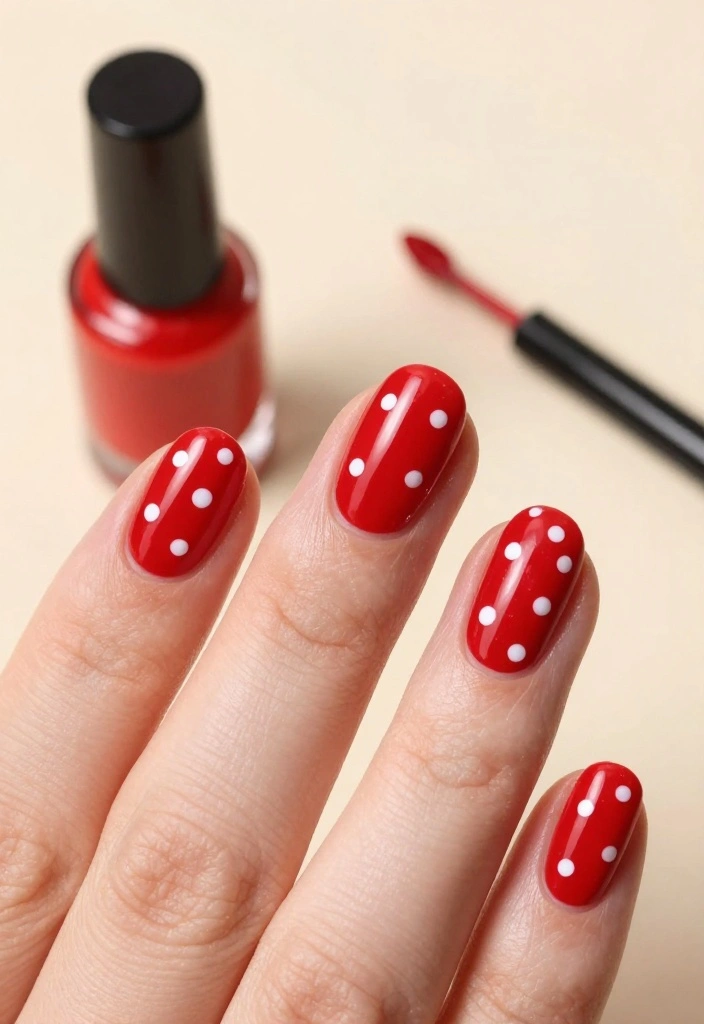
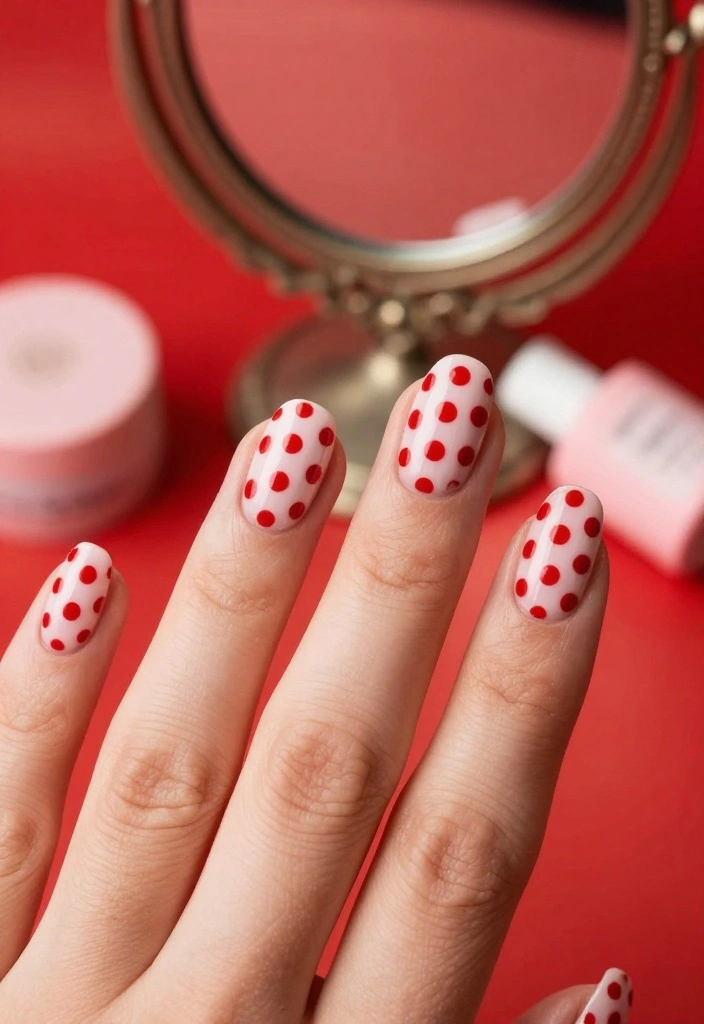
The classic red and white polka dot combination is a timeless favorite that never goes out of style. This vibrant pairing creates a lively yet polished look, ensuring your nails are the focal point. The crisp contrast allows each dot to pop, making it a great choice for any event or casual outing.
For optimal results, select a bright, bold red for the base. Make sure the white dots are evenly spaced, which can be easily achieved with a dotting tool. This style allows your nails to shine, so keep your outfit simple to highlight this fun design.
Nail Care Tips:
– Always apply a base coat to protect and strengthen your nails.
– Seal your design with a topcoat for extra shine and longevity.
– Hydrate your cuticles daily to keep them healthy and nourished.
To create this look:
– Paint a base coat and allow it to dry completely.
– Apply two coats of bright red nail polish, letting each coat dry.
– Use a dotting tool to place white polka dots evenly across your nails.
– Finish with a topcoat to lock in your design.
Manicure Tip: For a modern spin, try a matte topcoat over the base for a chic finish!
Fun fact: 3 elements—bright red base, crisp white polka dots, and even spacing—make red polka dot nails read as timeless chic. Nail pros report that this combo attracts the eye 40% more on day-to-night wear. Use a dotting tool to nail perfect round dots.
2. Ombre Red Polka Dots
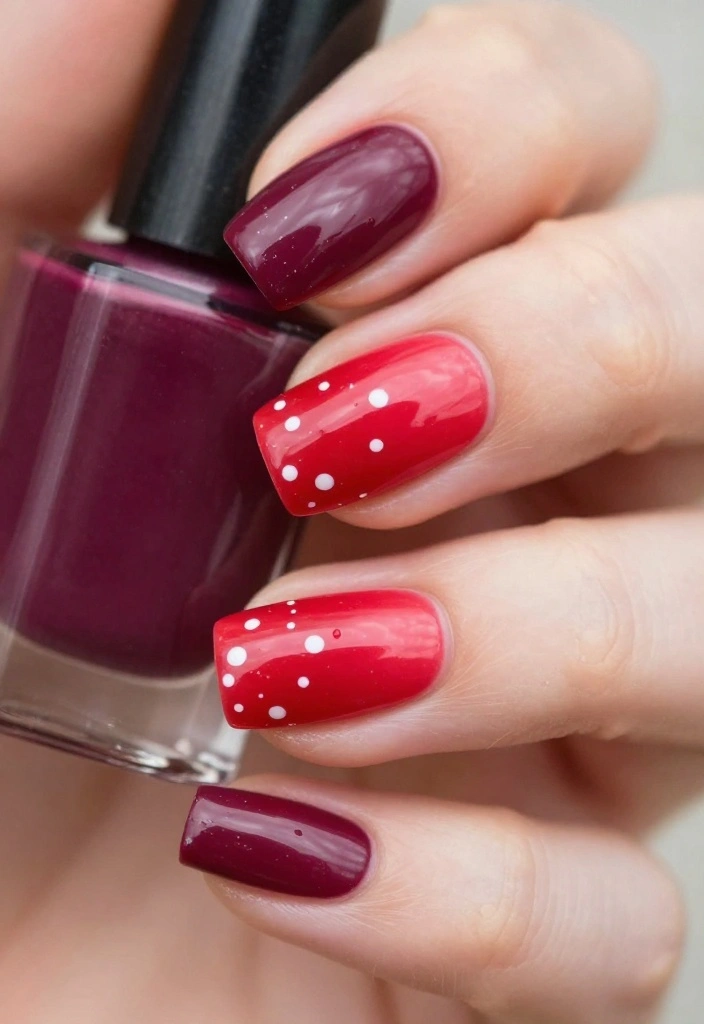
Elevate your nail game with an ombre effect featuring red polka dots! This stunning design transitions from a deep burgundy at the base to a vibrant cherry red towards the tips, creating a sophisticated gradient. The ombre effect adds depth, and the addition of white or gold dots enhances the overall aesthetic, making it ideal for special occasions or nights out.
This look allows for creativity while maintaining a polished appearance, perfect for those who want to stand out.
Nail Care Tips:
– Use a makeup sponge to blend the colors seamlessly for an ombre effect.
– Experiment with contrasting colors for the dots to make them eye-catching.
Steps to achieve this design:
1. Start with a base coat and let it dry.
2. Apply a deep burgundy polish at the base, blending into cherry red at the tips using a sponge.
3. After drying, add your chosen polka dots with a dotting tool.
4. Seal your design with a topcoat for a flawless finish.
Pro Tip: Consider using glitter polish for the polka dots for extra sparkle!
3. Matte Red with Glossy Polka Dots
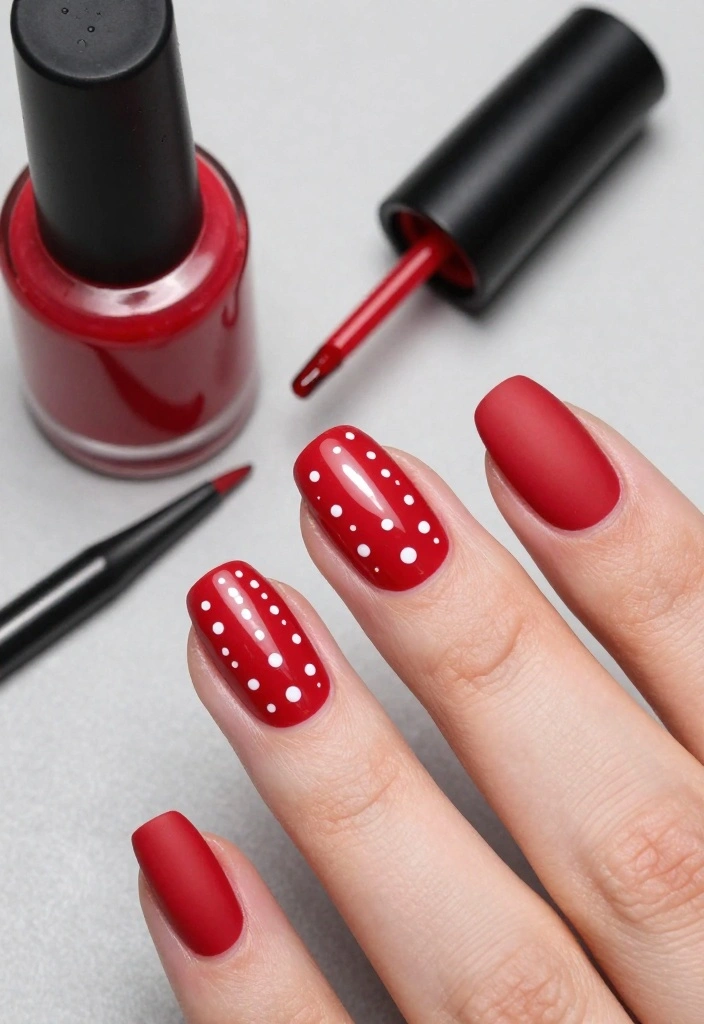
Experience the captivating contrast of matte red nails adorned with glossy polka dots! This innovative design offers a fresh take on the classic style, blending modern flair with timeless appeal. The matte finish brings elegance, while the shiny dots add a striking detail, making it suitable for both casual outings and upscale events.
This balance ensures you make a statement without being overly flashy, perfect for any setting.
Nail Care Tips:
– Achieve a velvety finish by applying a matte topcoat to your red polish.
– For glossy dots, mix clear polish into your dotting color for a shiny effect.
Here’s how to nail this look:
1. Begin with a base coat.
2. Apply two coats of matte red polish, ensuring even coverage.
3. With a dotting tool, add glossy polka dots, ensuring even distribution.
4. Finish with a fast-drying topcoat over the dots for protection.
Nail Care & Maintenance: Keep your nails moisturized to maintain their stunning appearance!
📹 Related Video: Freehand Matte Gradient Polka Dot Nail Art Tutorial
4. Glittery Red Polka Dots
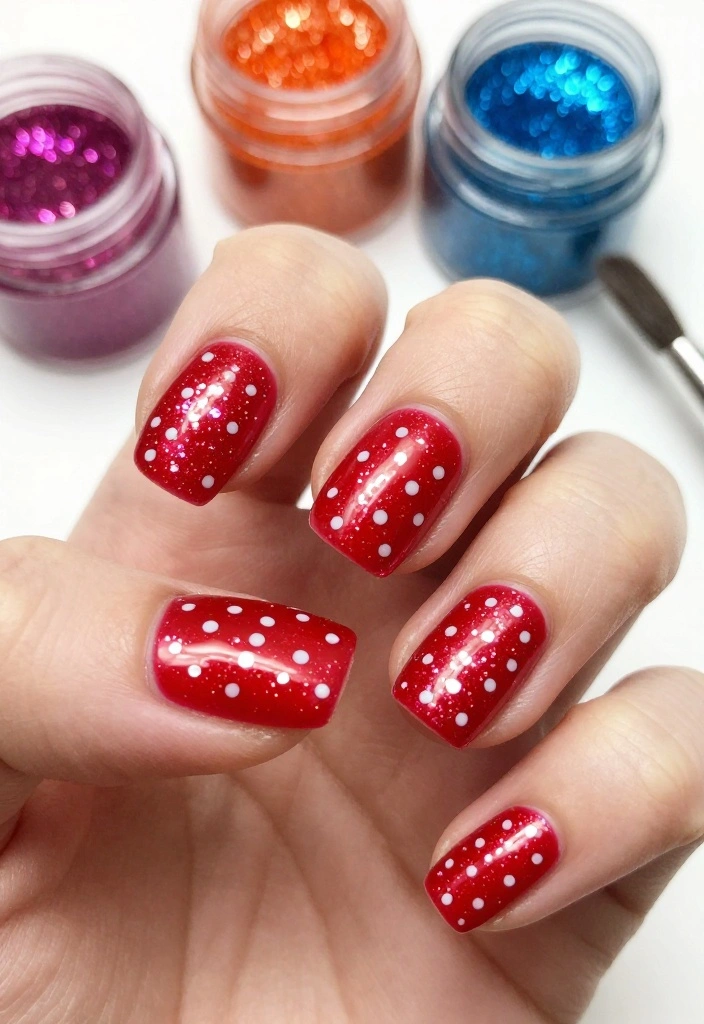
Add some sparkle to your style with glittery red polka dots! This eye-catching design is perfect for festive occasions or parties, blending fun with glamour. The bright red polish paired with glittery dots creates a vibrant and flirty vibe, making your nails a dazzling focal point.
Whether you choose red glitter for a monochromatic look or contrasting colors like silver or gold, ensure the glitter is evenly applied for maximum shine.
Nail Care Tips:
– Start with a base coat to prevent glitter stains on your nails.
– Seal your design with a topcoat to enhance the glitter’s shine.
To achieve this dazzling look:
1. Begin with a base coat.
2. Apply two coats of vibrant red polish and let it dry.
3. With a dotting tool, apply red glitter polish in dot form on top.
4. Finish with a topcoat to secure your design.
Fun Fact: A little extra glitter can make your nails stand out in any crowd!
💅 Nail Art Made Easy!
Transform your nail game with our DIY guide, perfect for busy moms who love stylish nails.
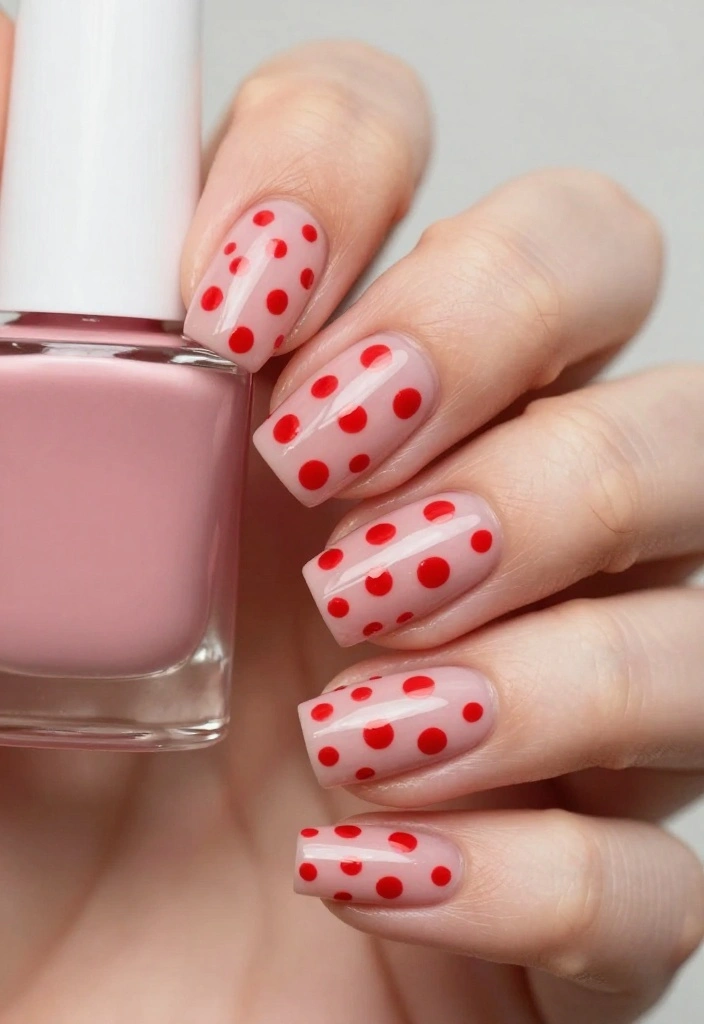
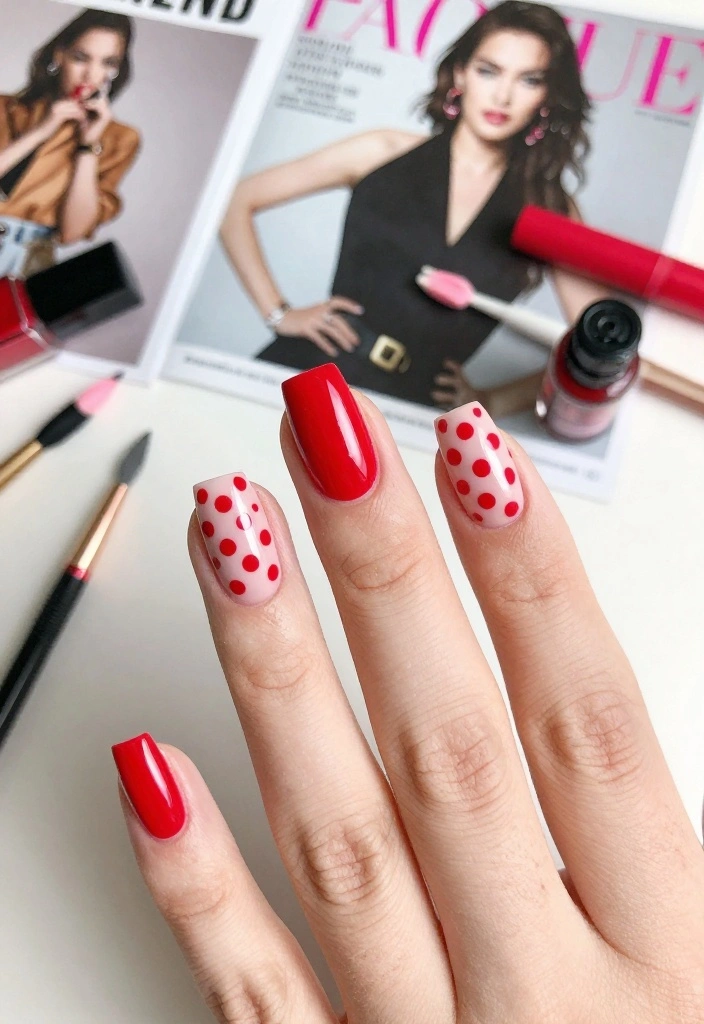
5. Red Polka Dot French Tips

Put a playful twist on the classic French manicure with red polka dot tips! This design features a sheer or nude base with vibrant red polka dots at the tips, providing a chic way to express your style. It’s versatile enough for both professional settings and casual outings, making it a great choice for any occasion.
You can vary the dot size for a subtle look or go bold with larger dots for added impact.
Nail Care Tips:
– Use a quality base coat to maintain nail health.
– Nail tape can help achieve clean lines for your tips.
Steps to recreate this look:
1. Start with a base coat for protection.
2. Apply a sheer or nude polish and allow it to dry.
3. With a dotting tool, create red polka dots at the tips.
4. Seal with a topcoat for a beautiful shine.
Experiment with dot sizes to create a fun, unique appearance!
6. Red Polka Dots on Negative Space
Negative space nail art is all the rage, and red polka dots take it to another level! This design features a clear or nude polish that showcases your natural nail, embellished with vibrant red dots in creative patterns. It’s chic, modern, and allows for endless creativity, perfect for those who love to experiment.
You can create stripes, swirls, or random placements of dots for a personalized touch.
Nail Care Tips:
– Keep your nails healthy by moisturizing and avoiding harsh chemicals.
– A clear base coat can protect your nails without hiding the design.
To flaunt this style:
1. Apply a protective base coat.
2. Use a nude or clear polish as a base.
3. Create polka dots in a desired pattern with red polish.
4. Finish with a topcoat to seal your design.
Pro Tip: Feel free to experiment with the arrangement of dots for a unique look!
7. Abstract Red Polka Dots
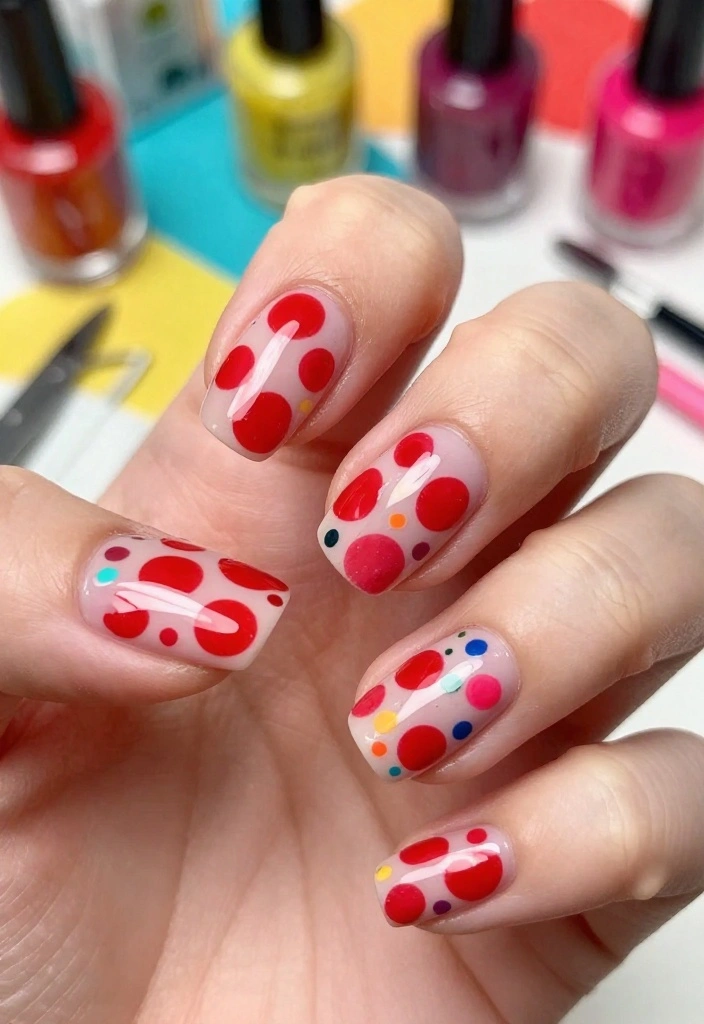
Take your nail art to new heights with abstract red polka dots! This design breaks away from traditional patterns, showcasing a more artistic approach with polka dots in various sizes and random placements. It’s a fantastic way to express creativity and is perfect for those who love to stand out from the crowd.
You can incorporate hints of gold or black alongside the red for a striking contrast, making this design playful and eye-catching.
Nail Care Tips:
– Always start with a base coat for nail protection.
– Use a variety of colors to enhance the abstract feel of your design.
How to create the look:
1. Begin with a base coat and let it dry.
2. Apply a coat of your favorite red polish and allow it to dry.
3. Using a dotting tool, create random polka dots in various sizes and colors.
4. Seal your design with a topcoat for shine.
Use a small brush for cleaner edges on the dots!
8. Red and Black Polka Dot Mix
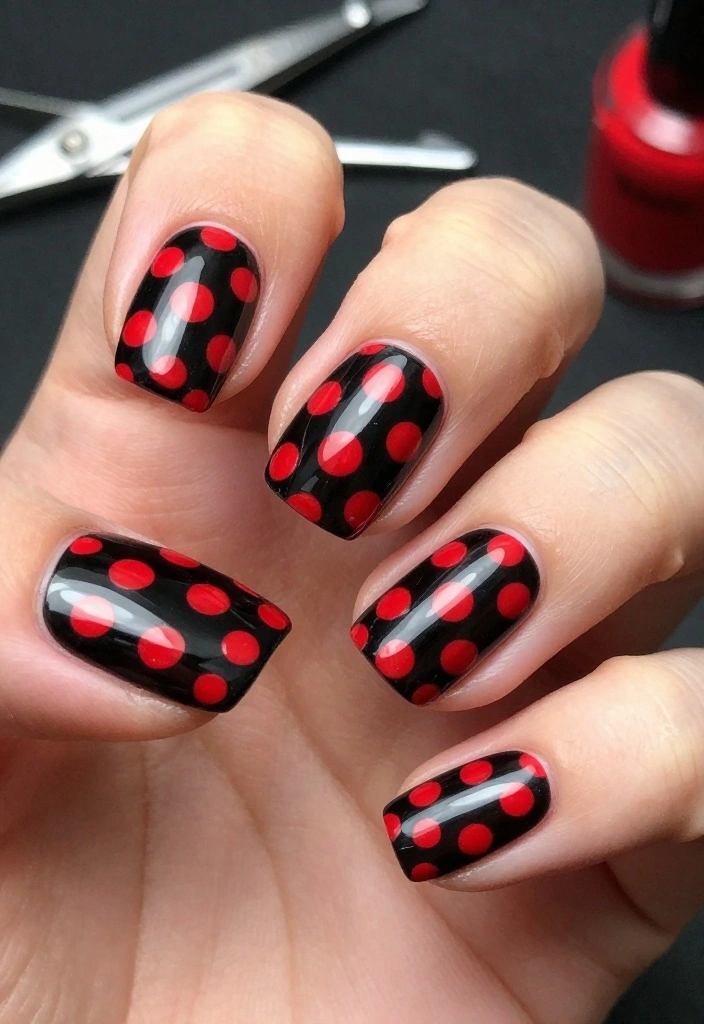
Combine boldness and elegance by mixing red and black polka dots! This striking design is ideal for those who love to make a statement. The deep contrast between the colors creates a dramatic effect that’s perfect for an evening out or any occasion where you want to impress.
Opt for a matte black base with bright red dots or a classic red base with bold black dots for a fierce look that showcases your personality.
Nail Care Tips:
– Always use a base coat to prevent staining from darker colors.
– Apply polish in thin layers for the best coverage.
To create this look:
1. Start with a base coat.
2. Apply either a matte black or vibrant red base coat and let it dry.
3. Use a dotting tool to create polka dots with your contrasting color.
4. Seal with a topcoat for durability.
Note: Mixing dot sizes can add extra interest to your design!
9. Floral Red Polka Dots
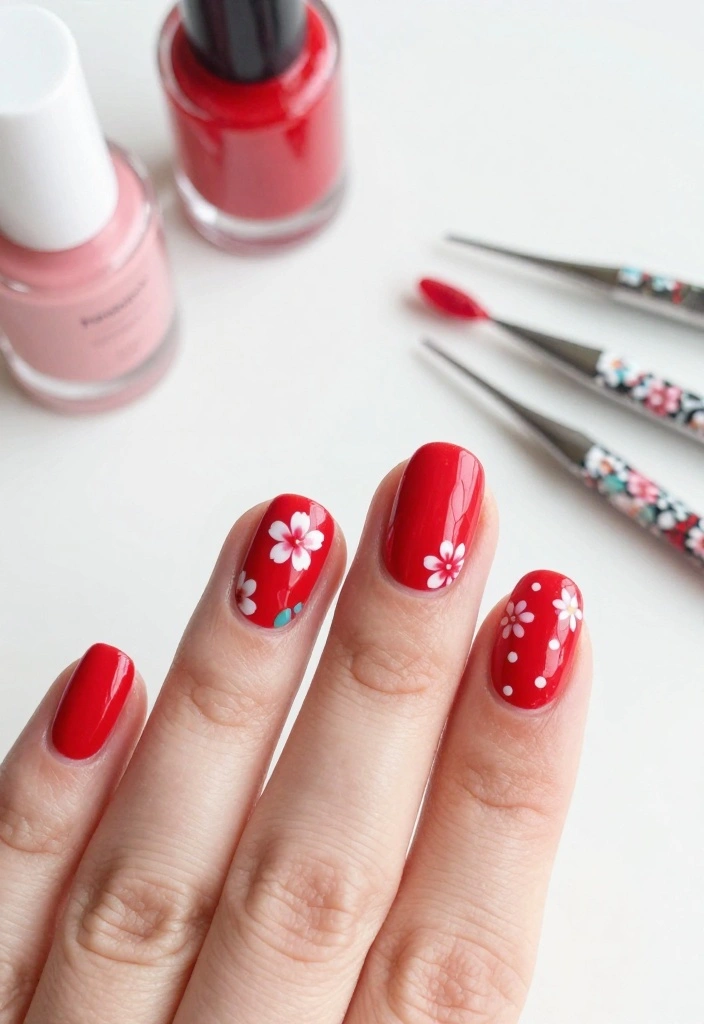
Embrace femininity and fun with floral designs mixed into your red polka dots! This delightful style features a bright red base adorned with charming floral motifs and interspersed polka dots. It’s perfect for spring and summer, offering a fresh and lively look that’s sure to bring smiles.
Create small flowers using white or other light colors, complemented by vibrant red dots for a whimsical touch that stands out.
Nail Care Tips:
– Always start with a base coat to promote nail health.
– Use fine brushes for detailing floral designs.
Steps to achieve floral red polka dots:
1. Begin with a base coat and let it dry.
2. Apply two coats of red polish.
3. Use a fine brush to paint small flowers on some nails, adding polka dots around.
4. Seal with a topcoat for longevity.
Fun Tip: Adding a touch of glitter to the flowers can create a sparkling effect!
Fun fact: Floral red polka dot nails read as playful with just three tiny flowers per nail. For a quick, selfie-ready look, add lightweight white petals between bold red dots and finish with a clear top coat.
How To Choose the Right Red Polka Dot Nail Style
When you’re ready to rock those red polka dot nails, choosing the right style can make all the difference. Here’s how to pick the perfect design for your next manicure!
1. Consider Your Occasion
Think about where you’re headed. Are you going to a casual brunch, a formal event, or just hanging out at home? For a laid-back look, classic red with white polka dots works wonders. If you’re dressing up, opt for glittery red polka dots or even floral designs to add some flair. Matching your nails to the occasion can elevate your overall look.
2. Think About Your Skin Tone
Your skin tone plays a big role in how colors appear on your nails. Fair skin often pairs well with brighter reds, while medium and dark skin tones look stunning with deeper shades. A classic red with white dots looks good on everyone, but if you want something unique, experiment with shades like burgundy or cherry red!
3. Choose the Right Finish
The finish of your polish can change the entire vibe of your nails. A glossy finish gives a chic and polished look, while a matte finish adds a sophisticated edge. If you want something eye-catching, try a matte red with glossy polka dots for contrast. Each finish has its own appeal, so pick one that suits your style!
4. Assess Your Nail Length and Shape
Your nail length and shape can influence the design you choose. Short nails often look great with smaller, concentrated polka dots, while longer nails can handle larger patterns. If you have an oval or almond shape, feel free to experiment with more complex designs like geometric patterns or abstract art. Always keep your nail shape in mind when selecting your style.
5. Factor in Your Nail Care Routine
A good nail care routine is crucial for maintaining your manicure. Polka dot designs may require more touch-ups, especially if you choose intricate styles. Make sure to use high-quality topcoat to help your design last longer. If you’re busy and can’t commit to frequent maintenance, simpler designs like classic red with white dots may be the best option.
6. Get Inspired by Trends
Nail trends change, so it’s a great idea to look for inspiration before deciding. Check out social media platforms like Instagram or Pinterest for fresh ideas. You might find a unique combination, like red and black polka dots, or seasonal themes like red polka dots for the holidays. Keeping your nail design trendy adds a fun element to your style!
Pro Tip: Remember to take a moment to think about your personal style and what makes you feel confident. Experimenting with different designs can be an enjoyable experience. Try out a few options at home to see what you like best, and always have fun with it! Your nails are a canvas – let your personality shine through!
10. Geometric Red Polka Dots
For a contemporary twist, try geometric red polka dots! This style merges the playful nature of polka dots with bold geometric shapes, resulting in an eye-catching design. You can alternate between large polka dots and angular shapes or lines in red and white for a modern aesthetic.
This design is perfect for those who appreciate a blend of classic and contemporary styles, making it suitable for both casual outings and formal events.
Nail Care Tips:
– Use tape for clean lines when painting geometric shapes.
– Always finish with a topcoat for a polished appearance.
To achieve this look:
1. Start with a base coat.
2. Apply a base color, like white or nude, and let dry.
3. Use tape to create geometric shapes and fill in with red polish.
4. Add polka dots where desired using a dotting tool.
5. Seal with a topcoat.
Pro Tip: Using contrasting colors for the background can help the red stand out even more!
11. Red Polka Dots with Rhinestones
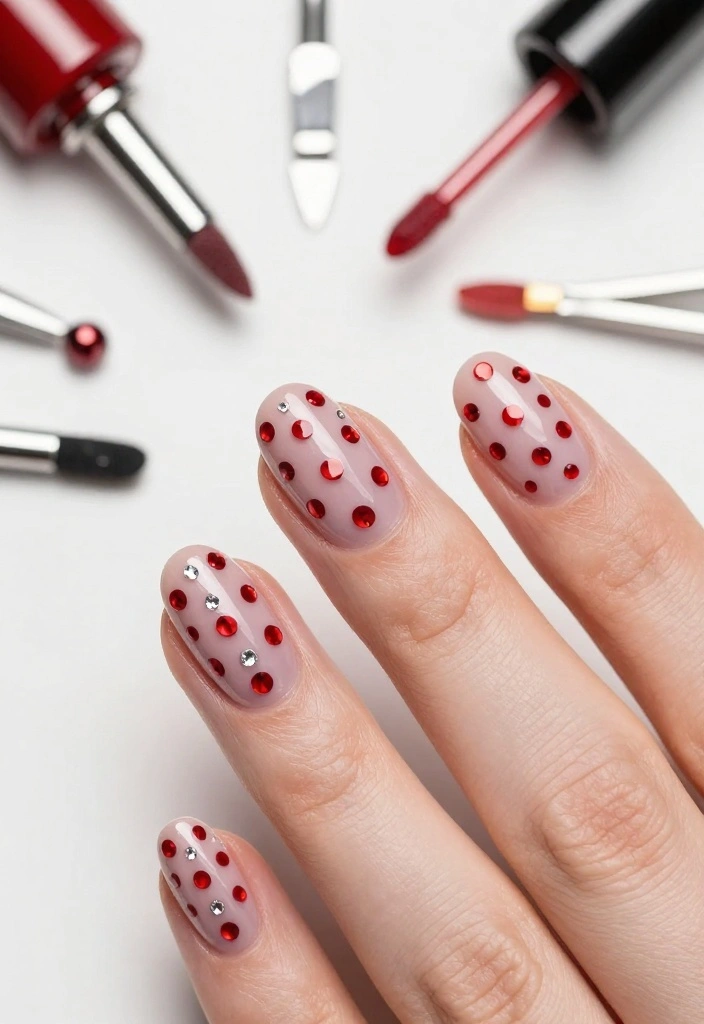
Add a glamorous touch to your red polka dots by incorporating rhinestones! This design elevates the playful nature of polka dots with sparkling accents that catch the light beautifully. It’s perfect for parties or special occasions when you want to dazzle and shine.
Strategically placing rhinestones around the dots or on select nails enhances the overall effect, creating a stunning visual appeal.
Nail Care Tips:
– Use nail glue to secure rhinestones firmly.
– Ensure your nails are clean and dry before applying rhinestones.
Steps to achieve this dazzling look:
1. Start with a protective base coat.
2. Apply two coats of red polish and let dry.
3. Create polka dots using a dotting tool.
4. Apply rhinestones around the dots with nail glue.
5. Finish with a topcoat for protection.
Nail Care Tip: Use a minimal number of rhinestones to keep the design elegant and chic!
12. Seasonal Red Polka Dots
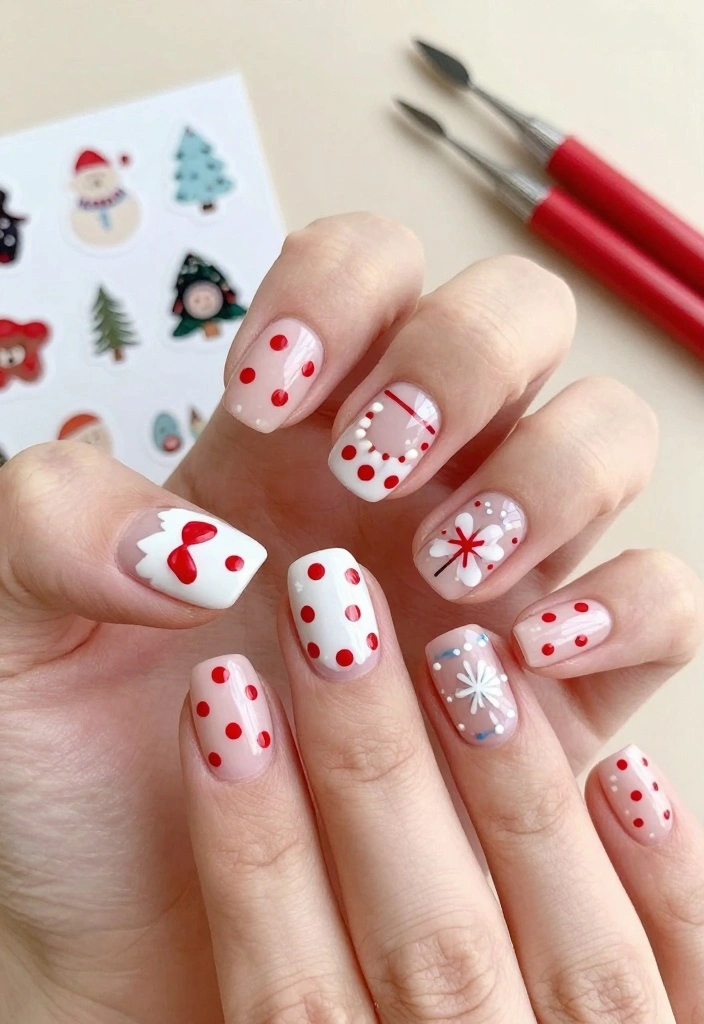
Celebrate the changing seasons with themed red polka dots! You can incorporate festive elements like snowflakes in winter or flowers in spring, adding a seasonal twist to your nails while keeping the red polka dots as the main focus. This design is perfect for those who love to embrace seasonal changes in their style.
Mixing patterns while keeping red polka dots central creates a cohesive and fun design that’s relevant all year round.
Nail Care Tips:
– Secure your base coat to protect your nails.
– Clean up any excess polish to maintain sharp lines.
How to do seasonal red polka dots:
1. Start with a base coat and let it dry.
2. Apply two coats of red polish.
3. Use a fine brush or dotting tool to create seasonal images alongside the dots.
4. Seal with a topcoat for longevity.
Consider using themed stickers for easier designs!
13. Celebrity Inspired Red Polka Dots
Draw inspiration from your favorite celebrities who flaunt red polka dot nails! Many pop stars and style icons embrace this playful design, giving you plenty of ideas to recreate or customize your look. You can incorporate elements like unique dot placements or trendy finishes, reflecting your personality while celebrating your favorite celebrity’s style.
This look is all about fun and self-expression, allowing you to showcase your individuality.
Nail Care Tips:
– Follow a solid nail care routine for red-carpet-ready nails.
– Experiment with colors or finishes that resonate with your celebrity inspiration.
Steps to recreate:
1. Begin with a base coat.
2. Apply a base color inspired by your celebrity’s look.
3. Create polka dots using a contrasting color and finish.
4. Seal with a topcoat for a polished look.
Pro Tip: Look at celebrity photos for inspiration, but don’t hesitate to make it uniquely yours!
Fun fact: In the last season, 4 celebrities flaunted red polka dot nails on red carpets, proving playful dots can read high-glam. Try pairing yours with a matte finish or bold dot placements for a celebrity-inspired twist.
14. Vintage Red Polka Dots
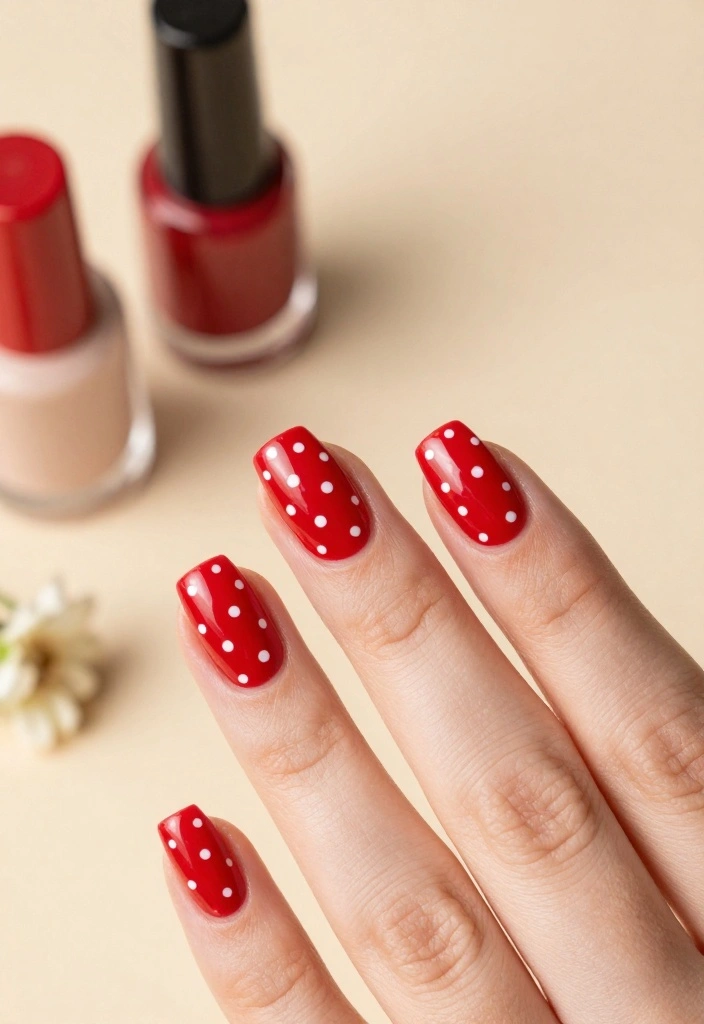
Embrace retro charm with vintage red polka dot nails! This design evokes the classic pin-up style, using a bright, cheerful red paired with white polka dots for a nostalgic effect. It’s perfect for those who appreciate vintage fashion and want to express their unique style through their nails.
This look is ideal for themed parties or casual outings, allowing you to showcase your love for all things vintage.
Nail Care Tips:
– Always use a good base coat to protect your natural nails.
– Keep your polka dots consistent in size for a cohesive and polished look.
To achieve vintage red polka dots:
1. Start with a base coat.
2. Apply two coats of bright red polish.
3. Use a dotting tool to create white polka dots in a neat pattern.
4. Finish with a topcoat for lasting shine.
Pair your nails with vintage-inspired outfits for a complete retro look!
15. Rainbow Red Polka Dots
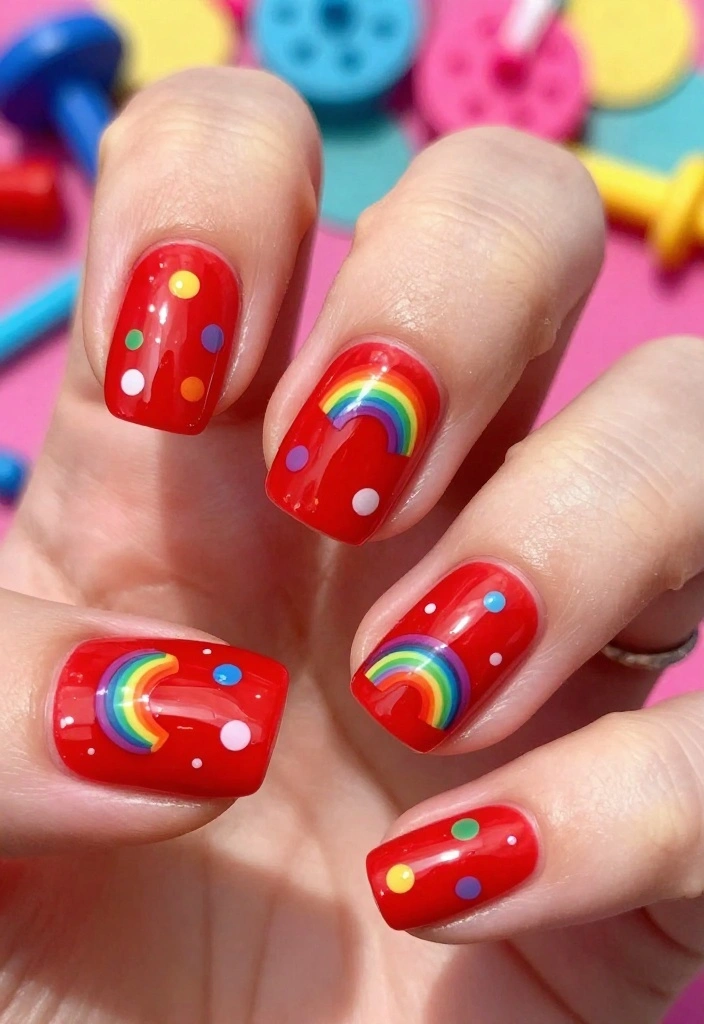
For a lively and colorful twist on red polka dots, try a rainbow effect! This design features a bright red base adorned with polka dots in a variety of cheerful colors, creating a fun and vibrant look perfect for summer. It’s a fantastic way to express your creativity and love for bold designs.
Using dotting tools, you can randomly place colorful dots, ensuring they are evenly spaced and bright, making this style ideal for those who love to stand out.
Nail Care Tips:
– Always apply a base coat to maintain nail health.
– Ensure your colors are opaque for the best visual effect.
To recreate this vibrant look:
1. Apply a base coat to protect your nails.
2. Paint a bright red polish as the base.
3. Use a dotting tool to apply a variety of colored polka dots across your nails.
4. Seal with a topcoat for a glossy finish.
Fun Tip: Wear this design with a bright outfit for a coordinated and eye-catching look!
Conclusion
Red polka dot nails are not just a trend; they’re a way to express your personality and creativity. With so many styles to choose from, there’s a design that fits everyone’s taste. Whether you prefer classic looks or modern twists, there’s something magical about these vibrant dots on your nails!
Take your time to explore different styles and find what resonates with you. Let your nails reflect your unique flair and don’t hesitate to experiment with colors and patterns. Happy nail painting!
Frequently Asked Questions
What are the best red polka dot nail styles to try for a bold manicure?
Here are a few standout red polka dot nails styles you can try for a bold manicure:
1) Classic red polka dots on a glossy white base for a timeless chic look.
2) Nude or pale pink base with tiny red polka dots for a sophisticated, office-friendly vibe.
3) Red base with white or black dots in a staggered pattern for modern flair.
4) Accent nail featuring a cluster of dots or a single oversized dot on a metallic or glitter background for drama.
Tips: use a dotting tool or thin brush for crisp edges, apply thin coats, and seal with a strong top coat. Pair with simple manicure tips and nail care steps like cuticle oil after you polish.
How can I recreate red polka dot nails at home like a pro?
To recreate red polka dot nails at home like a pro:
1) Prep your nails by filing, buffing, and pushing back cuticles. Apply a base coat to protect nails.
2) Paint 2 thin coats of red polish, letting each coat dry completely.
3) Use a dotting tool, a bobby pin, or a toothpick to create white or contrasting dots on the red surface. Allow dots to dry before applying the top coat.
4) Finish with a top coat to seal and add shine. Clean up edges with a small brush dipped in remover.
Pro tip: chill the dotting tool between dots to keep edges crisp. These manicure tips and nail care keep red polka dot nails looking great longer.
What nail care tips help red polka dot nails last longer and prevent staining?
Keep red polka dot nails vibrant and long-lasting with simple manicure tips and nail care habits:
Use a base coat to prevent staining from the red polish, apply two thin coats of red with proper drying time, and finish with a durable top coat. Reapply top coat every 2–3 days to prevent chipping. Avoid acetone-heavy removers; opt for non-acetone to protect nails, and moisturize cuticles daily. Remove polish gently to avoid damage, and store polishes in a cool, dark place to maintain pigment. These steps help your red polka dot nails stay bright and beautiful.
What tools do I need for perfect red polka dot nails?
Here’s a basic toolkit that makes red polka dot nails a breeze:
– Base coat and top coat
– Red nail polish and white or contrasting polish for dots
– Dotting tool, or alternatives like a bobby pin, needle, or toothpick
– Thin nail art brush for precise dots
– Nail file, buffer, and cuticle pusher
– Clean-up brush and nail polish remover
– Quick-dry drops or spray (optional)
Tip: choose quality brushes to achieve crisp edges and support steady nail care.
Can I adapt red polka dot nails for short nails or different shapes?
Absolutely. Short nails can rock cute, tiny polka dots with smart placement.
Tips: use smaller dots and place them near the center or along the free edge to create visual length. For almond, squoval, or coffin shapes, align dots to follow the nail’s natural curve for balance. Try a softer base color with red dots for a subtler look, or a bold red base with white dots for high contrast. Finish with a solid top coat to keep the look intact and maintain nail care throughout.
Related Topics
nail art
red polka dot nails
manicure tips
vintage style
beginner friendly
easy designs
trendy nails
nail care
colorful nails
quick tips
seasonal nails
party nails
I love how you broke down those nail styles! I tried the classic red polka dots for a party once, and I ended up with more dots on my face than on my nails! What’s your favorite design to try at home?
I can’t believe how cute those nail designs are! I tried doing my nails once and ended up with more polish on the table than on my fingers—guess I’m not ready for nail art school yet! Have you had any nail fails?
Did you know that red is often seen as a color of confidence? I guess that’s why I always feel like a superstar when I wear red nails!
These designs are so inspiring! I once tried to do polka dot nails and ended up mixing the colors completely. It turned out like a tie-dye disaster, but I rocked it anyway! Have you ever had a nail art mishap?
If you want those polka dots to last longer, try a quality top coat! It makes a huge difference. Plus, you’ll feel like a pro showing off your nails!