Nail art is more than just a trend; it’s a form of self-expression that allows you to showcase your personality and creativity. With the rise of celestial themes in fashion, star nail designs are taking the beauty world by storm. If you’ve been captivated by the magic of the night sky and want to incorporate that into your nail art, you’re in the right place. This post is all about the enchanting world of star nail designs that will leave you feeling inspired and ready to shine.
Whether you’re a nail art newbie or a seasoned pro, this collection of 20 celestial star nail designs is perfect for anyone eager to add some sparkle to their fingertips. If you love the idea of twinkling stars, cosmic colors, and stunning textures, you’ll find something that resonates with your style. Each design is unique, offering a range of options from chic and minimalist to bold and intricate. Get ready to dive into a world where your nails can reflect the beauty of the universe!
In this post, you’ll discover nail designs that are not only visually stunning but also surprisingly easy to recreate at home or bring to your favorite nail salon. I’ve curated a list of designs that are perfect for any occasion, whether you’re heading to a party or just want to brighten your day. Let’s explore these starry ideas and find the perfect look for you!
Key Takeaways
– Discover 20 unique star nail designs that cater to all tastes, from subtle elegance to bold statements.
– Get inspired by current nail trends and incorporate celestial art into your nail routine.
– Learn about simple techniques to achieve popular looks, making nail art accessible for everyone.
– Explore designs that include various textures like glitter and ombre effects for added depth.
– Find tips on how to customize your star nail designs to match your personal style and occasions.
Contents
- 1. Night Sky Elegance
- 2. Cosmic Glitter Ombre
- 3. Starry Marble
- 4. Celestial Heartbeat
- 5. Nebula Dreams
- 6. Zodiac Signs
- 7. Milky Way Mania
- 8. Shooting Star Streak
- 9. Simple Star Dots
- 10. Glittery Constellations
- 11. Galaxy Swirl
- 12. Starflower Fusion
- 13. Astro Minimalism
- 14. Ethereal Print
- 15. Celestial Vibes with Foil
- 16. Celestial Stripes
- 17. Crystal Stars
- 18. Twinkling Night
- 19. Lunar Phases
- 20. Celestial Eiffel
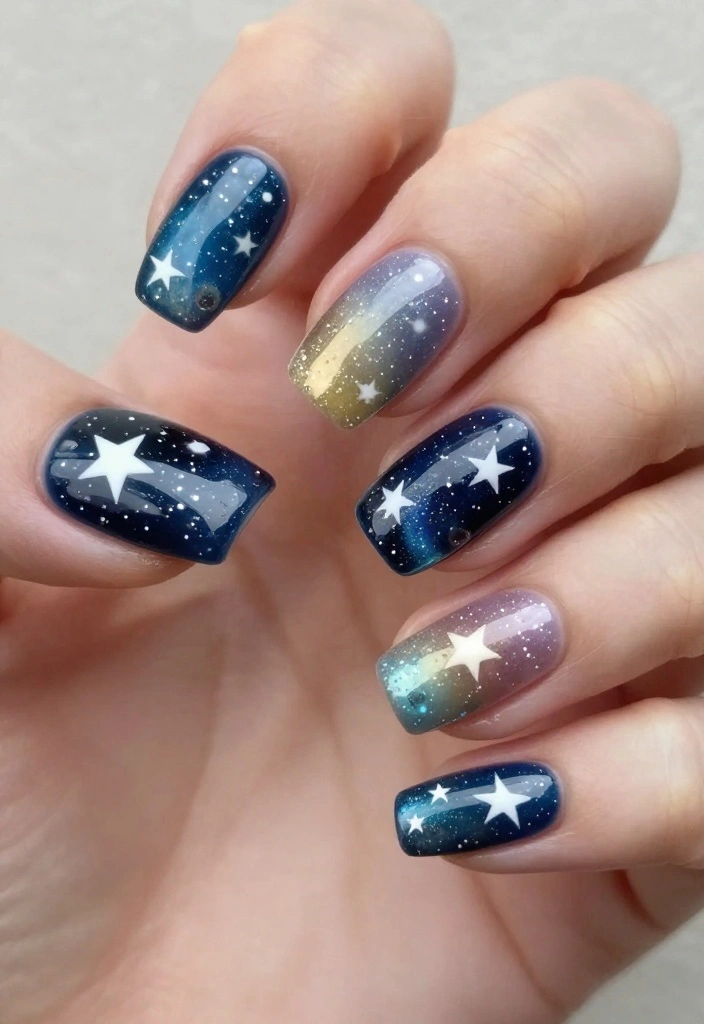
1. Night Sky Elegance

Transform your nails into a mesmerizing night sky using rich blue and black shades. Imagine a glossy navy base, sprinkled with shimmering gold and silver stars, creating an enchanting look. This design elegantly balances sophistication and whimsy, making it a perfect fit for both casual outings and formal events.
Ingredients/Materials Needed:
– Deep navy nail polish
– Black nail polish (for added depth)
– Gold and silver nail polishes
– Dotting tool or thin brush
– Base and top coat
Step-by-Step Instructions:
1. Start with clean, dry nails and apply a base coat.
2. Paint your nails using the deep navy polish as your base.
3. Once dry, use the dotting tool to create star shapes with the metallic polishes.
4. Finish with a topcoat to seal in your stunning design.
Tips: For extra flair, add tiny rhinestones to create a more eye-catching effect!
2. Cosmic Glitter Ombre

Prepare for a dazzling journey with a cosmic ombre effect! This style blends deep blues and sparkling purples, creating a dreamy gradient reminiscent of the universe. Start with a midnight blue base and softly transition into a light lavender or lilac, topped off with glitter for a celestial sparkle.
Ingredients/Materials Needed:
– Midnight blue nail polish
– Light lavender or lilac nail polish
– Fine glitter in silver or holographic shades
– Makeup sponge
– Base and top coat
Step-by-Step Instructions:
1. Apply a base coat to your clean nails.
2. Paint the tips with the midnight blue polish.
3. Use a sponge to dab on the lavender polish, blending it into the blue.
4. Once dry, sprinkle fine glitter to mimic twinkling stars.
5. Seal with a topcoat for a glossy finish.
Tips: Keep a light hand while applying the sponge for a seamless ombre effect!
3. Starry Marble
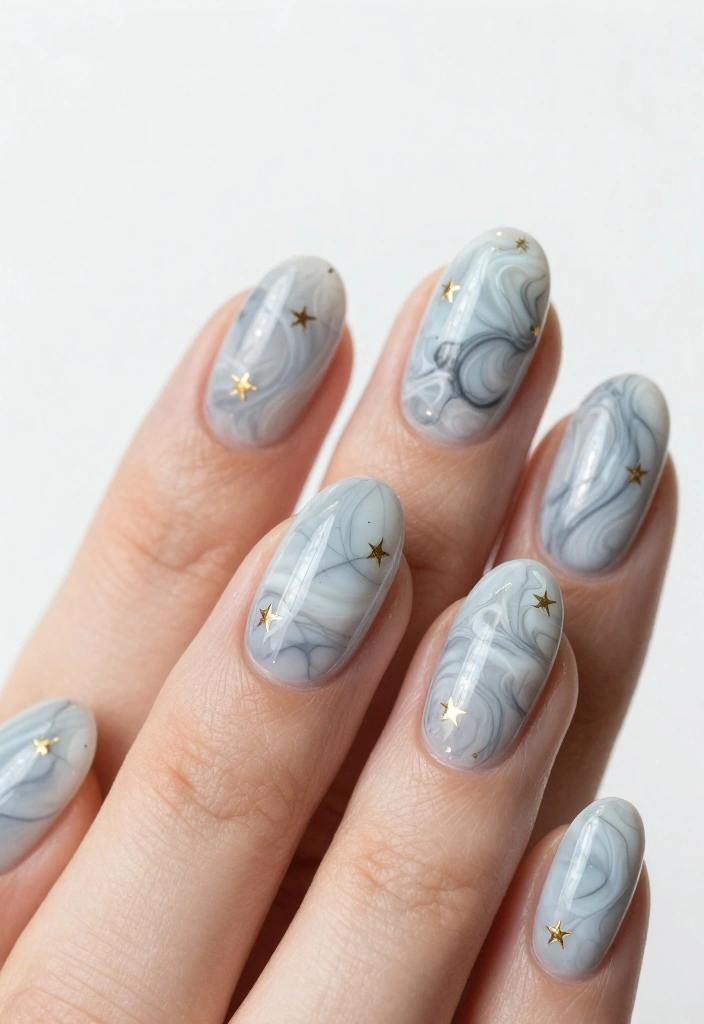
Marble nail art exudes luxury and elegance, and adding stars elevates it to a celestial masterpiece! Begin with a white or pale blue base, swirling in greys and navies to craft the marble effect. Accentuate with dainty gold or silver stars, simulating a night sky reflected in calm waters. This design is versatile enough for casual outings or more formal occasions!
Ingredients/Materials Needed:
– White or pale blue nail polish
– Grey and navy nail polishes
– Gold or silver star stickers or polish
– Nail brush
– Base and top coat
Step-by-Step Instructions:
1. Prep your nails with a base coat.
2. Apply the white or pale blue polish as your base.
3. Use a nail brush to swirl in grey and navy for a marble finish.
4. Once dry, add tiny stars to enhance the celestial vibe.
5. Seal with a topcoat to protect your design.
Tips: Practice swirling techniques on paper before applying to your nails for a perfect finish!
💅 Nail Art Made Easy!
Unlock your creativity with our DIY Nail Art Guide designed for busy moms who love stunning nails.
4. Celestial Heartbeat

Combine your love for the cosmos with a playful heartbeat design! Begin with a clear or nude base, and use fine brushes to draw a heartbeat line adorned with tiny stars. This design offers a fun yet sophisticated twist, making it ideal for those seeking unique nail art.
Ingredients/Materials Needed:
– Clear or nude nail polish
– Black or dark blue polish for the heartbeat
– Gold or silver polish for the stars
– Fine nail brushes
– Base and top coat
Step-by-Step Instructions:
1. Start with a base coat on clean nails.
2. Paint with clear or nude polish as your base.
3. Once dry, use a fine brush to create a heartbeat line across your nails.
4. Dot small stars along the heartbeat using gold or silver polish.
5. Seal with a topcoat for shine.
Tips: Take your time with the heartbeat line to ensure a smooth and continuous appearance!
5. Nebula Dreams
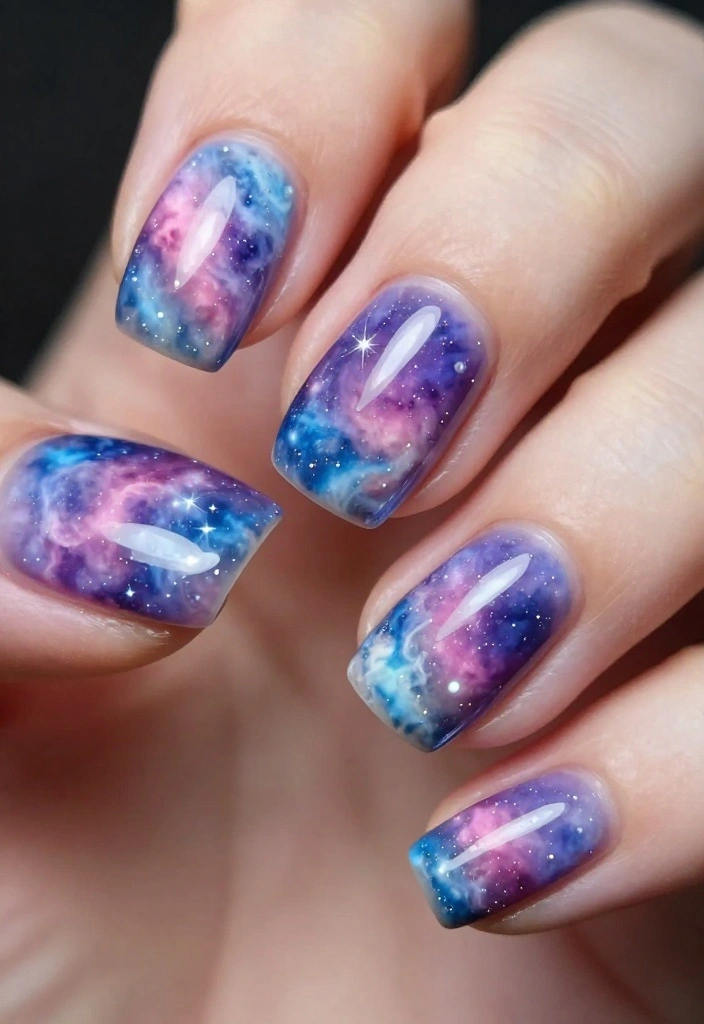
Create a stunning nebula effect on your nails using vibrant colors for an ethereal finish! Blend purples, blues, and pinks to capture the beauty of cosmic clouds. Start with a white or pale pink base, and use a sponge to dab and blend the colors together, finishing with a sprinkle of stars. This design lets your creativity shine while keeping a celestial theme alive.
Ingredients/Materials Needed:
– White or pale pink nail polish
– Purple, blue, and pink nail polishes
– Makeup sponge
– Star stickers or polish
– Base and top coat
Step-by-Step Instructions:
1. Prep your nails with a base coat.
2. Apply white or pale pink as your base color.
3. Use a sponge to apply different colors to mimic a nebula.
4. Add stars using stickers or polish for finishing touches.
5. Seal with a topcoat.
Tips: Blend colors while they’re still wet for a smooth look!
📹 Related Video: Galactic Glam: Starry Skies at Your Fingertips
6. Zodiac Signs
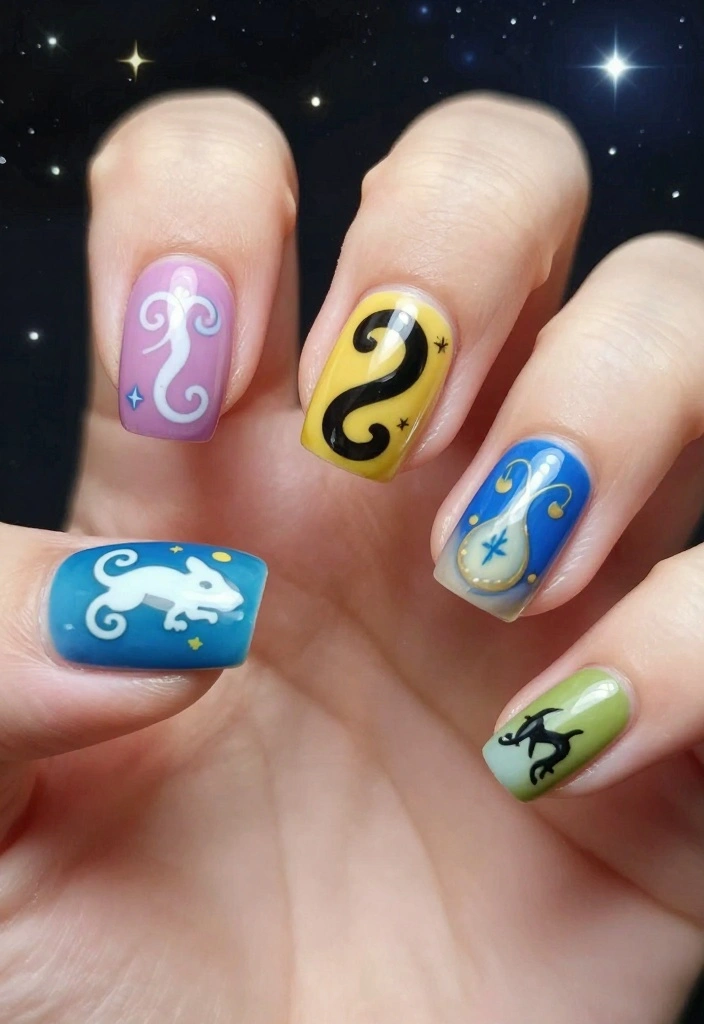
Astrology lovers will enjoy expressing their celestial side through zodiac nail art! Choose a base color representing your zodiac sign, like fiery red for Aries or earthy green for Taurus. Use nail art pens to draw your zodiac symbol on top of the base. This design not only showcases your sign but also adds a personal touch!
Ingredients/Materials Needed:
– Base coat
– Color of choice based on zodiac sign
– Gold or silver polish for the zodiac symbol
– Nail art pens
– Top coat
Step-by-Step Instructions:
1. Start with a base coat on clean nails.
2. Paint your chosen base color based on your zodiac sign.
3. Once dry, use a nail art pen to draw your zodiac symbol.
4. Seal the design with a topcoat for shine.
Tips: Research your zodiac sign’s colors and symbols to make your design personal!
Your zodiac mood is literally on your nails—base color matches your sign, and a tiny symbol seals the vibe. Pro tip: steady hands and a fine nail-art pen make your star nail designs pop every day.
How To Choose Celestial Star Nail Designs
When it comes to nail art, star designs can elevate your style to cosmic levels. With so many options available, it can feel overwhelming to choose the right design that matches your personality and current trends. Here’s a simple guide to help you make the best choice for your next nail look.
1. Consider Your Style
The first step is to think about your personal style. Are you drawn to bold colors and intricate designs, or do you prefer something more minimalist? Celestial nail art can range from vibrant galaxy swirls to subtle star dot patterns. Take a moment to visualize what you want your nails to express. This will narrow down your choices and help you feel more confident in your selection.
2. Think About the Occasion
Different occasions call for different nail designs. For a casual day out, simple star dots or minimalistic celestial vibes might be perfect. If you’re preparing for a party or a special event, consider going for a more extravagant design like cosmic glitter ombre or galaxy swirls that sparkle under the lights. Match your nail design with the vibe of the occasion for a more cohesive look.
3. Assess Your Skill Level
Your skill level in nail art also matters when choosing a design. If you’re a beginner, opt for simpler designs like star dots or simple celestial prints that require less precision. More complex designs like starry marble or nebula dreams may need advanced skills and techniques. Don’t shy away from tutorials that can guide you through intricate designs—practice makes perfect!
4. Choose Your Colors Wisely
Color selection can set the mood for your nail design. Dark blues and purples can evoke a night sky, while bright yellows or whites can create a playful feel. Consider the colors that complement your wardrobe and personal aesthetic. You can also experiment with a mix of colors for a galaxy effect or stick to monochromatic schemes for a chic look. Remember that the right colors can enhance the overall impact of your star nail designs.
5. Use Quality Products
The materials you use for your nail art can drastically affect your final look. Invest in good quality nail polishes, top coats, and nail tools. High-quality glitter, foils, and dots will not only make your designs pop but also last longer. Look for nail products that are durable and easy to apply. Researching popular brands in the nail trends community can lead you to discover top-rated products.
6. Get Inspired
Before making the final decision, gather inspiration. Browse through social media platforms like Instagram or Pinterest for celestial nail art ideas. You can save images of star designs that catch your eye to help you visualize what you like. Sometimes, seeing how others have styled their nails can spark creativity and lead to a design you’ll love.
Pro Tip: Don’t hesitate to mix and match different styles and colors! Nail art is about expressing your personality, so feel free to take elements from various designs to create something uniquely yours. If you love the sparkle of glitter and the elegance of a night sky, combine them for an out-of-this-world effect!
With these tips, you’re now ready to explore the enchanting realm of celestial star nail designs. Whether you go for intricate artistry or simple elegance, your nails will surely shine like the stars!
7. Milky Way Mania
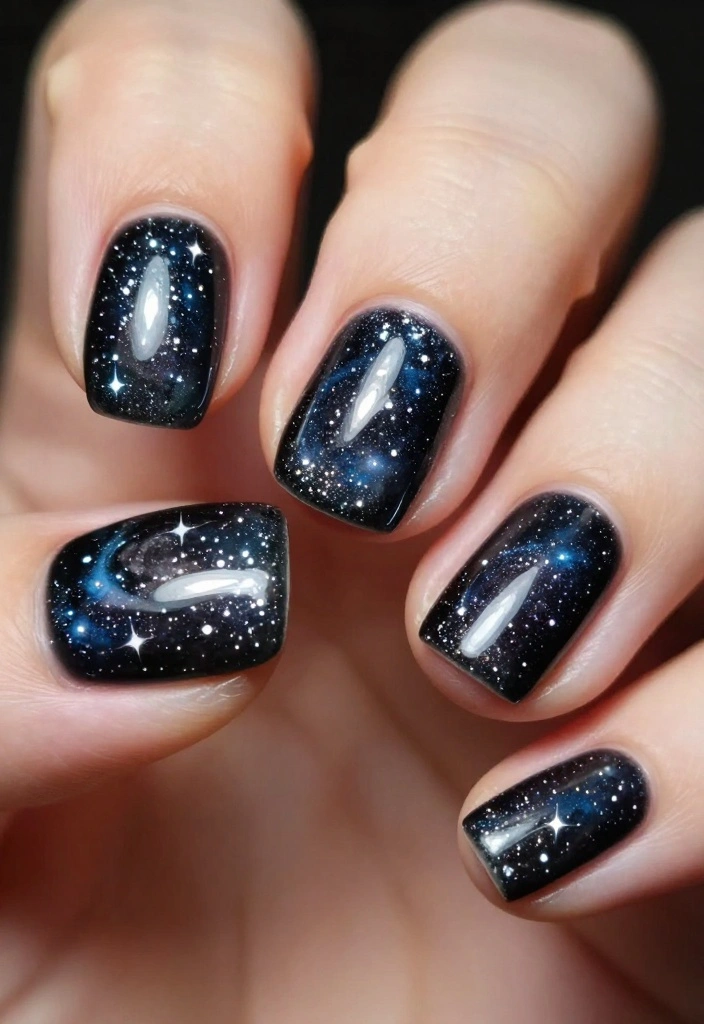
Capture the essence of the Milky Way with this dark, sparkly nail design! Start with a deep black or navy base, then use a sponge to dab in white, silver, and hints of blue, resembling the galaxy’s stars and clouds. Finish with a layer of chunky glitter polish for that dazzling starry effect. This look is perfect for evening events or parties, bringing cosmic vibes right to your fingertips!
Ingredients/Materials Needed:
– Black or navy nail polish
– White and silver polish
– Chunky glitter polish
– Makeup sponge
– Base and top coat
Step-by-Step Instructions:
1. Start with a base coat on clean nails.
2. Apply a deep black or navy polish as your base.
3. Use the sponge to dab white and silver polish across the nails.
4. Finish with a layer of chunky glitter polish for sparkle.
5. Seal with a topcoat to protect your design.
Tips: Experiment with different sizes of chunky glitters for added dimension!
8. Shooting Star Streak
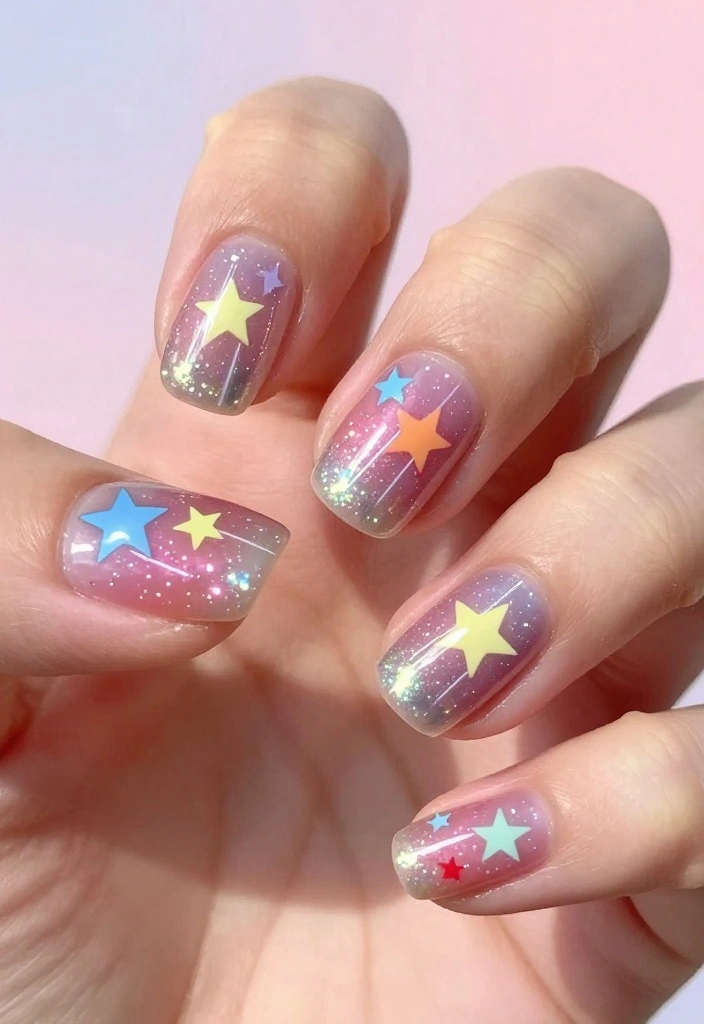
Infuse your nails with the magic of shooting stars using delightful streaks of color! Start with a soft pastel or white base, and use a thin brush to create elongated star shapes resembling shooting stars across the sky. Add a hint of glitter for an extra pop! This playful design is perfect for all ages and occasions.
Ingredients/Materials Needed:
– Light pastel or white nail polish
– Bright colored polishes (like yellow or pink)
– Fine glitter polish
– Thin nail art brush
– Base and top coat
Step-by-Step Instructions:
1. Start with a base coat for protection.
2. Paint your nails with light pastel or white polish.
3. Once dry, use a thin brush to paint shooting star shapes across the nails with bright colors.
4. Add fine glitter polish over the stars for sparkle.
5. Finish with a topcoat.
Tips: Use varying lengths for the shooting stars to create a dynamic and whimsical design!
9. Simple Star Dots

If you prefer a minimalist approach, try the simple star dots design! This style features a nude or soft pink base adorned with small star dots scattered throughout. It’s a chic and understated way to incorporate celestial art into your everyday look. This design suits both casual outings and professional settings perfectly.
Ingredients/Materials Needed:
– Nude or soft pink nail polish
– White or metallic polish for stars
– Dotting tool or a toothpick
– Base and top coat
Step-by-Step Instructions:
1. Start with a base coat to protect your nails.
2. Apply a nude or soft pink polish as your base.
3. Once dry, use a dotting tool to create small star shapes with white or metallic polish.
4. Allow to dry before sealing with a topcoat.
Tips: Space the stars evenly for a clean, professional look!
10. Glittery Constellations

Channel the universe with a constellations-themed nail design! Choose a dark base color like navy or black, and utilize a thin brush to outline your favorite constellations with glitter polish. This look can be personalized with your zodiac constellation or any beloved star patterns. It’s a fun way to nod to the cosmos while showcasing your artistic flair!
Ingredients/Materials Needed:
– Dark base polish (navy or black)
– Gold or silver glitter polish
– Thin brush for detailing
– Base and top coat
Step-by-Step Instructions:
1. Start with a base coat on clean nails.
2. Paint your nails with a dark base color.
3. Once dry, use a thin brush to draw constellations with glitter polish.
4. Let it dry before applying a matte topcoat.
Tips: Refer to constellation images for accurate designs!
11. Galaxy Swirl

Bring the galaxy to your fingertips with a mesmerizing swirl design! Start with a dark base color, and use a thin brush to create swirling patterns with blues, purples, and hints of silver. This captivating design feels like a journey through space, capturing the swirling essence of galaxies! Finish with a topcoat to keep those swirls vibrant.
Ingredients/Materials Needed:
– Dark base polish (black or navy)
– Blues and purples nail polishes
– Silver polish
– Thin nail brush
– Base and top coat
Step-by-Step Instructions:
1. Prep nails with a base coat.
2. Apply a dark base color on clean nails.
3. Once dry, use a thin brush to create swirling patterns with different colors.
4. Finish with a topcoat for shine.
Tips: Embrace the chaos of the galaxies; perfection isn’t necessary with swirls!
12. Starflower Fusion
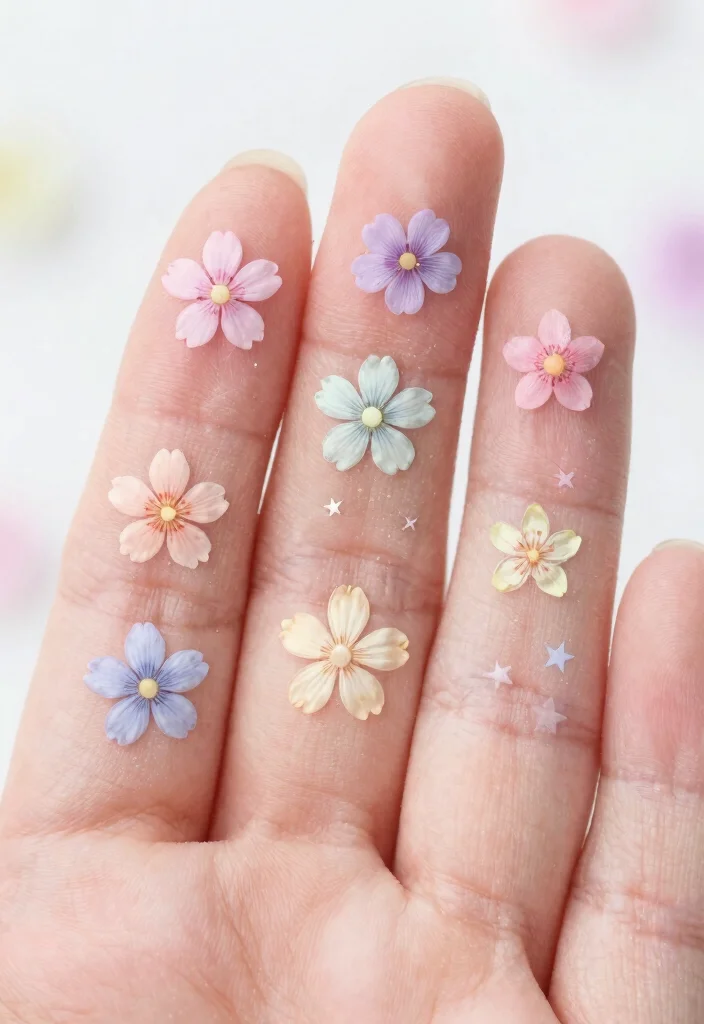
Merge floral designs with star motifs for a whimsical touch! Choose a soft base color and paint delicate flowers intertwined with tiny stars. This design beautifully combines nature and the cosmos, ideal for a fresh spring look or a vibrant summer vibe. Use pastel colors for flowers and tiny gold or silver stars to create a charming aesthetic.
Ingredients/Materials Needed:
– Soft base color polish (like light pink or mint green)
– Floral colors (various pastels)
– Gold or silver polish for stars
– Fine brush for detailing
– Base and top coat
Step-by-Step Instructions:
1. Apply a base coat for protection.
2. Paint your nails with the soft base color.
3. Once dry, create flower designs using various pastel colors.
4. Dot tiny stars around the flowers with gold or silver polish.
5. Seal with a topcoat.
Tips: Opt for simple floral designs to avoid clutter!
13. Astro Minimalism
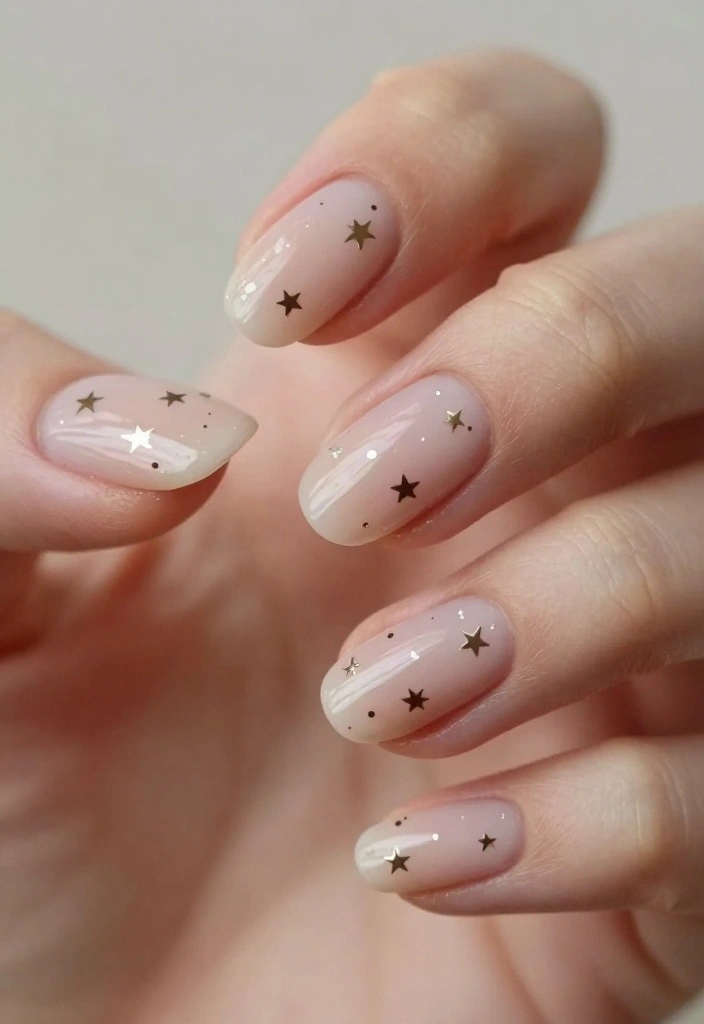
Some days call for simplicity, and astro minimalism is the perfect choice! A clear or nude base with sporadic star shapes in metallic colors creates a subtle yet eye-catching effect. The key is to keep it minimal, allowing the stars to shine! This design is chic and versatile, suitable for any occasion.
Ingredients/Materials Needed:
– Clear or nude polish
– Metallic polish for stars (gold, silver, or rose gold)
– Dotting tool or thin brush
– Base and top coat
Step-by-Step Instructions:
1. Begin with clean nails and apply a base coat.
2. Once dry, paint your nails with a clear or nude polish.
3. Use a dotting tool to create random star shapes with metallic polish.
4. Let it dry before sealing with a topcoat.
Tips: Keep the stars varied in size and placement for an organic look!
14. Ethereal Print
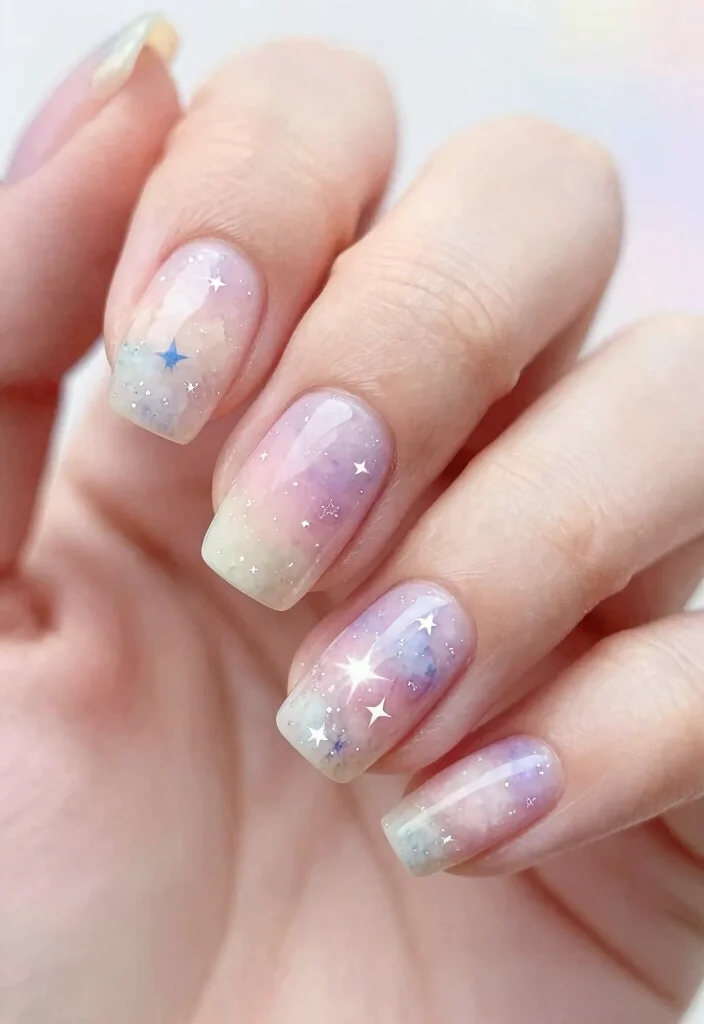
Capture ethereal beauty with a soft watercolor effect on your nails! Use pastel shades like pale blue, lavender, and mint to create a dreamy watercolor design. Blend the colors gently and finish with tiny stars to heighten the ethereal vibe. This design is perfect for romantic occasions or when you want your nails to feel light and airy!
Ingredients/Materials Needed:
– Base coat
– Pastel nail polishes (blue, lavender, mint)
– Thin brush or sponge for blending
– Small star stickers or polish
– Top coat
Step-by-Step Instructions:
1. Apply a base coat on your nails.
2. Use a thin brush or sponge to apply pastel colors in a watercolor fashion.
3. Blend the colors while they’re still wet for a seamless look.
4. Once dry, apply tiny stars to the design.
5. Finish with a topcoat to seal.
Tips: Practice the watercolor technique on paper beforehand!
❝ Fun fact: 72% of nail-art lovers say pastel watercolor designs with tiny stars feel more ethereal and Instagram-ready. When you add pale blue, lavender, and mint, the look instantly elevates your chic star nail designs to a dreamy, romantic vibe. ❞
15. Celestial Vibes with Foil
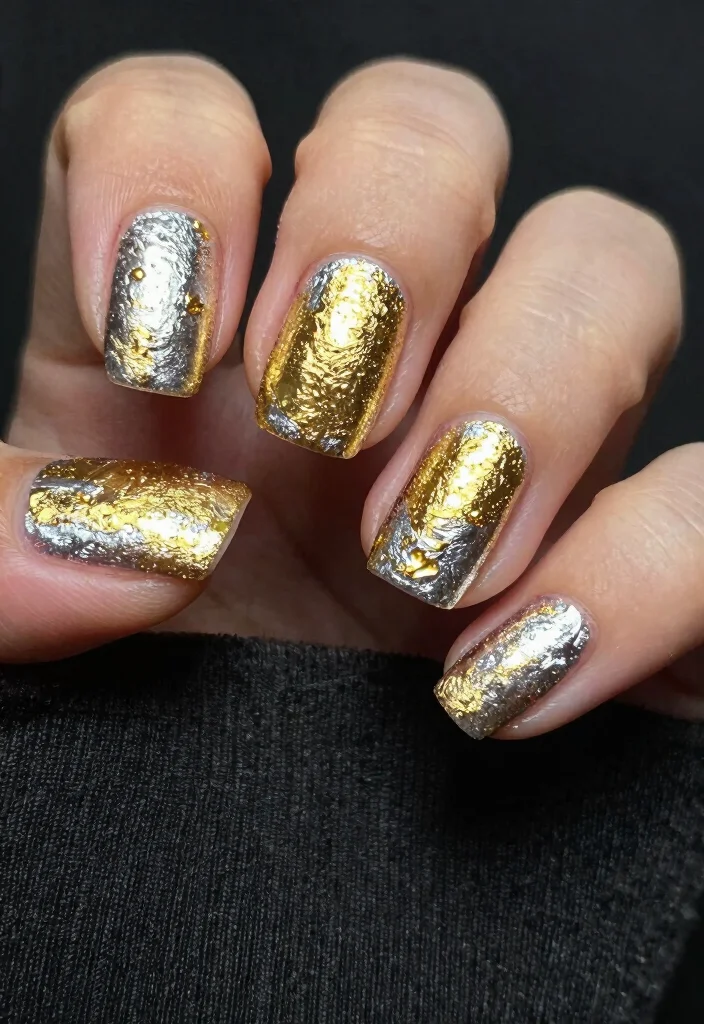
Elevate your nails with celestial foil accents for a luxurious touch! Start with a dark base and apply pieces of gold or silver foil in random patterns for a unique look. The foils catch the light beautifully, giving an ethereal feel that mirrors distant stars. This design is perfect for those wanting to glam up their nail art!
Ingredients/Materials Needed:
– Dark base color (like navy or black)
– Gold or silver foil
– Nail glue or top coat for foil application
– Base coat
Step-by-Step Instructions:
1. Prep your nails with a base coat.
2. Paint the nails with a dark base color.
3. Once dry, apply nail glue or top coat where you want the foil to stick.
4. Carefully place pieces of foil in random patterns.
5. Seal with a top coat for a glossy finish.
Tips: Try different foil patterns for a more personalized look!
Fun fact: celestial foil reflects light in 3D, galaxy-like flecks—perfect for glam nail art. Apply a dark base and random foil pieces for a uniquely starry finish that shines in every light. Your nails become wearable star nail designs, instantly chic.
16. Celestial Stripes
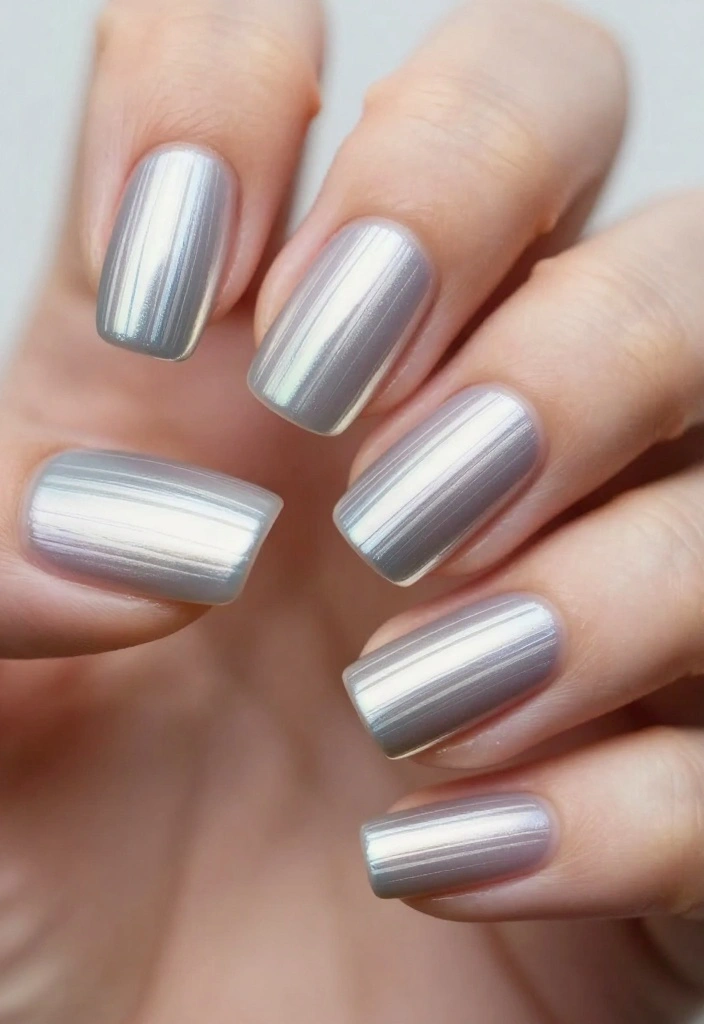
Add a fresh twist to traditional nail art with celestial stripes! Begin with a solid color base, then add thin metallic stripes to symbolize stars and planet rings. This design is sleek and modern, making it ideal for both casual and professional settings. Choose colors that resonate with your style while still capturing the universe’s essence!
Ingredients/Materials Needed:
– Solid color base polish (pick your favorite color)
– Metallic polish for stripes
– Striping tape or thin brush
– Base and top coat
Step-by-Step Instructions:
1. Start with a base coat on clean nails.
2. Apply your chosen solid color as a base.
3. Once dry, use striping tape or a thin brush to create metallic stripes.
4. Seal with a topcoat for protection.
Tips: Contrast the colors of the stripes against your base for a striking effect!
17. Crystal Stars
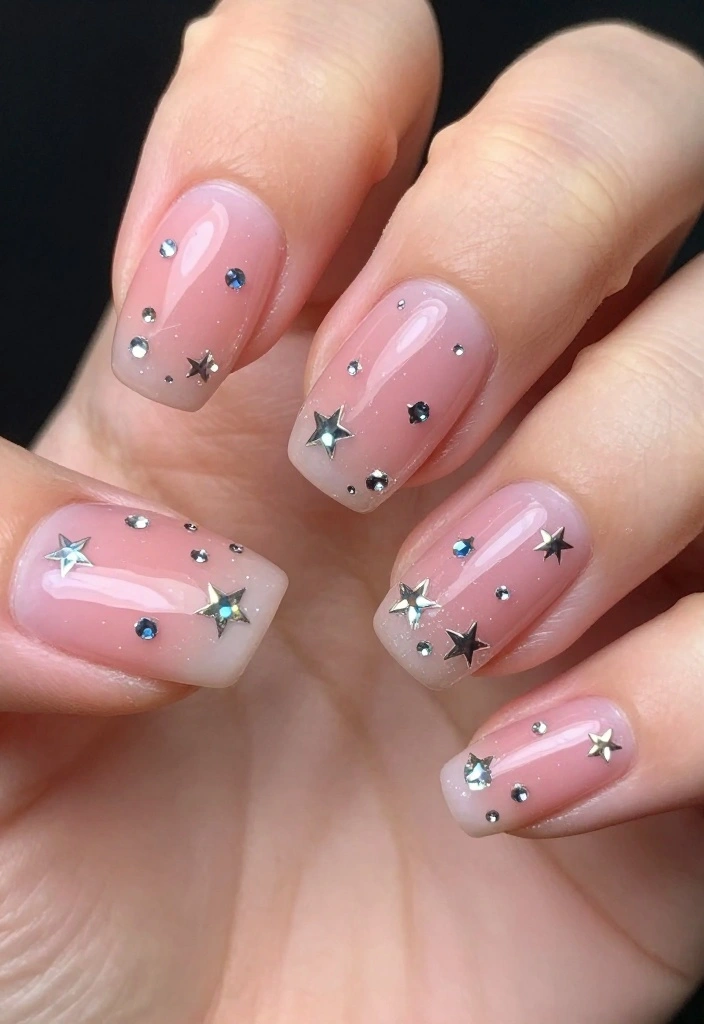
Incorporate a touch of sparkle with crystal star designs! Choose a nude or soft pink base, and use tiny rhinestones to form star shapes or clusters on your nails. This design adds glamour to any outfit, making it perfect for party nights or special occasions. The crystals catch the light beautifully, making your nails shine like the night sky!
Ingredients/Materials Needed:
– Nude or soft pink nail polish
– Rhinestones in star shapes or tiny sizes
– Nail glue or top coat to secure crystals
– Base coat
Step-by-Step Instructions:
1. Apply a base coat to your nails.
2. Paint nails with a nude or soft pink polish.
3. Once dry, use nail glue or top coat to place rhinestones in star shapes on your nails.
4. Seal with a topcoat to keep the rhinestones in place.
Tips: Use varying sizes of rhinestones to create depth and visual interest!
18. Twinkling Night

Bring the beauty of a twinkling night sky to your nails with this delightful design! Start with a dark base and add tiny dots of varying sizes in white or silver to mimic stars. You can enhance the look with larger star stickers for emphasis. This design is simple yet striking, perfect for any occasion where you want to shine! Don’t forget to finish with a shiny top coat.
Ingredients/Materials Needed:
– Dark base polish (navy or black)
– White or silver polish for stars
– Star stickers (optional)
– Base and top coat
Step-by-Step Instructions:
1. Start with a base coat on clean nails.
2. Paint your nails with a dark base color.
3. Once dry, use a dotting tool to create various sized dots to represent stars.
4. If desired, add larger star stickers.
5. Seal with a topcoat for shine.
Tips: Vary the sizes and placements of dots for a natural starry effect!
19. Lunar Phases

Celebrate the beauty of lunar phases with unique nail art! Start with a base coat of white or pale blue, and create crescent and full moon shapes using grey or silver polish. Add tiny stars in between the moon phases to enhance the cosmic theme. This design is perfect for lunar lovers and anyone who appreciates celestial beauty! It’s a great way to express your love for the night sky.
Ingredients/Materials Needed:
– White or pale blue base polish
– Grey or silver polish
– Base coat
– Top coat for sealing
Step-by-Step Instructions:
1. Start with clean nails and apply a base coat.
2. Paint nails with the chosen base color.
3. Once dry, use a fine brush to create moon shapes on each nail.
4. Dot tiny stars around the moons for extra flair.
5. Finish with a topcoat to seal the design.
Tips: Use reference images for accurate moon shapes!
20. Celestial Eiffel

Combine culture with celestial art in the Celestial Eiffel design! Start with a nude base and use a fine brush to paint a silhouette of the Eiffel Tower, surrounded by tiny stars. This design beautifully celebrates love alongside the cosmos. Remember to use metallic colors for the tower to make it pop against the base!
Ingredients/Materials Needed:
– Nude or soft pink nail polish
– Black or metallic polish for the Eiffel Tower
– Gold or silver for stars
– Fine brush for detailing
– Base and top coat
Step-by-Step Instructions:
1. Apply a base coat on clean nails.
2. Once dry, paint your nails with nude or soft pink polish.
3. Use the fine brush to create the Eiffel Tower silhouette.
4. Dot tiny stars around the tower using gold or silver polish.
5. Seal with a topcoat for shine.
Tips: Refer to an image of the Eiffel Tower for accuracy!
Conclusion
Whether you’re a celestial art aficionado or just beginning your nail art journey, these star nail designs are sure to inspire your next manicure! Embrace your creative side and let your nails shine like the stars. Explore these designs, mix and match ideas, and don’t be afraid to add your personal flair. The universe is your canvas!
Frequently Asked Questions
Question: What Are the Easiest Star Nail Designs to Try at Home?
For a quick win with star nail designs, start with a solid base color like deep navy, black, or a soft nude to let the stars shine. Add tiny white stars with a fine brush or use star decals, then seal with a clear top coat for lasting sparkle. If you want extra flair, try a subtle celestial backdrop—a sponge gradient in purples and blues with a few stars on one accent nail.
Tip: practice on a nail wheel first to build confidence and keep the design simple so it reads well at a glance.
Pro tip: embrace celestial art by pairing stars with a touch of iridescent glitter for that extra pop of shine.
Question: Which Tools and Materials Do I Need for Celestial Nail Art?
Getting started with star nail designs needs just a few basics: base coat, your chosen nail colors, a top coat, a dotting tool or a fine nail art brush, and star decals or stencils. Optional: striping tape for clean lines, rhinestones or metallic foils for extra sparkle, and a UV/LED lamp if you are using gel polish. For a quick celestial vibe, keep one accent nail with a galaxy-inspired gradient, and use a white or metallic star stamp on top.
Pro tip: use quality tools and practice on a nail wheel or spare nail to reduce mistakes.
Remember to choose colors that contrast with the base to highlight the celestial art and star nail designs.
Question: How Can I Make My Star Nail Designs Last Longer Between Manicures?
To keep your star nail designs looking fresh, start with a clean, dry nail and a good base coat. Apply two thin layers of color rather than one thick coat, sealing the edges, then add a top coat with a quick-dry or long-lasting formula for extra protection and sparkle. Reapply top coat every 3-4 days; avoid acetone-based removers or soaking hands in water for long periods. For decals, set them with a dedicated top coat; if you are using gel polish, cure properly under a LED lamp.
Careful nail prep and regular top-coat maintenance keep your celestial nail art vibrant longer.
Tip: avoid aggressive cuticle oils until you are ready for a new manicure to prevent loosening decals.
Question: What Are the Hottest Nail Trends in Celestial Art and Sparkle Right Now?
Right now, you will see nail trends leaning into galaxy gradients, constellation accents, metallic foils, and ultra-fine white stars on dark bases. Think moody blues, purples, and midnight black with iridescent glitter to add sparkle. Matte vs glossy finishes, negative-space celestial art, and asymmetric accent nails are popular. For a quick update, mix tiny star decals with a shimmering aurora gradient for a modern twist on star nail designs.
Question: How Do I Choose Colors and Finishes to Make Star Nail Designs Pop?
Consider a high-contrast base: black or deep navy nails make white or metallic stars stand out, while a pale base with dark stars creates a dreamy look. Pair glossy finishes with a sprinkle of holo or micro-glitter to enhance sparkle. Use a top coat that levels smoothly to avoid snagging the delicate star decals, and consider a matte finish on the base while keeping stars glossy for a chic celestial art vibe.
Experiment with gradients and a single accent nail to keep things balanced, and always seal with a strong top coat to protect your star nail designs.
Related Topics
star nail designs
celestial art
nail trends
sparkle nails
easy nail art
beginner friendly
glitter designs
cosmic manicure
trendy nail styles
seasonal nail art
nail design ideas
unique nail art
I absolutely love these star nail designs! The galaxy look is so fun, and it reminds me of the time I tried to paint my nails like a sunset and ended up with a mess. Have you tried any of these designs yourself?
These nail designs are a blast! I once tried to do a starry night theme, but it ended up looking more like a toddler’s art project. Why did the nail polish break up with the top coat? It found someone more matte!
Wow, these designs are so creative! Did you know that some stars you see at night are actually billions of light-years away? Makes you think about how small we are, right?
I tried a star nail design for a party last year, and it was such a hit! I ended up giving my friends mini mani-pedis, and it turned into a nail art night. Have you ever hosted something like that?