
Nail art has exploded in popularity lately, and for good reason! There’s something undeniably fun about expressing your personality through cute nail art designs. Whether you’re preparing for a special occasion or just want to spruce up your everyday look, these designs can make you feel stylish and confident. I created this post because I know how overwhelming it can be to navigate through countless nail art ideas. You might be craving something fresh, but perhaps you don’t know where to start.
If you’re someone who loves fashion and enjoys creative self-expression, this blog is perfect for you. You’ll discover an array of cute nail art designs that are not just trendy but also easy to replicate at home or request at your favorite nail salon. I’ve gathered 14 charming ideas that range from floral patterns to playful cartoon characters, each designed to inspire you to get those nails looking fabulous. By the end of this post, you’ll feel excited to try something new, transforming your nails into a canvas of creativity.
From simple designs for the minimalist to bold looks for the adventurous, there’s truly something for everyone. You’ll find tips and tricks that can help you achieve that perfect look, whether you’re aiming for chic or whimsical. So grab your nail polish, and let’s dive into the world of cute nail art designs you’ll wish you tried sooner!
Key Takeaways
– Discover 14 cute nail art designs that cater to various tastes, from floral to geometric styles.
– Each design is accompanied by tips on how to recreate it easily at home or at a salon.
– Find inspiration for seasonal themes and fun characters that reflect your personality.
– Learn about materials and techniques necessary for achieving each design effectively.
– Transform your nails into a stylish accessory that complements any outfit or occasion.
Contents
- 1. Floral Delight
- 2. Geometric Glam
- 3. Minimalist Magic
- 4. Confetti Craze
- 5. Ombre Effect
- 6. Glitter Glam
- 7. Adorable Animal Prints
- 8. Cute Cartoon Characters
- 9. Marble Effect
- 10. Seasonal Themes
- 11. Metallic Accent
- 12. Whimsical Watercolor
- 13. Tie-Dye Trends
- 14. Fun French Twist
1. Floral Delight
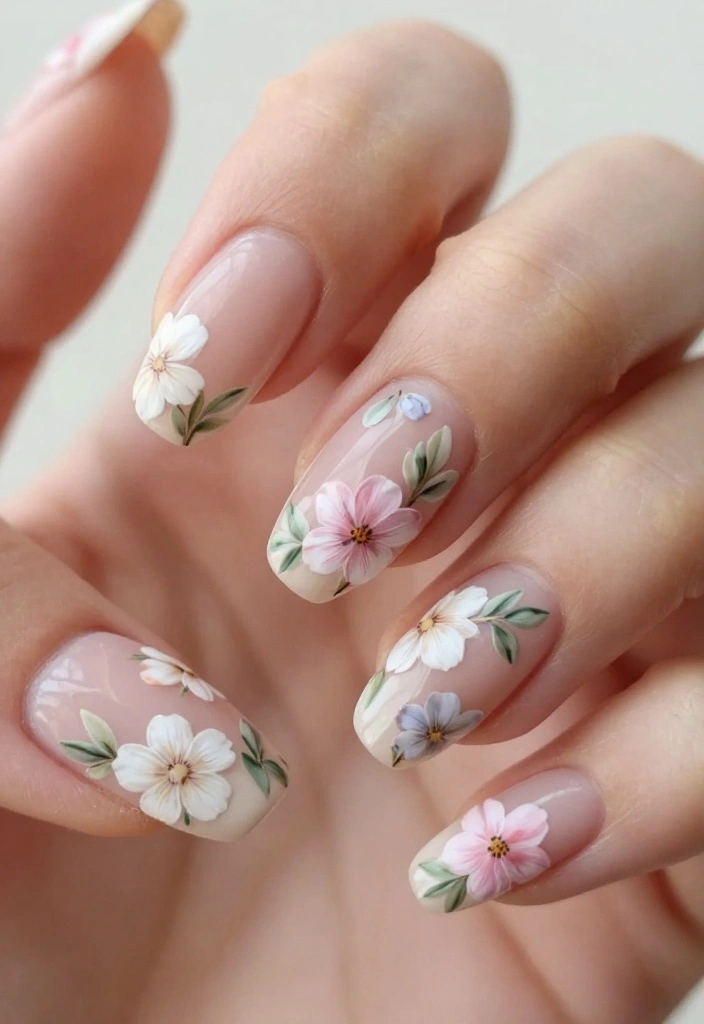
Floral nail art captures the essence of nature’s beauty, making it a delightful choice for your fingertips. Soft pastel hues like lavender, mint green, and pale pink create a refreshing spring and summer vibe. This design is adaptable to your mood, allowing you to choose between delicate blooms or bold blossoms for a personal touch.
To create this design, begin with a light base coat. Use a fine brush to paint intricate flowers in various colors, and add green leaves to enhance the contrast. The charm of floral designs is in their versatility, as you can customize the colors to match your outfit perfectly!
Preparation:
– Base coat
– Nail polish in pastel colors (light pink, mint green, lavender)
– Nail art brush
– Top coat
Steps:
1. Apply a base coat for a smooth start.
2. Once dry, paint your nails with a solid base color.
3. Use the brush to create flower shapes with dots for petals.
4. Add green leaves by painting small triangles.
5. Seal with a top coat for a glossy finish.
Feel free to experiment with different flower shapes and color combinations to truly make it your own!
💅 Nail Art Made Easy for Moms
Transform your nail game with our DIY Nail Art Guide, perfect for busy moms looking to express creativity effortlessly.
How To Choose Cute Nail Art Designs
Choosing the right cute nail art designs can elevate your style and express your personality. With so many options available, it’s important to think about what suits you best. Here are several criteria to help you select the perfect nail art designs for your next manicure.
1. Consider Your Style
Think about your personal style. Do you prefer bold and colorful designs, or are you more into simple and minimalist patterns? Your nail art should reflect who you are. If you often wear vibrant clothes, a fun, colorful design like “Confetti Craze” might be a perfect match. On the other hand, if your wardrobe is mostly neutral, a design like “Minimalist Magic” could be more fitting.
2. Occasion Matters
Different occasions call for different nail art. For everyday wear, designs like “Cute Cartoon Characters” or “Floral Delight” can bring a cheerful touch. If you’re heading to a formal event, consider “Ombre Effect” or “Metallic Accent” for a classy look. Always think about where you’ll be showing off your nails.
3. Nail Length and Shape
Your nail length and shape play a huge role in how a design will look. Long nails can pull off intricate designs like “Adorable Animal Prints” or “Whimsical Watercolor” beautifully. Shorter nails may benefit from simple designs like “Geometric Glam” or “Fun French Twist.” Always choose designs that complement your nail shape for the best effect.
4. Color Palette
Select colors that not only reflect your style but also match your outfits. Bright colors work well for summer, while darker hues can be perfect for fall. If you love experimenting, consider ombre designs which can blend several colors beautifully. Keeping a color wheel handy can help you visualize the combinations that will work best for you.
5. Skill Level
Be honest about your nail art skills. If you’re a beginner, choose designs that are easy to replicate. Simple patterns like “Confetti Craze” or “Fun French Twist” can be a great start. As you gain confidence, you can move on to more complex designs such as “Marble Effect” or “Tie-Dye Trends.” Don’t forget, practice makes perfect!
6. Seasonal Inspiration
Think about the season when choosing your nail art. For spring, floral designs are a hit, while winter can inspire snowy or glittery looks. Seasonal themes like “Seasonal Themes” can be a fun way to celebrate the time of year. Keep an eye on seasonal color trends to stay fresh and stylish!
Pro Tip: Before committing to a nail art design, consider practicing on a set of press-on nails. This allows you to see how the design works with your style without the commitment. Plus, you can easily change them if you don’t love the outcome!
Taking your time to choose the right cute nail art design will ensure you love your manicure. Whether it’s for a special occasion or just for fun, your nails can be an expression of your creativity and style. Happy nail designing!
2. Geometric Glam
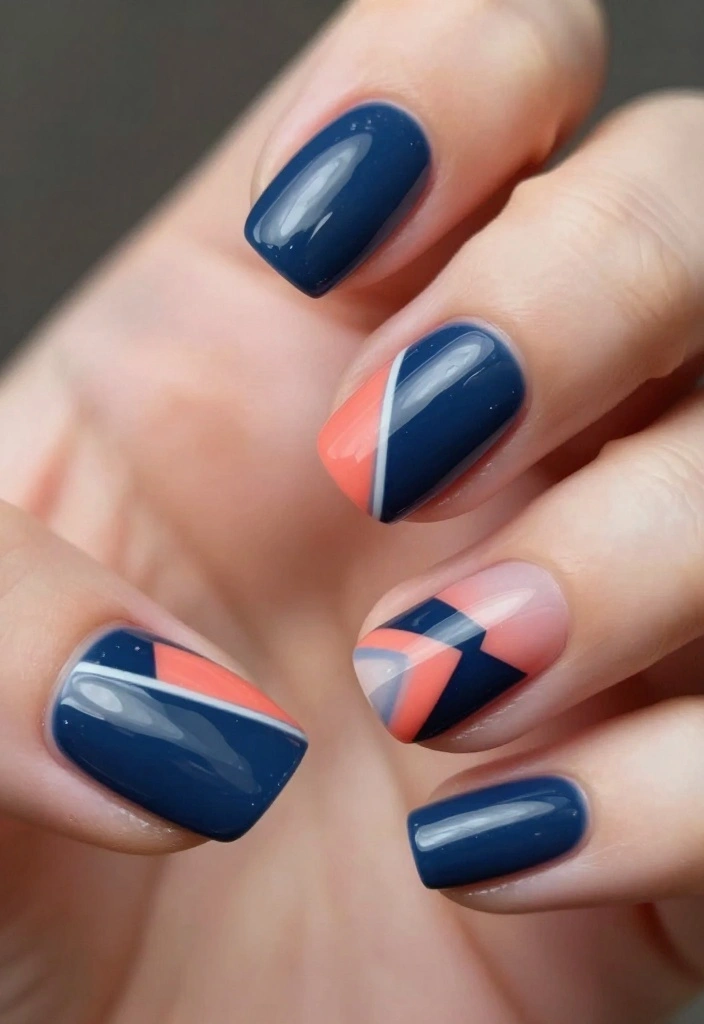
Geometric nail art is a modern classic that combines clean lines with bold contrasts. This striking design can seamlessly transition from cute to sophisticated, making it ideal for various occasions. The precision involved in geometric patterns adds a layer of elegance that stands out beautifully.
To achieve this trendy look, select complementary colors like black and gold or navy and coral. Start with a base coat in one color and utilize nail tape to create sections for a contrasting color. This style is all about structure and balance, making your nails a true work of art!
Preparation:
– Base coat
– Nail polish in two contrasting colors
– Nail tape
– Top coat
Steps:
1. Apply a base coat and choose your primary color.
2. Once dry, place nail tape in geometric shapes on your nails.
3. Paint over the tape with your contrasting color.
4. Carefully peel off the tape before the polish dries.
5. Finish with a top coat to enhance the shine.
Your nails will look fantastic, especially if you add a matte finish for a unique twist!
📹 Related Video: Nail art Geometric Glam: Glam and Spider Gel nails tutorial – Thuya Professional
3. Minimalist Magic
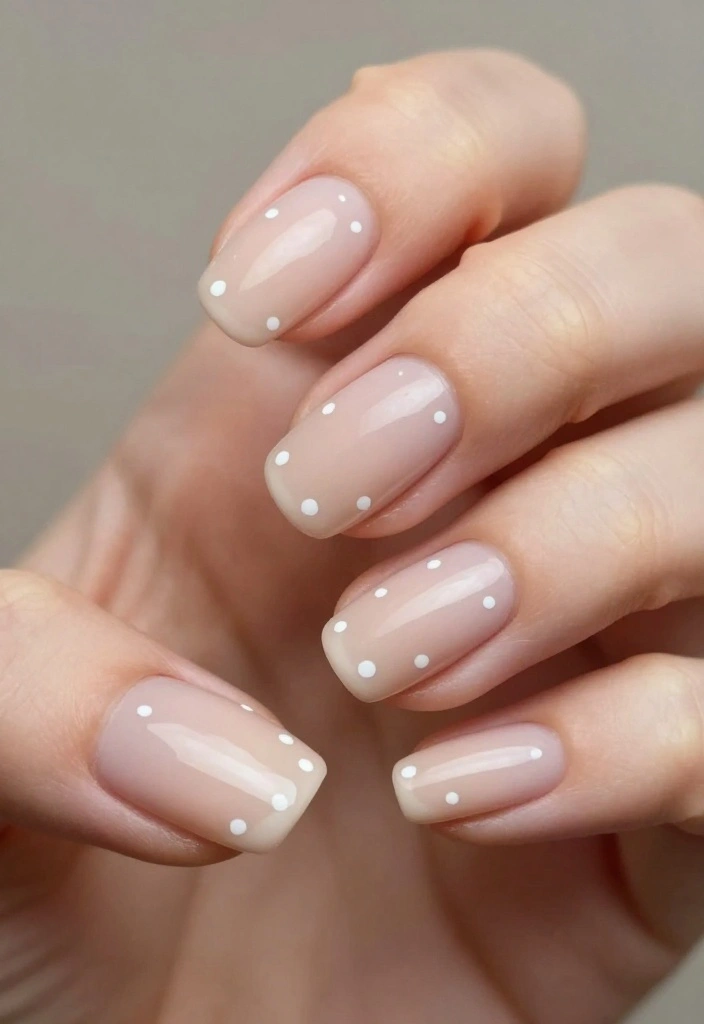
Minimalist nail art is a celebration of simplicity and elegance. This chic style highlights the beauty of understated designs, making it perfect for anyone who loves a clean look. A nude base with delicate dots or lines in white or black offers an effortlessly stylish appearance.
This design is versatile enough for any occasion, from office settings to nighttime outings. Pairing it with various outfits makes this minimalist approach even more appealing.
Preparation:
– Base coat
– Nude nail polish
– White or black nail polish
– Top coat
Steps:
1. Apply a base coat and let it dry.
2. Paint your nails with a nude polish.
3. Use a fine brush to add tiny dots or lines.
4. Finish with a top coat for a shiny finish.
Feel free to vary the placement of dots for an individualized touch!
Fun fact: 8 out of 10 nail-art fans reach for a nude base to nail the minimalist chic. Simple dots or thin lines in white or black instantly elevate any cute nail art designs—from desk to nightlife.
4. Confetti Craze
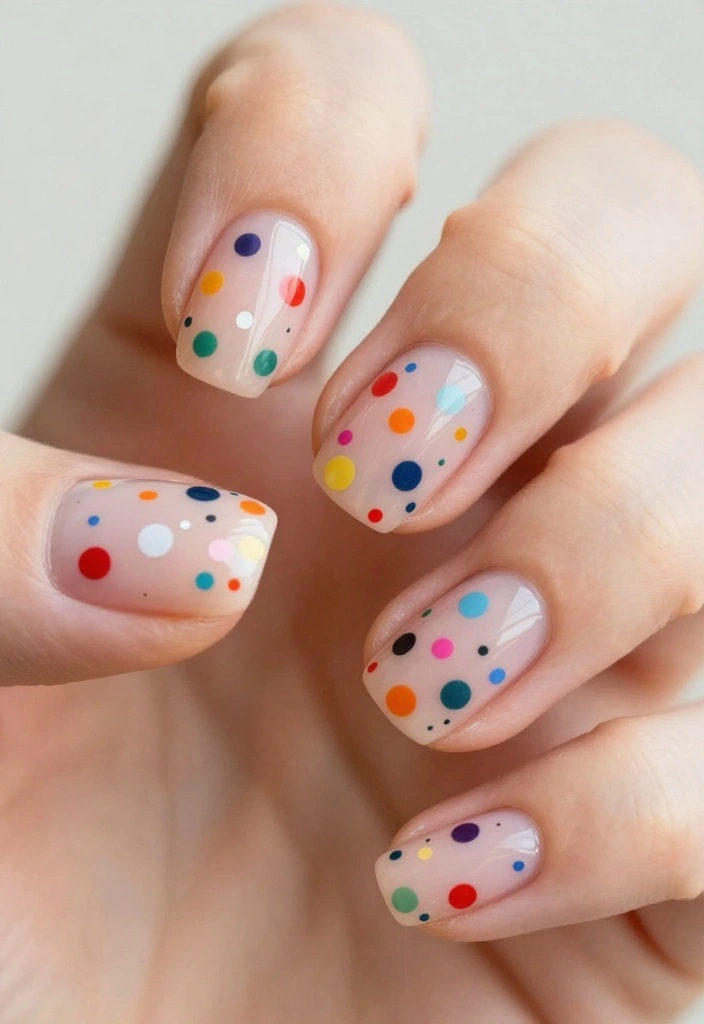
Add a burst of fun to your nails with confetti nail art! This lively design features colorful specks that resemble confetti, making it perfect for celebrations or simply to brighten your day. The playful randomness of this design means that each nail can have its own unique flair.
Start with a clear or pastel base coat and use a dotting tool to place small dots of various colors all over your nails. This whimsical touch is ideal for those who love to express their creativity through their nail art.
Preparation:
– Clear or pastel base coat
– Nail polish in vibrant colors
– Dotting tool
– Top coat
Steps:
1. Apply your chosen base coat.
2. Use the dotting tool to create colorful dots in random patterns.
3. Seal your art with a top coat for longevity.
For extra sparkle, consider adding glitter to some of the dots!
5. Ombre Effect
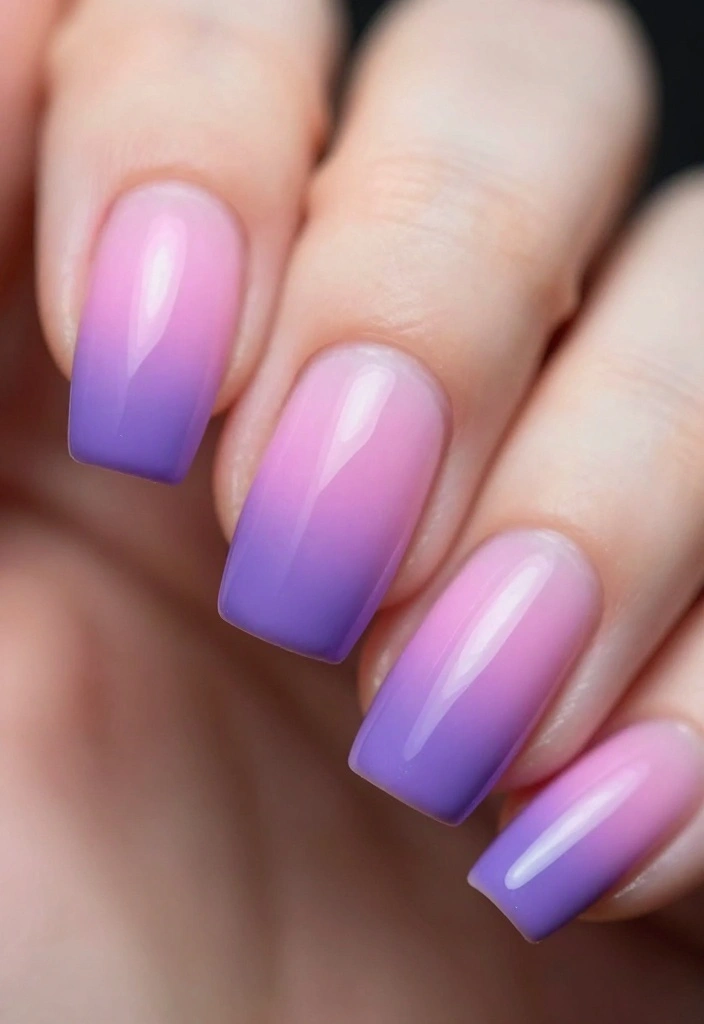
Ombre nails create a stunning transition of colors that captures an ethereal quality. This technique beautifully blends shades, resulting in nails that look long and elegant. Perfect for a romantic date or a casual day out, ombre nails provide a dreamy aesthetic.
Select two or three colors that harmonize well, such as pink and purple or blue and teal. To achieve this look, apply the lighter color at the cuticle and blend towards the darker color at the tips. A sponge can help create a soft, seamless transition that’s both cute and stylish!
Preparation:
– Base coat
– Two or three nail polish colors (gradient shades)
– Makeup sponge or brush
– Top coat
Steps:
1. Apply a base coat.
2. Paint the lighter color on your nails.
3. Use a sponge to dab the darker color towards the tips, blending as you go.
4. Finish with a top coat to smooth everything out.
Add a shimmer top coat to elevate the ombre effect!
6. Glitter Glam
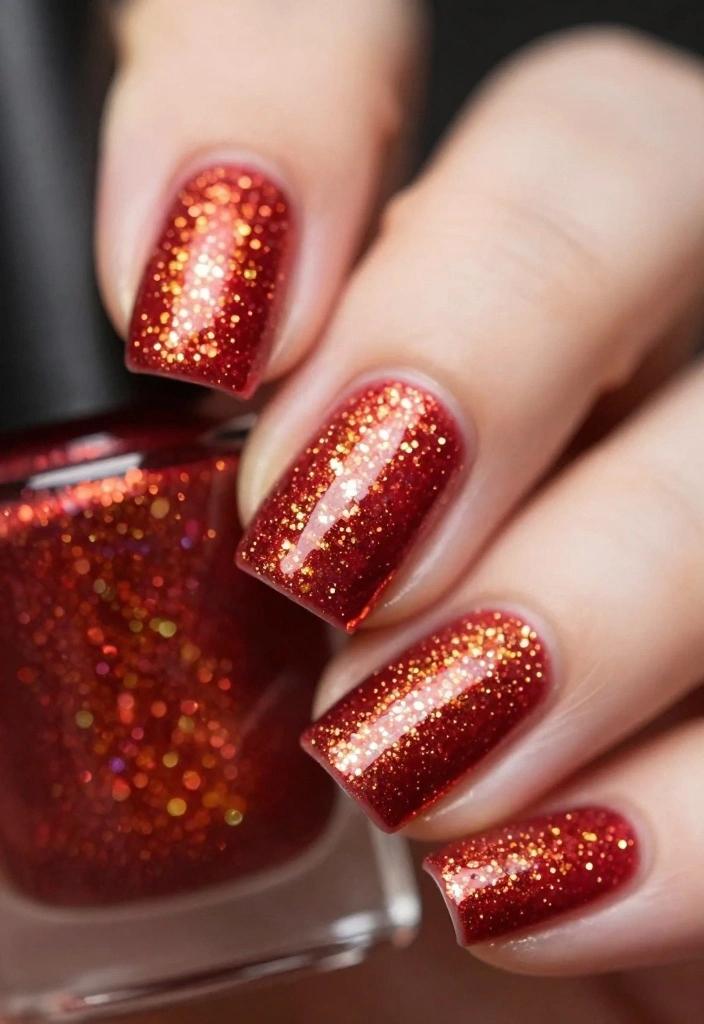
Glitter nails are an instant way to elevate your look! Whether you’re preparing for a special event or simply want to add some sparkle to your day, glittery nails add an irresistible charm. This design can be as bold or subtle as you desire, allowing for infinite creativity.
Begin with a solid base color of your choice, then apply glitter polish over it or as an accent on a few nails. You can go for full-on sparkly coverage or just add glitter to the tips for a chic French twist. The key is sealing it well with a top coat to keep your glitter in place!
Preparation:
– Base coat
– Solid nail polish in any color
– Glitter nail polish
– Top coat
Steps:
1. Apply a base coat and your solid color.
2. Once dry, apply glitter polish all over or just on the tips.
3. Seal with a top coat for durability.
Mix different sizes of glitter for added texture and dimension!
7. Adorable Animal Prints
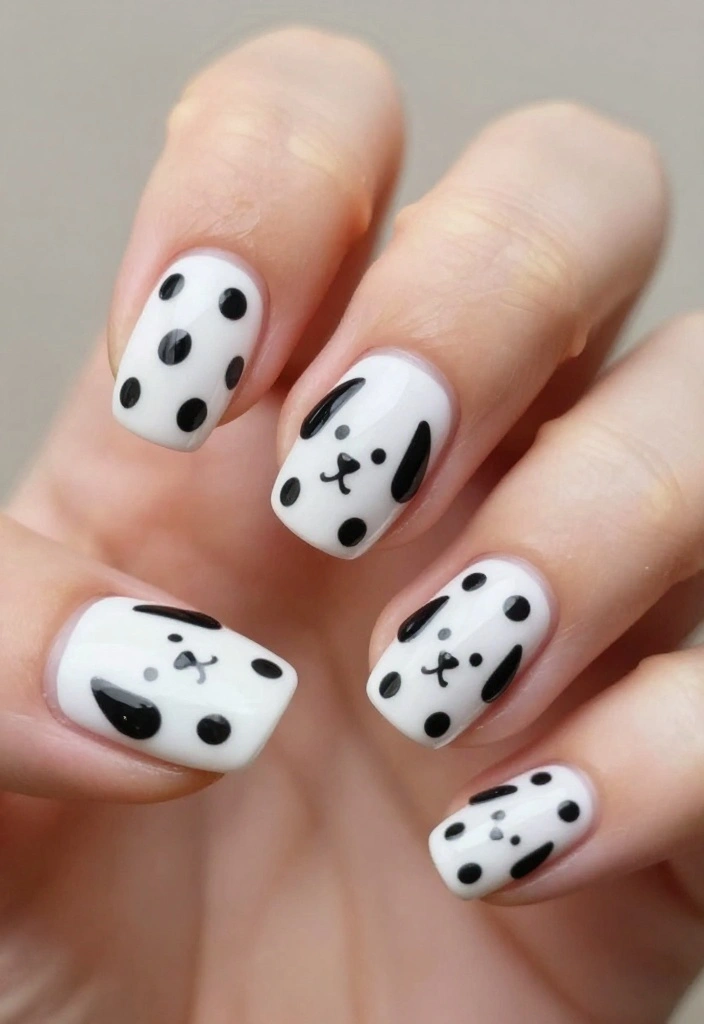
Animal prints are not just for clothing; they can make a fabulous statement on your nails too! Think of playful dalmatian spots, sweet zebra stripes, or trendy leopard spots. These designs add a whimsical touch that can elevate any look.
To create your animal prints, start with a solid color base and use a thin brush or dotting tool to add your chosen print. You can opt for contrasting colors for a bold statement or go for tonal shades for a more subtle effect. The timeless appeal of animal prints means they never go out of style!
Preparation:
– Base coat
– Nail polish in a solid color
– Additional colors for the prints
– Fine nail art brush or dotting tool
– Top coat
Steps:
1. Apply a base coat and your primary color.
2. Use the brush or dotting tool to create your animal print design.
3. Seal it with a top coat to keep it fresh.
Feel free to mix different prints for an eclectic look!
8. Cute Cartoon Characters
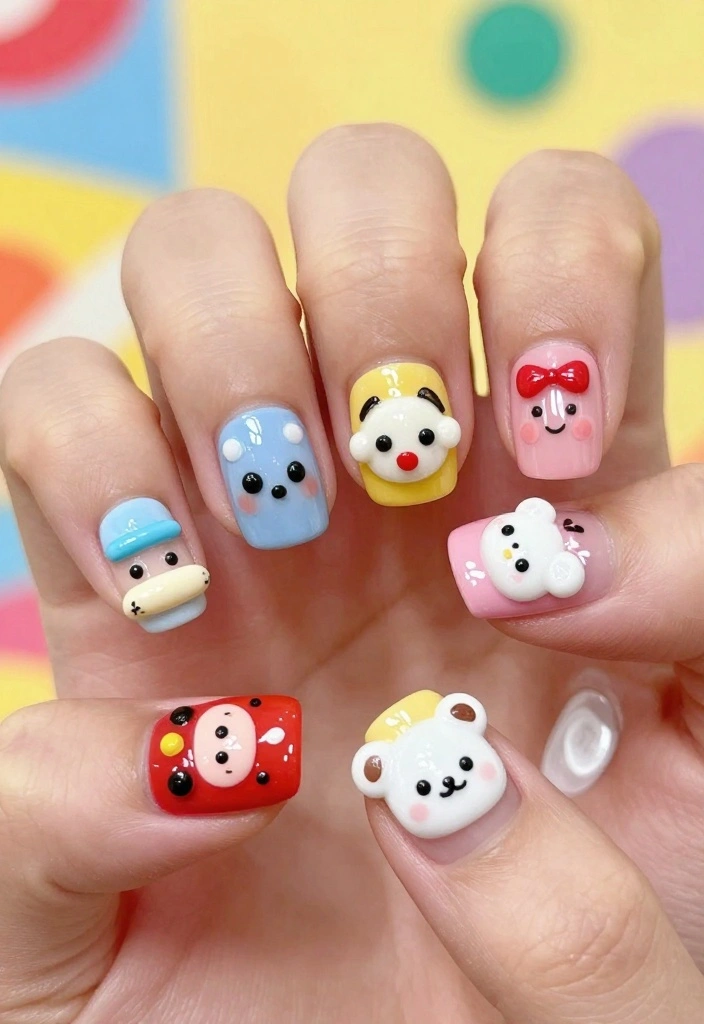
Bring a smile to your nails with adorable cartoon characters! This fun nail art design lets you express your playful side and showcase your favorite characters. Whether it’s classic cartoons or trendy icons, your options are endless.
Begin by painting a solid base color, then use a fine brush to draw or paint your chosen characters. Adding tiny details like glitter or shiny polish for their eyes or outfits can create extra dimension and charm. This design is perfect for those who love to embrace their inner child!
Preparation:
– Base coat
– Nail polish in solid color(s)
– Fine brush for detailing
– Top coat
Steps:
1. Apply your base coat and color.
2. Draw your chosen characters on each nail using the fine brush.
3. Add fun details and finish with a top coat to protect your artwork.
Practice your designs on paper before committing to your nails for the best results!
9. Marble Effect
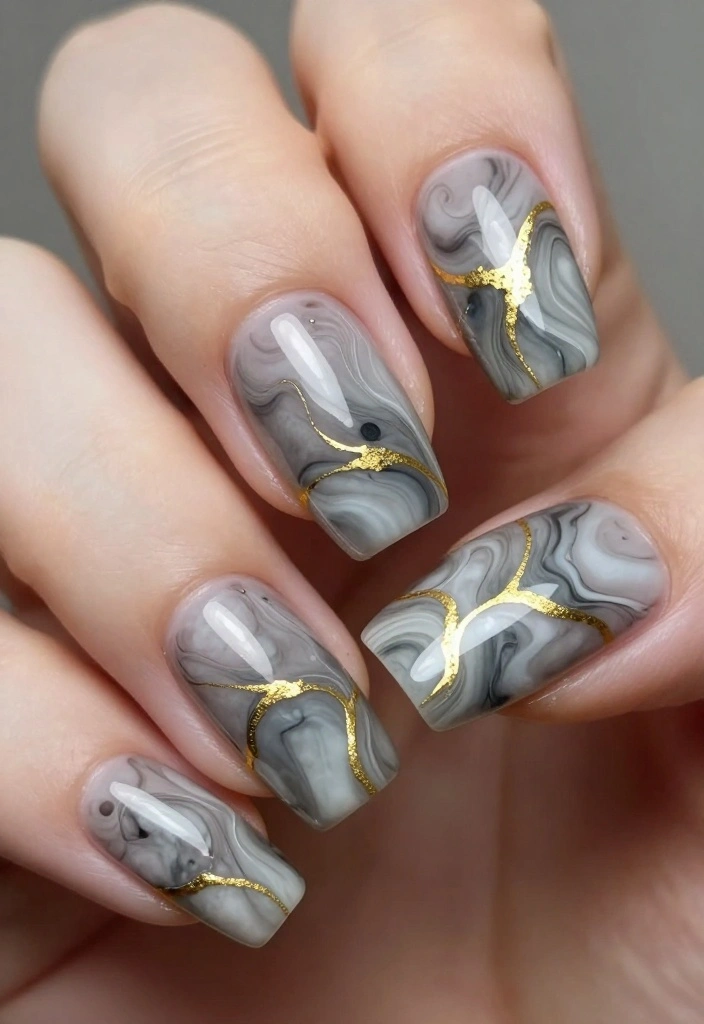
Marble nails offer an elegant and sophisticated look reminiscent of natural stone. This chic design adds a luxurious vibe to your manicure, making it a perfect choice for both casual outings and formal events.
To achieve the marble effect, start with a base coat in white or gray. Using a thin brush or sponge, swirl together complementary colors such as black, gold, or pastel shades. The result is a stunning marbled appearance that looks incredibly polished. It’s a fantastic way to show off your artistic flair!
Preparation:
– Base coat
– White or gray polish
– Two or more colors for marbling
– Top coat
Steps:
1. Apply your base coat.
2. Once dry, apply the base color.
3. Swirl additional colors using your brush or sponge.
4. Finish with a top coat to seal the design.
Experiment with different color combinations to create a unique look!
Marble nails aren’t just pretty; they’re surprisingly versatile—perfect for cute nail art designs for both day-to-day fashion and formal events. A quick tip: swirl tiny drops of black, gold, and pastel varnishes into white to create a chic, high-end look in minutes.
10. Seasonal Themes
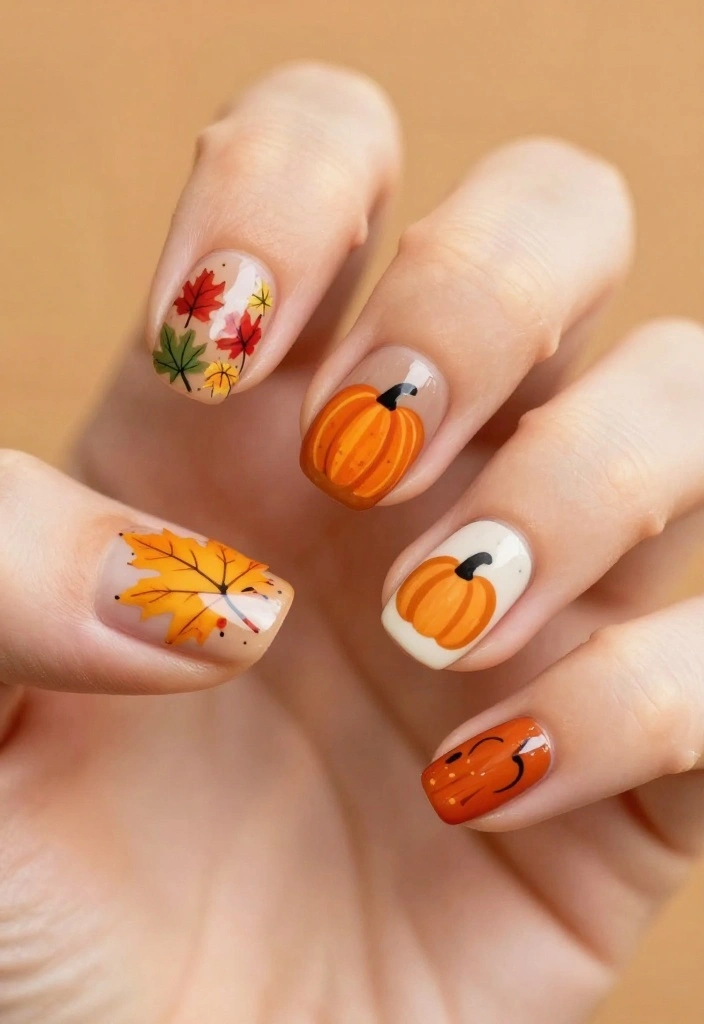
Seasonal nail art brings the charm of each season right to your fingertips! Think of cute autumn leaves, winter snowflakes, spring flowers, or summer sun motifs. These designs allow you to celebrate the changing seasons creatively.
Select colors that reflect the season—warm oranges and browns for fall or cool blues and whites for winter. You can paint seasonal themes on every nail or choose a few accent nails to highlight your designs. Seasonal nails add a festive and fun touch to any manicure!
Preparation:
– Base coat
– Nail polish in seasonal colors
– Fine brush for details
– Top coat
Steps:
1. Apply your base coat and choose your seasonal colors.
2. Paint the designs on your nails, focusing on seasonal motifs.
3. Seal with a top coat to preserve your art.
If you’re short on time, consider using stickers for intricate designs!
11. Metallic Accent
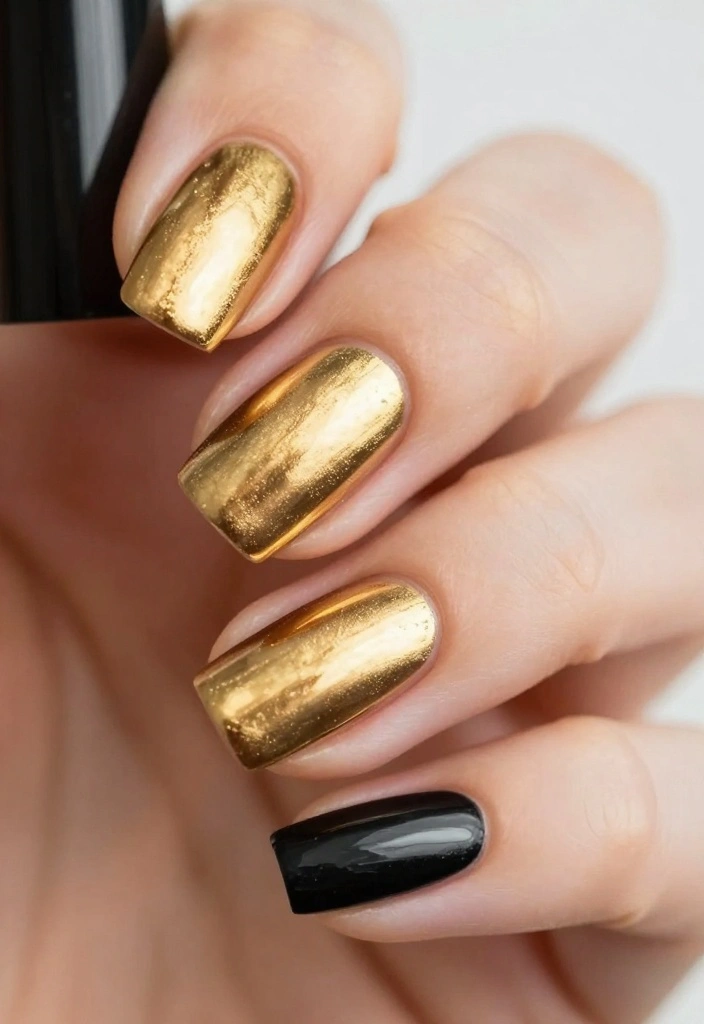
Metallic nails are the ultimate way to make a bold statement! This striking design focuses on shine and glamour, perfect for a night out or any occasion where you want to attract attention. The reflective quality of metallic polish adds a stunning dimension to your look.
Use a metallic nail polish as a base for all your nails or apply it as an accent on a few. Combining it with matte finishes creates a beautiful contrast that’s both modern and sophisticated. Your nails will shine in any light!
Preparation:
– Base coat
– Metallic nail polish
– Matte top coat (optional)
– Top coat for shine
Steps:
1. Apply a base coat.
2. Paint your nails with metallic polish.
3. For accent nails, consider a matte finish for contrast.
4. Seal with a glossy top coat to lock in the look.
Pair metallics with geometric designs for an ultra-modern feel!
Fun fact: Metallic nails catch the light from every angle, boosting shine by up to 70% in photos. You’ll love using a full metallic base or an accent nail with a matte topcoat to create that modern, glamorous glow.
12. Whimsical Watercolor
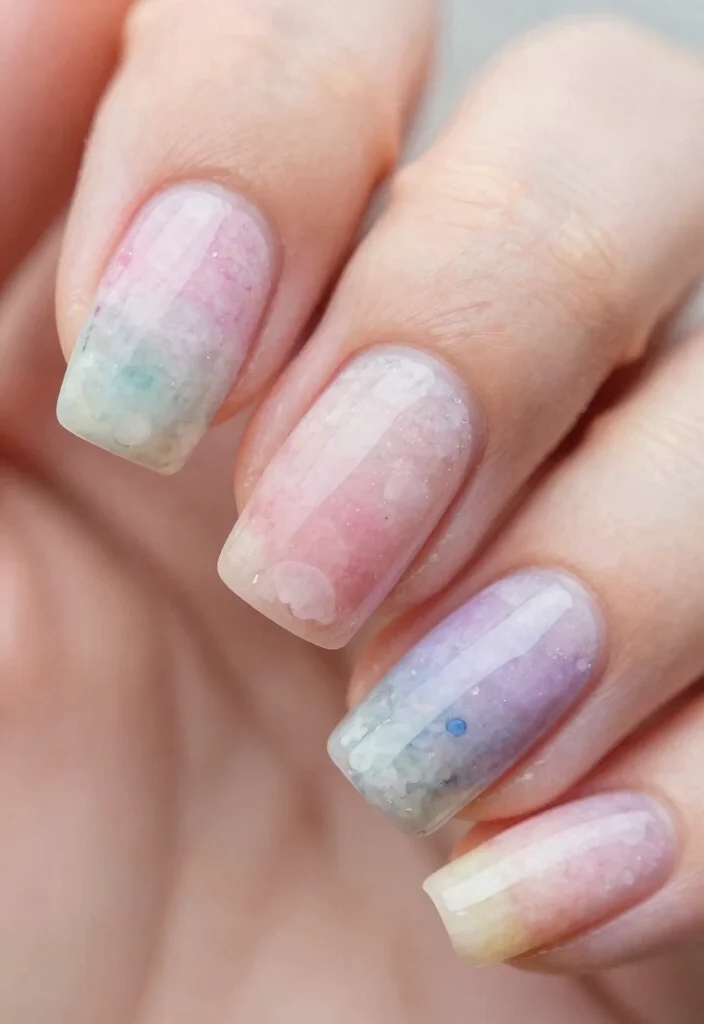
Watercolor nails introduce a soft, artistic vibe to your manicure. This cute nail art design focuses on gently blending colors to create a dreamy effect. It’s perfect for spring and summer, allowing for endless creativity.
Start with a sheer base coat and layer soft colors like pink, blue, and yellow for that watercolor look. You can use a sponge or a brush to achieve a beautiful blend, making your nails look like a piece of art!
Preparation:
– Base coat
– Sheer nail polish in pastel colors
– Makeup sponge or brush
– Top coat
Steps:
1. Apply a base coat.
2. Use a sponge to dab on watercolor shades, blending as you go.
3. Seal with a top coat to preserve the effect.
Keep the design light and airy for the best result!
13. Tie-Dye Trends
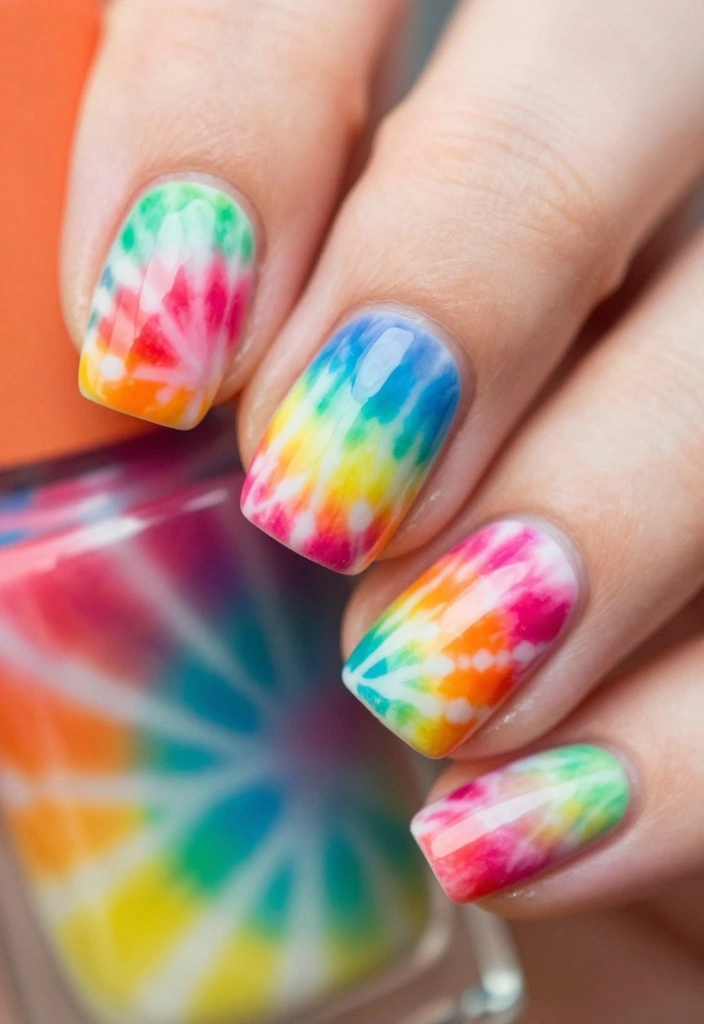
Embrace the funky, vibrant look of tie-dye nails! This playful design allows for a variety of color combinations, evoking a bohemian spirit. Perfect for summer festivals or casual outings, tie-dye nails are all about fun and creativity.
Start with a white base and use a sponge to dab on different colors randomly, creating a lively swirl pattern. The randomness means you don’t have to worry about perfection—just enjoy the process!
Preparation:
– Base coat
– White nail polish
– Bright nail polish colors
– Makeup sponge
– Top coat
Steps:
1. Apply a base coat and a solid white color.
2. Use a sponge to add colors in a random tie-dye pattern.
3. Seal with a top coat for lasting effect.
Choose colors that remind you of your favorite tie-dye shirts for a personal touch!
14. Fun French Twist
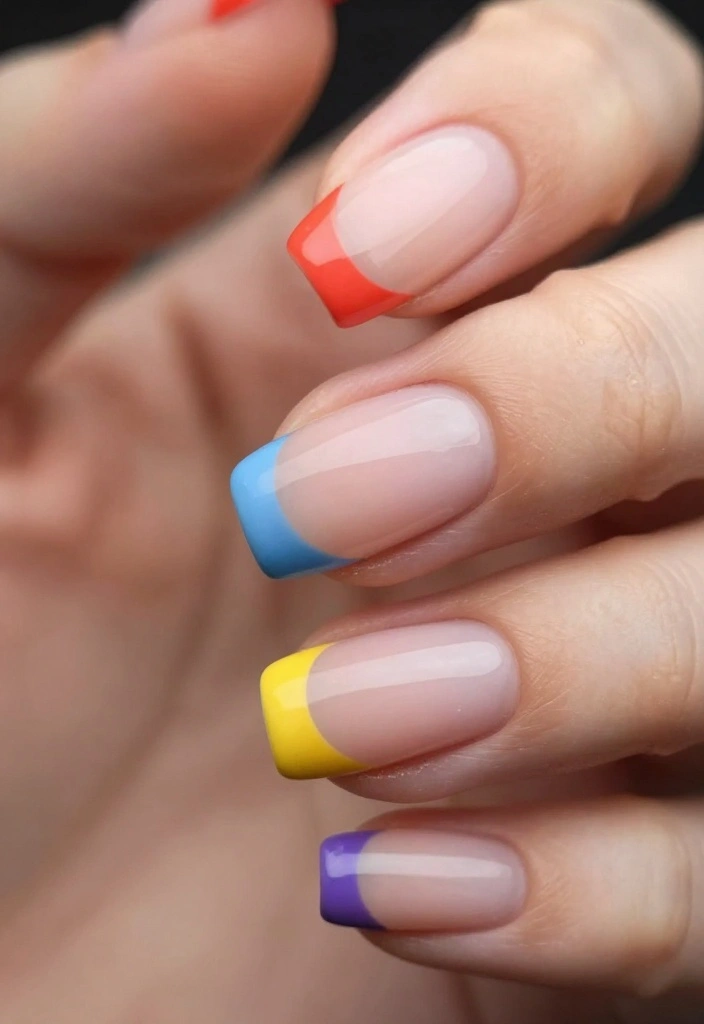
The classic French manicure gets an exciting update with a colorful twist! Instead of the usual white tips, try bright colors or playful designs that express your personality. This fresh take on a timeless look is perfect for those who want to add a fun element while remaining elegant.
Select any color for the tips, or create patterns like stripes or polka dots. Pair it with a nude base for a polished finish that’s still playful.
Preparation:
– Base coat
– Nude polish
– Colorful polish for tips
– Top coat
Steps:
1. Apply a base coat and your nude polish.
2. Paint your tips with your chosen colors or patterns.
3. Seal with a top coat for a glossy finish.
For precision on the tips, consider using nail tape!
Conclusion
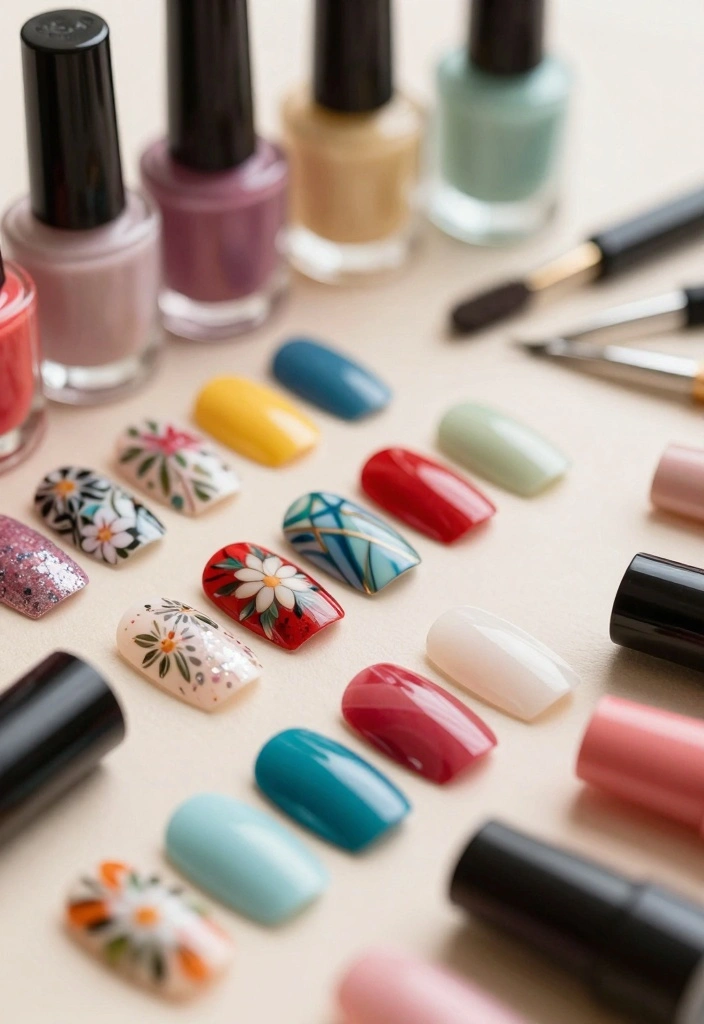
Exploring these 14 cute nail art designs can spark your creativity and add a splash of fun to your manicure routine! Whether you prefer playful patterns, elegant designs, or colorful accents, there’s something here for everyone.
Each of these styles offers a unique way to express yourself and elevate your look. So gather your polishes and tools, and get started on your nail art journey! Remember, nail art is all about having fun and embracing your creativity.
Frequently Asked Questions
What are some easy, budget-friendly cute nail art designs I can try this weekend?
Here are some beginner-friendly, cute nail art designs you can try this weekend, all quick and wallet-friendly.
1) Polka-dot nails: Paint a solid base color, then use a dotting tool or a toothpick to place evenly spaced dots. Finish with a fast-drying top coat for lasting shine.
2) Color-block tips: Paint your base color, apply masking tape diagonally, paint the tip with a contrasting color, remove the tape while the polish is still tacky, and seal with top coat.
3) Minimal negative-space: Tape off a small crescent near the cuticle, paint over with a second color, then lift the tape for a chic, cute nail art designs look. Finish with a clear top coat for protection.
What tools and supplies do I need to recreate these cute nail art designs at home?
Here’s a quick essentials list to recreate cute nail art designs at home:
Base coat to protect your nails and help the color grip.
Two to three nail polishes that contrast well.
A dotting tool or a simple toothpick for perfect dots.
A striping brush or masking tape for clean lines.
Nail vinyls or tape for precise edge work.
Nail polish remover, cotton swabs, and a cleanup brush for tidy edges.
Optional: a stamping plate or glitter for extra flair.
How can I make my cute nail art designs last longer and avoid chipping?
Prep nails properly to maximize wear: clean, file, and push back cuticles. Use a good base coat with a sticky formula to help color cling.
Apply two thin coats of color rather than one thick coat, letting each layer dry fully. This reduces chipping and streaking while keeping your cute nail art designs looking fresh.
Finish with a high-quality top coat and seal the edges by brushing over the tip. Reapply top coat every 2-3 days and avoid prolonged water exposure during the first 24 hours after painting.
Are there any quick nail art ideas for beginners that still look stylish?
Yes! Here are three quick ideas that still look stylish on cute nail art designs for beginners:
1) Dot accent nail: Paint a solid color on all nails, then place a single bold dot on one accent nail using a dotting tool or toothpick.
2) Tape stripes: Place two thin tapes side by side to create a stripe, paint over with a second color, then remove tape for crisp lines.
3) Soft gradient: Use a sponge to dab two colors onto a single nail for a gentle gradient; finish with a coat of top gloss for a polished look.
What color combinations help my nails look cute and stylish without looking too busy?
Start with a simple, balanced color palette to keep things cute and stylish without getting chaotic.
Try: pastel pairings (baby pink + mint), nude base with a single glitter or metallic accent nail, or a clean black/white combo with one colored nail as the focal point.
Keep most nails in a solid, soft shade and reserve one nail for the pop of color or pattern. This makes cute nail art designs easy to wear every day.
Related Topics
nail art
cute nail designs
stylish nails
easy nail art
spring nails
beginner friendly
trendy nail styles
minimalist nail art
colorful patterns
quick nail designs
festive nail art
diy nail techniques
I love these nail art designs! I’ve tried a few simple ones at home, but they never turn out as cute as yours. Which one do you think is the easiest for beginners?
These designs are adorable! I once tried to do a rainbow design, but it ended up looking like a toddler’s art project instead! Do you have tips for avoiding that?