Nail art can be a game changer for your style, and there’s nothing quite like the charm of rose designs. As we step into a season filled with color and creativity, I’ve been craving stunning rose nail art that can withstand the test of time—like your busy week ahead. Nothing is more frustrating than chipped nails, especially when you’ve poured your heart into a beautiful design. That’s why I created this post; I want to help you embrace gorgeous nail art that lasts all week without the worry of unsightly chips.
If you love expressing yourself through unique nail designs, this collection is for you! Whether you’re a nail art novice or a seasoned pro, the beauty of rose nail art will captivate your heart. With styles ranging from classic to modern, there’s something here for everyone. Get ready to explore ten stunning rose nail art looks that will elevate your manicure game and keep those chips at bay.
From classic red roses against glossy black backgrounds to soft pink creations with golden accents, you’ll find ideas that inspire. Say goodbye to constant nail upkeep and hello to long-lasting beauty with gel nails that shine. Let’s dive into these creative designs that not only look fabulous but also provide the durability you need for your busy lifestyle.
Key Takeaways
– Discover 10 beautiful rose nail art designs that are perfect for any occasion and can last all week without chips.
– Learn about the versatility of gel nails, which provide a long-lasting finish compared to traditional nail polish.
– Explore various styles, from classic red roses to abstract patterns, ensuring there’s a look for everyone.
– Get practical tips on how to maintain your rose nail art to keep it looking fresh and vibrant for days.
– Understand the importance of choosing the right tools and techniques for applying nail art, ensuring your designs are both stunning and durable.
Contents
- 1. Classic Red Roses on Glossy Black
- 2. Soft Pink Roses with Gold Accents
- 3. White Roses with a Matte Finish
- 4. Gradient Rose Nails
- 5. 3D Rose Nail Art
- 6. Vintage Rose Design
- 7. Tropical Rose Nail Art
- 8. Abstract Rose Patterns
- 9. Floral Accent Nails
- 10. Ombre Rose Nails
1. Classic Red Roses on Glossy Black
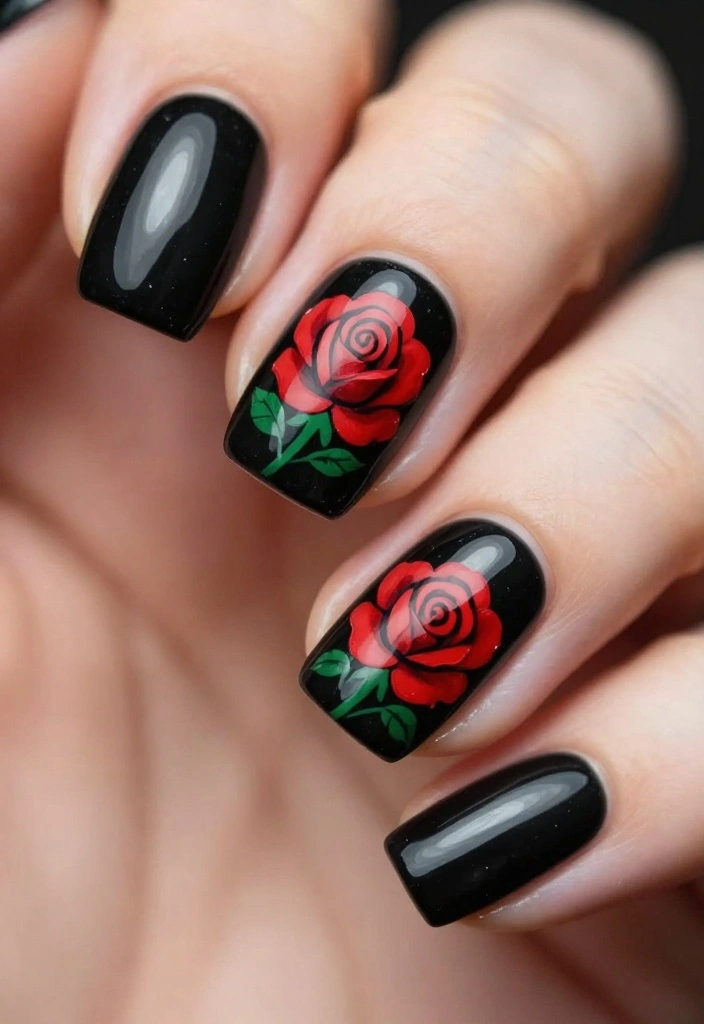
Classic red roses on a glossy black background exude a timeless charm that never goes out of style. The striking contrast between the deep crimson of the roses and the slick black canvas creates a bold statement that’s perfect for any occasion. This design effortlessly captures attention, making it ideal for formal events or night outings with friends.
To achieve this look, start with a base coat of black gel polish. Once it’s dry, use a fine brush to paint the petals in a rich crimson hue. Adding green leaves will bring balance and vibrancy to the design. Finish everything off with a shiny top coat to lock in your art and enhance the gloss. This nail art is designed to stay chip-free for days, ensuring your manicure remains flawless!
Steps to Create This Look:
1. Apply a black gel base coat and cure under a lamp.
2. Paint red roses using a detailing brush.
3. Add leaves with dark green polish.
4. Seal your design with a clear gel top coat.
5. Cure again for lasting results.
– Use a dotting tool for added texture on the petals.
– Practice rose shapes on a nail wheel to perfect your technique.
This design is perfect for special occasions, romantic dinners, or a night out. For a twist, swap the black for a deep navy or dark burgundy to switch up the vibe.
💅 Nail Art Made Easy!
Transform your nail game with our DIY Nail Art Guide, perfect for busy moms who love stunning nails.
2. Soft Pink Roses with Gold Accents
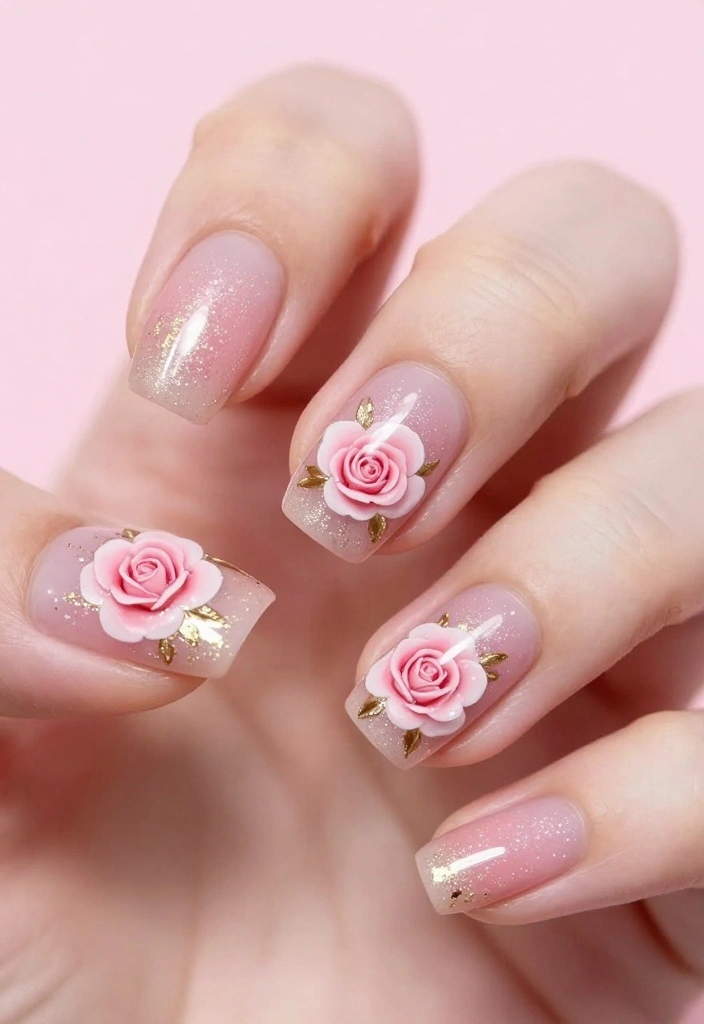
Soft pink roses radiate femininity and grace, making them an excellent choice for romantic dates or bridal celebrations. The inclusion of gold accents elevates this design, adding a touch of sophistication that catches the eye. This look is all about delicate elegance, perfect for those who want to showcase their playful side while maintaining a refined appearance.
Begin with a light pink gel polish as your base. Then, using a fine brush, create small rose shapes in a darker pink shade. Once your roses are set, incorporate gold striper polish to add delicate lines or dots around them. This shimmering detail will catch the light beautifully, enhancing the overall effect of your manicure.
Steps to Create This Look:
1. Apply a light pink gel base coat and cure.
2. Paint soft pink roses using a darker hue.
3. Add gold accents around the roses with a striper brush.
4. Seal the design with a top coat for longevity.
– Use high-quality gel polish for a flawless finish.
– Experiment with varying shades of pink for a unique twist.
This design shines at bridal showers, romantic dinners, or any occasion where you want to feel extra special. For added glam, consider using glitter polish as an alternative accent!
3. White Roses with a Matte Finish
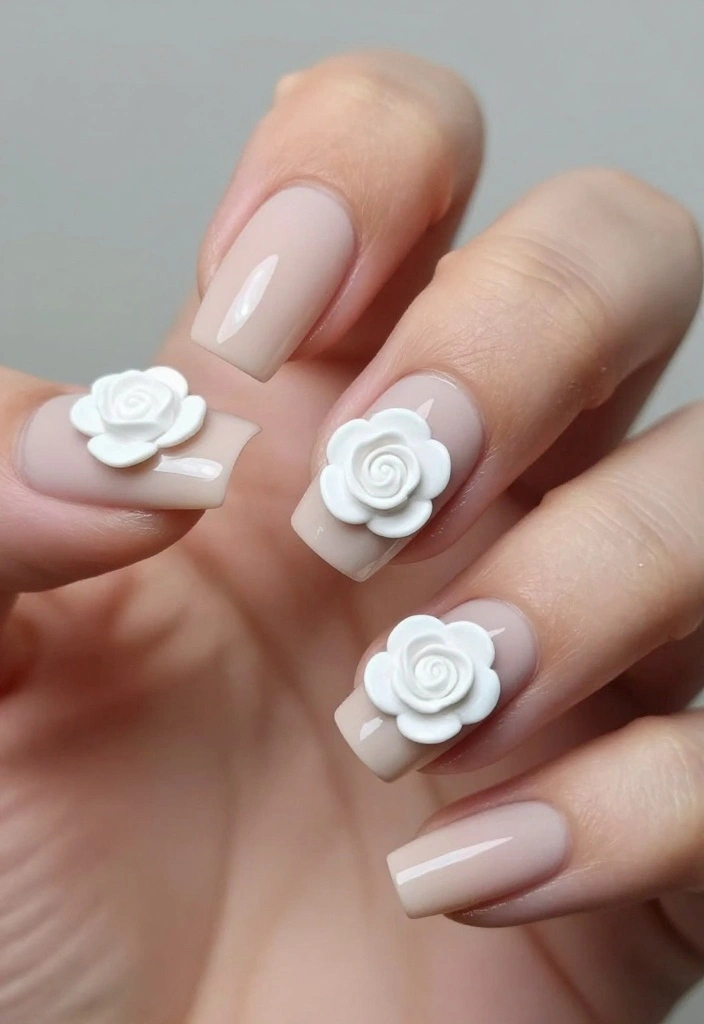
A matte finish adds a modern twist to the classic white rose design, creating a chic and understated look. This style is perfect for those who appreciate elegance without being overly flashy. The contrast between the matte base and the glossy white details makes this design stand out in a subtle yet striking way.
Start with a matte nude or beige gel polish for the base. Once it’s dry, delicately paint tiny white roses and leaves with a fine brush. The soft texture of the matte finish highlights the intricate details of the white flowers, making this design suitable for any occasion while being remarkably resilient against wear.
Steps to Create This Look:
1. Apply a matte nude gel base coat and cure.
2. Use white polish to paint small roses.
3. Add tiny green leaves to complement the design.
4. No top coat is needed as the matte finish emphasizes the art.
– Ensure your base coat is thoroughly dry before applying designs to avoid smudging.
– Vary the sizes of the roses for a more dynamic appearance.
This look is perfect for work, casual outings, or even weddings. For a twist, try a glossy top coat on the roses for a striking contrast!
Fun fact: matte base and white rose nail art can extend wear by up to 40% compared to glossy finishes. A soft nude matte creates contrast that hides minor chips, while tiny white petals stay crisp with a fine brush—easy, elegant, and long-lasting.
📹 Related Video: White Rose Nails Art For Beginner 💖Vẽ Hoa Mùa Xuân 💅 New Nails Design 💝 New Nails
4. Gradient Rose Nails
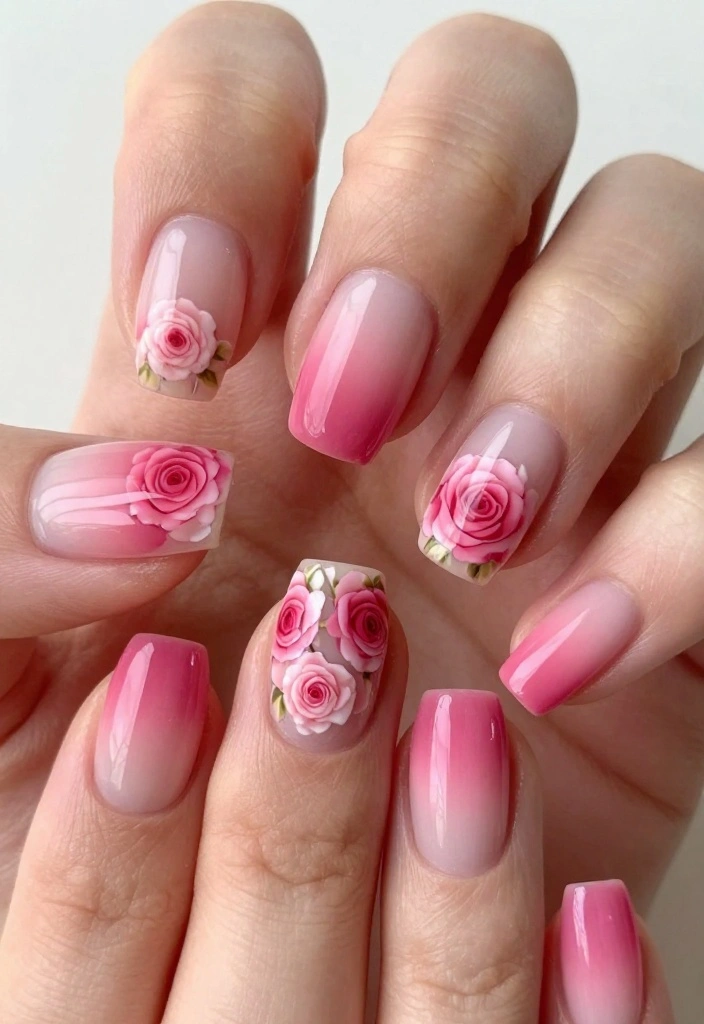
Gradient techniques bring depth and dimension to nail art, and when combined with rose designs, the result is nothing short of stunning. This look is ideal for those who love vibrant colors and want to make a statement. The blend of colors enhances the floral elements, making your nails truly eye-catching.
Start by creating a gradient effect using a makeup sponge with two complementary colors for your base. Once the gradient is dry, use a fine brush to paint small rose designs near the cuticle area. The vivid colors of the gradient will accentuate the flowers beautifully, making this design perfect for spring or summer occasions.
Steps to Create This Look:
1. Apply a base coat and cure.
2. Use a sponge to create a gradient with two colors, blending seamlessly.
3. Once dry, paint roses at the cuticle with a fine brush.
4. Finish with a clear top coat to seal.
– Utilize a quick-dry top coat to speed up your process!
– Test different color combinations to create your unique look.
This design is perfect for parties, summer events, or anytime you want to stand out. For an even bolder statement, consider using neon colors in your gradient!
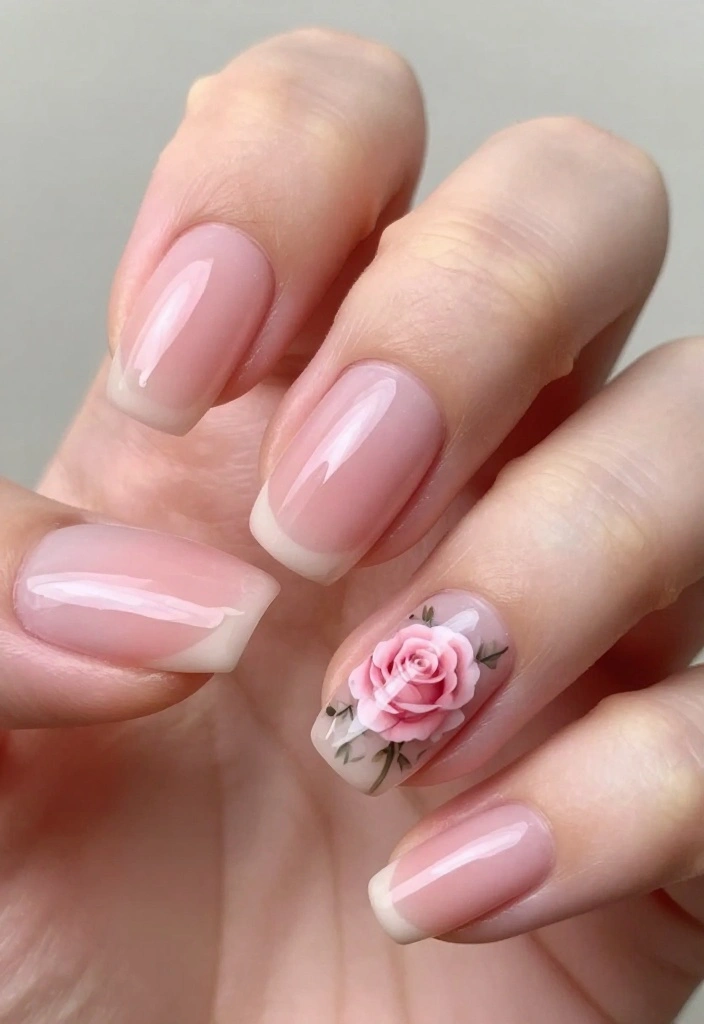
5. 3D Rose Nail Art
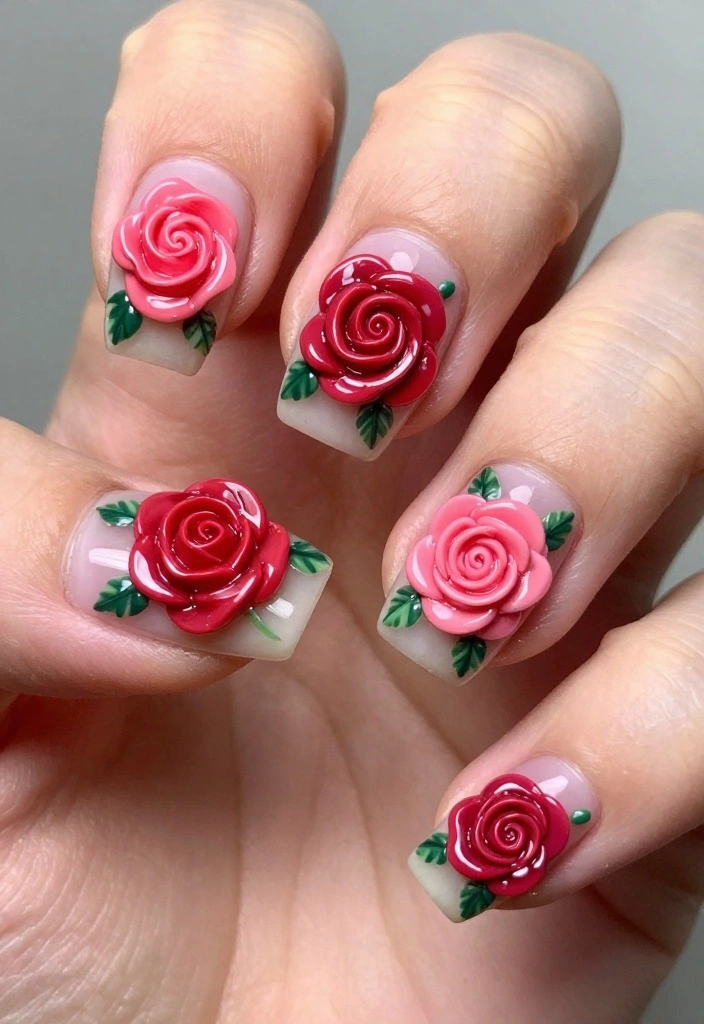
3D rose nail art is a daring and creative choice that adds an exciting tactile element to your manicure. Ideal for special occasions, these roses are sculpted to create a stunning three-dimensional effect that truly stands out. This design showcases your artistic skills while offering a unique look that will definitely turn heads.
To create this look, begin with a base coat of your chosen color. Once that’s dry, use gel or acrylic to sculpt tiny rose shapes right on your nails. Opt for vibrant colors to make the roses pop, and incorporate green leaves to complete the design. Finish with a glossy top coat to enhance the 3D effect and protect against chipping.
Steps to Create This Look:
1. Apply your desired base color and cure.
2. Use gel or acrylic to sculpt 3D roses on each nail.
3. Add leaves and additional details as desired.
4. Seal everything with a top coat for durability.
– Use a dotting tool to help shape your roses more easily.
– Work efficiently with the gel or acrylic, as it dries fast.
This design shines at weddings, parties, or any event where you want your nails to be a conversation starter. For a twist, try using metallic shades for the roses!
6. Vintage Rose Design
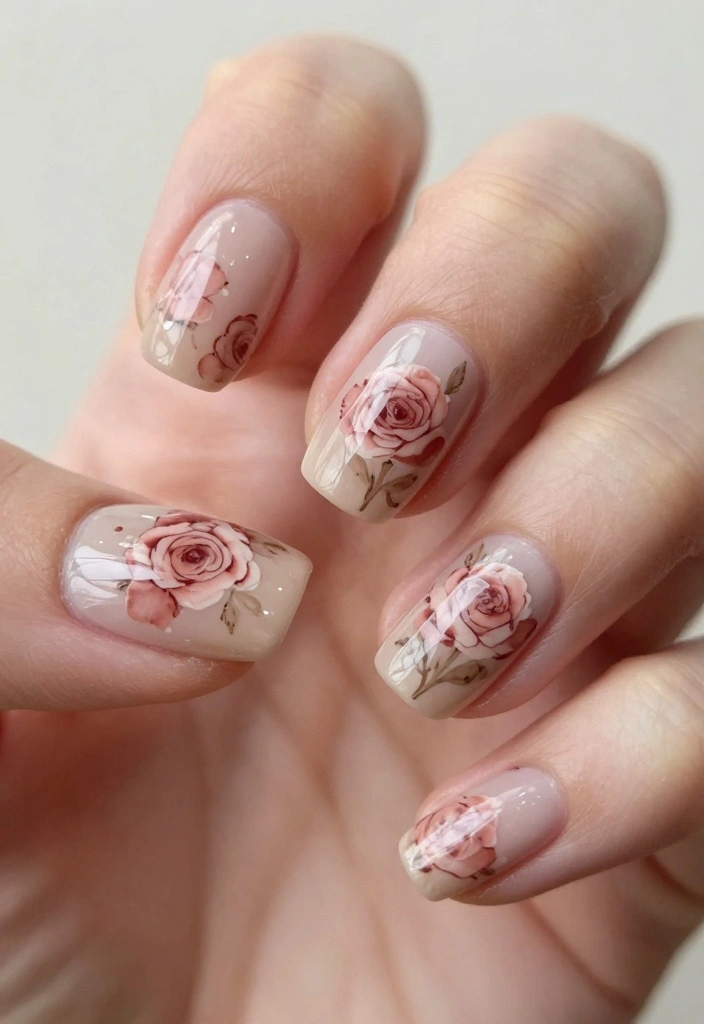
Capture the essence of nostalgia with a charming vintage rose nail design. This style is perfect for those who admire classic floral patterns infused with an old-world charm. The muted tones and soft lines create a delicate look that resonates with timeless elegance.
Start with a soft beige or pastel base. Next, use a fine brush to paint roses in faded shades like dusty pinks and soft greens. This faded look mimics vintage wallpaper, giving your nails a lovely antique vibe. Not only is this design beautiful, but it’s also surprisingly durable when sealed with a quality top coat.
Steps to Create This Look:
1. Apply a soft base color and cure.
2. Paint roses with a smaller brush using muted tones.
3. Incorporate green leaves and subtle details.
4. Finish with a matte or glossy top coat.
– Use a sponge for a soft background texture if desired.
– Be patient and let each layer dry before adding more detail.
This design is excellent for tea parties, vintage-themed events, or just a day when you want to feel special. For a twist, try adding a shimmer top coat for a hint of sparkle!
7. Tropical Rose Nail Art
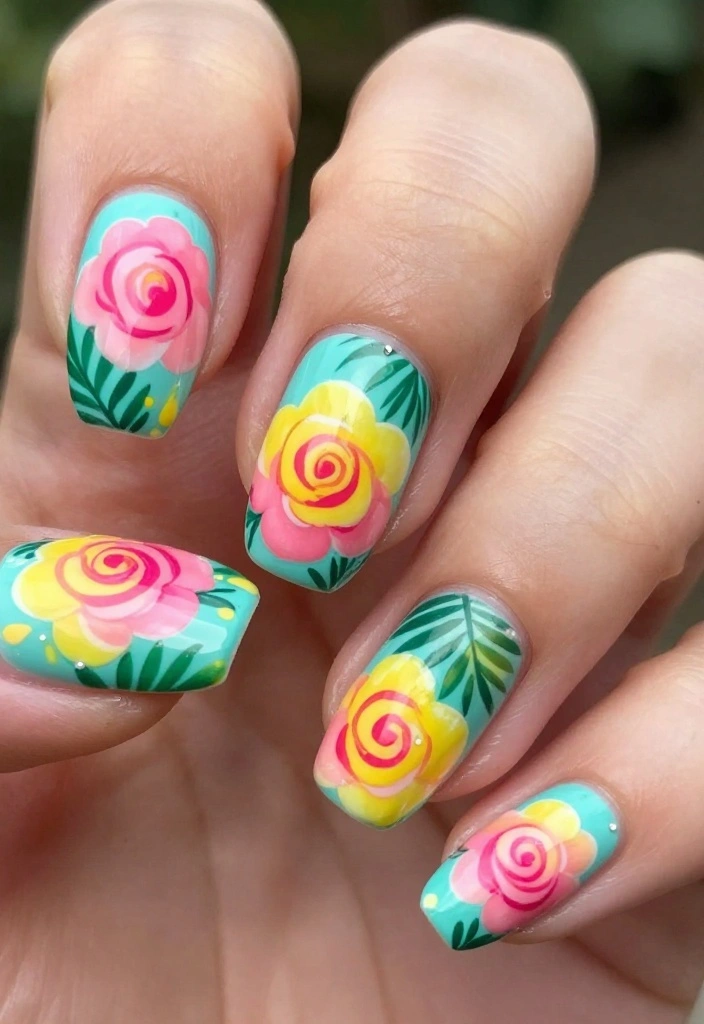
Inject a burst of color into your nails with tropical rose designs that radiate fun and vibrancy! Perfect for summer or vacations, this nail art captures the essence of lively blooms found in tropical locales. It’s an exciting way to show off your personality and style.
Use a bold turquoise or coral base to embody that beachy spirit. Then, create large, vibrant roses using shades like hot pink and sunny yellow. To enhance the tropical theme, consider adding palm leaves or fun patterns. This design is not only playful but also surprisingly durable when created with gel polish.
Steps to Create This Look:
1. Start with a bright base color and cure.
2. Paint large tropical roses using vivid colors.
3. Add foliage like palm leaves to enhance the tropical feel.
4. Seal with a top coat for longevity.
– Use bright neon colors for an even more striking effect.
– Try adding glitter for a festive touch.
This design shines at beach parties, summer festivals, or whenever you want to feel vibrant and cheerful. For a twist, consider using metallic colors for the roses to add a unique shine!
How To Choose the Right Rose Nail Art Design
Choosing the perfect rose nail art can elevate your style and keep your nails looking fresh all week. With so many options available, it’s essential to consider a few key factors to ensure you pick a design that suits your taste and lifestyle. Here’s how to narrow down your choices:
1. Style Preference
Start by deciding what overall style you want for your nails. Are you leaning towards classic elegance or something more playful? Classic designs, like red roses on a glossy black background, offer sophistication, while fun patterns like tropical rose nail art can showcase your personality. Think about the occasions you’ll wear these nails to, as they can significantly influence your choice.
2. Color Palette
The colors you choose can make or break your rose nail art design. Soft pastels like pink and white give a delicate look, whereas bold colors such as red and deep burgundy create a striking statement. Consider the season or the outfits you plan to wear. For example, vibrant colors can be perfect for summer, while deep hues look fantastic in fall or winter.
3. Nail Length and Shape
Your natural nail length and shape will affect which designs are most suitable. Shorter nails may benefit from simpler designs, like floral accent nails, while longer nails can handle intricate details, like 3D rose nail art. Make sure your design complements your nail shape—square, oval, or stiletto—to achieve a polished look.
4. Longevity and Maintenance
If you want your rose nail art to last all week without chipping, consider going for gel nails. Gel nail art is known for its durability, meaning you can enjoy beautiful designs for longer periods without worrying about touch-ups. Additionally, think about your maintenance routine. Some designs may require more upkeep than others, so choose one that fits your lifestyle.
5. Skill Level
If you’re doing your nails at home, your skill level matters. If you’re a beginner, opt for designs that are easier to achieve, like ombre rose nails or simple floral patterns. More complex designs, like vintage rose designs, are better suited for those with a bit more experience. Don’t hesitate to practice on a few fake nails before going all in!
6. Trends and Inspiration
Stay updated with the latest nail art trends. Platforms like Instagram and Pinterest are treasure troves for inspiration. Look out for seasonal trends or popular techniques to keep your nail art fresh. Incorporating current trends can make your nails the talk of the town.
Pro Tip: When choosing your rose nail art, always consider how well it fits into your everyday life. If you’re active or have a job that requires lots of manual work, a more durable and simplified design might be best. Don’t forget to have fun with it—your nails are a canvas for your creativity!
8. Abstract Rose Patterns
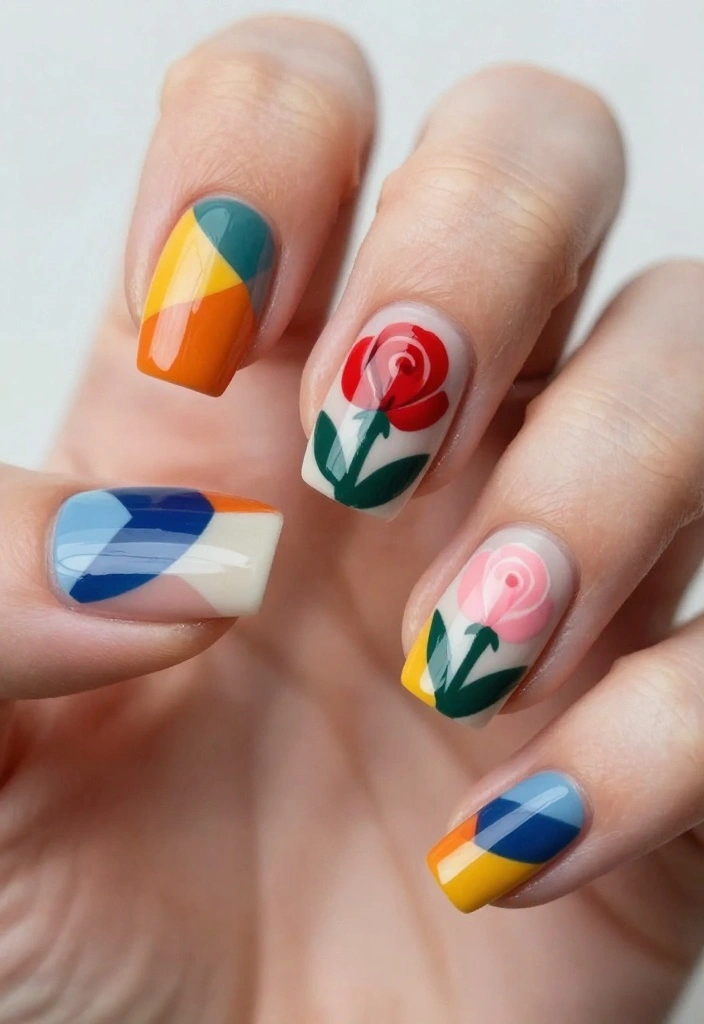
Embrace your creativity with abstract rose patterns that redefine floral nail art. This trend allows for unique interpretations using various colors and shapes, making each set truly one-of-a-kind. It’s a fantastic way to showcase your artistic flair while keeping your nails trendy.
Begin with a white or neutral base. Instead of traditional roses, use geometric shapes and bold colors to represent them. Don’t hesitate to experiment with unconventional combinations; the more unique, the better! This style is all about self-expression, turning each nail into a mini canvas.
Steps to Create This Look:
1. Apply a neutral base and cure.
2. Use a fine brush to paint abstract rose shapes in various colors.
3. Explore techniques like dabbing or splattering for an artistic touch.
4. Seal with a top coat for a polished finish.
– Utilize nail tape for cleaner lines.
– Opt for contrasting colors for a bold appearance.
This design is perfect for art events, casual outings, or when you want to express your individuality. For a twist, consider adding a matte top coat for a trendy finish!
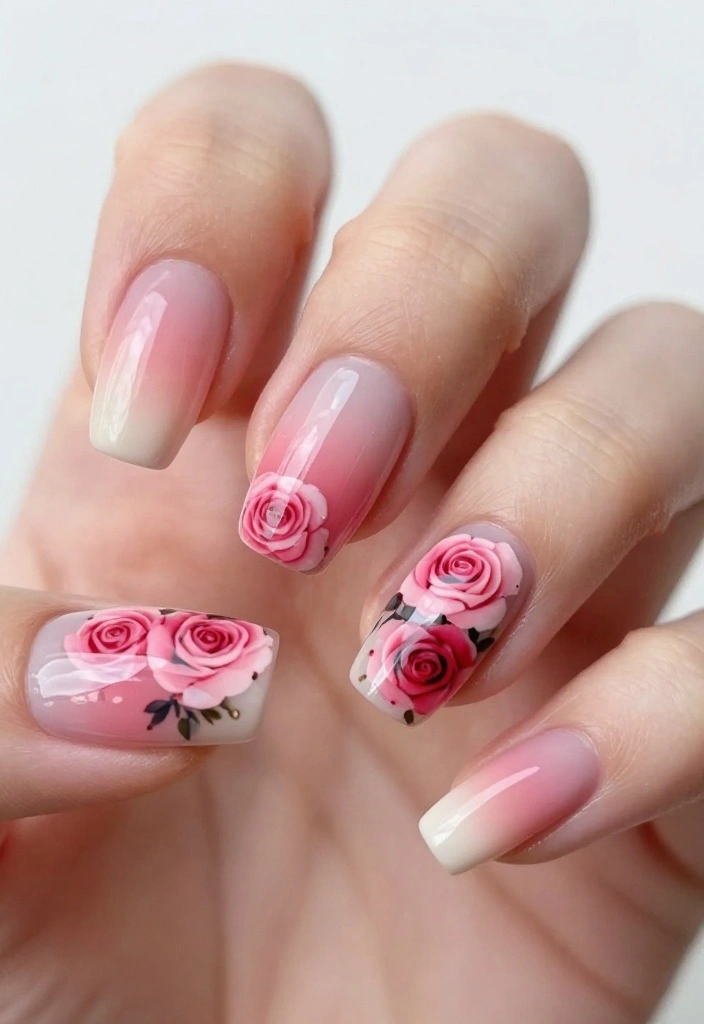
9. Floral Accent Nails
Floral accent nails are a stylish way to incorporate rose designs without overwhelming your look. Ideal for those who prefer a subtle touch of floral charm, this design keeps things elegant while still being fun. It’s a great option for everyday wear or professional settings.
Select a base color for your nails, such as a classic nude or soft pink, then choose one or two accent nails to feature the rose design. Painting a single rose or a small bouquet on these accent nails creates a beautiful focal point while maintaining a chic overall appearance.
Steps to Create This Look:
1. Apply your base color to all nails and cure.
2. Choose 1-2 nails to add rose accents.
3. Paint roses on the accent nails and add any desired details.
4. Seal the entire manicure with a top coat.
– Keep the design simple for a refined elegance.
– Use contrasting colors to make the accent nails pop.
This design is perfect for the office, casual outings, or anytime you want a hint of floral without going all out. For a twist, consider using a glittery polish for the accent nails!
Fun fact: using one rose design on an accent nail can last up to 7 days with a strong top coat. Floral accent nails let you enjoy rose nail art without overwhelming your look.
10. Ombre Rose Nails
Ombre effects aren’t just for hair; they create stunning visual statements in nail art as well! Ombre rose nails blend gradient designs with floral details, making them a showstopper that’s perfect for any occasion. This look is ideal for those who love a mix of color and artistry.
Start with a gradient base that fades from one color to another. Then, paint small roses using shades that complement or contrast with the gradient. The combination of smooth ombre with intricate roses results in a breathtaking design that’s sure to impress.
Steps to Create This Look:
1. Apply a base coat and create your ombre effect using a sponge.
2. Cure the gradient and let it settle.
3. Paint roses with colors that harmonize with the gradient.
4. Seal everything with a shiny top coat.
– Ensure you blend the gradient colors smoothly for the best effect.
– Use detailed brushes for the roses for precision.
This design is perfect for parties, date nights, or any event where you want to dazzle. For a twist, try adding holographic top coat for a stunning finish!
Anyone can nail a chic look with ombre rose nails—it’s all about a soft gradient and tiny floral accents in rose nail art. Start with a smooth gradient base, then paint delicate roses that either match or contrast the colors. Rose nail art that feels polished, not fussy.
Conclusion
Rose nail art is not just a fleeting trend; it’s a fabulous way to express your personality and style! With these ten designs, you have a variety of options to choose from, ensuring you’ll find something that suits every occasion. Remember to use quality gel products to keep your nails chip-free throughout the week. Whether you prefer subtle elegance or vibrant flair, rose nail art can transform your look and boost your confidence. So go ahead, give these designs a try, and enjoy the beauty they bring to your fingertips!
Frequently Asked Questions
What is rose nail art and how can I get it to last all week without chips?
Rose nail art refers to nails decorated with graceful rose motifs. To make it last all week: start with clean, dry nails and push back cuticles, then shape the nails. Use a quality base coat to prevent staining. For long lasting results, choose gel nails or a high quality long lasting polish with a strong top coat. Apply thin layers: base coat, two coats of color, then the rose design with a fine brush or stamping plate. Seal with a durable top coat and cure if using gel. Let the finish dry completely if you are using regular polish. Protect the manicure by avoiding hot water for the first 24 hours, wearing gloves for chores, and reapplying top coat every 3–4 days. Keep nails healthy with cuticle oil for lasting elegance.
Do gel nails really make rose nail art last longer, and how should I maintain them?
Yes, gel nails are widely known to extend wear for rose nail art, often keeping the design looking fresh for 2–3 weeks with minimal chipping. To maintain them: avoid acetone heavy removers, file gently instead of peeling, moisturize cuticles, wear gloves for chores, and schedule regular fills as nails grow. If you want extra protection, reapply a gel top coat every few days. For removal, follow safe gel removal steps to protect the natural nails.
What are beginner friendly rose nail art designs that stay chic and durable?
Try simple options like a single rose accent on one nail, a small rose bouquet on the ring finger, or a negative space rose with a clear tip. A soft watercolor rose using sheer polish also looks elegant. Use fine brushes or stamping plates for clean lines, and seal with a gel top coat or a high quality long lasting polish to keep the rose nail art looking chic and long lasting all week.
What tools and products do I need for long-lasting rose nail art at home or in a salon?
Equip yourself with a good nail file and buffer, base coat, top coat, and your choice of polish—either a gel polish kit with a UV/LED lamp or a reliable long lasting regular polish. Add fine nail art brushes, dotting tools, striping tape for clean lines, and optional stamping plates or decals for roses. Keep acetone remover handy, as well as cuticle oil and a nail strengthener for added resilience so your rose nail art stays long lasting.
How can I remove rose nail art safely without damaging nails?
For gel rose nail art, use acetone on a cotton pad and wrap with foil to lift the gel, or use a dedicated gel removal method until the color fades. For regular polish, soak in acetone or use a non acetone remover, then gently buff away leftovers. Never peel or force layers. After removal, wash hands, apply cuticle oil, and consider a nail strengthener or a short break before reapplying new rose nail art.
Related Topics
rose nail art
gel nails
long-lasting manicure
floral design
nail art techniques
beginner friendly
trendy nails
easy nail art
chip-resistant
seasonal nails
nail care tips
vibrant colors
These nail art designs are stunning! I’ve tried doing roses on my nails before, but they always end up looking like squished bugs. Do you have any tips for a beginner like me?
I love these rose nail ideas! Last week, I tried to do my nails while watching a movie and ended up with popcorn butter on my fingers. At least it was a tasty disaster! What’s your favorite movie to watch while doing your nails?
These designs are not just pretty; did you know that rose nail art became popular in the 1970s? It’s amazing how trends come back around! What other styles do you think will make a comeback?
I once tried to do rose nails for a wedding, and I was so nervous about messing up that I accidentally painted my whole finger! It was a colorful disaster, but everyone got a good laugh out of it! Have you ever had a nail fail?