Nail art is more than just a trend; it’s an expression of creativity, personality, and style. If you’re like many of us, you find yourself scrolling through Instagram or Pinterest, craving fresh and stunning nail designs that make a statement. We are living in a time when nail tech has evolved into an art form, where even the simplest designs can transform your hands into a canvas of creativity. That’s why I put together this post. I want to inspire you with 30 nail tech inspirations that you absolutely need to try right now, especially the jaw-dropping #5!
This guide is perfect for anyone who loves to keep their nails stylish and updated—whether you’re a seasoned nail art enthusiast or just starting on your creative journey. If you care about keeping your nails on-trend and want ideas that are both unique and fun, you’re in the right place! Within these pages, you’ll find a range of nail art ideas that embrace seasonal trends, color palettes, and techniques that will leave you feeling inspired and ready to book your next nail appointment.
You’ll discover a variety of designs from bold and vibrant colors to soft pastels and intricate patterns. Each idea is curated to help you find the perfect look for any occasion, be it a casual outing or a glamorous event. Get ready to refresh your nail game with fresh inspiration that celebrates your personal style. Let’s dive in!
Key Takeaways
– Explore 30 stunning nail tech inspirations that cater to every style preference, ensuring you find something you love.
– Discover popular seasonal trends that highlight current color palettes and designs to keep your nails looking fresh year-round.
– Each nail art idea includes a unique twist, whether it’s bold patterns or delicate touches, giving you plenty of variety.
– Practical tips are offered alongside each design, making it easy for you to recreate your favorite looks at home or with your nail tech.
– Let your creativity shine! These inspirations are designed to encourage you to express your individuality through beautiful nail art.
Contents
- 1. Ombre Bliss
- 2. Floral Fantasy
- 3. Minimalist Chic
- 4. Glitter Galore
- 5. Marble Magic
- 6. Bright and Bold Colors
- 7. Neon Nights
- 8. Textured Trends
- 9. Animal Prints
- 10. Artistic Expressions
- 11. French Twist
- 12. Bejeweled Beauty
- 13. Seasonal Scenes
- 14. Holographic Illusions
- 15. Color Block Fun
- 16. Gradient Glitter
- 17. Artistic Watercolor
- 18. Monochrome Magic
- 19. Sweet Pastels
- 20. Dynamic Duo
- 21. Galaxy Nails
- 22. Creative Cut-Outs
- 23. Holiday Cheer
- 24. Retro Vibes
- 25. Unique Shapes
- 26. Bold Patterns
- 27. Subtle Shimmer
- 28. Layered Looks
- 29. Translucent Touch
- 30. Iconic Classics
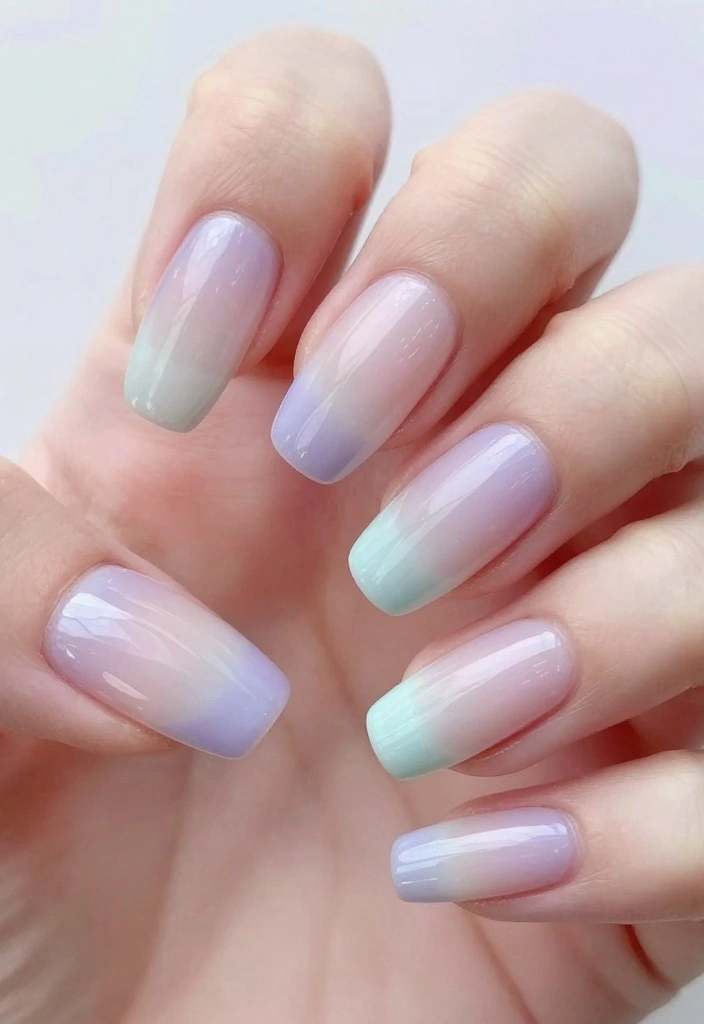
1. Ombre Bliss
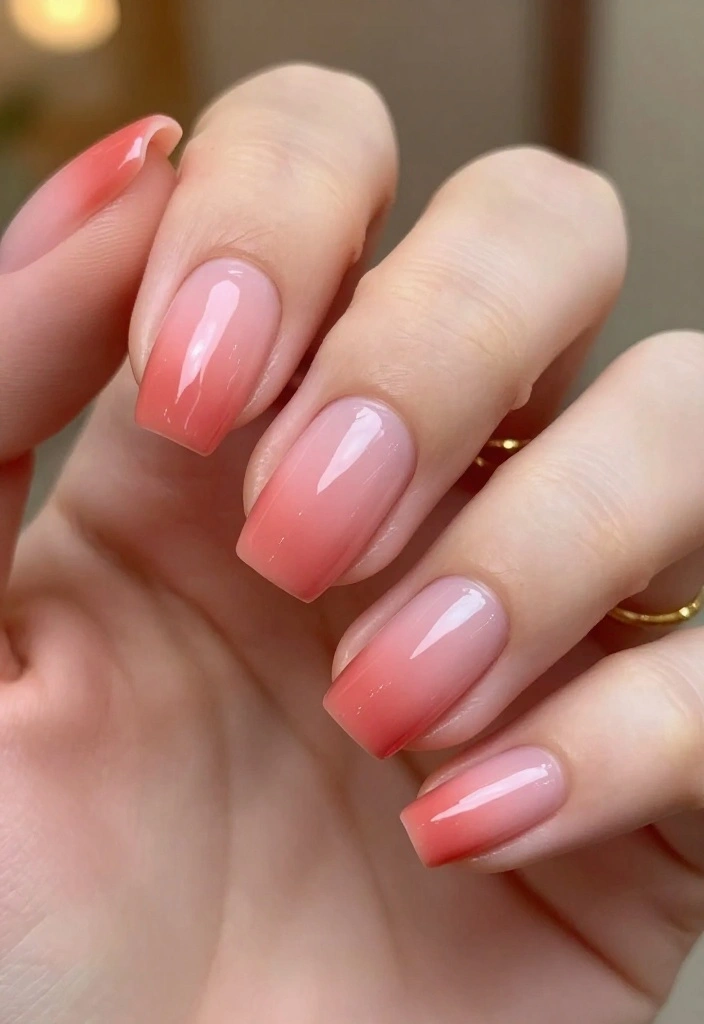
Ombre nails create a beautiful gradient effect by seamlessly blending two or more colors. This nail art technique is endlessly versatile, whether you opt for playful pastels in spring or deep jewel tones for fall. Ombre nails can be as simple or elaborate as you desire, making them perfect for any occasion.
To achieve an ombre look, start with your lightest shade as a base coat. Once dry, use a makeup sponge to apply your second color, gently dabbing to blend the two together. Seal with a glossy top coat for a stunning finish.
– Choose contrasting colors for a bold statement.
– Experiment with textures, like pairing matte and glossy finishes.
– Consider adding glitter for an extra touch of sparkle.
This versatile style works for any event and can easily be customized to reflect your personal style or outfit.
2. Floral Fantasy

Floral nail art is a delightful way to embrace spring vibes! Adorn your nails with delicate blooms that can elevate any outfit. From simple daisies to intricate roses, floral designs are perfect for both casual outings and formal occasions.
To create floral designs, start with a neutral base that allows the colors to pop. Use a fine brush or dotting tool to make petals and leaves in varying colors. Feel free to mix shades to express your personality.
– Opt for soft pastel colors for a romantic feel.
– Try a matte topcoat for a contemporary twist.
– Combine different floral styles on each nail for a playful look.
Floral nails are an excellent way to showcase your love for nature while adding a trendy touch to your look!
3. Minimalist Chic

If you prefer a clean aesthetic, minimalist nail art is a stylish and timeless choice. Simple lines and subtle designs can make a strong statement without overwhelming your appearance. This style is ideal for professional settings or any occasion where you want to maintain a polished yet trendy look.
For a minimalist effect, start with a solid color base that complements your skin tone. Use a thin brush or nail tape to create geometric shapes, stripes, or dots for accents. Stick to a limited color palette for an elegant finish.
– White and nude shades serve as excellent bases.
– Incorporate negative space for a modern flair.
– Keep your nails well-groomed to enhance the minimalist vibe.
Minimalist nails are perfect for anyone who appreciates understated elegance!
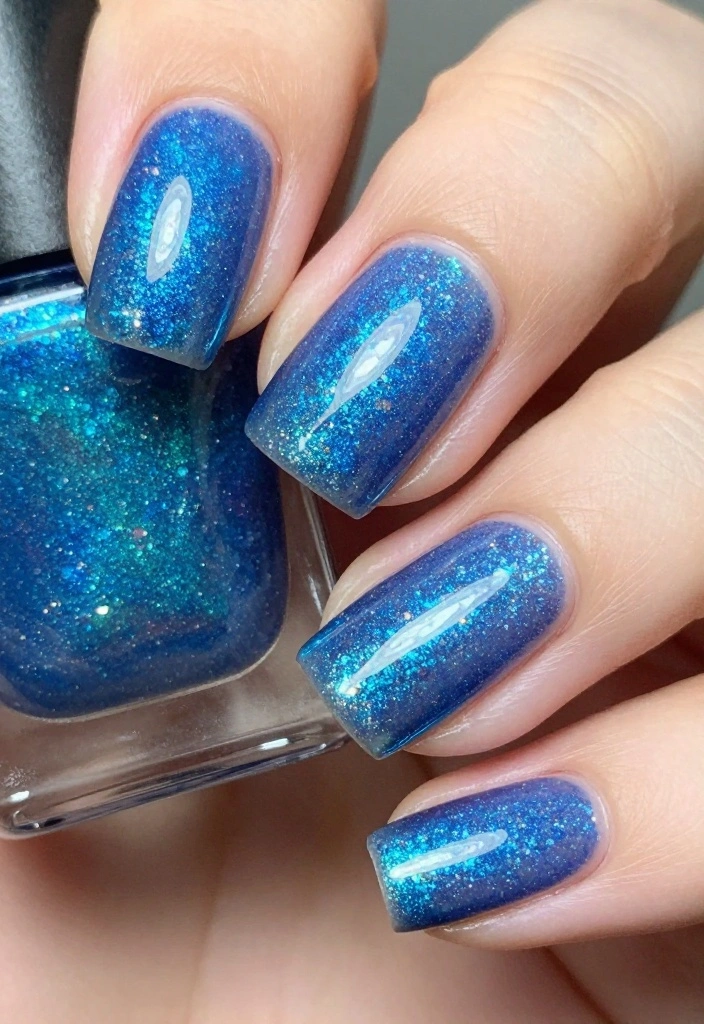
4. Glitter Galore

Add a touch of sparkle to your nails with glitter! Glitter nails are an exciting way to shine and bring glam to any look. Ideal for parties or just because, glitter can enhance any design or be used as a standalone statement.
You can go all out with full glitter coverage or use it selectively on one or two nails as an accent. Choose a base color that complements your glitter for a striking effect. Apply glitter polish directly or use a sponge to dab loose glitter onto wet polish.
– Seal your glitter with a thick top coat to prevent chipping.
– Create stunning gradient effects by applying glitter from the tips downwards.
– Pair glitter with other nail art styles for a mixed-media approach.
Get ready to dazzle with glitter nails that are sure to grab attention!
📹 Related Video: DOs & DON’Ts: Glitter Gradient Nails | how to do glitter gradient nails!
How To Choose Nail Art Ideas for Your Next Look
When it comes to selecting nail art ideas, the choices can feel overwhelming. You want something that suits your style, the season, and the occasion. Here’s a simple guide to choose the right nail tech inspirations for your next manicure.
1. Consider Your Personal Style
Think about what reflects your personality. Do you prefer bold and vibrant nail art or something more subdued? If you’re someone who loves to stand out, try bright colors or artistic expressions. If you lean towards minimalism, consider a minimalist chic design. Your nails should be an extension of who you are.
2. Assess the Season
Different seasons bring different vibes. For spring and summer, floral designs and bright colors are popular. In fall, opt for warm tones and swirling patterns that evoke autumn leaves. Winter is perfect for glitter and holiday themes. Tailoring your nail art to seasonal trends can add an extra touch of fun to your look.
3. Think About the Occasion
What’s the event? Casual get-togethers might call for something playful, like animal prints or textured trends. For weddings or formal events, elegant designs like French twists or bejeweled beauty might be more appropriate. Take a moment to consider where you’ll be showing off your nails.
4. Explore Color Combinations
Choosing the right colors can elevate your nail art. Consider color blocking for a fun, modern look, or gradients for a soft, blended effect. Holographic nails can add a trendy edge. Use a color wheel to see which shades complement each other well. Don’t be afraid to mix and match to create a unique palette.
5. Keep Nail Health in Mind
Before diving into nail art, check the current health of your nails. Are they brittle or weak? If so, skip the heavy designs and opt for something lightweight and non-damaging, like sweet pastel shades or subtle shimmer. Healthy nails will look better with any nail art, so consider a good base coat and regular care.
6. Budget for Your Nail Art
Nail art can range from simple DIY designs to elaborate salon treatments. Set a budget before you choose a design. If you’re planning to do it yourself, gather necessary materials like nail polish, brushes, and tools. If you’re heading to a nail tech, make sure to inquire about pricing for complex designs like marble magic or galaxy nails.
Pro Tip: Look for inspiration on social media platforms like Instagram or Pinterest. You can save images of designs you love, which can help communicate your vision to your nail technician. Don’t hesitate to bring your ideas! This can help you achieve the perfect look tailored just for you.
Choosing the right nail art ideas can be both fun and creative. By considering your personal style, the season, the occasion, color combinations, nail health, and your budget, you can ensure your nails will be the statement piece you want. Happy nail tech exploring!
5. Marble Magic
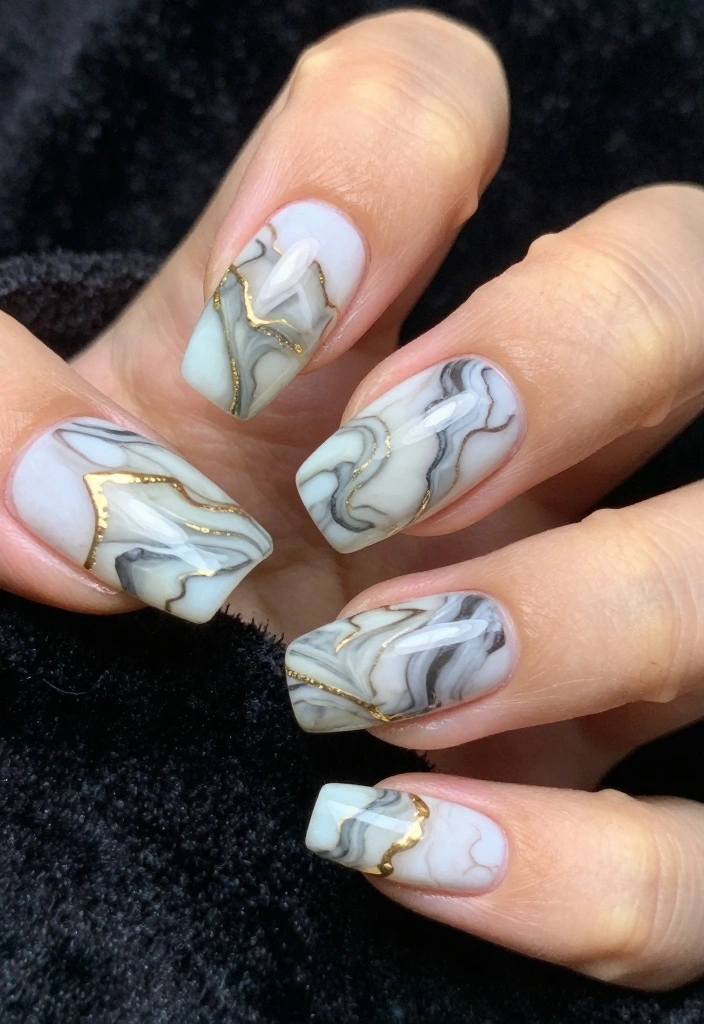
Marble nail art is a sophisticated trend that emulates the stunning look of marble stone. This chic style adds a touch of elegance to your nails, making it suitable for casual outings and upscale events alike. Each nail can showcase unique patterns, ensuring that your manicure is one-of-a-kind.
To create a marble effect, start with a solid base coat in white or a light shade. Use a thin brush to swirl in shades of grey, black, or even vibrant colors to mimic natural marble veins. Finish with a glossy top coat for a polished appearance.
– Experiment with metallic shades for a modern take on marble.
– Incorporate gold or silver foil accents for added glam.
– Choose colors that coordinate with your outfit for a cohesive look.
Marble nails not only look stunning but also add a luxurious touch, making them a must-try for nail art lovers!
💅 Nail Art Made Easy!
Transform your nails with our DIY Nail Art Guide, perfect for busy moms craving creativity and style.
6. Bright and Bold Colors
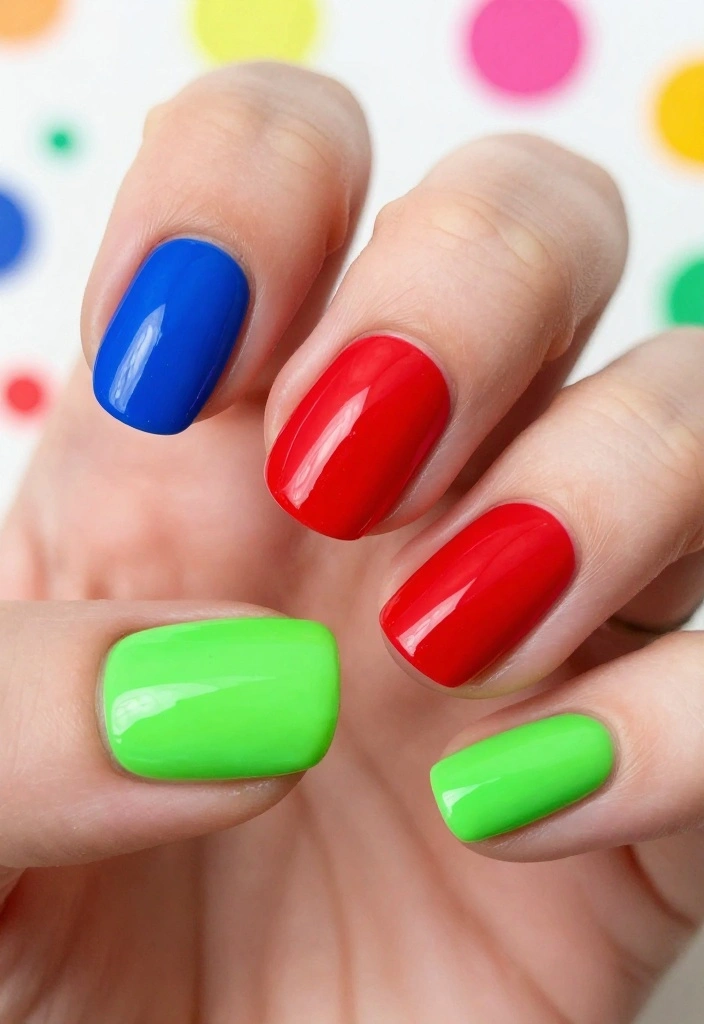
Sometimes, a vibrant pop of color is all you need to elevate your mood! Bold nail colors can instantly brighten your day and showcase your unique personality. From electric blues to fiery reds, the options are endless when selecting the perfect hue.
To achieve a bold look, select a high-quality nail polish that delivers vivid color in just one coat. Prepping your nails by buffing and priming will ensure a smooth, flawless finish.
– Use contrasting colors for nail art designs to make them stand out.
– Experiment with different nail shapes that complement bold colors.
– Keep nail lengths uniform to draw attention to your chosen shades.
Bright, bold colors are perfect for summer fun and any time you want to add excitement to your style!
7. Neon Nights

Neon nails are making a vibrant comeback! Ideal for summer festivals or nights out, these lively colors demand attention. Whether applied as a full set or used as accents, neon shades bring energy and fun to your nail art.
To achieve a neon look, choose highly pigmented polishes. Often, pairing neon colors with a white base coat will help them truly pop. Finish with a glossy topcoat to enhance the shine and extend wear.
– Pair neon colors with contrasting matte designs for an edgy effect.
– Add nail stickers or gems to amplify the playful vibe.
– Experiment with various finishes for a unique look.
Neon nails are a fabulous way to express your fun-loving side while staying on trend this season!
8. Textured Trends
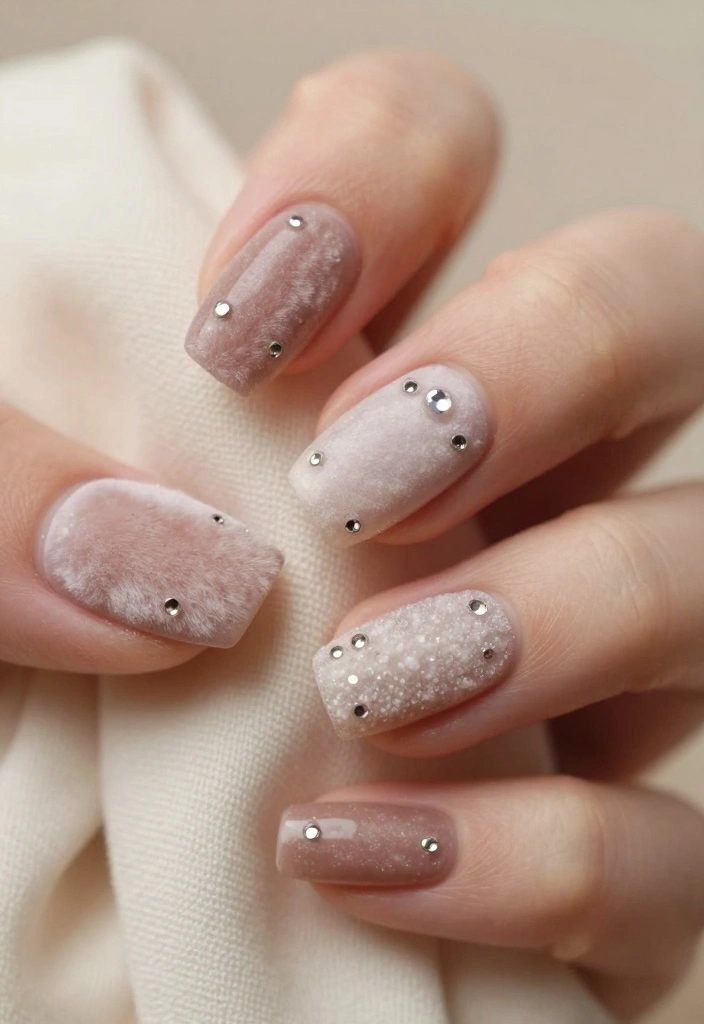
Adding texture to your nail art introduces an exciting dimension! Incorporating different finishes, like velvet or sand, creates a stunning visual effect that stands out. Textured nails are perfect for winter festivities or whenever you want to add cozy vibes to your look.
To achieve a textured style, consider using special textured nail polish or layering your nails with materials like sand. You can also create dimension by applying rhinestones or intricate nail stickers.
– Combine matte and glossy finishes for interesting contrasts.
– Keep nail shapes consistent to highlight the texture.
– Seal textured designs with a good top coat for durability.
Textured nails allow you to play with materials and styles, making them a fun choice for those looking to break from conventional polish!
9. Animal Prints

Unleash your wild side with eye-catching animal print nail art! From classic leopard spots to playful zebra stripes, these designs add an adventurous flair to any manicure. Animal prints work wonderfully on their own or as accents against solid colors, ensuring versatility.
To create animal print designs, start with a solid base coat. Use a fine brush to draw your chosen patterns in contrasting colors. For a quicker option, nail wraps or stickers can also do the trick.
– Choose earthy tones for a more subtle take on animal prints.
– Mix various animal prints for an eclectic and trendy look.
– Keep your base color neutral to let the print shine.
Animal print nails not only make a bold statement but also allow you to express your unique style!
10. Artistic Expressions
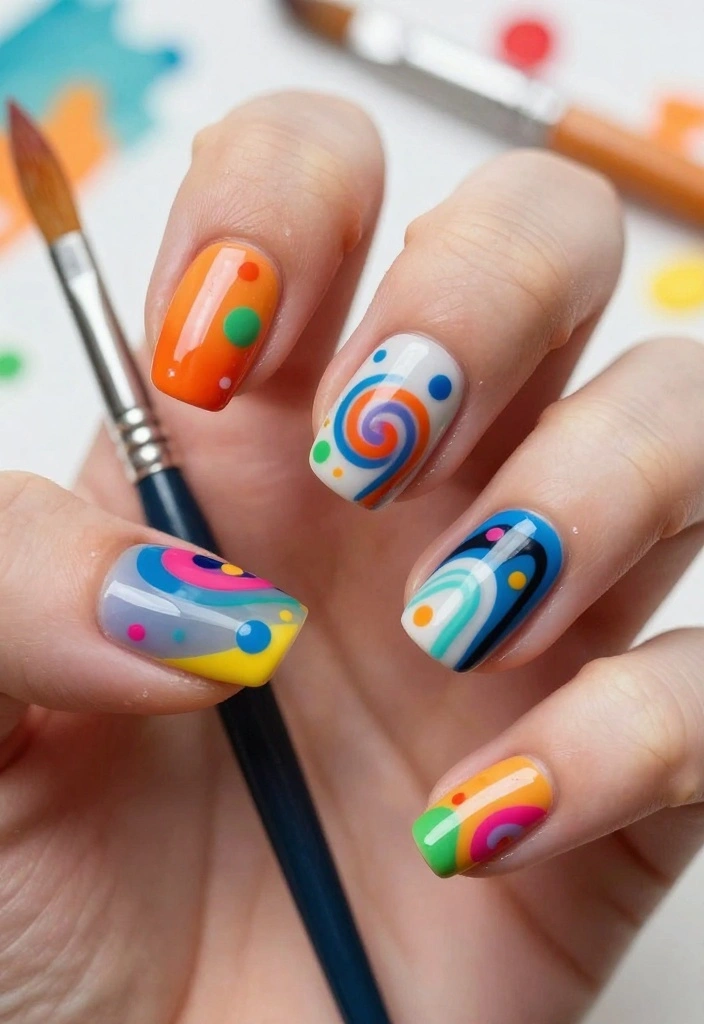
Artistic nail designs let you unleash your creativity! Think of your nails as a canvas for abstract art, intricate patterns, or even portraits. This style may be more advanced, but it offers endless possibilities for self-expression.
To create artistic nails, you’ll need a steady hand and a variety of nail art brushes or dotting tools. Start with a solid base color and let your imagination guide you as you explore different colors and designs. You can even use watercolor techniques for a softer touch.
– Feel free to mix techniques, like water marbling with painting.
– Draw inspiration from your favorite artists or art movements.
– Practice on paper if you’re trying something new.
Artistic nails are a fantastic way to showcase your personality and creativity, making each manicure uniquely yours!
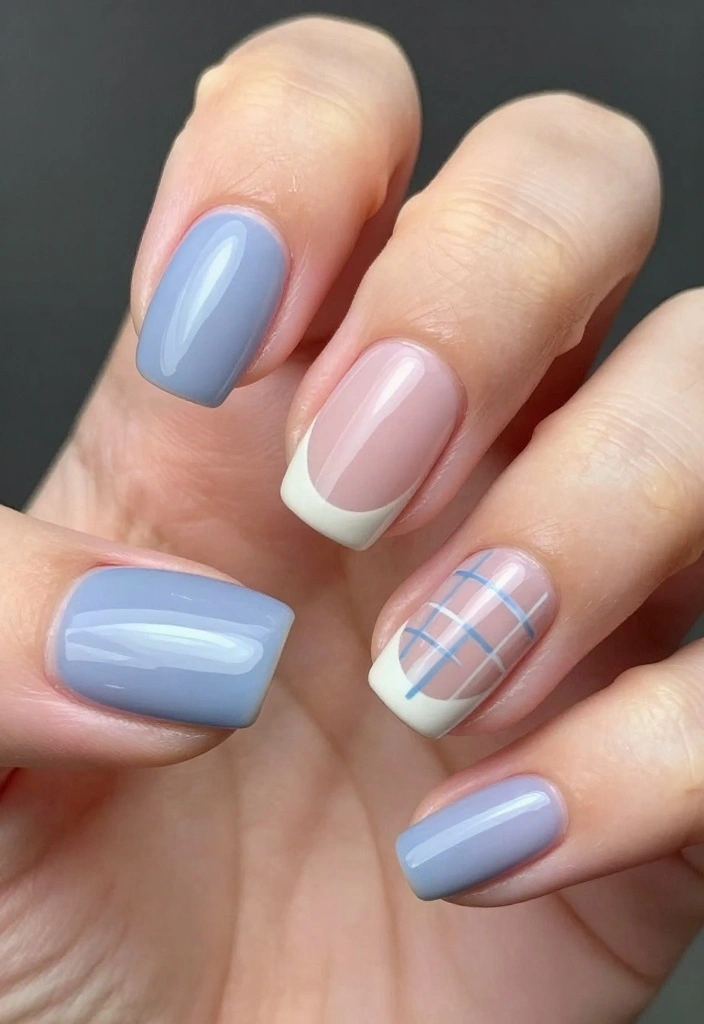
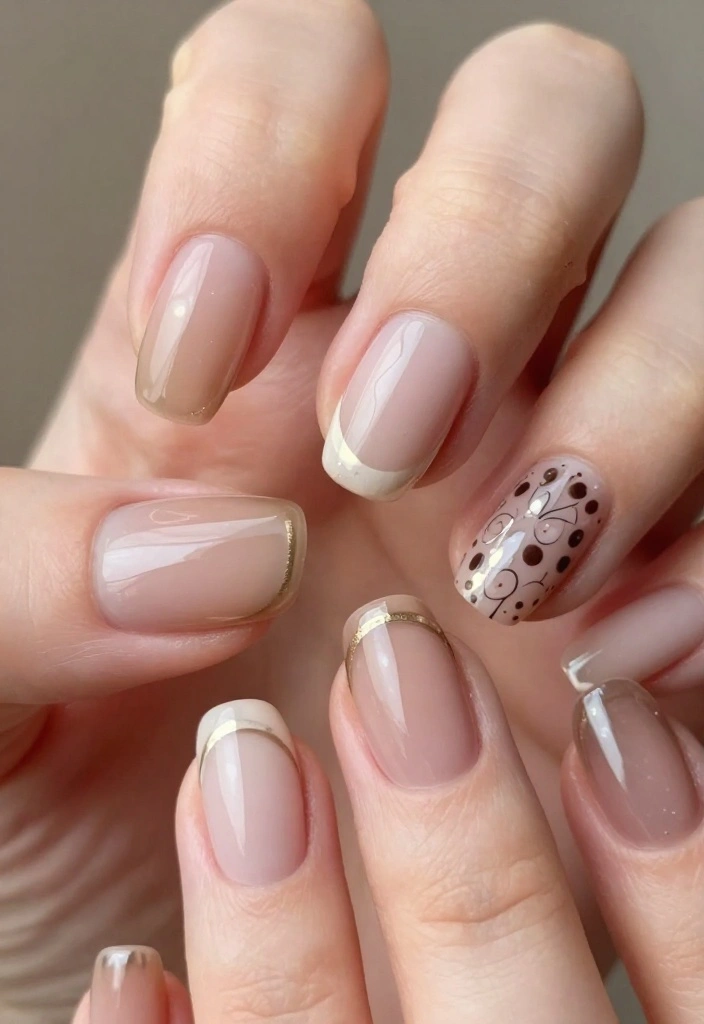
11. French Twist

The classic French manicure gets a fun update with colorful tips or playful designs! This timeless style can be refreshed with vibrant hues, glitter, or patterns on the tips for a modern flair. The French twist is suitable for any occasion, blending chicness with a playful touch.
To create this design, start with a nude or pale pink base coat. Paint the tips with your chosen color or design, ensuring clean lines for a polished finish.
– Use a small brush for precise application on the tips.
– Experiment with different colors like pastels or bold shades for a fun contrast.
– Try a matte topcoat for a contemporary finish.
The French twist is a perfect blend of classic elegance and modern style, making it a must-try!
12. Bejeweled Beauty
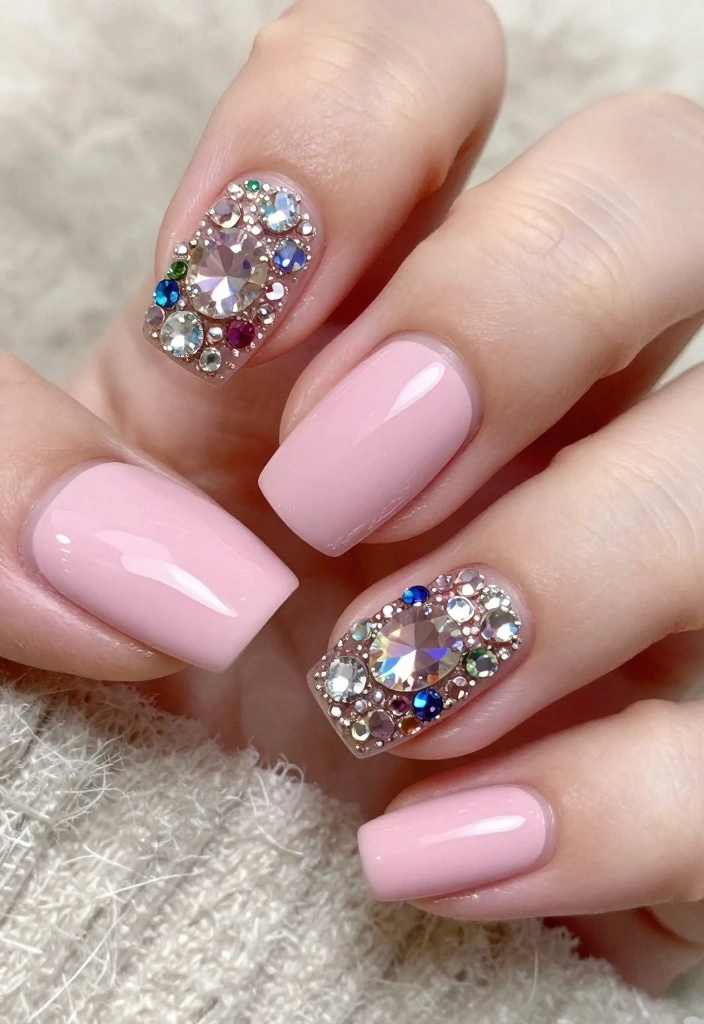
For a truly luxurious look, bejeweled nails are the ultimate choice! Adding rhinestones, gems, or pearls can create stunning bling that’s perfect for special occasions or simply to feel glamorous every day.
To achieve a bejeweled effect, start with a solid color base. Once dry, carefully place your gems using nail glue or top coat. You can embellish one or two accent nails or go all out with a fully adorned design.
– Choose gems that complement your nail polish color.
– Mix various sizes and shapes for a unique bling effect.
– Seal with a sturdy top coat to keep your gems in place.
Bejeweled nails are all about making a statement, so don’t hold back on the sparkle!
13. Seasonal Scenes

Celebrate the seasons with nail art that reflects the time of year! From autumn leaves to snowy winter scenes, seasonal designs can keep your nails festive and fun. This style adds a personal touch and keeps your manicure fresh throughout the year.
To create seasonal scenes, start with a solid base that fits your theme. Use fine brushes for detailed designs, adding elements like snowflakes, pumpkins, or flowers. Nail stamps can be a quick and easy way to achieve seasonal art.
– Choose colors that resonate with the season (e.g., pastels for spring, warm tones for fall).
– Experiment with textures like matte for winter or shiny for summer.
– Consider adding small charms to enhance the seasonal theme.
Seasonal nails not only look festive but also allow you to express yourself as the seasons change!
Seasonal scenes are your canvas: start with a season-appropriate base, then layer fine-brush details for snowflakes, pumpkins, or leaves. As a nail tech, use stamps for quick seasonal art to keep clients coming back all year.
14. Holographic Illusions
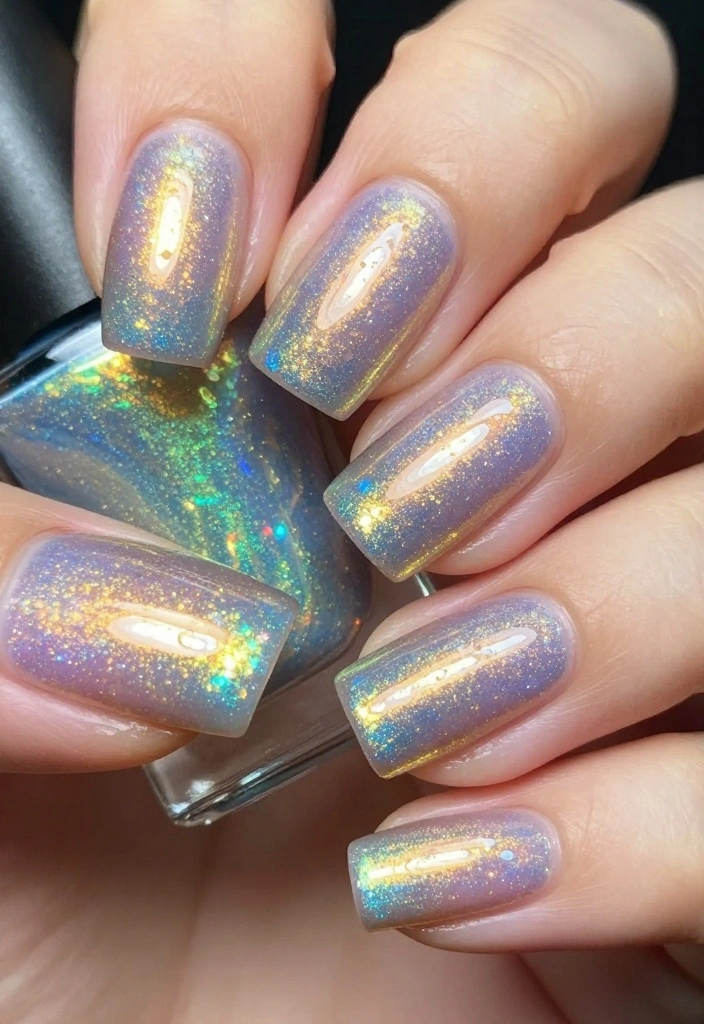
Holographic nails are truly mesmerizing! This trend features an iridescent finish that changes color based on the light, creating a magical effect. Perfect for those who want a little sparkle in their look, holographic nails can be achieved using special polishes or powders.
To create holographic nails, start with a solid base and apply a holographic top coat or powder. Buff the surface for a smooth application. The end result is stunning, making your nails the focal point of any outfit.
– Choose a base color that contrasts with the holographic finish for maximum impact.
– Seal with a high-gloss top coat to enhance the holographic effects.
– Experiment with different shapes and lengths to showcase the shine.
Holographic nails are a delightful way to express your playful side and stay trendy!
15. Color Block Fun
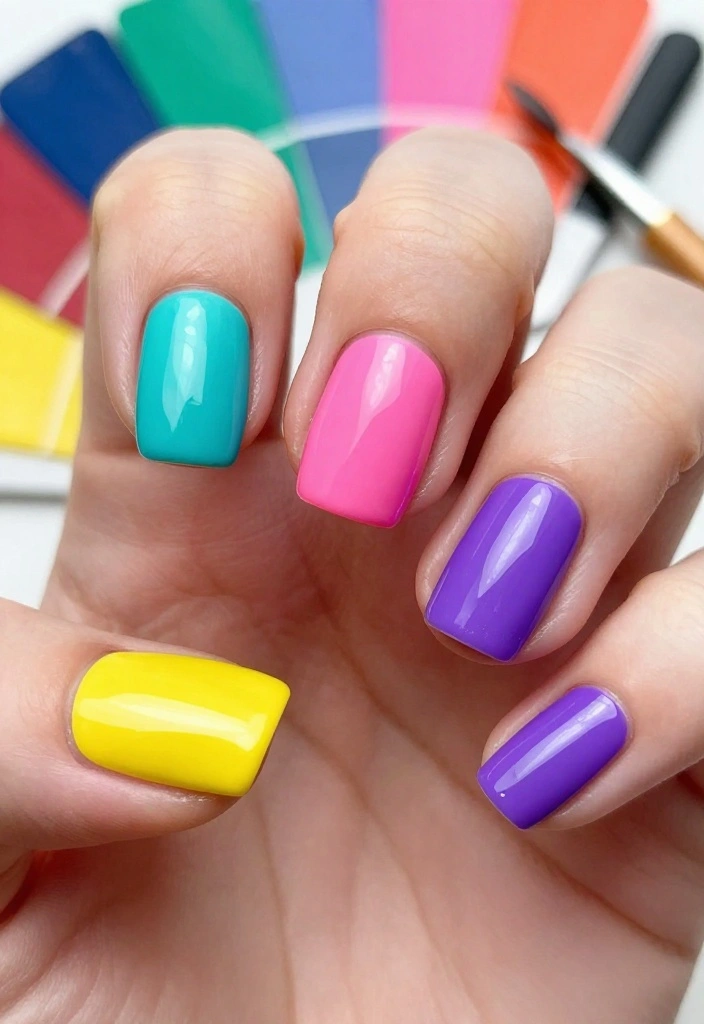
Color blocking is a bold and exciting way to play with color combinations on your nails! This technique involves using two or more contrasting colors to create geometric shapes, resulting in an eye-catching design. Ideal for the adventurous spirit, color block nails let you mix your favorite shades.
To achieve a color block look, start with a base coat and use nail tape to section off areas for your colors. Fill in the sections with your chosen hues and allow to dry thoroughly.
– Select contrasting colors for maximum impact.
– Try using matte and glossy finishes together for added depth.
– Finish with a top coat for durability.
Color block nails are a fantastic way to express your creativity while keeping your nails stylish!
16. Gradient Glitter
Gradient glitter nails combine the best of both worlds, offering a sparkly transition from one color to another. This design is perfect for special occasions or whenever you want to feel glamorous. The gradient effect adds depth while the glitter keeps things festive.
To create this look, start with a base color and apply glitter polish from the tips downwards, lightly blending it toward the cuticle for a soft gradient.
– Choose colors that complement each other for a seamless transition.
– Experiment with different glitter sizes for added texture.
– Seal with a strong top coat to keep the glitter in place.
Gradient glitter nails are a fabulous way to shine and showcase your creativity!
17. Artistic Watercolor
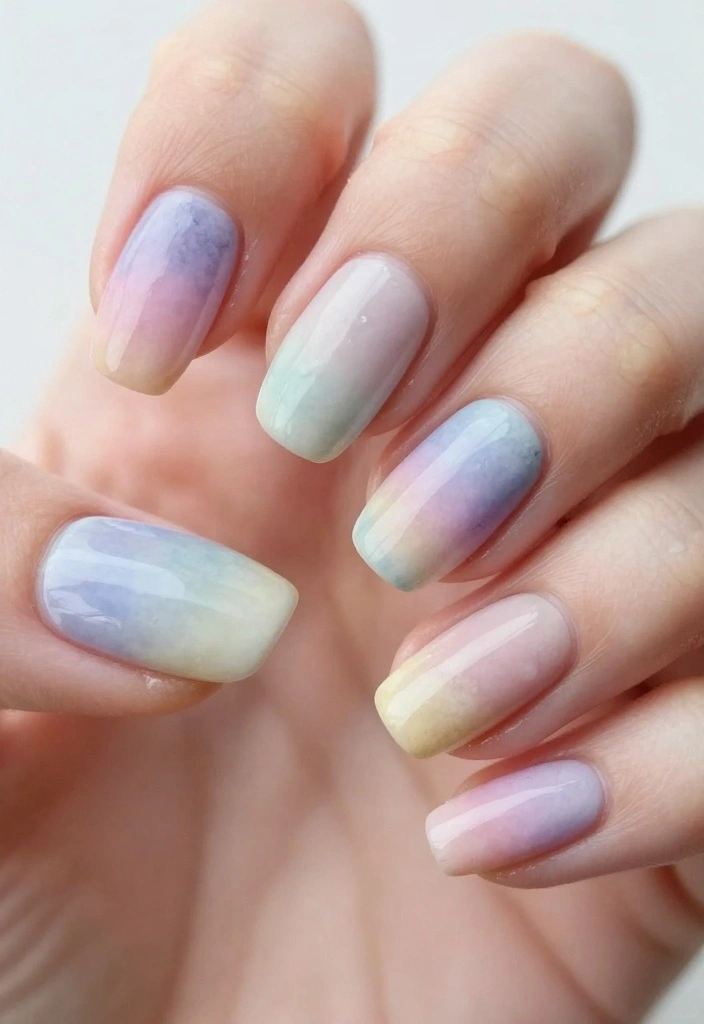
Watercolor nails offer a soft and dreamy design, giving an artistic flair to your manicure. This style allows for gentle color transitions that resemble a watercolor painting, making it perfect for breezy spring or summer days.
To achieve watercolor nails, start with a light base coat and use a small brush or sponge to apply diluted nail polish in soft strokes. Blend the colors together for a smooth transition.
– Use pastel shades for a delicate effect.
– Seal with a matte top coat for a more artistic feel.
– Experiment with layering colors for added depth.
Watercolor nails are a charming option for those wanting a unique, artistic look!
18. Monochrome Magic

Monochrome nail designs are a chic way to embrace simplicity while adding sophistication. This trend involves using varying shades of the same color for a cohesive look that’s easy to wear. Perfect for those who appreciate understated elegance, monochrome nails can be dressed up or down.
To achieve a monochrome look, select your favorite color and choose three to four shades ranging from light to dark. Apply each shade to different nails or create an ombre effect.
– Stick to colors that complement your wardrobe for a polished look.
– Matte finishes can enhance the monochrome aesthetic.
– Add texture with various nail art techniques for added interest.
Monochrome nails are a fantastic choice for anyone looking to express their style with elegance!
Fun fact: use 3 shades of the same color from light to dark to create a chic monochrome ombre. Nail tech pros swear this small trick makes every manicure look high-end, perfect for subtle sophistication on all nails.
19. Sweet Pastels

Pastel nails are perfect for adding a soft, whimsical touch to your look. These gentle hues are ideal for spring and summer, evoking the essence of fresh blooms and sunny days. Pastel colors like mint green, baby blue, and soft pink create a serene and beautiful manicure.
To create pastel nails, choose your favorite shades and apply a neutral base for maximum vibrancy. You can use solid colors or incorporate designs like polka dots or stripes for added fun.
– Mix and match pastel shades for a playful look.
– Consider adding a matte finish for a modern twist.
– Use a light top coat to seal and protect your design.
Pastel nails are a charming choice for anyone wanting to keep their look light and cheerful!
20. Dynamic Duo
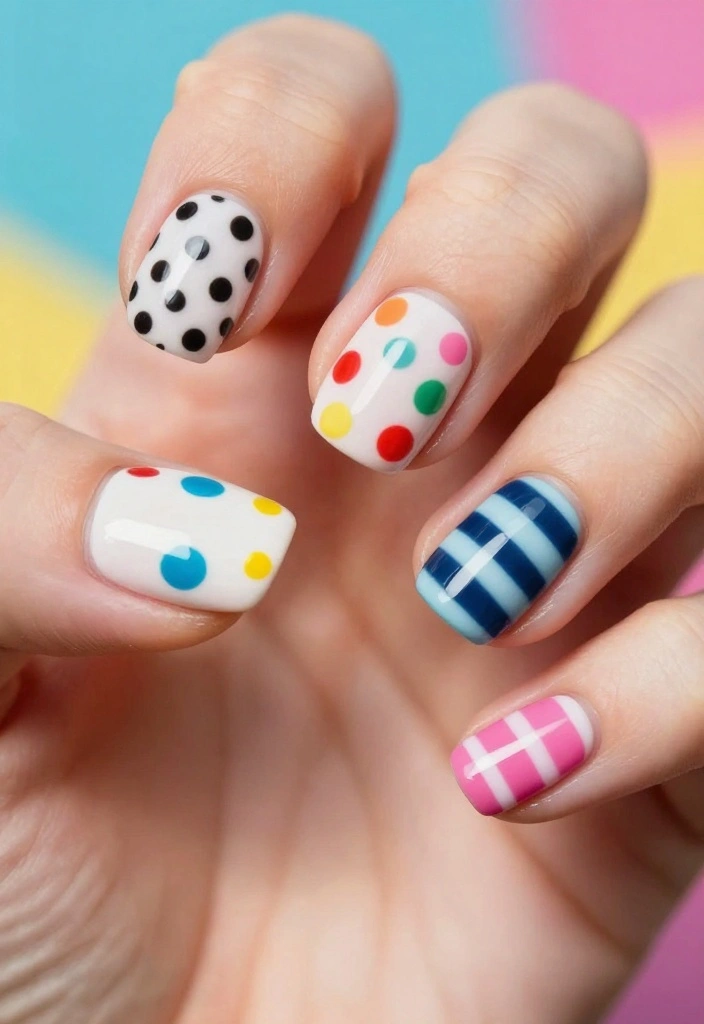
Combining two different nail art styles on one hand creates a dynamic duo that’s both fun and stylish! This trend allows you to express your creativity by mixing designs like stripes with polka dots or florals with geometric patterns. Ideal for adventurous spirits, this pairing showcases your personality beautifully.
To create a dynamic duo, select two designs that complement each other and alternate them across your nails. Maintain a consistent color palette for harmony.
– Choose designs that contrast yet complement each other.
– Use nail tape for clean lines between styles.
– Don’t hesitate to get creative and mix patterns!
Dynamic duo nails are perfect for those looking to showcase their unique style in an exciting way!
21. Galaxy Nails

Bring the beauty of the night sky to your fingertips with galaxy nails! This design mimics the stunning visuals of the universe, complete with twinkling stars and vibrant cosmic colors. Perfect for those who love dramatic nail art, galaxy nails are a true work of art.
To create galaxy nails, start with a dark base coat. Then, use a sponge to apply various colors like blues, purples, and pinks for a cosmic effect. Add small dots of white for stars and finish with a glossy top coat.
– Experiment with different color combinations for a unique galaxy look.
– Use glow-in-the-dark polish for an exciting twist.
– Add small star-shaped studs for extra flair.
Galaxy nails are a perfect way to channel your inner stargazer and display your artistic side!
22. Creative Cut-Outs
Cut-out nails offer a unique twist on traditional nail art by incorporating negative space into your design for a modern appearance. This style showcases your creativity and can be customized to fit your personal taste. Perfect for contemporary nail art lovers, cut-out nails make a bold statement!
To achieve this look, start with a solid base coat and use nail tape to create shapes that leave parts of the nail bare. Fill in the remaining sections with contrasting colors or designs.
– Choose bold colors for the filled portions to make cut-outs pop.
– Use a fine brush for clean cut-out lines.
– Experiment with different shapes and patterns for variety.
Creative cut-out nails are an excellent choice for those wanting to push the boundaries of nail art!
23. Holiday Cheer
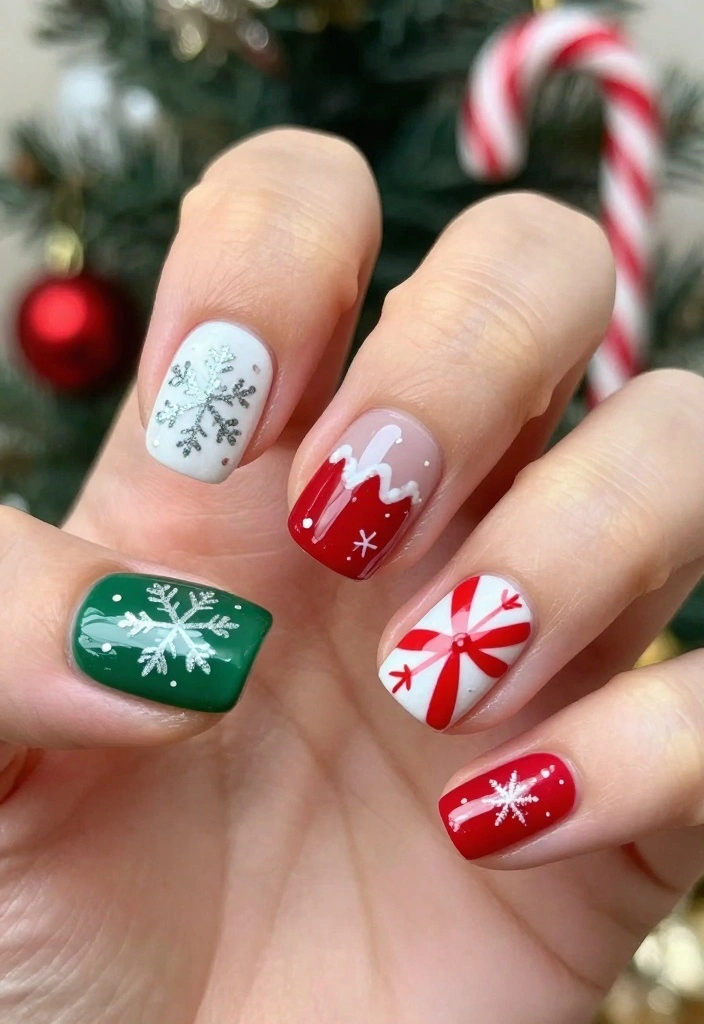
Get into the holiday spirit with festive nail art! Seasonal themes can bring joy and cheer to any occasion, whether for Christmas or Halloween. Think sparkling snowflakes or spooky pumpkins to celebrate the season’s essence.
To create holiday-themed nails, choose a base color that matches the holiday theme. Use nail art brushes to draw in seasonal designs, or utilize nail wraps for quick decoration.
– Match your nail art with your holiday outfits for a cohesive look.
– Use glitter or metallic finishes for a festive touch.
– Consider adding small charms like bells or ornaments for extra spirit.
Holiday-themed nails are a fun way to spread cheer and showcase your festive spirit!
24. Retro Vibes

Retro-inspired nail art is back, embracing fun patterns and colors from past decades. Think funky designs, vibrant shades, and playful prints that capture a nostalgic vibe. This trend celebrates individuality and a carefree spirit!
To achieve retro vibes, select bold colors and patterns inspired by the ‘70s, ‘80s, or ‘90s. Incorporate polka dots, stripes, or geometric shapes into your designs for added flair.
– Use bright colors that stand out for an authentic retro look.
– Mix and match patterns for a playful vibe.
– Maintain well-groomed nails to enhance the overall effect.
Retro nails are an exciting way to channel your whimsical side while keeping your style fresh!
25. Unique Shapes

Unique nail shapes can elevate your manicure to new heights! From stiletto to coffin, experimenting with different shapes allows you to express your personal style while keeping your nails looking trendy. Each shape brings a distinct vibe to your overall look.
To create unique shapes, start with a basic nail length and file them into your desired form. Ensure each nail is shaped consistently for a polished appearance.
– Choose shapes that complement your hand size and finger length.
– Decorate with nail art styles that match your chosen shape.
– Keep your nails healthy and well-pampered to shine in any shape.
Unique shapes are a fun way to showcase your individuality while experimenting with your look!
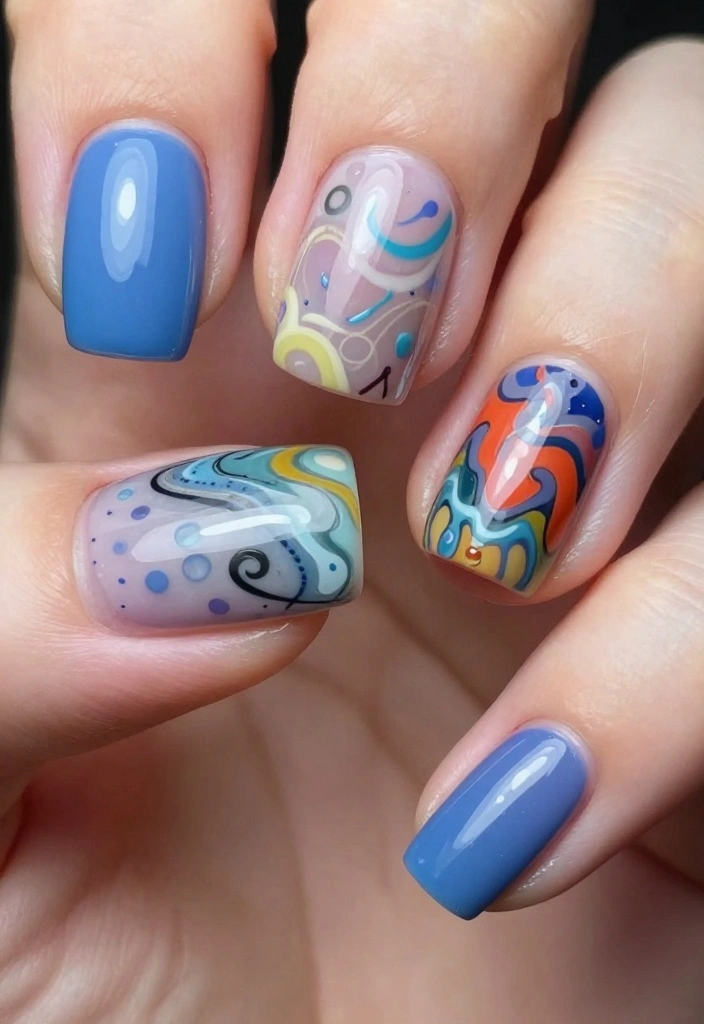
26. Bold Patterns
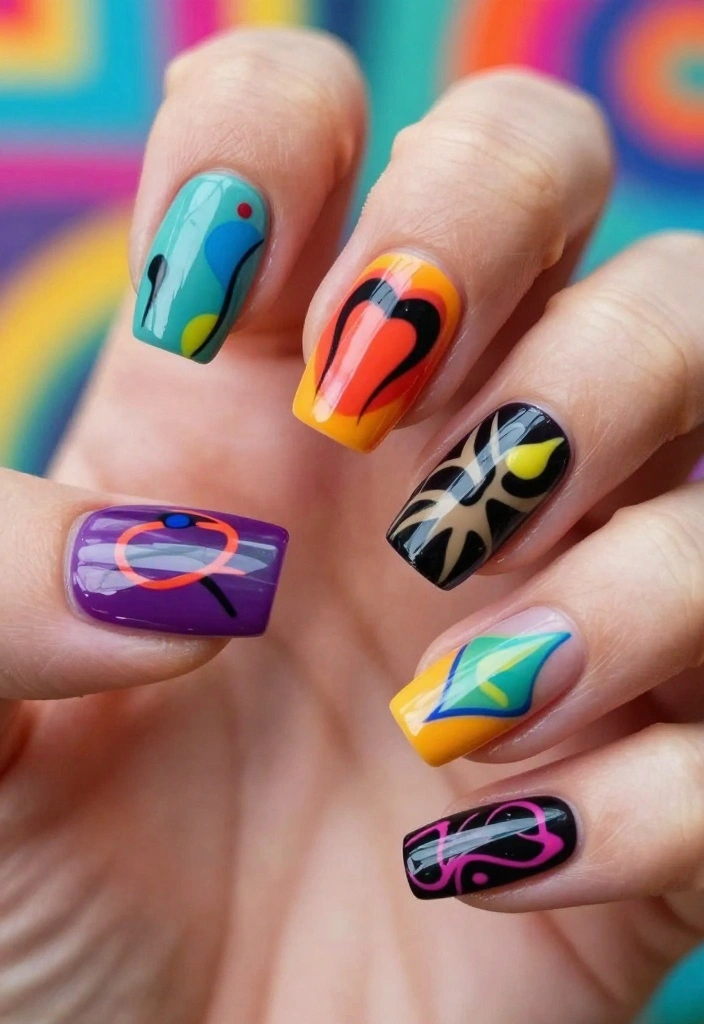
Bold patterns can transform your nails into stunning works of art! This trend involves using graphic designs, intricate details, and vibrant colors to create standout nail art. Perfect for those who love to make a statement, bold patterns range from abstract designs to detailed illustrations.
To achieve bold patterns, start with a solid color base and use fine brushes or nail art pens to create intricate designs. Stamping plates can also help you achieve more complex patterns.
– Choose colors that contrast well for a striking look.
– Experiment with layering patterns for added depth.
– Keep nails well-groomed to enhance the overall design.
Bold pattern nails are an exciting way to express your creativity and make an unforgettable statement!
27. Subtle Shimmer
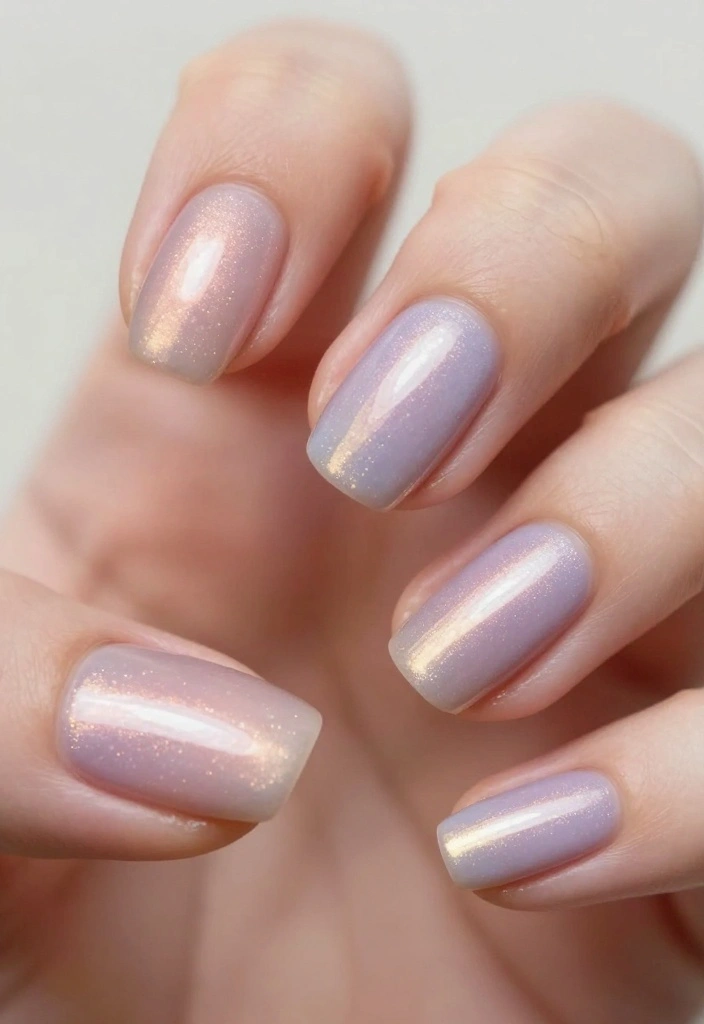
Sometimes, less is more, and subtle shimmer nails embody understated elegance. These designs feature gentle sparkles that catch the light without overpowering your look. Ideal for office settings or elegant occasions, subtle shimmer adds a classy touch to any manicure.
To achieve subtle shimmer nails, start with a neutral or pastel base coat. Then, apply a sheer glitter polish on top or mix in fine glitter for a delicate sparkle.
– Keep nail shapes simple and elegant to enhance the shimmer.
– Use soft colors for a refined appearance.
– Seal your design with a glossy top coat for added shine.
Subtle shimmer nails are a wonderful way to maintain sophistication while embracing a bit of sparkle!
28. Layered Looks
Layered nails offer a fun and creative way to showcase multiple designs within a single manicure! This trend lets you combine different nail art techniques, colors, and textures for a truly unique appearance. Perfect for those who love to experiment with their style, layered nails can be as bold or subtle as you wish.
To create layered looks, start with a solid base coat and apply various designs or textures one on top of the other. Use nail tape for clean separation between sections.
– Select colors that work well together for a cohesive appearance.
– Experiment with different finishes like matte and gloss for added depth.
– Don’t hesitate to mix styles for an eclectic vibe.
Layered nails are an exciting way to push the boundaries of nail art and express your creativity!
29. Translucent Touch
Translucent nails offer a soft, ethereal look that stands out in its simplicity. This style utilizes sheer polishes to create a delicate effect, allowing your natural nail or underlying colors to peek through. Perfect for a minimalistic approach, translucent nails can be charming and lightweight.
To achieve translucent nails, start with a clear base and apply sheer polishes in soft hues. Layer the polish to reach your desired opacity while allowing some natural nail to show.
– Use pastel shades for a romantic touch.
– Consider adding small embellishments for a hint of elegance.
– Seal with a glossy top coat for a polished finish.
Translucent nails can add a whimsical touch to your look while keeping it effortlessly chic!
Fun fact: 3 thin coats of sheer polish create a translucent glow that lets your natural nail peek through. A clear base plus soft hues keeps things airy, lightweight, and a nail tech favorite for a chic, Instagram-ready finish.
30. Iconic Classics
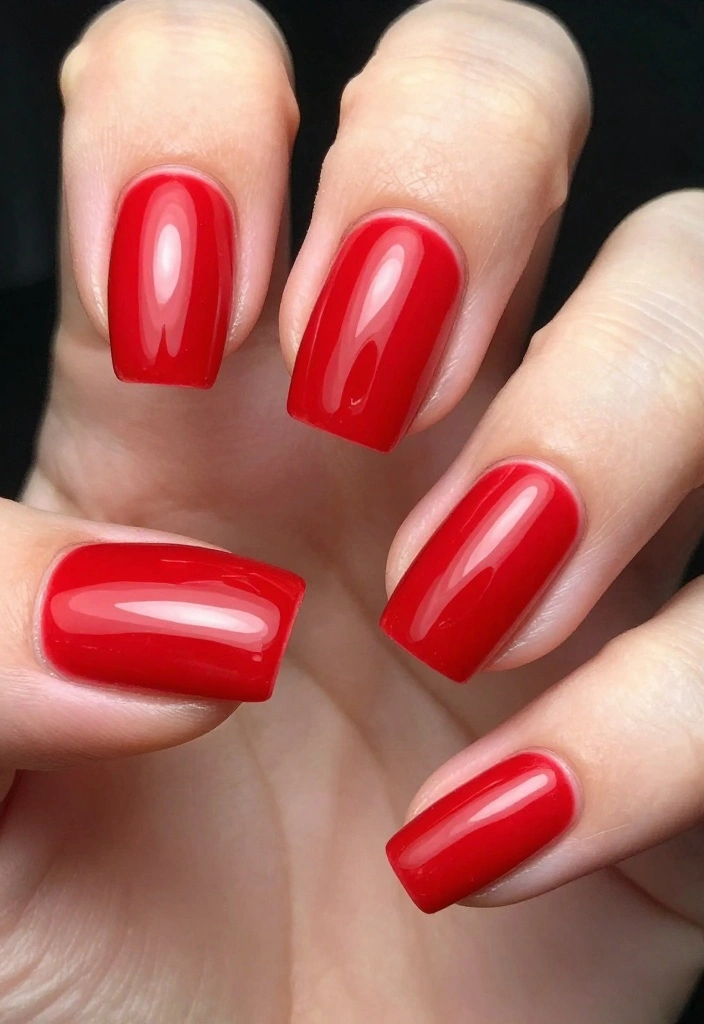
Classic nail designs are timeless and never go out of style. Iconic looks like red nails, chic French tips, or elegant nude shades are perfect choices for any occasion. These styles provide a polished and sophisticated appearance, suitable for professional settings or formal events.
To achieve classic nails, focus on quality and clean lines. For red nails, choose a premium polish that glides on smoothly for a flawless finish. For French tips, use tape for precision and finish with a glossy top coat.
– Invest in good-quality polishes for a more professional appearance.
– Keep your nails well-groomed to enhance any classic style.
– Experiment with different shades of red to suit your skin tone.
Classic nails are an essential part of any nail art collection, ensuring you always look chic and put together!
Conclusion
Exploring the world of nail art is like embarking on a journey of self-expression and creativity. With these 30 nail tech inspirations, there’s no shortage of exciting ideas to keep your nails looking trendy and fabulous. Whether you opt for a bold statement or a delicate design, there’s always room for innovation and personalization in your nail art.
So go ahead, try out these designs and let your nails reflect your unique style. Remember, the best accessory is confidence, and with stunning nails, you’ll definitely feel empowered!
Frequently Asked Questions
Which nail tech inspirations from ’30 Nail Tech Inspirations You Need to Try Right Now’ are easiest to start with, and how do I pick the right look for me?
Great question! Start by considering your nail length, lifestyle, and the season. For beginners, look for simple nail art ideas like clean stripes, dots, negative space, or soft gradients. The article mixes easy and statement looks, so pick 1–2 that fit your vibe and bring clear photos to your nail tech appointment. If you want a bold showpiece, use the featured look near #5 and tailor the colors to your skin tone. Don’t forget to check seasonal trends for a timely twist and decide on a finish (glossy or matte) that suits your routine.
What are some practical at-home nail art ideas that still look polished?
Here are easy, practical at-home nail art ideas that still look polished: 1) tape-lined stripes for crisp edges, 2) dot patterns with a small tool, 3) negative-space designs, 4) soft gradient using a makeup sponge, 5) small decals or stickers for instant flair. Prep nails with a base coat, apply color in thin layers, finish with a strong top coat, and clean edges with a brush dipped in remover. Try these at your own pace and build up to more complex looks with confidence, all while keeping your nail tech vibe in mind.
What are the current seasonal nail trends and how can I incorporate them with my nail tech?
Seasonal trends shift, but you’ll often see spring pastels, summer brights, autumn neutrals, and winter metallics. To tap into seasonal trends, pick a color family that fits the season and ask your nail tech for finishes like glossy, matte, glitter, or chrome. Add a simple pattern—think minimalist lines, marble, or floral accents—that suits your lifestyle. Bringing a few swatches or photos to your appointment helps communicate exactly what you want and keeps the look fresh with the season.
How can I ask my nail tech to recreate a look from the article?
To get the look you want, bring clear reference photos and describe the key elements: color family, finish, nail length, and whether it’s daily-wear or for a special occasion. Speak in practical terms for your nail tech: ‘thin lines,’ ‘negative space,’ ‘gradient,’ or ‘accent nail.’ Ask about color matching to your skin tone and whether the design works with gel or regular polish. If you love the vibe of #5, mention that exact look and let your nail tech tailor it with their technique and materials.
How can I extend nail art longevity and prevent chipping between salon visits?
Keep trendy designs looking fresh with good prep and protection. Start with a solid base coat, apply high-quality color, and seal with a durable top coat. Reapply the top coat every 3–4 days to prevent chips, and avoid harsh chemicals by wearing gloves when cleaning. Keep nails moisturized with cuticle oil, and re-balance the shape gently as your nails grow. Following these steps helps your seasonal trends look good longer and reduces the need for frequent touch-ups, especially between salon visits.
Related Topics
nail tech
nail art ideas
seasonal trends
minimalist design
vintage style
beginner friendly
creative techniques
trendy colors
quick designs
holiday nails
advanced nail art
summer vibes
I loved the nail art ideas in this post! I tried a similar design for my sister’s wedding, and everyone kept asking where I got my nails done! Which design do you think is the easiest to try at home?
These nail inspirations are to die for! I attempted a glitter ombre once and ended up looking like I put my hand in a craft box. Ever tried a design that went hilariously wrong?
I never knew how much nail art could express personality! Did you know some cultures have used nail color to signify social status? It’s wild how much history is in something so simple!
I remember trying to recreate a cool marble design for my friend’s birthday. Let’s just say my nails looked more like a toddler’s art project! But it was fun, and she loved it! Have you ever had a nail design that didn’t turn out as planned?