This holiday season has me craving the perfect way to show off my festive spirit. There’s something magical about Christmas that brings out the creative side in all of us. If you’re anything like me, you want your nails to shine as bright as the Christmas lights on the tree. That’s why I put together this collection of stunning nail Christmas designs that will make you the star of every holiday party.
If you love nail art and festive nails, this post is specially for you. Whether you’re preparing for a cozy gathering with friends or a dazzling office party, these nail designs will elevate your holiday look. I’ve gathered ten incredible ideas that are not just beautiful, but also easy to recreate at home. Get ready to dazzle with nail art that embodies the joy and spirit of the season!
From sparkling snowflakes to cozy sweater patterns, you’ll find styles that fit every personality and taste. Let’s dive into these stunning designs that will surely draw compliments and make you feel festive!
Key Takeaways
– Sparkling Snowflakes: Capture the winter wonderland with delicate snowflake designs that twinkle on your nails.
– Christmas Tree Glam: Show off your holiday spirit with glittery Christmas tree patterns that sparkle with every gesture.
– Candy Cane Delight: Add a sweet touch to your look with classic red and white candy cane stripes that are playful yet chic.
– Elegant Gold Ornaments: Use gold polish for an elegant look that mimics beautiful ornaments hanging on the tree.
– Cozy Sweater Patterns: Embrace the warmth of the season with knit-like patterns that give your nails a cozy, festive feel.
Contents
- 1. Sparkling Snowflakes
- 2. Christmas Tree Glam
- 3. Candy Cane Delight
- 4. Elegant Gold Ornaments
- 5. Festive Glitter Gradient
- 6. Whimsical Rudolph
- 7. Minimalist Mistletoe
- 8. Frosted Winter Wonderland
- 9. Classic Red and Green
- 10. Cozy Sweater Patterns
1. Sparkling Snowflakes
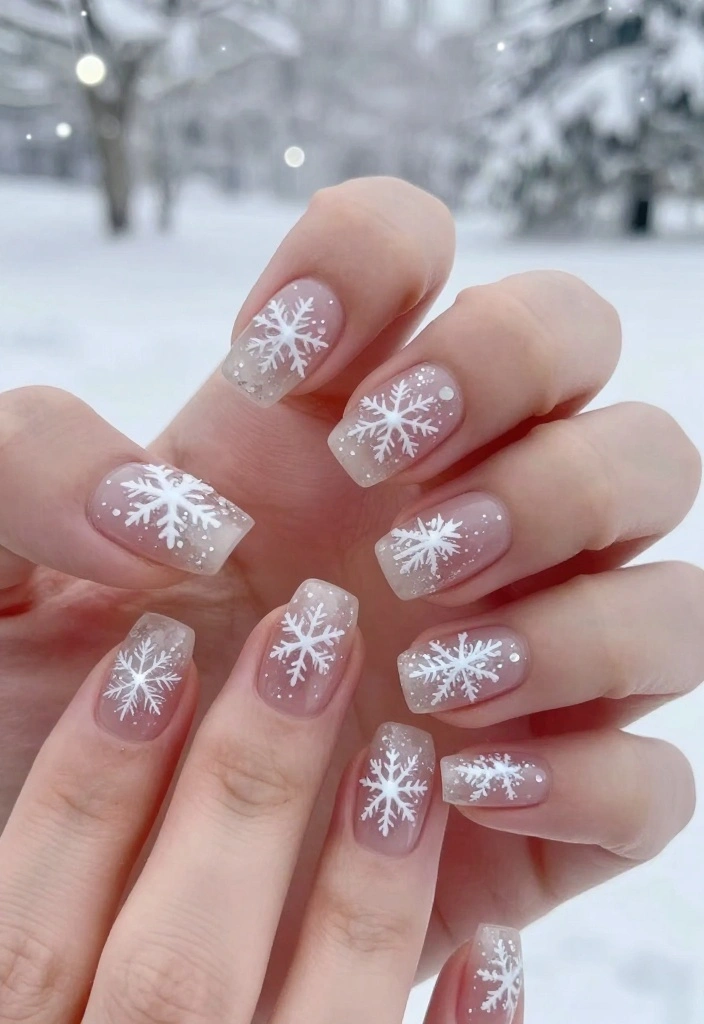
Capture the essence of winter with sparkling snowflakes on your nails. This design beautifully combines a clear base coat with delicate white snowflakes, giving your nails a frosty charm. Add a hint of glitter for that extra sparkle, making your nails glisten like freshly fallen snow.
To achieve this look, start with a solid base coat to protect your nails. Use a fine brush or dotting tool to create intricate snowflake patterns with white or silver polish. A sprinkle of glitter on top mimics the shimmer of snowflakes. This elegant design is versatile enough for casual gatherings or formal holiday parties.
Tips: Opt for a matte top coat for a softer appearance or a glossy finish for maximum shine. For durability, consider using gel polish to make your design last longer.
Fun fact: nails with clear base coats and snowflake accents stay sparkle-perfect for up to 7 days of holiday events. That shimmering touch turns a simple nail christmas into a festive centerpiece, whether you’re at casual gatherings or elegant parties.
2. Christmas Tree Glam
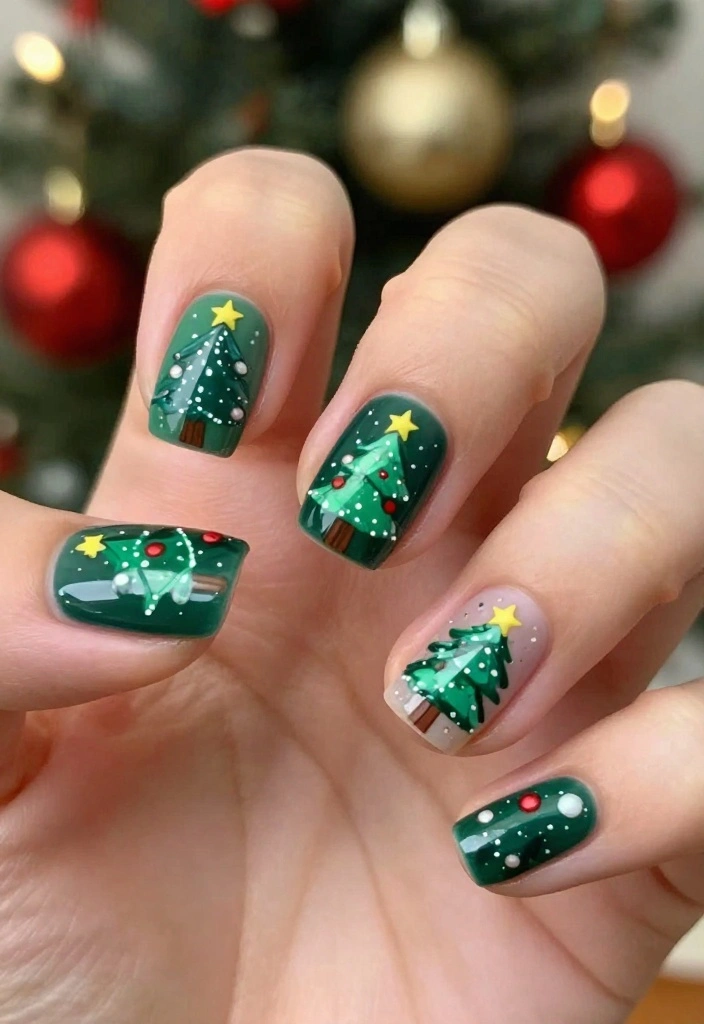
Embrace the holiday spirit with a festive Christmas tree design on your nails. These playful trees can range from simple green triangles to detailed creations adorned with tiny gems and glitters. This design is not only adorable but also exudes a fun vibe, perfect for family gatherings.
Begin with a green base coat, then draw a triangle shape for the tree. Decorate with colorful dots or small rhinestones to represent ornaments, finishing with a star on top. Seal it all with a shiny top coat to lock in your design. This charming look is sure to spark joy during the holiday season.
Trick to try: Use a matte polish for the tree and glossy for the ornaments to create a striking contrast.
🎨 Nail Art Made Easy!
Unleash your creativity this holiday season with our DIY Nail Art Guide, perfect for busy moms on the go!
3. Candy Cane Delight
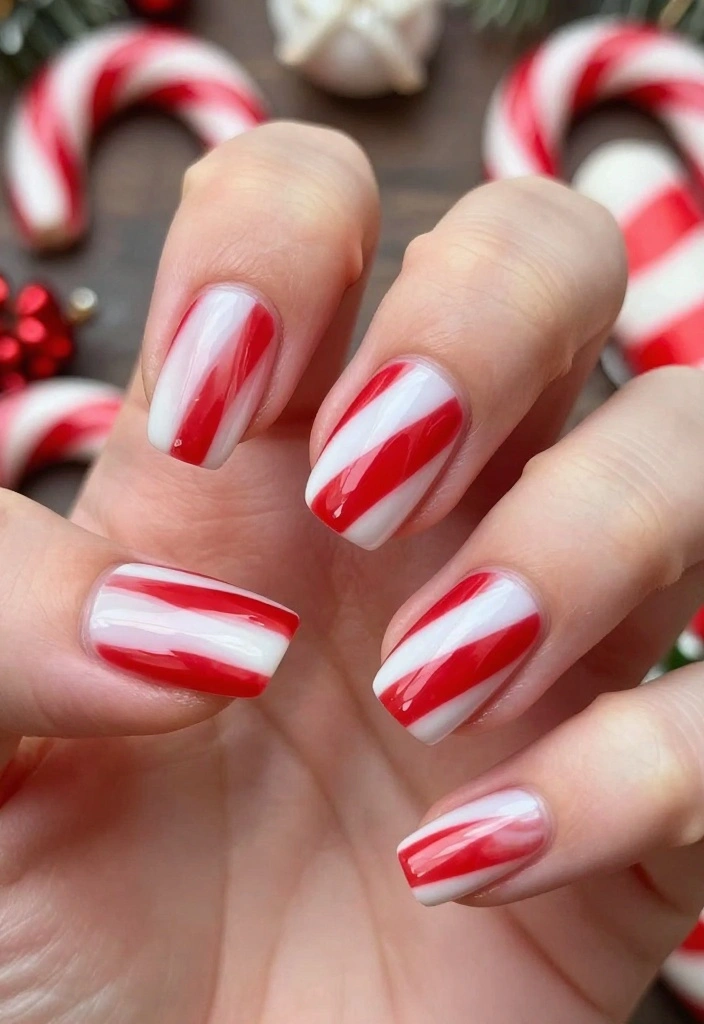
Indulge in a sweet candy cane nail design that embodies the spirit of Christmas treats! The classic red and white stripes are not only festive but also eye-catching, making your nails a delightful conversation starter.
Start with a white base coat, then apply red polish in diagonal stripes to achieve the candy cane look. For added cheer, consider sprinkling glitter over the stripes. This playful design is perfect for those looking to showcase their fun side during the holidays.
Quick Tip: For sharp and precise lines, use striping tape to ensure your design looks polished and professional.
Fun fact: Candy cane nails take just 3 simple steps—white base, red stripes, and a glossy top coat. The bold red and white contrast lights up holiday parties and selfies. With these quick tips, nail christmas vibes are easy to recreate at home.
4. Elegant Gold Ornaments
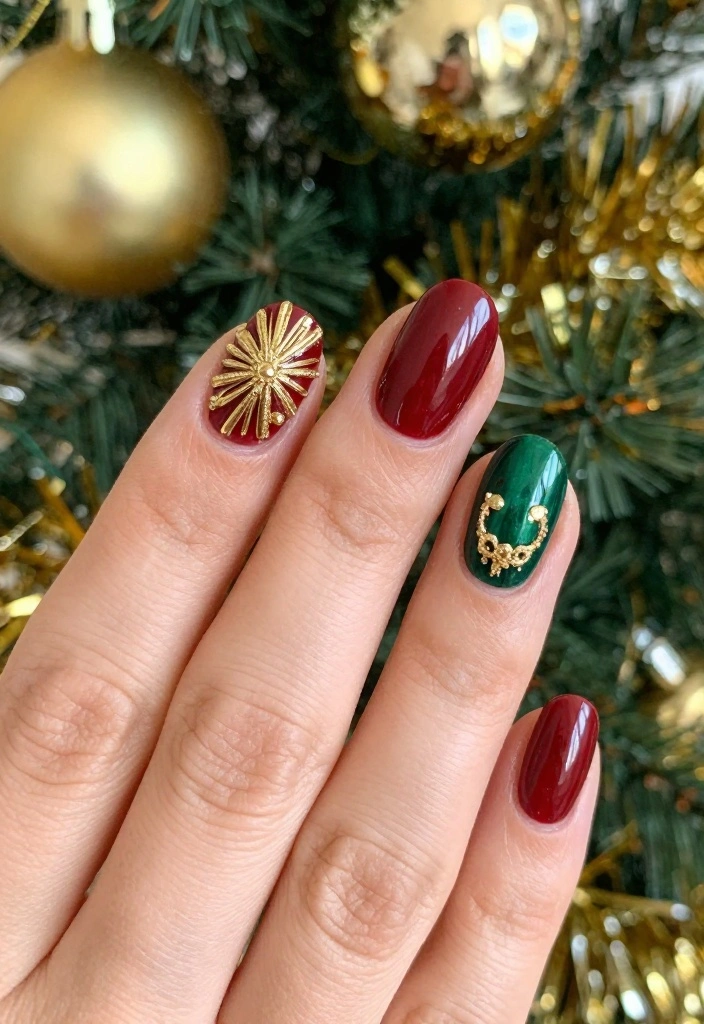
Elevate your holiday style with an elegant gold ornament design that exudes sophistication. This chic nail art is perfect for more formal events, blending shimmering gold with rich dark or neutral shades for contrast.
Begin with a deep red or green base polish. Using a dotting tool, create small gold dots or ornament shapes, adding tiny lines to mimic strings hanging from the ornaments. This classy design appeals to those with a refined taste, making it an excellent choice for upscale parties.
Style Tip: Pair your nails with gold jewelry to create a cohesive and glamorous holiday look.
📹 Related Video: Super Easy Gold 3D Gel Nail Art ✨ Sparkly Stars ✨ and Liquid Gold 🤩
5. Festive Glitter Gradient
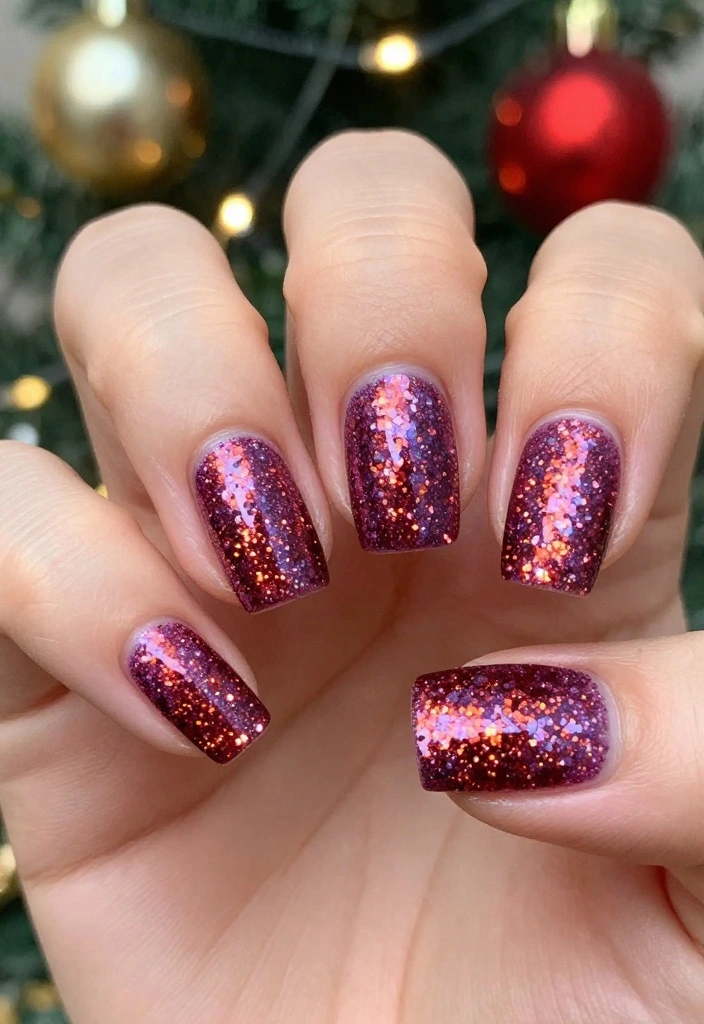
Infuse some sparkle into your holiday nails with a dazzling glitter gradient! This effortlessly chic design allows you to experiment with colors while maintaining a festive vibe. The gradient effect beautifully transitions from a solid base to shimmering tips, ideal for any holiday occasion.
Start with your favorite color, such as red or emerald green. Once dry, use a makeup sponge to dab glitter polish from the tips to halfway down the nail for a seamless gradient. This versatile design can adapt to any color scheme, making it suitable for everyone.
Pro Tip: Finish with a clear top coat to blend the gradient smoothly and enhance the glitter’s shine.
We all want party-ready nails without the mess. A quick glitter gradient from a classic red or emerald base to glitter tips makes nail christmas shine in minutes. Dab on glitter with a sponge for a smooth fade and you’re done.
6. Whimsical Rudolph
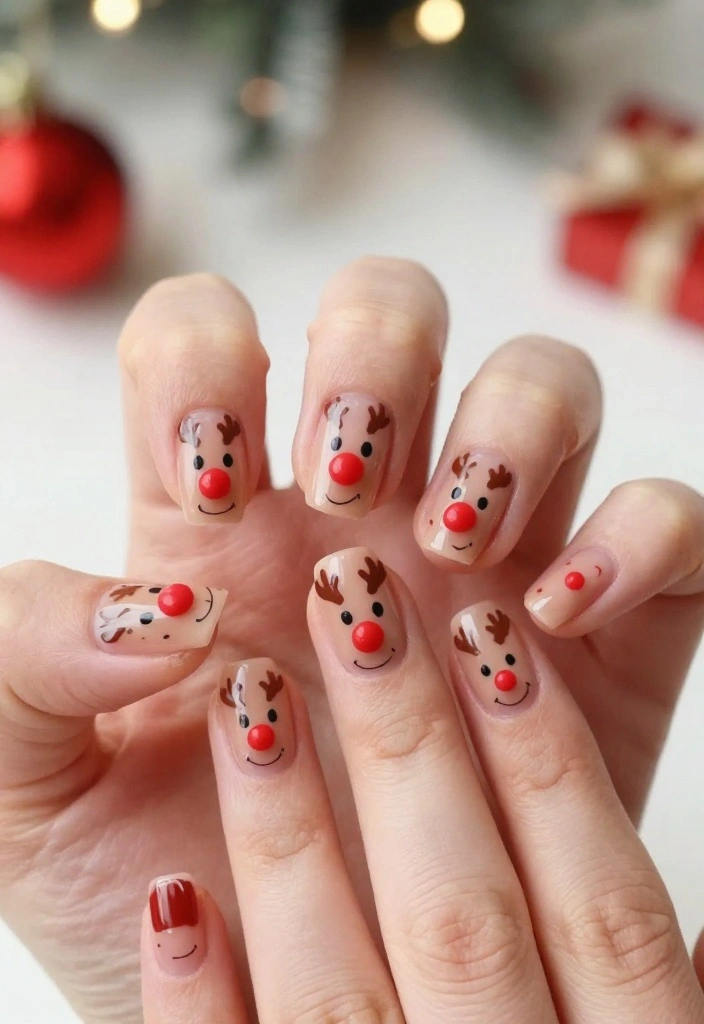
Add a touch of whimsy to your nails with a charming Rudolph design! Featuring Rudolph’s iconic red nose and antlers, this fun nail art is perfect for sparking conversations at holiday parties. It looks great on any nail length and offers endless decorating possibilities.
Start with a nude or brown base, then paint Rudolph’s face using a small brush. Don’t forget to add his antlers and finish with a bright red dot for his nose. This playful design is perfect for those who adore fun and quirky nail art.
Fun Fact: Experiment with different facial expressions for a unique variation!
7. Minimalist Mistletoe

If you prefer a subtle approach, a minimalist mistletoe design is a chic and elegant choice. This understated look lets you celebrate the holidays while maintaining a refined style, adding sophistication to your nails.
Begin with a clear or nude base and use a fine brush to create slender green leaves and tiny red berries. This modern design adapts easily to both casual and formal settings, making it a versatile option.
Style Suggestion: Complement this look with minimalistic jewelry for an effortlessly polished appearance.
How To Choose The Right Nail Christmas Designs
Choosing the perfect nail Christmas design can elevate your holiday look and make you the center of attention at any festive gathering. With so many options available, it’s important to select a design that suits your style, personality, and the occasion. Here are some key factors to consider:
1. Personal Style
Think about your everyday style when choosing your nail Christmas design. Do you prefer bold and colorful patterns, or are you more into subtle and elegant designs? For example, if you love vibrant colors, go for a design featuring candy canes or Christmas trees. If you’re drawn to minimalism, a simple mistletoe or elegant gold ornaments may resonate more with you.
2. Occasion
Consider the events you’ll be attending during the holiday season. A glitzy nail design with lots of glitter may be perfect for a New Year’s Eve party, while a cozy sweater pattern might be ideal for a casual family gathering. Matching your nail art to the occasion can enhance your overall look and make your nails a conversation starter.
3. Nail Length and Shape
Your nail length and shape play a crucial role in how a design will look. Shorter nails may be overwhelmed by intricate designs, so opt for simpler patterns that won’t clutter the space. Conversely, longer nails can handle more detailed artwork. For example, a sparkling snowflake design would look stunning on long, almond-shaped nails, while a minimalist design works well on shorter styles.
4. Color Palette
Christmas is known for its traditional red, green, and gold colors, but don’t be afraid to mix it up! Look for designs that incorporate unique colors or shades that match your holiday outfit. Pastel colors can also lend a fresh twist to a classic look. When in doubt, a classic red and green combination will always bring forth that festive spirit!
5. Nail Art Skill Level
Consider your nail art skill level or the skill level of your nail technician. Some designs are more complicated than others. If you’re doing your nails yourself, opt for simpler designs like a glitter gradient or minimalistic mistletoe. If you’re visiting a salon, discuss your ideas with your nail artist, as they may have suggestions based on their expertise.
6. Time and Maintenance
Think about how much time you want to invest in your nails. Some designs require more upkeep than others. For instance, intricate designs with multiple colors may need retouching sooner than simpler ones. If you’re busy during the holidays, opt for a design that looks stunning but requires minimal maintenance, like a classic red with a single accent nail.
Pro Tip: Before settling on a design, spend some time browsing through images on social media or nail art websites. Bookmark your favorite styles and try to visualize them on your own nails. If you’re unsure, consider showing your nail technician your favorite designs during your appointment for a personalized touch!
Now that you understand how to choose the right nail Christmas designs, let your creativity flow, and enjoy the process of celebrating the holidays with beautiful and festive nails!
8. Frosted Winter Wonderland
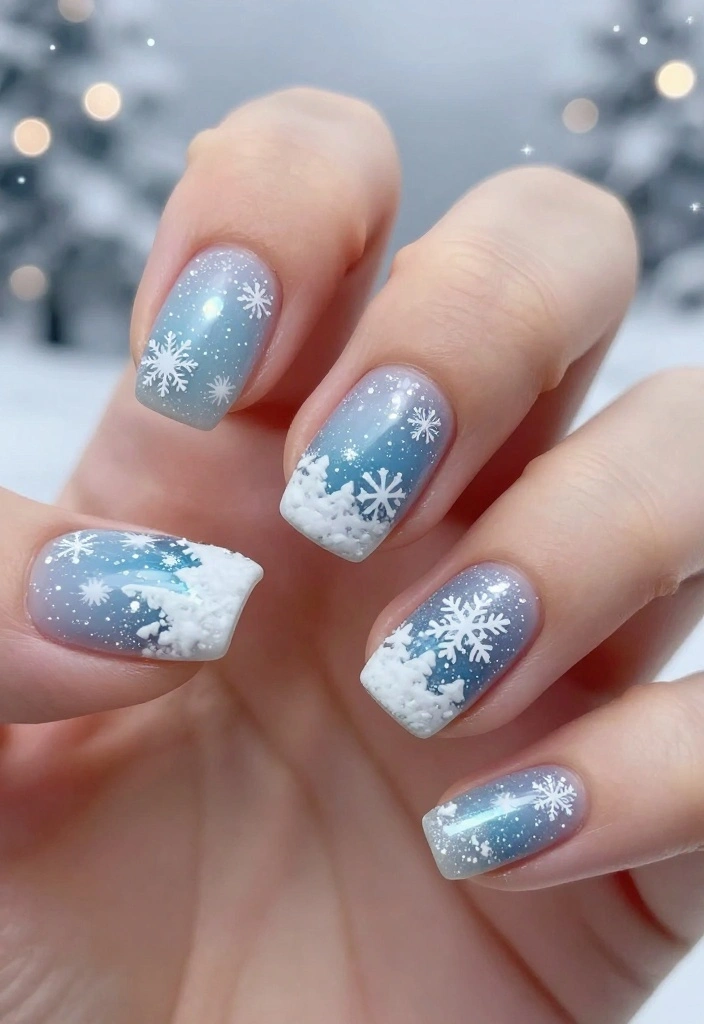
Transform your nails into a frosted wonderland with this enchanting design. It captures the magic of winter, showcasing everything from snowflakes to shimmering ice, perfect for those who appreciate the beauty of the season.
Start with a base of icy blue or soft white. Create snowflakes, icicles, or soft dots with white or silver polish to mimic falling snow. Add a layer of holographic glitter for a frosty finish. This stunning design beautifully embodies the essence of winter holidays and is sure to impress.
Tip: Seal your design with a top coat to keep the glitter intact and shimmering.
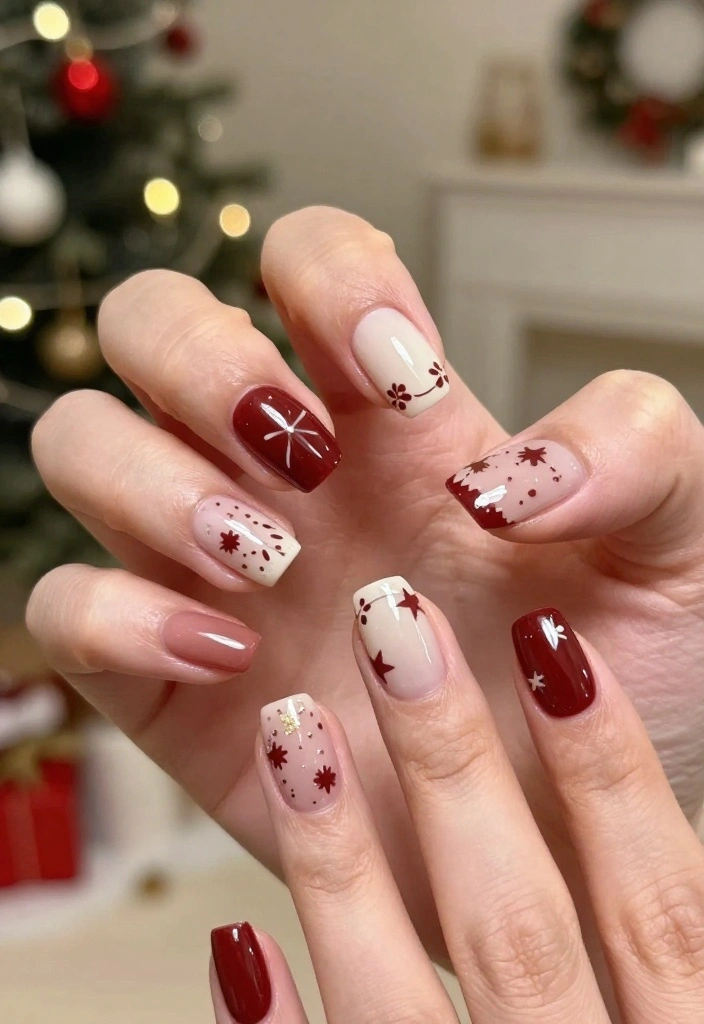
9. Classic Red and Green
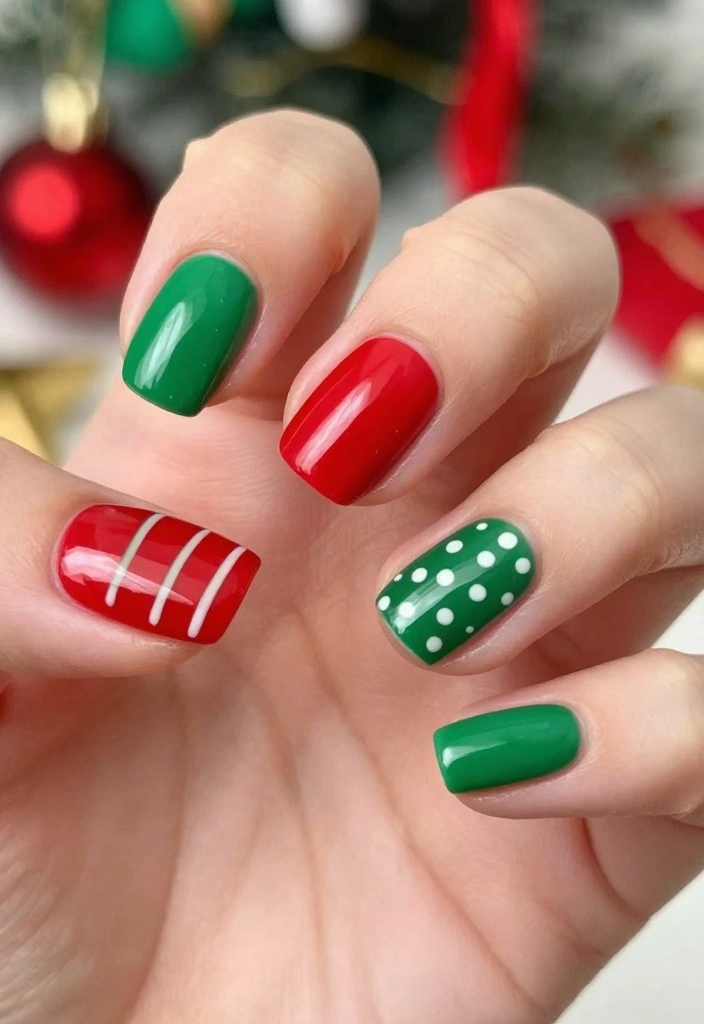
You can’t go wrong with the iconic red and green combination for Christmas nails! This timeless duo instantly evokes holiday cheer and allows for a range of styles, from simple to elaborate designs.
Start with alternating red and green nails or create fun patterns on each nail, like stripes, polka dots, or holiday symbols. This design is versatile and easily customizable to reflect your personal style.
Customization Tip: Enhance the classic look by mixing in metallic or glittery polish for an added festive flair.
10. Cozy Sweater Patterns
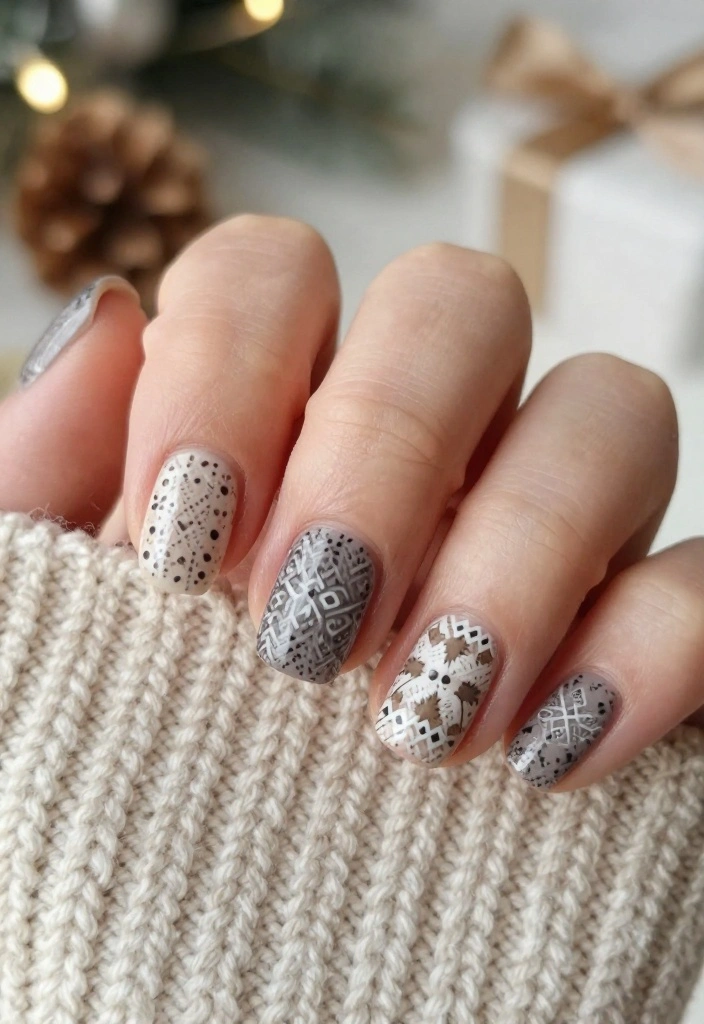
Wrap your nails in warmth with cozy sweater patterns that mimic your favorite winter garments. This design adds texture and comfort, making it perfect for chilly holiday nights spent by the fire.
Select a seasonal base color like beige or soft gray. Using a fine brush, add knit-like designs in white or darker shades. This trendy nail art keeps you looking stylish and snug, reminiscent of cozy winter sweaters.
Inspiration Tip: Use different colors for each nail for a unique, eclectic look that captures the festive spirit!
Conclusion
As the holidays approach, let your nails do the talking and showcase your festive spirit! From whimsical Rudolphs to elegant gold ornaments, there’s a design for every style and occasion. Experiment with these ideas to find the perfect look for your holiday gatherings, and have fun with your nail art! Don’t be afraid to mix and match styles or even come up with your unique variations.
Share your creations with friends and family, and inspire others to join in the festive fun. Happy nail painting!
Frequently Asked Questions
What are the easiest DIY nail christmas designs I can recreate for the holidays?
Here are a few ultra-easy DIY nail christmas designs you can finish in under 30 minutes. Start with a classic red or deep green base to instantly say holiday and then try simple details like white snowflakes, candy cane stripes, or glitter tips.
Design ideas: 1) White snowflakes on a red or emerald backdrop using a fine brush or stamping plate. 2) Candy cane stripes on an accent nail with red and white polish and striping tape for clean lines. 3) Glitter tips on a neutral or red base for instant festive nails.
Practical tips: prep nails with a base coat, apply 2 coats of color, use a thin liner brush or decals for precision, and seal with a durable top coat to keep your nail christmas look intact. For longer wear, consider gel layers or a quality quick-dry top coat. And yes, these ideas are perfect for nail art that makes your festive nails shine.
Which color palettes and finishes work best for nail christmas designs?
To create a cohesive nail christmas vibe, start with classic combos like red, green, and gold, or go chic with metallic gold or silver accents.
Finish matters too: glossy tops coats give a traditional, festive glow, while matte finishes offer a modern twist. Try a red base with gold foil accents, or emerald nails with white snowflakes for a versatile nail art look that pairs well with many outfits and festive nails themes.
How can I make my festive nails last through holiday parties and gatherings?
Begin with a solid base coat to protect nails and extend wear for your nail christmas designs. Use a high-quality top coat and reapply it every 2–3 days for longevity. Keep nails dry after washing, wear gloves when doing dishes, and apply cuticle oil nightly to prevent cracking. If you anticipate heavy use of hands during holidays, consider gel overlays for a long-lasting festive nails look that retains its shine.
Should I go with gel or regular polish to achieve longer-lasting nail christmas designs?
Gel polish and gel top coats are great for a longer-lasting nail christmas design, often resisting chips for 2–3 weeks with proper care. Regular polish dries faster and is easier to remove but may chip sooner. If you’re short on time, start with a strong base coat and a fast-drying top coat for quick, durable nail art results, or book a gel mani for peak holiday durability and luminous festive nails.
How can I match my nail christmas designs with outfits and accessories?
Coordinate color palettes with your outfit to create a harmonious nail christmas look. If your clothes feature red, green, or gold, mirror those shades on your nails with accents like snowflakes, candy cane stripes, or holly decals. For a balanced vibe, keep patterns subtle on most nails and reserve one accent nail for a bold design. Pair with jewelry in similar metallic tones to enhance the overall nail art statement and ensure your festive nails complement every party look.
Related Topics
nail christmas
festive nails
holiday nail art
glitter designs
winter themes
easy nail art
party nails
beginner friendly
advanced techniques
trending nail styles
colorful designs
quick holiday looks
These nail designs are so fun! I can already picture myself showing them off at the holiday party. Which design do you think would be the easiest for a beginner like me?
I tried doing my nails like one of these last year, and let’s just say I ended up with more glitter on my face than on my nails! At least I was sparkly for a week! 😂
Did you know that the tradition of painting nails dates back to ancient Egypt? They used henna to decorate their nails! It’s amazing how styles change over time.