Red nails have always held a special place in the world of fashion. They exude confidence and elegance, making them a go-to choice for many. If you have short nails and think that limits your nail art options, think again! I created this post to show you just how versatile and stunning red nail patterns can be, even on short nails. Whether you’re preparing for a special occasion or looking to spice up your everyday look, you can make a statement with these designs.
This guide is for anyone who loves nail art and wants to explore unique styles without the need for long nails. If you’ve been searching for fresh ideas that are easy to achieve, you’re in the right place. I’ve rounded up nine eye-catching red nail patterns that will inspire you to get creative. From classic looks to modern twists, these designs are sure to make your nails stand out.
What can you expect to gain from this post? You’ll discover various red nail patterns that are simple yet striking. Each design comes with tips on how to achieve the look, so you can replicate them at home or take them to your favorite salon. By the end of this article, you’ll have a wealth of inspiration to help you rock your short nails with confidence!
Key Takeaways
– Short nails can still shine with red nail patterns that are bold and stylish.
– Classic styles, like red with gold accents, never go out of fashion and can elevate any outfit.
– Ombre effects and floral designs add a playful twist to traditional red nails.
– Unique techniques, such as geometric shapes and color blocking, make your nails a canvas for creativity.
– With the right tips and tools, you can achieve these stunning looks right at home.
Contents
- 1. Classic Red with Gold Accents
- 2. Ombre Red to Nude
- 3. Floral Designs
- 4. Geometric Shapes
- 5. Dotted Design
- 6. Matte Red with Glossy Tips
- 7. Color Blocking
- 8. Marble Effect
- 9. Ripped Paper Effect
1. Classic Red with Gold Accents
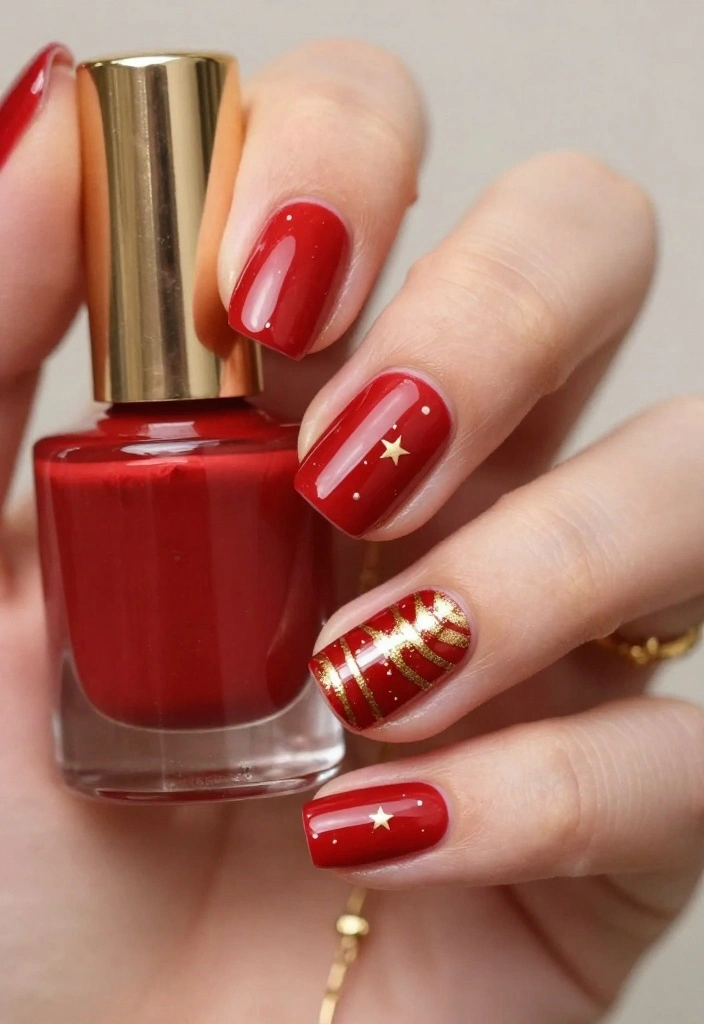
A deep, vibrant red nail paired with stunning gold accents exudes timeless elegance. This classic combo is effortlessly chic, making it suitable for both day and night occasions. The golden details, whether thin stripes or tiny dots, add a glamorous flair that elevates the entire look.
To create this striking design, start with a rich red base and let it dry completely. Then, using a fine brush, apply gold polish in your desired patterns. The contrast between the two colors creates a captivating effect, perfect for pairing with gold jewelry for a coordinated style!
– Rich red polish (choose a shade that complements your skin tone)
– Gold polish for accents (metallic finish recommended)
– Clear base coat for protection
– Optional: nail art brush for precision
– Step-by-Step Instructions:
1. Prep nails by filing them into your desired shape.
2. Apply a clear base coat to protect your nails.
3. Paint two coats of deep red polish once the base coat dries.
4. Create gold accents using a nail art brush on the red base.
5. Finish with a top coat for added shine and durability.
– Tips:
Use nail tape for sharper lines, and ensure each layer is dry before proceeding to avoid smudging.
Ideal for office settings, romantic dinners, or festive celebrations. Switch to a matte finish for a different vibe, or pair with a sleek black outfit for a bold statement.
How To Choose the Right Red Nail Patterns for Short Nails
When it comes to selecting the perfect red nail patterns for your short nails, there are several important factors to consider. With a little guidance, you can confidently choose a style that reflects your personality and enhances your look. Here’s how to navigate your options effectively:
1. Consider Your Skin Tone
Your skin tone plays a significant role in how a nail color will appear on you. If you have a warm undertone, opt for reds with orange or golden hues. If your skin is cool-toned, choose reds with blue or purple undertones. Testing shades on your nails can help you see what complements your complexion best.
2. Assess the Occasion
Different patterns and shades suit different occasions. For work or formal events, simple and elegant patterns, such as classic red with gold accents, can be perfect. In contrast, playful designs like floral or geometric patterns work well for casual outings or parties. Think about where you’ll be wearing your nail design before making a choice.
3. Explore Unique Styles
With so many unique styles available, take time to explore what resonates with you. From an ombre look transitioning from red to nude to a matte finish with glossy tips, your options are diverse. Research trending designs on social media platforms like Instagram or Pinterest to find inspiration that speaks to your style.
4. Match Your Outfit
Coordinate your nail design with your wardrobe. A striking red nail pattern can beautifully tie together your outfit, whether it’s a classic little black dress or a vibrant floral print. Using your nails as a fashion accessory can elevate your overall appearance. Keep your clothing colors in mind when choosing patterns to ensure a cohesive look.
5. Think About Your Nail Shape
The shape of your nails plays a critical role in how patterns will look. Short nails can benefit from designs that create an illusion of length, such as vertical stripes or bold geometrical shapes. Ensure that the pattern you choose complements the natural shape of your nails to enhance their beauty.
6. Maintain Your Lifestyle
Consider how your daily activities will affect your nail design. If you’re active or work with your hands frequently, opting for durable patterns or finishes, like a matte or gel polish, may be wise. Avoid intricate designs that chip easily if they won’t fit your lifestyle. Choose a look that matches both your aesthetic and your routine.
Pro Tip: Test out your nail design on a few fake nails before committing. This allows you to see if the color and pattern are what you envisioned. Plus, it’s a fun way to experiment with various styles without immediate commitment on your real nails!
By following these steps, you can confidently choose the perfect red nail patterns for your short nails. Don’t hesitate to mix and match styles until you find the one that feels just right for you!
2. Ombre Red to Nude
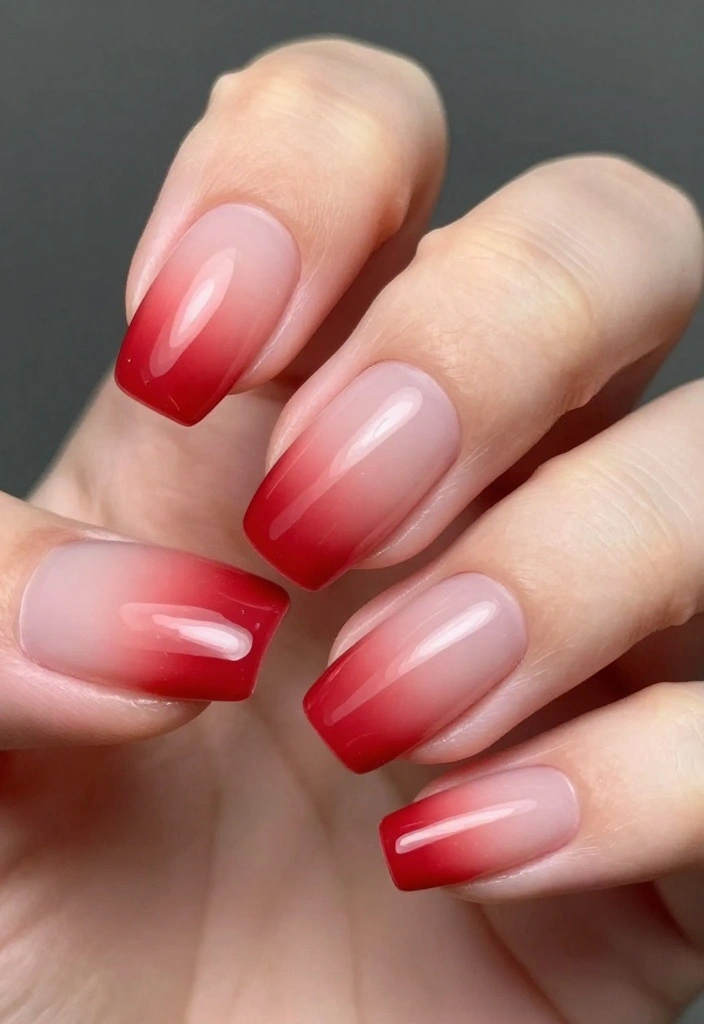
The ombre trend is making waves, and a gradient from red to nude is a stylish twist for short nails. This eye-catching design not only looks chic but also creates an illusion of longer fingers, enhancing your overall aesthetic. The smooth transition from bold red to soft nude strikes a perfect balance between daring and sophisticated.
To achieve this stunning look, start with a solid red base and blend a nude shade at the tips. A makeup sponge is your best friend for creating a seamless gradient. This versatile design complements any outfit, making it perfect for casual days or special events!
– Vibrant red polish (choose a shade that suits your style)
– Soft nude polish (beige or light pink works well)
– Clear base coat for protection
– Makeup sponge for blending
– Step-by-Step Instructions:
1. File and prep nails, applying a clear base coat.
2. Paint the base of your nails with vibrant red and let it dry.
3. Use a makeup sponge to dab nude polish on the tips, blending into the red.
4. Finish with a top coat for a glossy finish and protection.
– Tips:
Practice the ombre effect on a piece of paper to refine your technique before applying it to your nails.
Perfect for brunch dates, office wear, or a night out. You can easily switch the nude for a soft pink or pastel to match different outfits.
❝ Fun fact: for short nails, a red-to-nude ombre visually lengthens your fingers and elevates your style. Start with a solid red base, then blend nude at the tips using a makeup sponge for a seamless fade—easy, chic, and long-lasting. ❞
3. Floral Designs
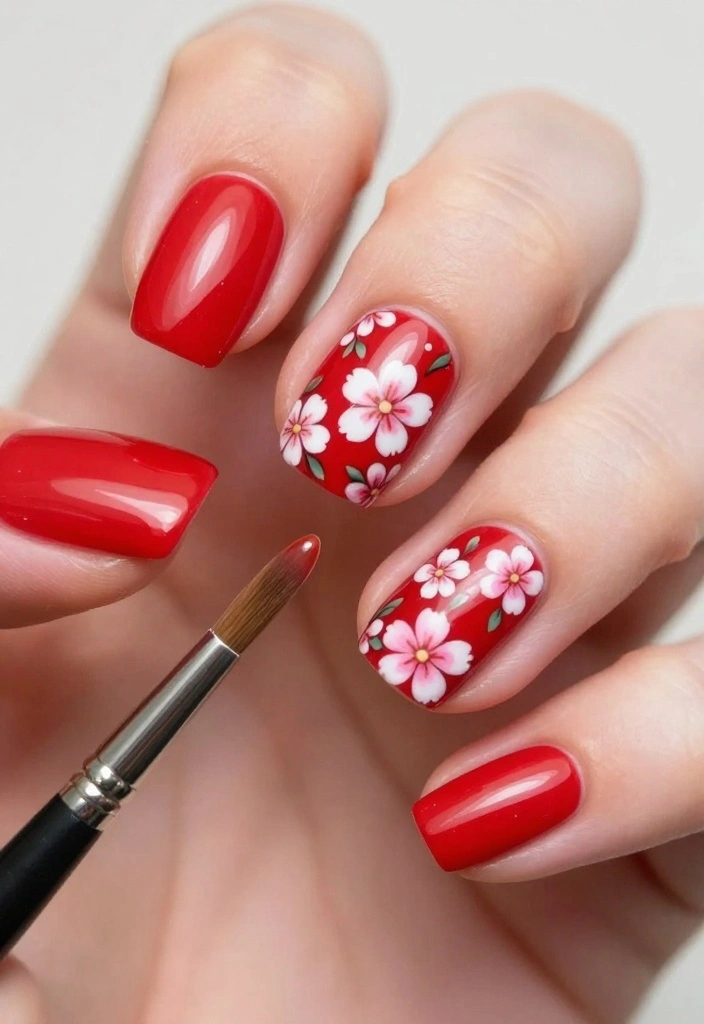
Floral patterns add a fresh and playful touch to your nails, making them a great choice for short red nails. These delicate blooms create a charming aesthetic, especially in spring or summer, giving your look a feminine flair. The bright red background serves as the perfect canvas for tiny flowers in contrasting colors, ensuring they stand out beautifully.
To create this lovely design, use a fine brush or dotting tool to add small flowers in shades like white, pink, or even blue. You can vary the sizes and placements for a whimsical effect, making your nails truly unique.
– Classic red polish (choose your favorite shade)
– White, pink, or blue polish for flowers
– Clear base coat for protection
– Fine brush or dotting tool for details
– Step-by-Step Instructions:
1. Start with a clean, filed nail and apply a base coat.
2. Paint your nails with chosen red polish and let them dry.
3. Add flowers using a fine brush or dotting tool with contrasting colors.
4. Seal your artwork with a top coat for durability.
– Tips:
Use a toothpick for intricate details, and practice on paper before applying to your nails for best results.
Ideal for picnics, garden parties, or casual outings. Swap the red for a pastel base for a softer spring look.
Fun fact: tiny floral details on short nails red can boost perceived nail length by up to 20%. The contrast makes blooms pop, and you can pull this off in just 20 minutes with a fine brush.
4. Geometric Shapes

Geometric nail designs bring a modern and edgy vibe to your short nails. Featuring crisp lines and bold shapes, this style is perfect for anyone wanting a trendy look. Pairing red with contrasting colors like black, white, or gold creates a striking effect that is sure to turn heads.
To achieve this design, use nail tape for clean lines and create various shapes such as triangles or stripes. This playful yet sophisticated style suits any occasion, from professional meetings to casual meet-ups! Each nail can showcase a different geometric design, or you can keep it uniform for a cohesive look.
– Bright red polish (select your favorite shade)
– Black, white, or gold polish for contrast
– Clear base coat to protect your nails
– Nail tape for sharp lines
– Step-by-Step Instructions:
1. Prep your nails with a clear base coat and apply red polish.
2. Once dry, use nail tape to outline your desired geometric shapes.
3. Fill in the taped areas with contrasting colors and allow to dry.
4. Carefully remove the tape and finish with a top coat.
– Tips:
A steady hand is essential, so take your time and use tweezers to place the tape accurately.
Great for office wear, art events, or casual outings. You can easily switch colors to match seasonal vibes or outfits.
💅 Nail Art Made Easy!
Transform your short nails with simple, stylish designs perfect for busy moms on the go.
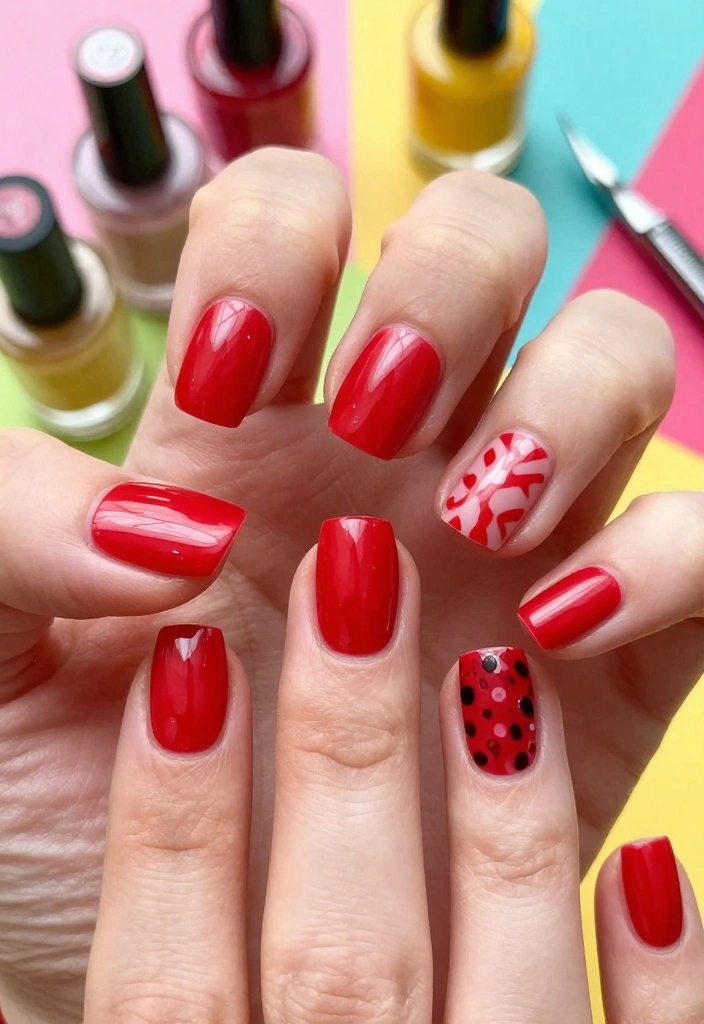
5. Dotted Design
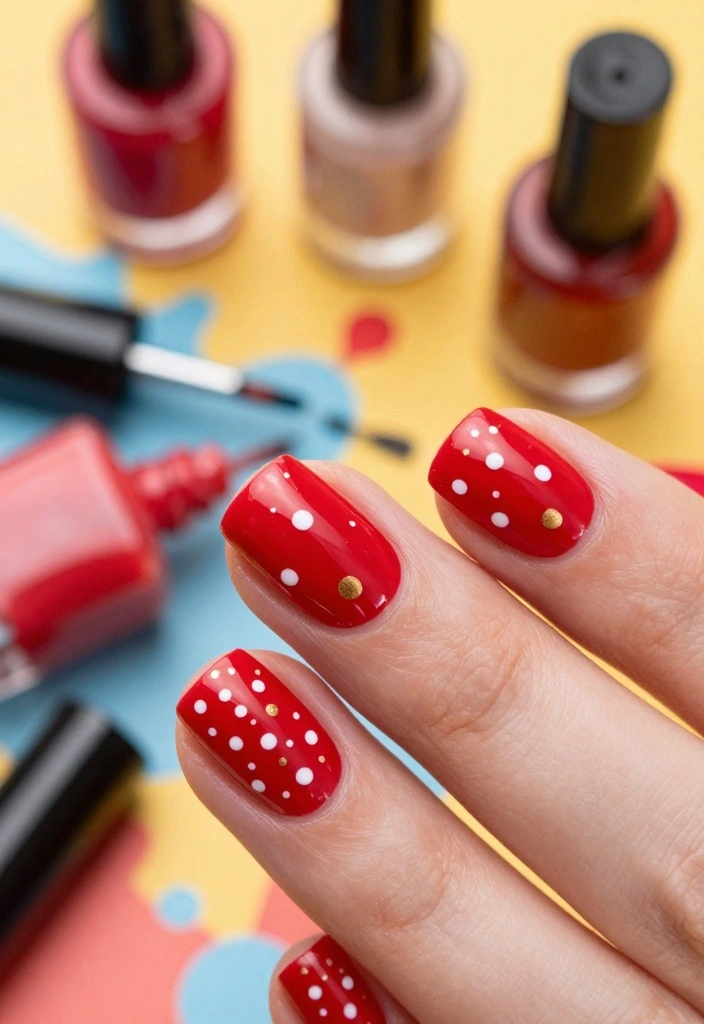
Keep it simple yet stylish with a dotted design that adds a fun twist to your short red nails. This playful look is beginner-friendly and allows for creative expression. Using a dotting tool or even a toothpick, you can create patterns ranging from classic polka dots to intricate designs.
Dots can be placed randomly or in specific patterns, such as lines or curves, and colors like white or gold pop beautifully against the red background! This design is perfect for casual outings or when you want to keep things light and fun.
– Bright red polish (your favorite shade)
– White or gold polish for dots
– Clear base coat for protection
– Dotting tool or toothpick for creating dots
– Step-by-Step Instructions:
1. Start with a red base coat and let it dry.
2. Dip a dotting tool or toothpick in white or gold polish.
3. Create your desired dot pattern across your nails.
4. Seal with a top coat for durability.
– Tips:
Experiment with different dotting tools to find the right one for uniform dots.
Perfect for casual meet-ups, beach days, or when you want a playful look. You can easily change the colors for different seasons or occasions.
6. Matte Red with Glossy Tips

For a chic and edgy style, try a matte red base with glossy tips. This design plays with texture, creating an eye-catching contrast that stands out. The matte finish gives a sophisticated touch, while glossy tips add a playful twist.
To achieve this look, start with a matte red polish and apply a glossy top coat solely on the tips. Tape can help create a defined line separating the matte and glossy areas. This combo is perfect for nightlife or formal events, making it a stylish addition to your nail art collection!
– Matte red polish (find a shade that suits you well)
– Glossy top coat for tips
– Clear base coat for protection
– Tape for clean lines
– Step-by-Step Instructions:
1. Prep nails with a clear base coat and apply two coats of matte red polish.
2. Once dry, use tape to section off the tips of your nails.
3. Apply the glossy top coat to the tips only and let it dry completely.
4. Finish with a top coat over the matte areas for added protection.
– Tips:
Ensure the matte polish is fully dry before applying the glossy coat for the best results.
Ideal for dinner parties, dates, or formal events. You can switch the glossy color for a metallic for a more dramatic effect.
📹 Related Video: Matte Nails with Glossy Tips
7. Color Blocking
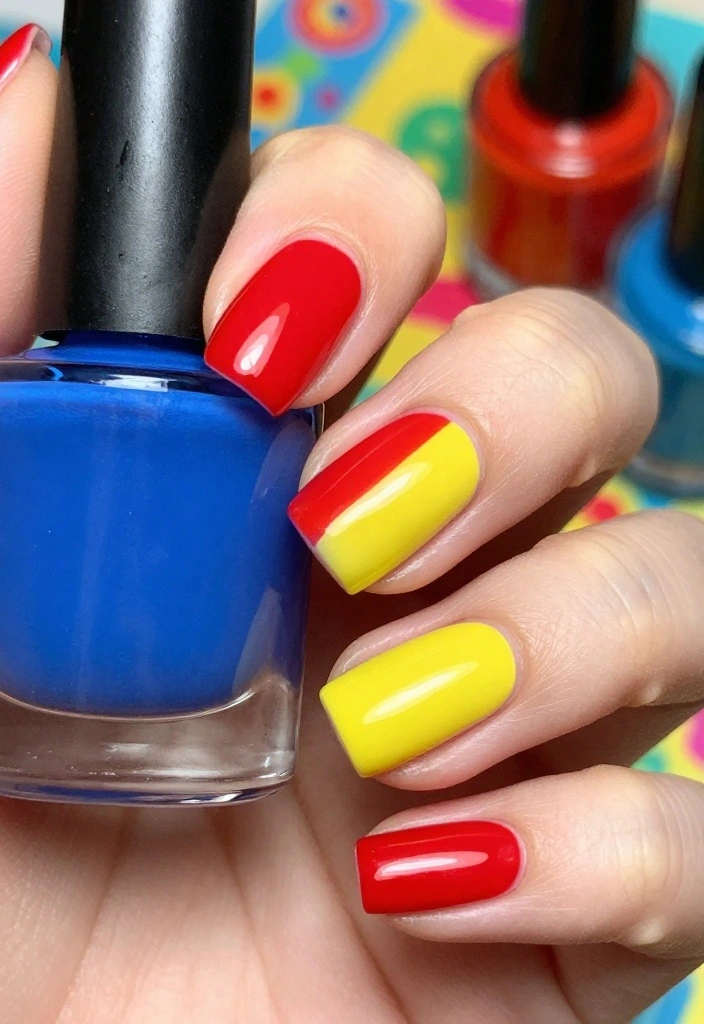
Color blocking is a bold and trendy way to style your short red nails. By pairing red with vibrant shades like blues, greens, or yellows, you can create a striking, visually engaging look. This design is perfect for those who love to express their personality through nail art!
To achieve this effect, use tape to section off different areas of your nails, allowing you to fill in each section with a different color while keeping the lines sharp and clean. The result is a fun and creative design that showcases your adventurous side.
– Bright red polish (your go-to shade)
– Contrasting colors (choose vibrant hues that pop)
– Clear base coat for protection
– Tape for creating sections
– Step-by-Step Instructions:
1. Prep nails with a clear base coat and apply red polish.
2. Use tape to section off parts of your nails for the color block effect.
3. Paint the sections with your chosen contrasting colors and let them dry.
4. Carefully remove the tape and finish with a top coat.
– Tips:
Use a clean brush to smooth out any edges after removing the tape for a polished look.
Perfect for parties, festivals, or any fun outing. You can easily swap colors for seasonal themes or personal preferences.
Color blocking isn’t just bold—it’s budget-friendly chic for short nails red. Pro tip: tape off clean sections, pair red with two other bright hues, and you’ll get a high-impact manicure in minutes. Try it this week and watch your nails stand out.
8. Marble Effect
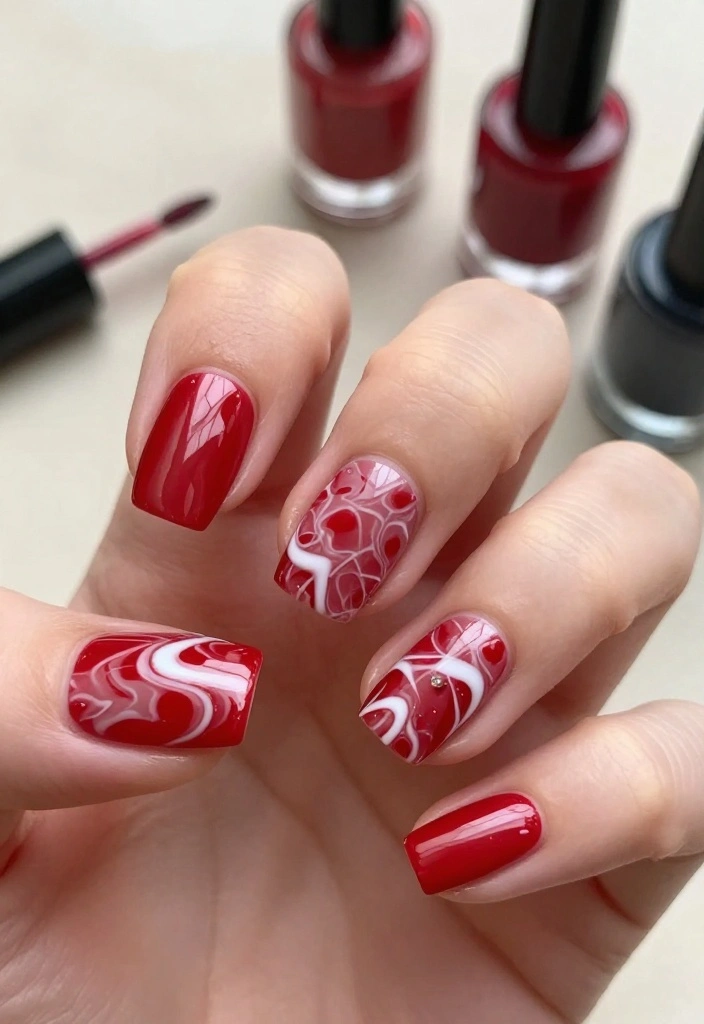
The marble effect offers an elegant choice for those wanting to elevate their nail game with short red nails. This sophisticated design mimics the luxurious look of marble stone, adding a classy touch to any outfit. By blending red with white or black, you can create stunning swirls that resemble real marble.
To achieve this effect, use a dotting tool or small brush to swirl the colors together on wet polish. It may take a bit of practice to perfect the technique, but the stunning outcome is worth the effort! This design works beautifully for special occasions or when you want to feel glamorous.
– Bright red polish (choose a shade you love)
– White or black polish for swirling
– Clear base coat for protection
– Dotting tool or small brush for the marble effect
– Step-by-Step Instructions:
1. Apply a base coat followed by two coats of red polish.
2. On a wet surface, add small dots of white or black polish using a dotting tool.
3. Gently swirl the colors together for a marble effect.
4. Allow to dry and finish with a top coat for shine.
– Tips:
Practice on paper to master the swirling technique before applying it to your nails for the best results.
Ideal for weddings, formal events, or whenever you want to feel extra special. You can easily swap colors for a different take on the marble effect.
9. Ripped Paper Effect
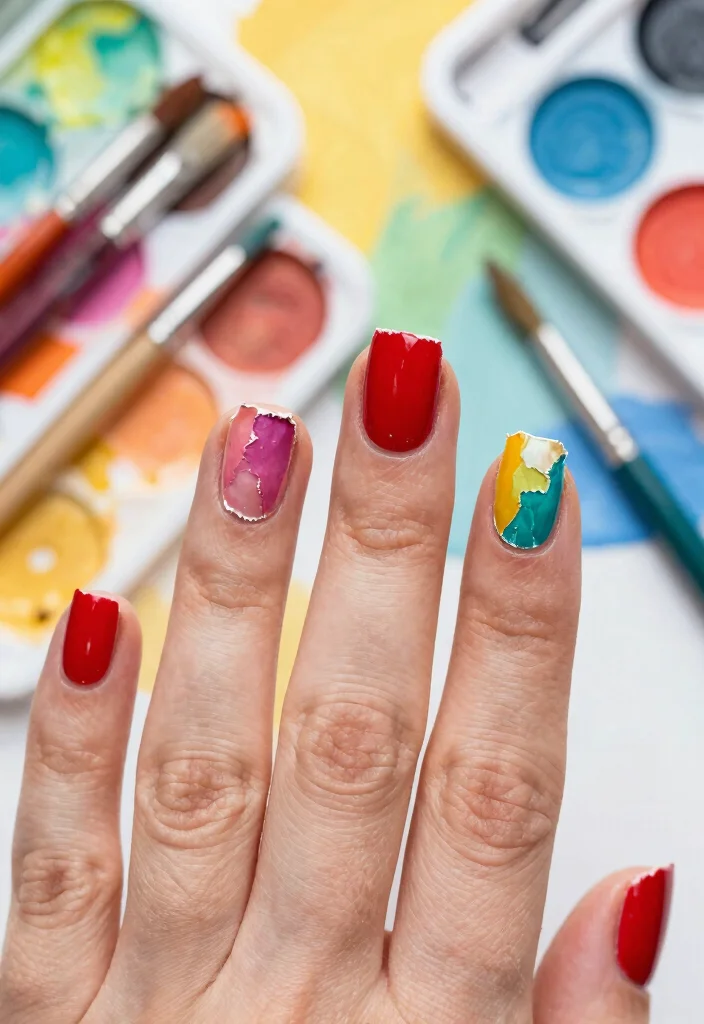
If you enjoy a playful and abstract approach, the ripped paper effect is a quirky option for your short red nails. This design mimics torn paper layered with different textures and colors, giving a fun twist to traditional nail art. Using contrasting colors like white, black, or metallics can create a striking appearance.
To achieve this look, paint your nails with a base coat of red, then use a sponge or brush to apply random patches of other colors. The jagged edges evoke the ripped paper look, adding an artistic flair. This design is perfect for casual outings or when you want to showcase your creative side!
– Bright red polish (your favorite shade)
– Contrasting colors (white, black, or metallics work well)
– Clear base coat for protection
– Sponge or brush for applying patches
– Step-by-Step Instructions:
1. Prep your nails with a clear base coat and apply two coats of red polish.
2. Use a sponge or brush to apply patches of your chosen colors randomly across your nails.
3. Allow to dry and finish with a top coat for protection.
– Tips:
Experiment with different shapes and colors for a unique look, and keep the design playful and free-spirited!
Ideal for casual hangouts, art events, or when you want to express your creativity. You can switch the colors for a fresh twist on the design.
Conclusion
With these 9 unique red nail patterns, you’re now equipped to express your creativity and style through your short nails. Each design offers a different vibe, whether you want something classic, playful, or modern.
Don’t hesitate to mix and match these ideas or even put your twist on them. Nail design is all about having fun and showcasing your personality. So grab your favorite red polish and let your creativity shine!
Frequently Asked Questions
What are the best red nail patterns for short nails?
These red nail patterns are ideal for short nails red and help elongate the fingers while staying balanced. Try these ideas:
1) Negative-space red: leave a small nude crescent near the cuticle and fill the rest with bold red for a modern, lengthening look.
2) Thin diagonal tips: red on most of the nail with a slim nude or black diagonal tip to add interest without crowding the nail bed.
3) Subtle dot or line accents: a tiny white dot near the cuticle or a single vertical stripe down the center on one nail for a clean, chic vibe.
4) Accent nail with red glitter: keep the other nails solid red and use glitter red on one nail for unique styles with minimal bulk.
5) Matte red with a glossy edge: use a matte red base and add a glossy smile line for contrast. For durability, choose high-pigment short nails red shades and seal with a strong top coat.
How can I make bold red nails stand out on short nails without looking bulky?
Bold red can really pop on short nails if you keep the rest simple and polished. Start with a true short nails red shade and use clean lines for impact. Try: a glossy red base with a slim nude diagonal tip, a single accent nail featuring a tiny red nail pattern like a dot or stripe, or a crisp red matte finish with one shiny edge. Finish with a strong top coat to maximize longevity and keep edges neat for a sleek, elongated look.
Which red nail patterns are quickest to DIY for busy days?
Keep it simple and gorgeous. Quick red nail patterns include: solid red nails with a high-gloss finish, an accent nail with a small red nail pattern (dot or stripe), a diagonal stripe created with striping tape, a negative-space crescent at the base with red on the rest, or a matte red base with one glossy detail. These ideas fit into a busy schedule and still read as red nail patterns that stand out on short nails red.
What tools are essential to create unique styles on short nails with red polish?
To achieve unique styles on short nails with red polish, stock up on these essentials: a good base coat and top coat, striping tape for clean lines, a fine nail art brush or dotting tool for tiny details, a stamping plate if you want intricate patterns, and a clean-up brush with nail polish remover for precise edges. With these, you can experiment with red nail patterns that look effortless and chic on small nails.
How can I care for short nails to make red nail patterns last longer?
Prep your nails like a pro: push back cuticles, lightly buff the surface, and apply a nourishing base coat. Choose high-pigment short nails red polishes and apply in thin, even layers with a quick-dry top coat. Reapply the top coat every 2–3 days to prevent chipping, and avoid harsh acetone-heavy removers. A proper seal ensures your red nail patterns stay vibrant and intact for longer.
Related Topics
short nails red
red nail patterns
unique styles
nail design
trendy manicures
easy nail art
beginner friendly
minimalist design
seasonal nails
vibrant colors
quick nail ideas
fashion nails
I love all the nail patterns you shared! Red is my go-to color, and I can’t wait to try the polka dots. Which one do you think is the easiest for a beginner?
These patterns are so cute! I tried doing nail art once, but I ended up looking like I painted my nails while riding a roller coaster. Maybe I should stick to solid colors for now!
Did you know that red nails have been popular since the 1920s? It’s amazing how a color can stay trendy for so long!