Nail art is not just a trend; it’s a form of self-expression that allows you to showcase your creativity and personality. This season, my obsession has turned towards the fiery allure of fire nails. If you’re anything like me and love to dazzle your friends with stunning nail designs, this post is for you. I’ve gathered a list of ten hot fire nail designs that are sure to turn heads and prompt the inevitable question: “How did you do that?!”
Whether you’re gearing up for a special event or seeking everyday flair, these trendy nails will help you make a statement. From classic flame patterns to modern minimalist styles, you’ll find nail art ideas that suit any vibe. I’ve included designs that are bold, fun, and perfect for anyone wanting to light up their nail game. Get ready to feel inspired and take your nail art to new heights!
Key Takeaways
– Discover 10 unique fire nails designs, from classic flames to modern minimalist styles.
– Each design is curated for its creativity and ability to impress your friends.
– Learn about the materials and techniques needed for each nail design.
– Gain tips on customizing these designs to match your personality and style.
– Get inspired to experiment with nail art, making every day a chance to show off your creativity.
Contents
- 1. Classic Flame Design
- 2. Ombre Flame Effect
- 3. Glitter Fire Nails
- 4. Minimalist Fire Nail Art
- 5. Flame Nail Tips
- 6. Fire and Ice Combo Nails
- 7. 3D Flame Art
- 8. Fire Nail Wraps
- 9. Abstract Fire Nail Art
- 10. Fire Gradient Nails
1. Classic Flame Design
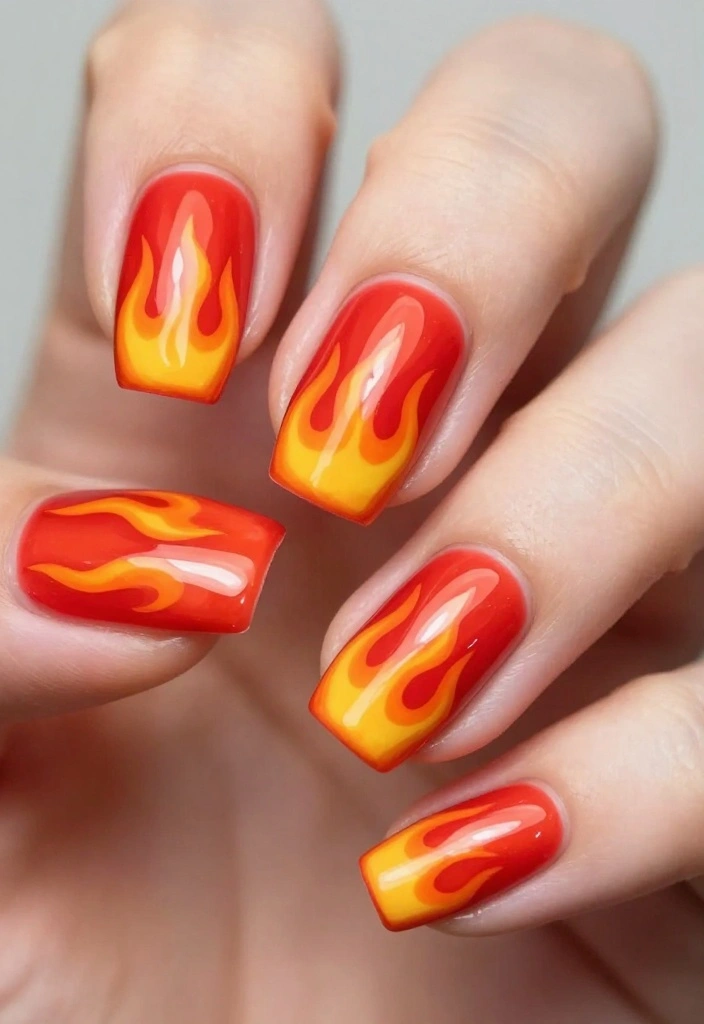
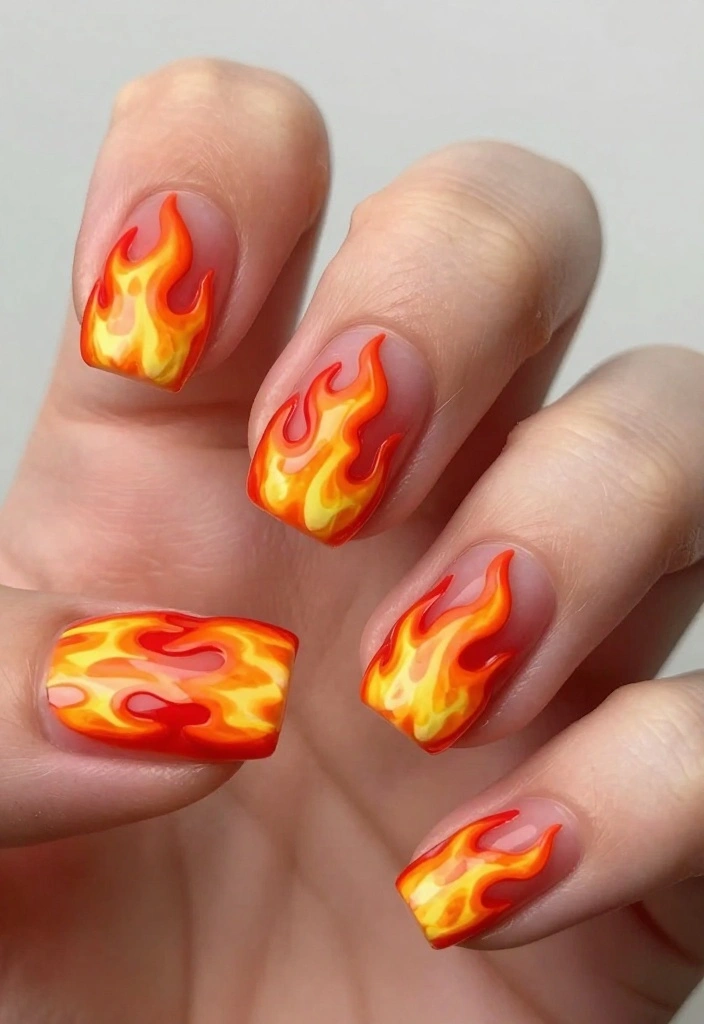
The classic flame design is an absolute must-have for nail art fans. It features a captivating mix of red, orange, and yellow that beautifully imitates real flames. This vibrant combination not only draws attention but also adapts well to both short and long nails, making it a versatile choice for any nail art lover.
To create this look, begin with a bright red base coat. Then, using a fine brush, paint flame shapes with orange and yellow polish, allowing the colors to blend for a smooth finish. For an extra touch, add a layer of glitter topcoat for that glowing effect. Remember to apply a sturdy top coat to keep your design intact for longer.
– Base Color: Bright Red
– Flame Colors: Orange, Yellow
– Tools Needed: Nail brush, dotting tool, top coat
– Tips: Blend colors gently, use a light hand for precision.
2. Ombre Flame Effect
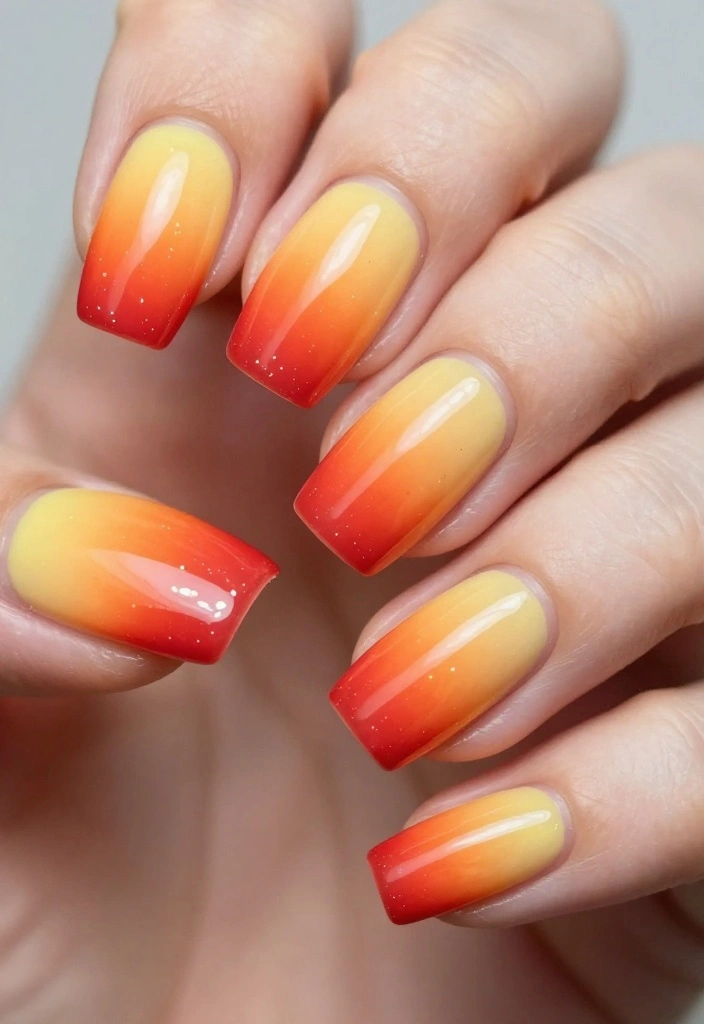
For a fresh take on fire nails, the ombre flame effect is an excellent choice! This style showcases stunning gradient transitions combined with fiery hues, creating a soft yet eye-catching look. Start with a nude or pale yellow base, and blend vibrant reds and oranges using a makeup sponge for a smoky, ember-like appearance.
To enhance this design, consider adding small metallic flecks that catch the light. The ombre effect is not only visually appealing but also complements a variety of skin tones, making it a popular choice for anyone looking to make a statement.
– Base Color: Nude or Pale Yellow
– Flame Colors: Gradient of Red and Orange
– Technique: Sponging for smooth transitions
– Add-ons: Gold or metallic flecks for accent.
Ombre flame nails are a quiet showstopper: start with a nude base and blend fiery reds and oranges with a makeup sponge for a smoky ember look. Add tiny metallic flecks to catch the light, and finish with a glossy top coat for lasting impact.
3. Glitter Fire Nails
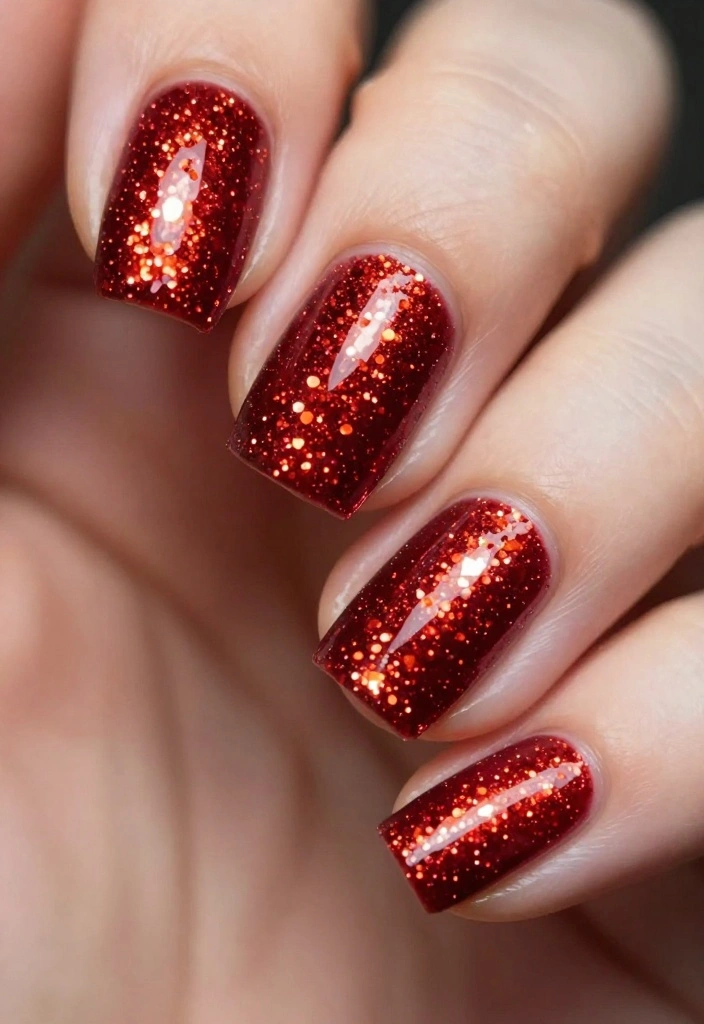
If you crave some sparkle, glitter fire nails are the perfect fit! This design merges the fierce hues of fire with dazzling glitter, making your nails shine brightly. Start with a solid base of red or orange, then apply glitter polish while the base is still wet to ensure it sticks well. To add dimension, place larger glitter pieces at the tips for a flame-like effect.
This design is ideal for parties or special occasions where you want your nails to steal the show. Just remember to seal your look with a thick top coat to prevent chipping and keep your glitter in check.
– Base Color: Red or Orange
– Glitter Type: Fine and chunky glitter
– Top Coat: Gel formula recommended for durability
– Occasions: Great for parties or festive events.
❝ Fun fact: Glitter fire nails shine brighter when you apply glitter while the red or orange base is still wet, and sealing with top coat boosts wear by up to 5 days. Pro tip: place larger glitter at the tips for a flame-like glow. ❞
4. Minimalist Fire Nail Art
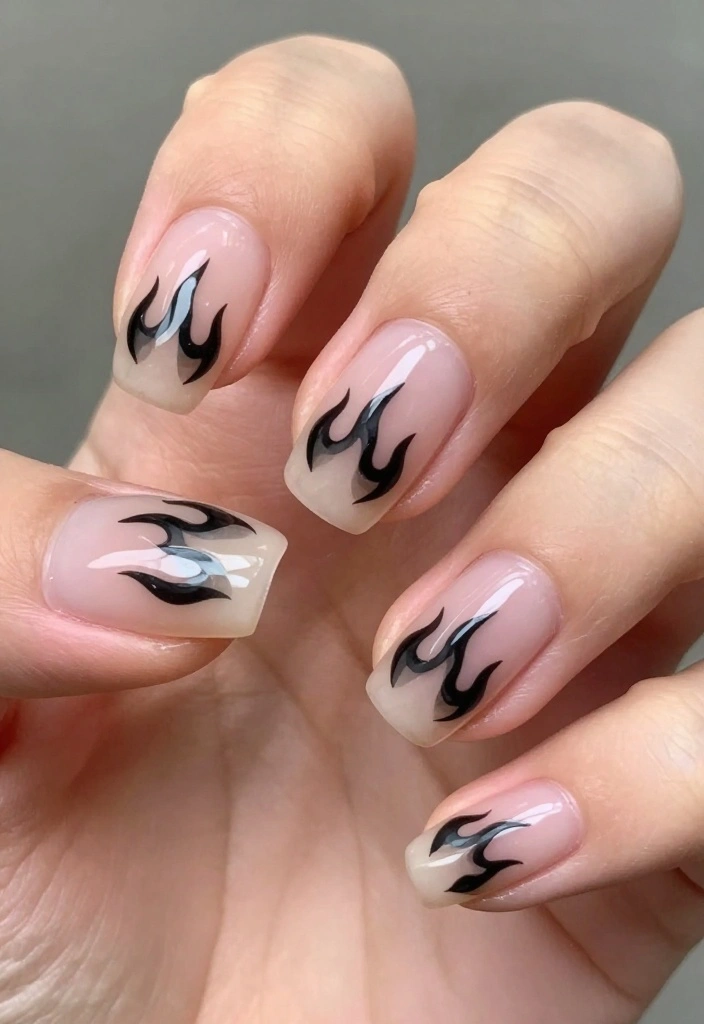
If a subtle look is more your style, minimalist fire nail art is perfect for you. This design uses simple flame outlines in thin lines, making it chic and suitable for any setting. Begin with a clean base and sketch flame shapes using a fine nail art brush in black or dark red polish.
This understated design allows a hint of personality without being overwhelming. Finish with a glossy top coat to enhance its polished look. Minimalist fire nails are versatile, working beautifully for casual outings or office environments.
– Base Color: Clear or Naked Polish
– Flame Color: Black or Dark Red
– Style: Simple outlines for a minimalist effect
– Occasions: Everyday wear, office-friendly.
📹 Related Video: Flame Nail Design Tutorial | EASY Design! | Holliebedsbeauty
💅 Nail Art Made Easy!
Transform your nails with stunning designs using our easy DIY guide perfect for busy moms on the go!
5. Flame Nail Tips
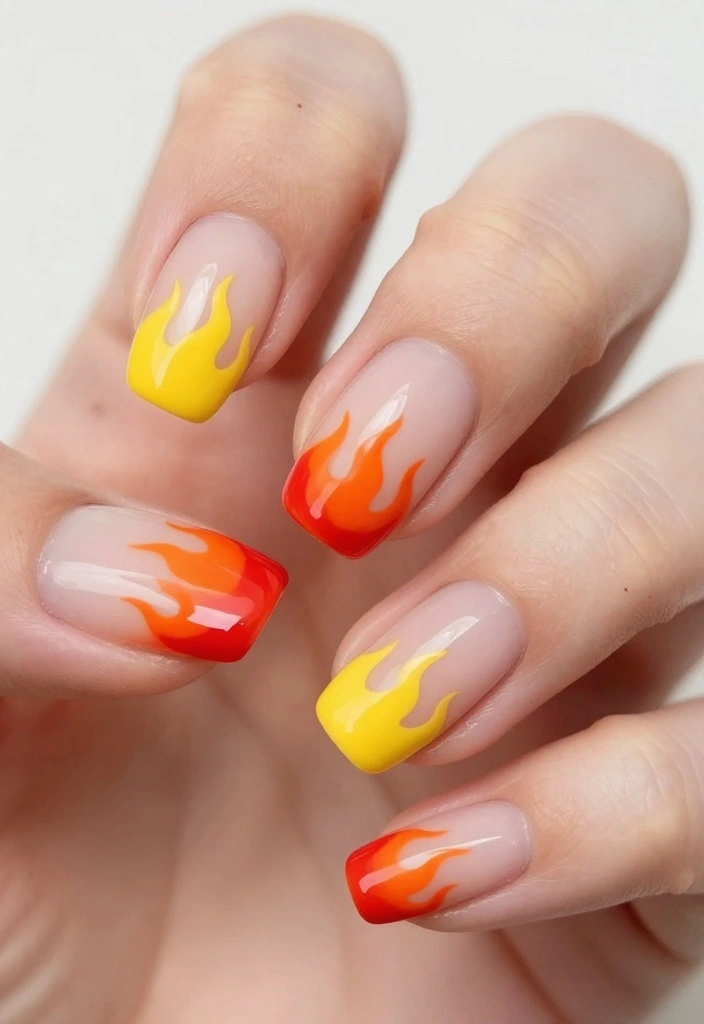
Flame nail tips are trending this season, blending two fabulous nail art trends! This design focuses on applying vibrant flames only at the tips, offering a chic yet bold appearance. Start with a nude or light pink base and paint flames in vivid colors at the tips using a nail brush.
This playful twist adds freshness to a classic manicure. To keep your flame tips sharp and clean, use tape for precise lines. It’s a fun way to experiment with colors without fully committing to a detailed design.
– Base Color: Nude or Light Pink
– Flame Colors: Bright Red, Orange, and Yellow for the tips
– Technique: Tape for clean lines and edges
– Style: Perfect for a trendy, playful look.
Fun fact: Flame nails can be designed in under 15 minutes. Use a nude base, tape for crisp lines, and vibrant flame colors at the tips.
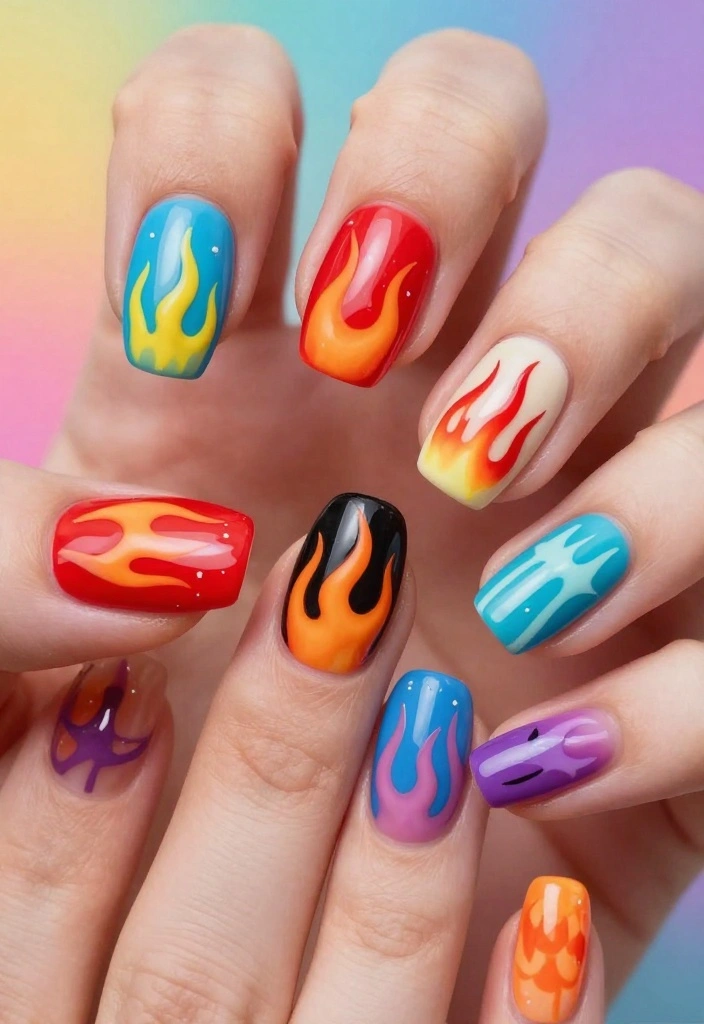
6. Fire and Ice Combo Nails
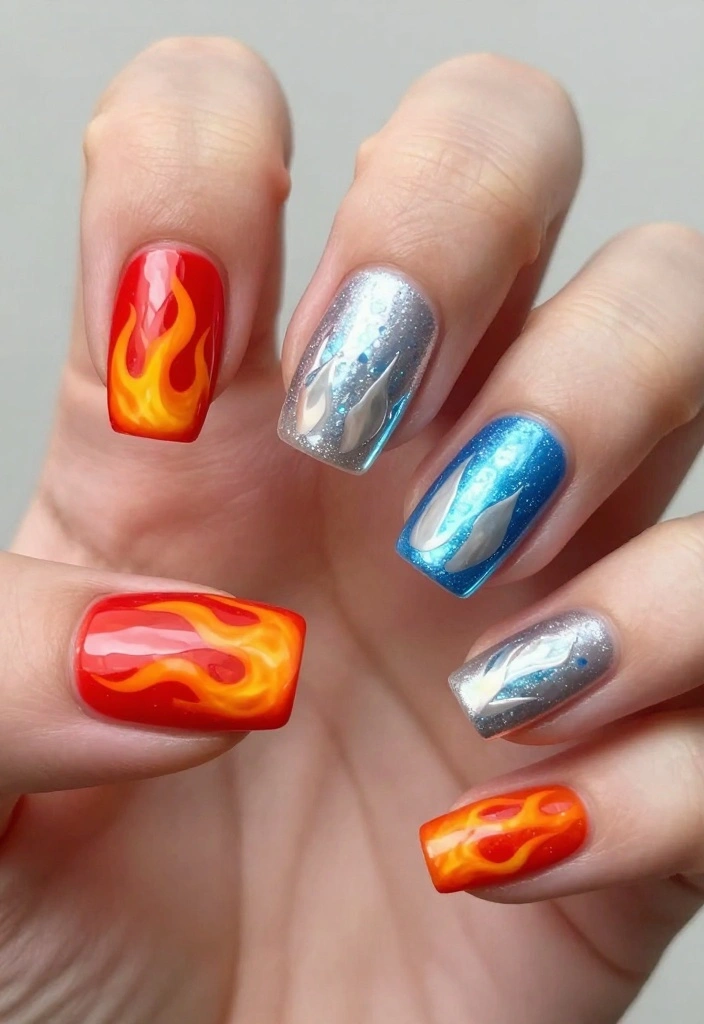
For a unique statement, the fire and ice combo nails blend warm and cool elements beautifully. This design features one hand adorned with fiery reds and oranges, while the other showcases icy blues or shimmering silvers. It creates a striking visual contrast that stands out.
To amplify your look, add a shimmering topcoat to the icy nails and a glossy finish to the fiery ones. This daring choice is perfect for those who enjoy showcasing their bold style and love to stand out from the crowd.
– Fire Colors: Red and Orange for one hand
– Ice Colors: Icy Blue and Silver for the other
– Top Coat: Glossy for fiery nails, shimmering for icy nails
– Style: Great for those who love contrast.
How To Choose the Right Fire Nails Design
Choosing the perfect fire nails design can be a fun yet challenging task. With so many styles and options available, you want to make sure you pick something that reflects your personality and stands out. Here are some key criteria to help you select the best fire nails design for you:
1. Style Preference
First, think about your personal style. Do you prefer bold and dramatic looks, or are you more into minimalist designs? Fire nails can range from intricate flame patterns to simple tips that just hint at the concept. Consider what resonates with you before making a decision.
2. Occasion
Next, consider where you plan to wear your fire nails. Are you preparing for a casual outing, a formal event, or perhaps a festival? For a casual look, you might opt for a minimalist fire design. For special occasions, a glittery or 3D flame nail art can create a complete showstopper. Tailoring your design to the occasion ensures you shine appropriately.
3. Nail Length and Shape
The length and shape of your nails play a significant role in how your fire nails design will look. Long, almond-shaped nails can showcase a dramatic flame design beautifully, while shorter, square nails might benefit from a more straightforward approach. If you’re unsure, consult with a nail technician for advice on what suits your natural nail shape the best.
4. Color Choices
Color is critical in fire nails designs. Traditional flames incorporate reds, oranges, and yellows, but you can explore beyond that. Consider adding glitters or holographic elements to make your design pop. Alternatively, you might choose cooler tones like blues and purples for a unique twist on the fire theme. Choose colors that complement your skin tone and wardrobe.
5. Skill Level for Application
Think about whether you will do your nails yourself or go to a salon. If you’re attempting to create fire nails at home, choose a design that matches your skill level. Some designs, like ombre flames or glitter fire nails, may require practice or specific tools. If you prefer a more complex design, consider visiting a professional who can bring your vision to life.
6. Maintenance
Lastly, consider how much maintenance you’re willing to invest in your fire nails. Glitter and 3D designs often require more upkeep than solid colors or simple patterns. If you lead a busy lifestyle, you might prefer a design that looks great even as it grows out or wears down. Discuss your options with your nail technician to find a design that fits your lifestyle.
Pro Tip: Before finalizing your design, look at social media platforms like Instagram or Pinterest for inspiration. You can find endless fire nails ideas that can help you visualize different styles and combinations, ensuring your final choice is completely you!
7. 3D Flame Art
Elevate your fire nails with stunning 3D flame art! This design adds a literal twist to the flame concept by incorporating dimension using acrylic or gel materials. Begin with a solid base color, then sculpt flame shapes with colored acrylic or gel to create raised effects that truly stand out.
This creative approach guarantees that your nails become a conversation starter. Keep in mind that 3D nails require extra care, so always finish with a strong top coat to protect your artistic creation.
– Base Color: Any solid color works
– Material: Colored acrylic or gel for 3D elements
– Technique: Building up layers for dimension
– Occasions: Perfect for special events or parties.
8. Fire Nail Wraps
For those who love nail art without the time commitment, fire nail wraps are a fantastic solution! These pre-designed stickers feature amazing flame patterns that are easy to apply. Simply choose your favorite design, peel it off, and place it on your nails, finishing with a clear top coat for durability.
Nail wraps come in various styles, making it simple to change your look without the hassle of painting. They are especially great for beginners or anyone looking for an efficient way to achieve stunning nails.
– Product: Fire-themed nail wraps
– Application: Peel, stick, and top coat
– Duration: Lasts up to two weeks
– Great for: Beginners or those short on time.
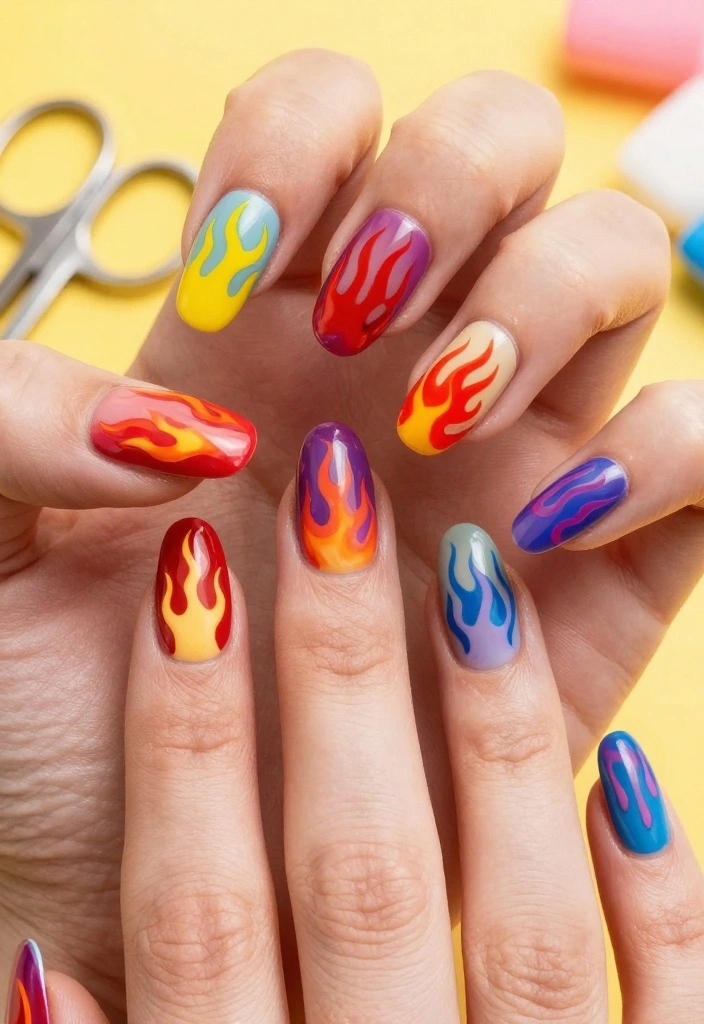
9. Abstract Fire Nail Art
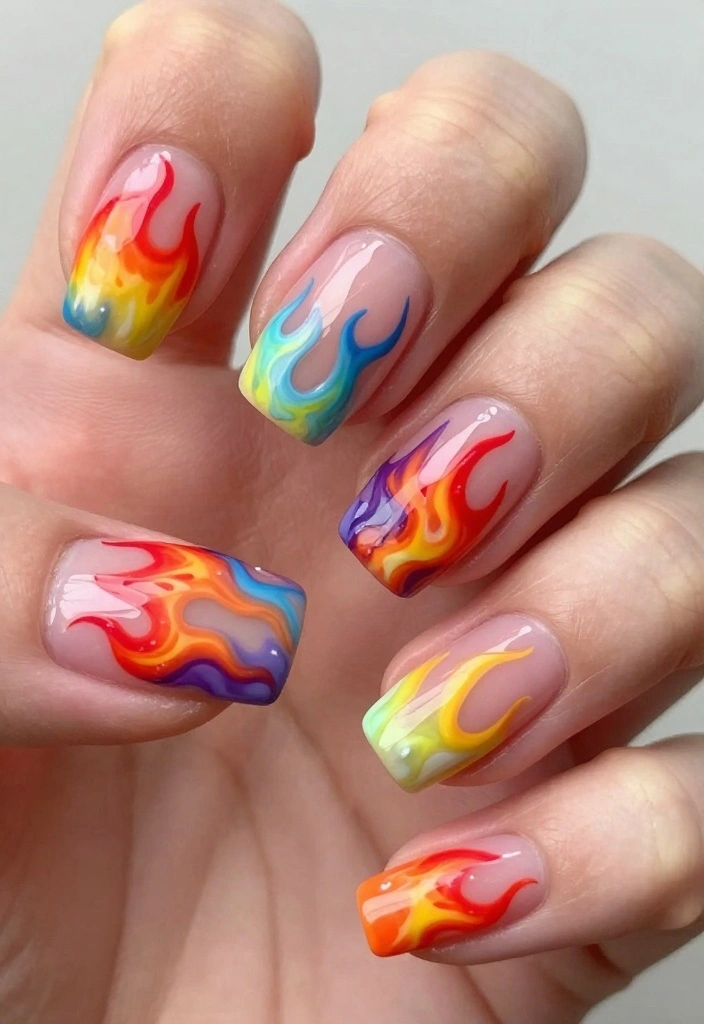
Abstract fire nail art is perfect for creative individuals wanting to express their artistic flair. This design uses a mix of colors, shapes, and patterns to represent flames in a unique way. Start with a nude or clear base, and combine colors like red, orange, black, and hints of gold to craft abstract flame patterns.
You can experiment with sponging, brush strokes, or even nail tape for various effects. This style invites creativity, allowing you to let your imagination run wild. It’s not just nail art; it’s a true masterpiece on your fingertips!
– Base Color: Nude or clear
– Colors Used: Red, Orange, Black, Gold
– Techniques: Sponging, brush strokes, or tape
– Style: Great for creative expressions.
10. Fire Gradient Nails
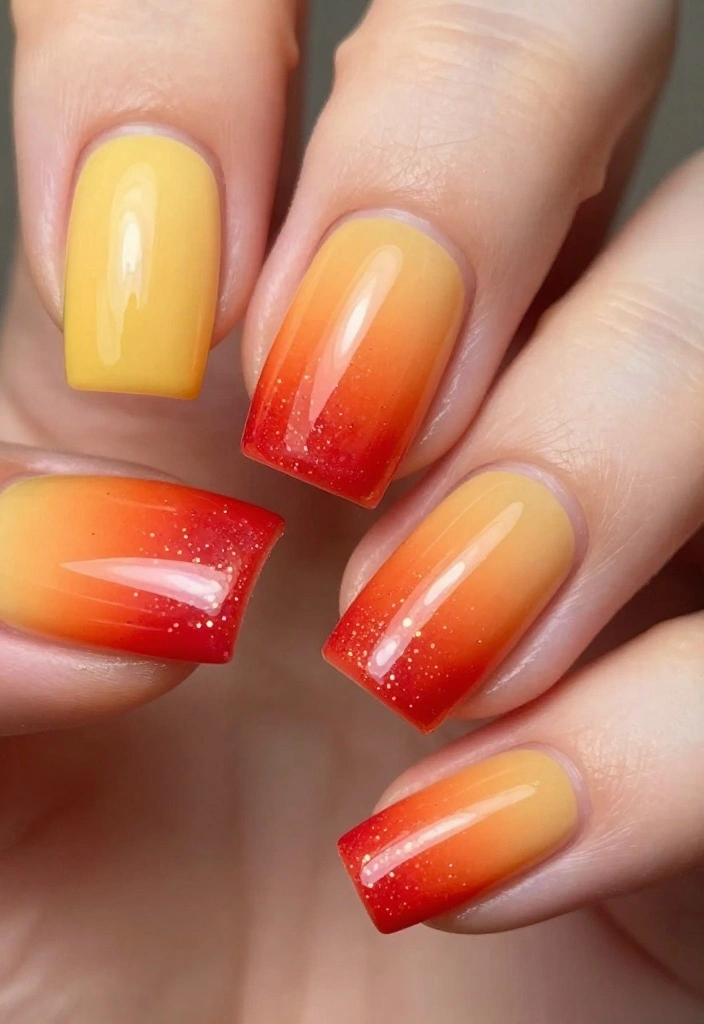
Fire gradient nails offer a fabulous way to blend multiple fiery colors into a stunning ombre effect! Start with a lighter base coat and gradually transition into darker, vibrant shades like red and orange at the tips. Use a sponge to seamlessly blend the colors for a smooth gradient.
This design looks especially breathtaking with added glitter at the tips, enhancing the fiery vibe. Fire gradient nails are an excellent choice for those seeking a show-stopping manicure that transitions beautifully from day to night.
– Base Color: Light Yellow or Nude
– Gradient Colors: Red to Orange
– Technique: Sponge for blending
– Additions: Glitter on tips for extra glam.
Conclusion
Fire nails are all about creativity, expression, and, of course, fun! With these ten fiery designs, there’s something for everyone, whether you prefer bold statements or subtle elegance. Nail art is a fantastic way to showcase your personality and style.
So go ahead, try out these designs, and watch your friends marvel at your nail expertise. Who knows? You might just ignite a new trend in your circle!
Frequently Asked Questions
What exactly are fire nails and why are they a fashion statement?
Fire nails are nail art designs inspired by flames, using bold reds, oranges, and yellows with flame silhouettes or molten-metal accents.
They are a fashion statement because the high-contrast colors and dramatic flame shapes draw attention and pair with nail designs that trend in fashion. Whether you wear them short or long, a clever flame gradient and glossy top coat can look striking in person and in photos.
This look centers on fire nails that you can customize from subtle embers to full-on wildfire drama.
How can I recreate the fire nails look at home?
Prep your nails by shaping and pushing back cuticles, then apply a clear base coat.
Paint a base color close to your flame palette, or use a nude base.
Create the flames with a fine brush in red, orange, and yellow, letting colors blend. You can also use stamping plates, stencils, or foil for cleaner flame shapes.
Finish with a glossy top coat and cure if you are using gel polish. You will have trendy nails you can show off in minutes.
What nail shapes and color palettes work best with fire nails?
Choose shapes that show the flames clearly, like almond or coffin shapes, and go long enough to let the design breathe.
Favorite palettes include bold reds, bright oranges, and sunny yellows, with optional black or metallic accents for contrast. Keep the flame colors layered so they look like real fire, and pair with neutral bases to make the design pop as fire nails.
What tools and products do I need to achieve fire nails?
You will want a solid setup: base coat and top coat, your choice of red, orange, and yellow polishes or gels, a fine nail-art brush, a detailing brush for flames, and optional stamping plates or flame stencils.
Add nail foil or metallic accents if you like, plus a UV/LED lamp for gel systems.
Do not forget cleanup brushes, acetone, and a good cuticle oil for finishing touches on nail designs.
How long do fire nails designs last and how can I care for them to stay flawless?
With gel or hard-wearing polish, you can expect about 2-3 weeks of wear when properly applied.
For longevity, prep nails well, seal the edges, and re-apply top coat every 3-4 days. Wear gloves for cleaning and avoid harsh chemicals when possible. Moisturize cuticles daily to keep your trendy nails looking fresh as the days go by.
Related Topics
fire nails
nail art
trendy nails
bold designs
celebrity inspiration
easy tutorials
seasonal nail trends
party ready
beginner friendly
nail design techniques
colorful nails
graphic nail art
I love these nail designs! I tried the ombre effect last week and my friends couldn’t believe I did it myself. What’s your favorite design to try out?
These nail ideas are fire! Speaking of fire, I once tried to do a gradient and ended up looking like I dipped my fingers in a paint can! 😂
Did you know that nail art dates back thousands of years? Ancient Egyptians used to use henna to decorate their nails! How cool is that?