Are you tired of the same old nail designs and looking for something fresh? This desire for change sparked the idea for this post! With the rise of at-home care and DIY projects, there’s never been a better time to unleash your creativity right at your fingertips. Whether you’re a nail art newbie or a seasoned pro, these DIY nails will give you a chance to play and express your style without needing a trip to the salon.
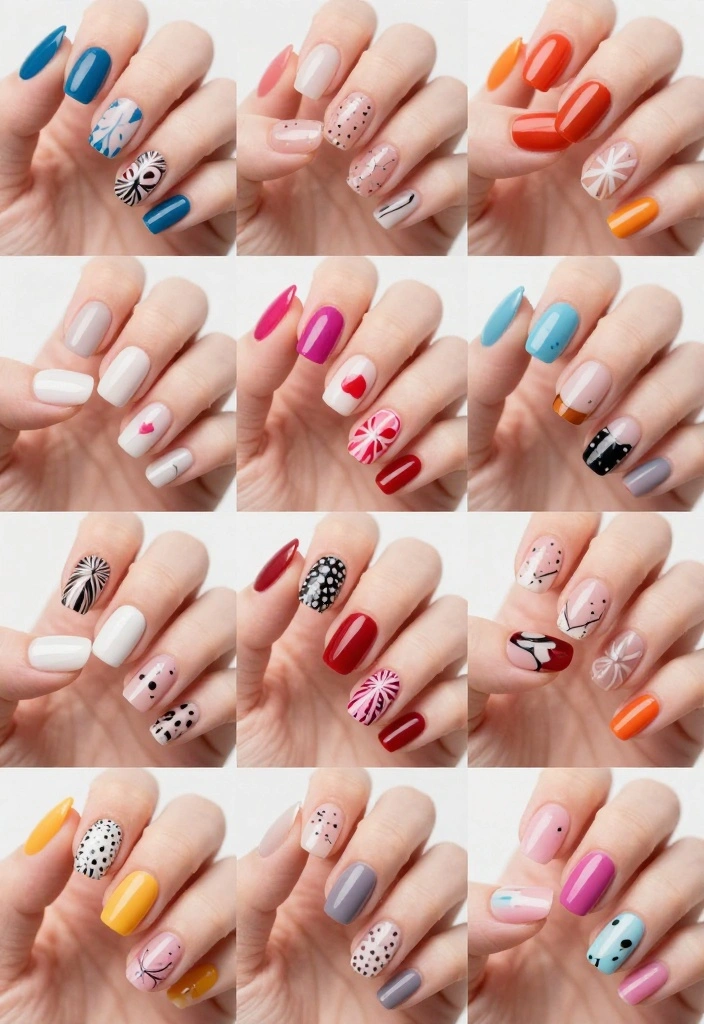
This guide is for anyone who loves fashion and wants to elevate their nail game. If you care about nail health while having fun with colors and designs, you’re in the right place! I’ve compiled 12 inspiring DIY nail ideas that are chic, easy to follow, and sure to impress. You’ll discover how to create stunning looks like ombre nails and floral patterns, along with essential tips for maintaining your nails’ health. Get ready to transform your nails and showcase your personality with each design!
Key Takeaways
– Variety of Styles: Explore 12 unique DIY nail ideas that cater to different tastes, from color block chic to glitter galore.
– Nail Health Tips: Learn practical strategies for maintaining nail health while trying out new designs, ensuring your nails look good and feel great.
– At-Home Care: Discover easy techniques for creating salon-quality nails at home, saving you time and money.
– Step-by-Step Guides: Each idea comes with straightforward instructions, making it simple to replicate these stunning looks.
– Creative Expression: These DIY nails allow you to express your individuality and keep your style fresh and current, ensuring your nails are always on point.
Contents
- 1. Color Block Chic
- 2. Ombre Nails
- 3. Floral Fantasy
- 4. Minimalist Lines
- 5. Glitter Galore
- 6. Natural Nail Care
- 7. Marble Effect
- 8. Negative Space Nails
- 9. Statement Nails
- 10. Metallic Shine
- 11. Seasonal Themes
- 12. Nail Stamping
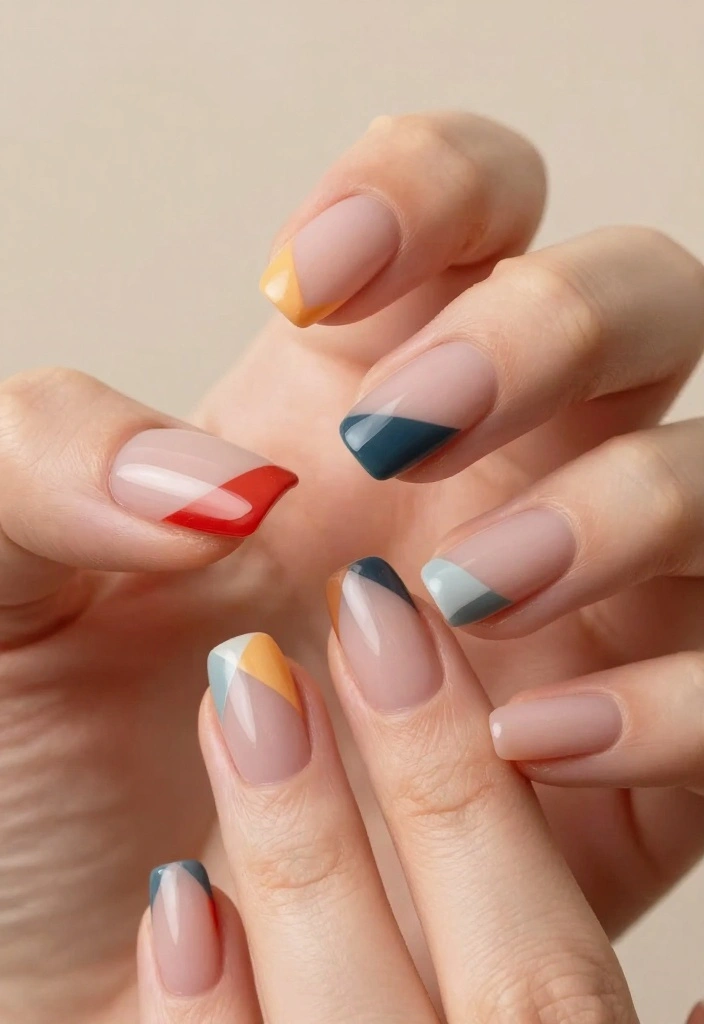
1. Color Block Chic
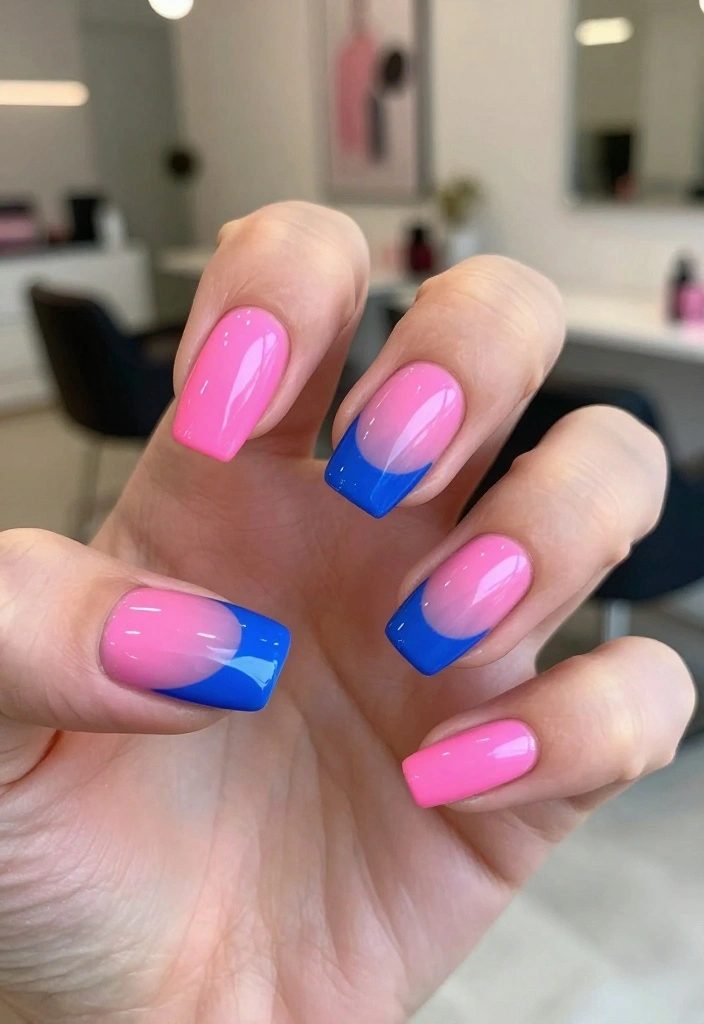
Color block nails are vibrant and playful, perfect for making a statement. By combining two or three bold colors, you create a look that’s eye-catching yet simple to achieve. This style works well for casual outings, parties, or any occasion where you want to express your creativity.
Outfit Pieces:
– Base coat
– Two contrasting nail polishes (e.g., bright pink and teal)
Step-by-Step Instructions:
– Start with clean, dry nails.
– Apply one layer of base coat.
– Paint half of your nails with the first color and allow it to dry completely.
– Use tape to create a clean separation and paint the other half with your second color.
– Carefully remove the tape and finish with a top coat.
Play with different shapes like triangles or stripes for a unique effect. This look is perfect for anyone looking to brighten their day or outfit!
Did you know color block nails can be done in under 15 minutes for your diy nails? Two bold colors, a base coat, and a quick-dry top coat create a bold look that’s easy to pull off at home.
💅 Transform Your Nails Today!
Unlock your creativity with easy DIY nail art techniques designed for busy moms who want beautiful nails.
2. Ombre Nails
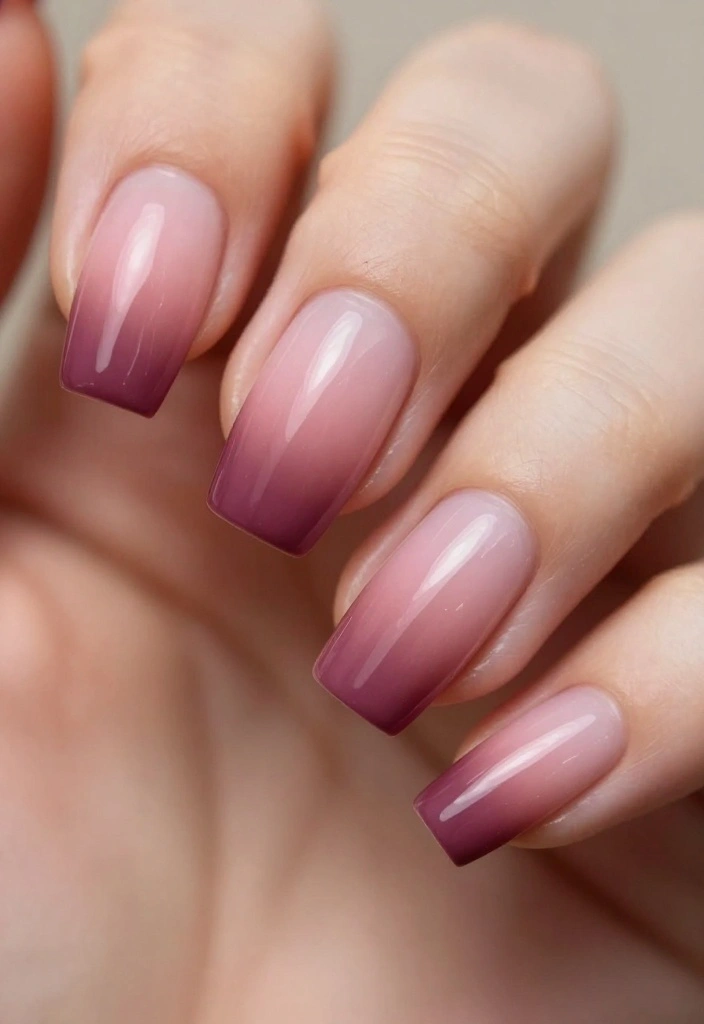
Ombre nails offer a soft, blended look that feels both modern and chic. This design creates a gradient effect by merging two complementary shades, giving your nails a stunning finish. It’s a versatile choice, great for both everyday wear and special occasions.
Outfit Pieces:
– Base coat
– Light nail polish (e.g., pale pink)
– Darker complementary nail polish (e.g., deep rose)
– Makeup sponge
Step-by-Step Instructions:
– Apply a base coat to protect your nails.
– Paint your nails with the lighter polish and let them dry.
– Use a makeup sponge to dab the darker polish onto the tips of your nails, blending it into the base color.
– Finish with a top coat for a glossy look.
Feel free to experiment with different color combinations, and don’t hesitate to add glitter for extra flair. Ombre nails can elevate any outfit!
Fun fact: Ombre nails can be perfected with just 3 dabs per nail, giving a soft gradient in under 10 minutes. diy nails shine when you blend light pink into deep rose with a makeup sponge. It’s chic, versatile, and totally doable at home.
3. Floral Fantasy
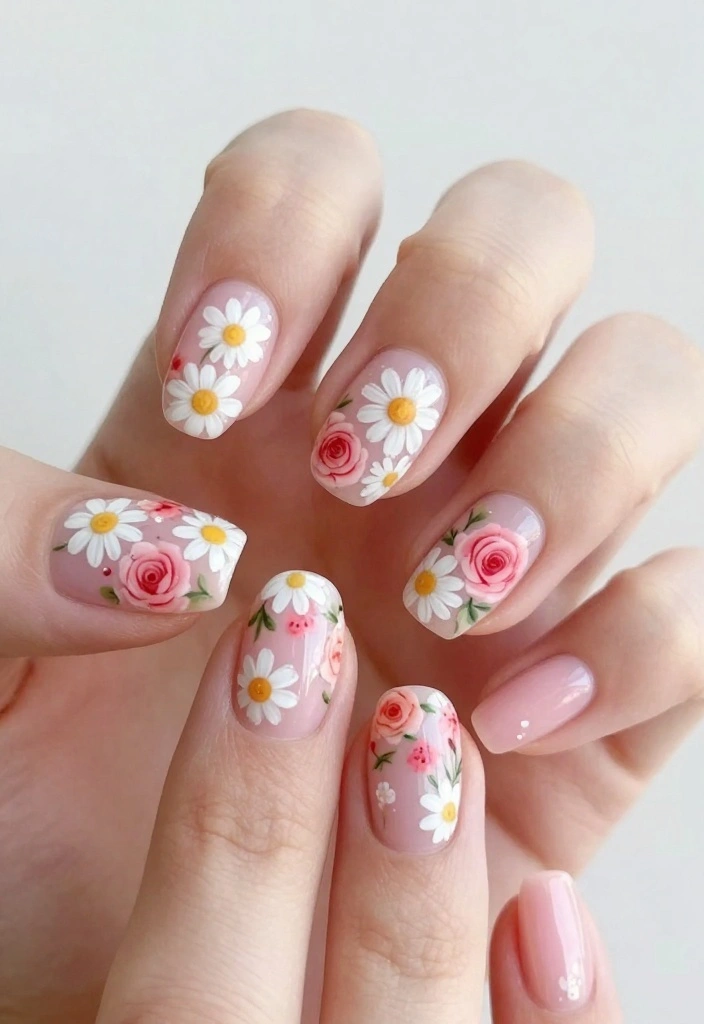
Floral designs on nails bring a delightful touch of whimsy and femininity. By painting delicate flowers over a neutral base, you can create a charming look that stands out. This style is perfect for spring events, garden parties, or whenever you want to add a little sweetness to your appearance.
Outfit Pieces:
– Base coat
– Light nail polish (e.g., soft beige)
– Various colors for floral designs (e.g., pastel pinks, yellows)
Step-by-Step Instructions:
– Start with a clear base coat.
– Apply your light polish and let it dry.
– Use a thin brush to paint flower shapes on your nails.
– Add details like leaves using different colors.
– Seal with a top coat for longevity.
If you make a mistake, don’t worry—just use nail polish remover to fix it. Floral nails are a beautiful choice for any occasion where you want to feel pretty!
📹 Related Video: Easy Purple Flower Nails Art For Beginner 💖Vẽ Hoa💅 New Nails Design 💝 New Nails
4. Minimalist Lines
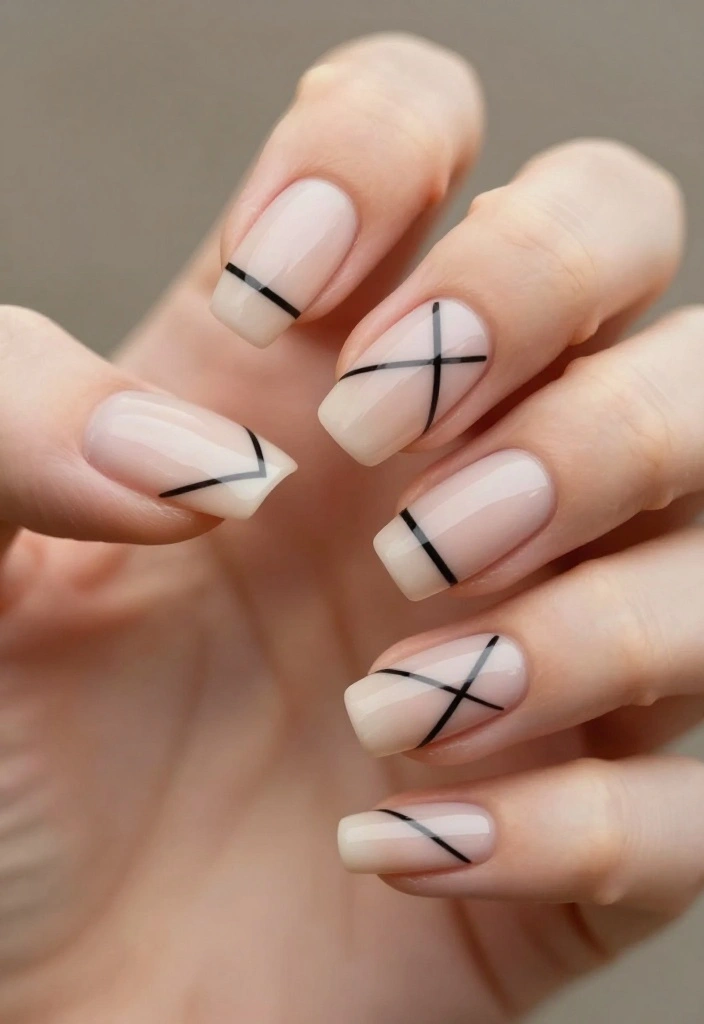
If you prefer a sleek and understated look, minimalist line designs are your go-to. Using clean, geometric lines over a solid base color creates a polished and modern effect. This style is perfect for professional settings or any occasion where you want to exude sophistication.
Outfit Pieces:
– Base coat
– Neutral nail polish (e.g., nude or light gray)
– Striping tape or thin brush
Step-by-Step Instructions:
– Apply a base coat for protection.
– Paint your nails with a neutral color and let it dry.
– Use striping tape to create your desired pattern.
– Paint over the tape with a contrasting color.
– Carefully remove the tape and finish with a top coat.
Mix colors for added interest, and feel free to get creative with your patterns. Minimalist nails are a chic choice for any event!
5. Glitter Galore
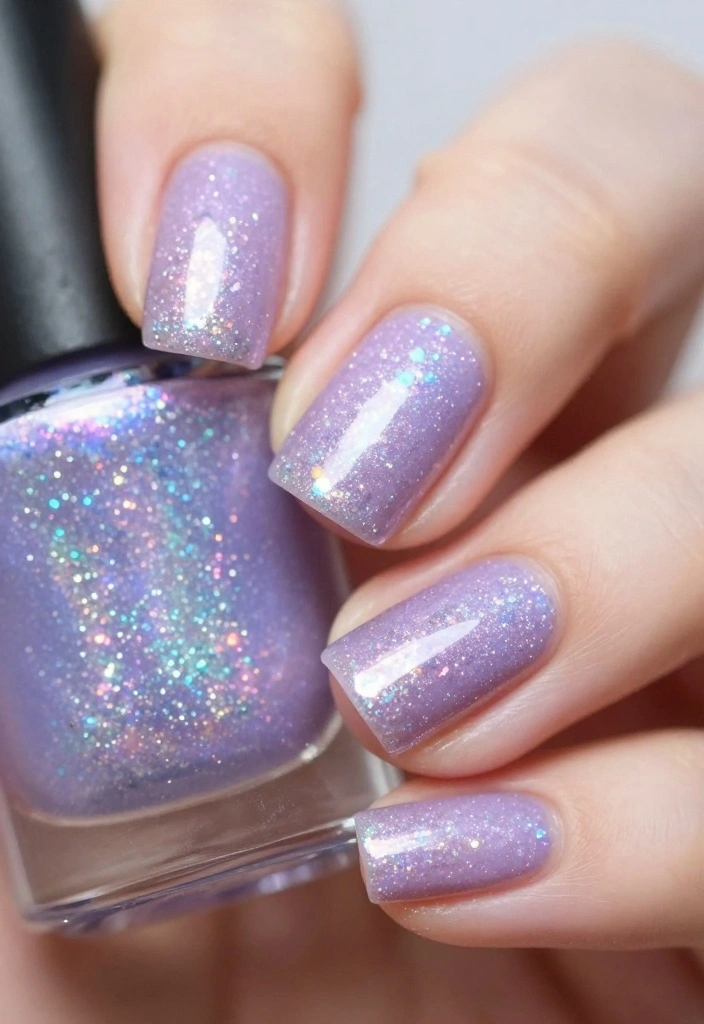
Sparkle is always in style, and glitter nails are the perfect way to add some glam. Start with a solid base color and layer glitter polish on top for a dazzling effect. This design is ideal for parties, celebrations, or whenever you want to shine bright.
Outfit Pieces:
– Base coat
– Solid color nail polish (e.g., classic red)
– Glitter polish (e.g., silver or gold)
Step-by-Step Instructions:
– Apply a base coat to protect your nails.
– Paint your nails with a solid color and let dry.
– Apply glitter polish, focusing on the tips or covering the entire nail.
– Finish with a clear top coat to seal the look.
For a more refined sparkle, apply glitter only to certain nails. Glitter nails can elevate your look for any festive occasion!
6. Natural Nail Care
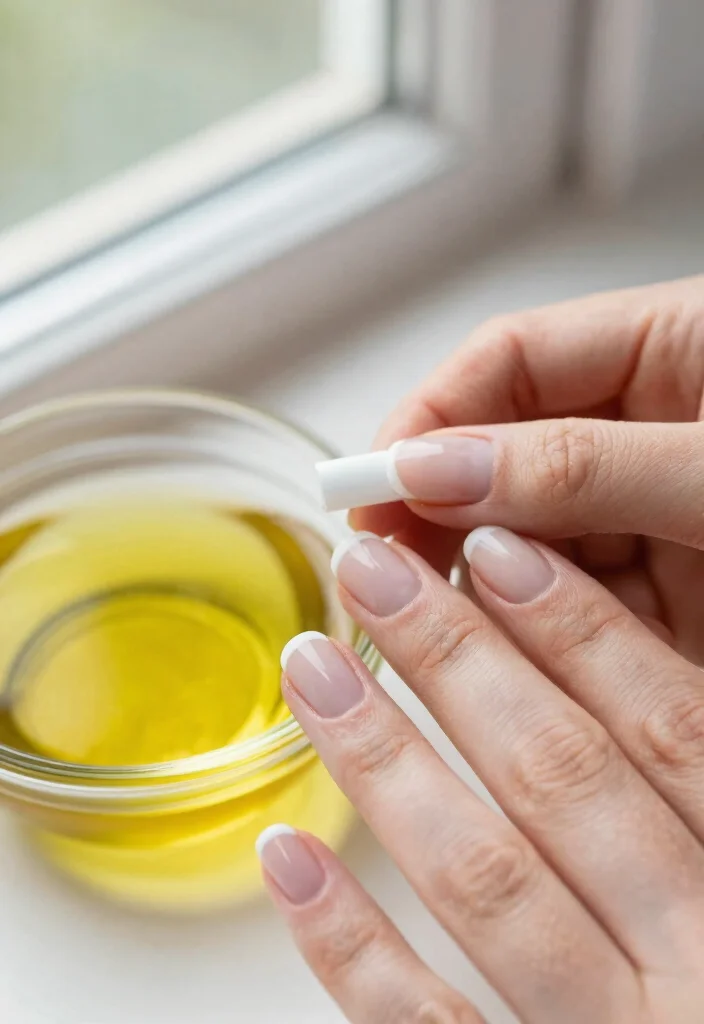
Strong, healthy nails are the perfect canvas for any nail art. Invest in a good natural nail care routine to keep your nails looking vibrant. Regular hydration, along with careful filing and buffing, helps maintain their strength and beauty.
Outfit Pieces:
– Cuticle oil
– Hand cream
– Nail file
Step-by-Step Instructions:
– Start by removing any old polish.
– Gently push back your cuticles with a stick.
– File your nails to your desired shape.
– Massage cuticle oil and hand cream into your nails and hands.
Consistency is key, so try to maintain this routine weekly. Healthy nails will help your nail art shine even more!
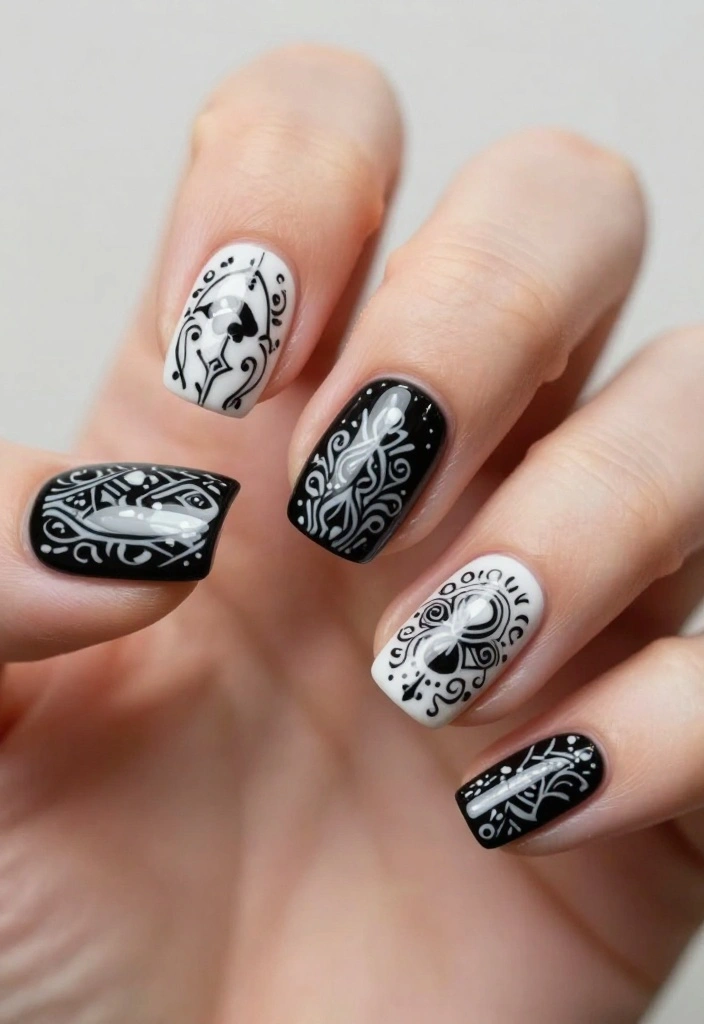
7. Marble Effect
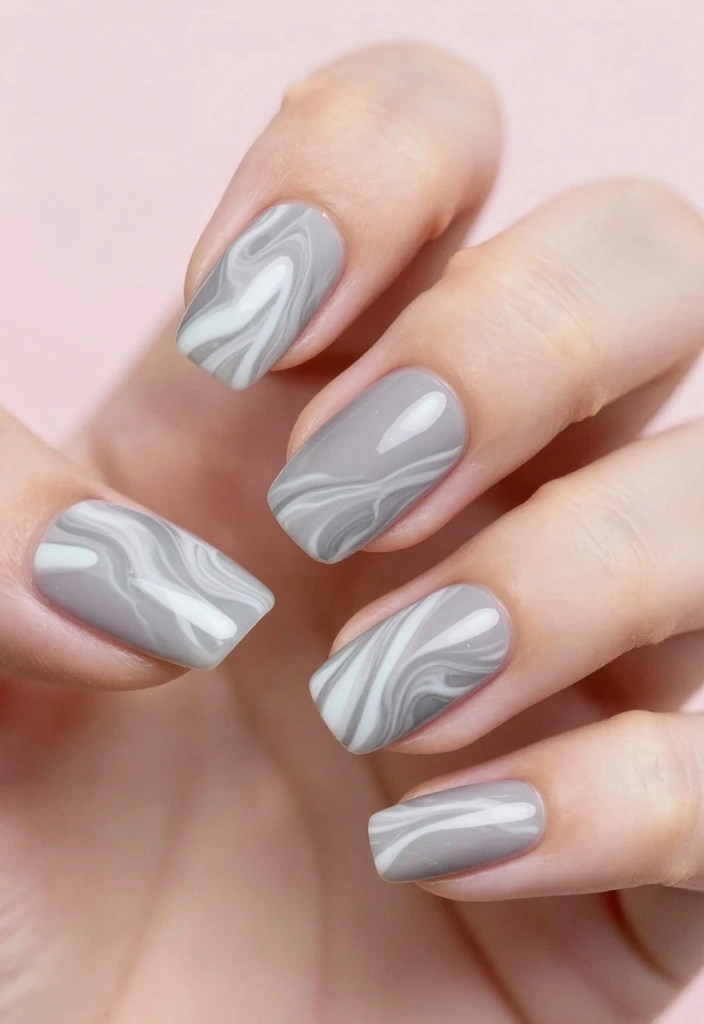
Marble nail art is a chic trend that adds elegance to your look. By swirling colors together, you can create a stunning marbled effect that resembles natural stone. This design is great for special occasions or whenever you want to feel sophisticated.
Outfit Pieces:
– Base coat
– White nail polish
– Gray or black polish
Step-by-Step Instructions:
– Apply a base coat for protection.
– Paint your nails with white polish and let dry.
– Use a small brush to swirl gray or black polish into the white.
– Finish with a top coat for a glossy look.
Practice on paper first if you’re unsure, and don’t hesitate to try different colors for a unique effect. Marble nails are perfect for making a stunning impression!
How To Choose the Right DIY Nail Designs
Choosing the perfect DIY nail design can feel overwhelming, but it doesn’t have to be! With some guidelines, you can find a style that not only looks great but also fits your lifestyle and enhances your nail health. Here’s how to navigate your options.
1. Consider Your Skill Level
Before diving into a DIY nail project, assess your skill level. If you are a beginner, opt for simpler designs such as solid colors or minimalist lines. Advanced nail art like marbling or nail stamping may require more finesse and practice. Start with manageable designs and graduate to complex ones as your confidence grows.
2. Nail Health First
Your nail health should always be a priority when choosing a design. If your nails are brittle or damaged, avoid harsh chemicals and heavy embellishments. Instead, consider natural nail care options that promote strength while looking good. Look for non-toxic polishes, and ensure you hydrate your nails regularly.
3. Occasion Matters
Think about where you will showcase your nails. Special events might call for unique designs, such as glitter galore for a party or seasonal themes for the holidays. For everyday wear, simpler patterns or neutral colors might be more suitable. Choose a style that complements the occasion and your outfit.
4. Gather the Right Supplies
Once you’ve selected your design, gather all necessary supplies. Basic tools include base coats, nail polish, top coats, brushes, and nail art tools. Ensure they are of good quality; using the right materials can make a significant difference in results. Also, don’t forget to have a clean workspace to keep everything organized!
5. Allow Time for Drying
Patience is key in DIY nail art. Each layer of polish needs adequate time to dry to prevent smudging. Rushing this process can ruin your design. Plan your DIY session when you have enough time—ideally, a couple of hours of uninterrupted time.
6. Experiment and Have Fun
The best part of DIY nail art is the room to experiment! Try different colors, textures, and techniques. You can mix and match styles, such as pairing ombre with floral fantasy. Don’t be afraid to make mistakes; they often lead to the most creative designs.
Pro Tip: Keep a nail art journal! Document your designs and any techniques you enjoyed or want to try in the future. This can serve as a great reference for your next DIY project!
With these tips, you’re ready to choose and create stunning DIY nail designs that reflect your personality and style. Remember, practice makes perfect, and most importantly, have fun with it!
8. Negative Space Nails
Negative space nails are a trendy way to showcase your natural nail while adding artistic elements. By leaving parts of your nail unpainted, you create a striking contrast with your chosen colors. This modern design is perfect for any casual or semi-formal setting.
Outfit Pieces:
– Base coat
– Nail polish in your choice of color (e.g., bright blue)
Step-by-Step Instructions:
– Apply a base coat to protect your nails.
– Paint your nails with your chosen color, leaving some areas unpainted.
– Use tape to create your desired design.
– Finish with a top coat for longevity.
Mix and match colors to create a unique look. Negative space nails are perfect for those who love a modern twist!
9. Statement Nails
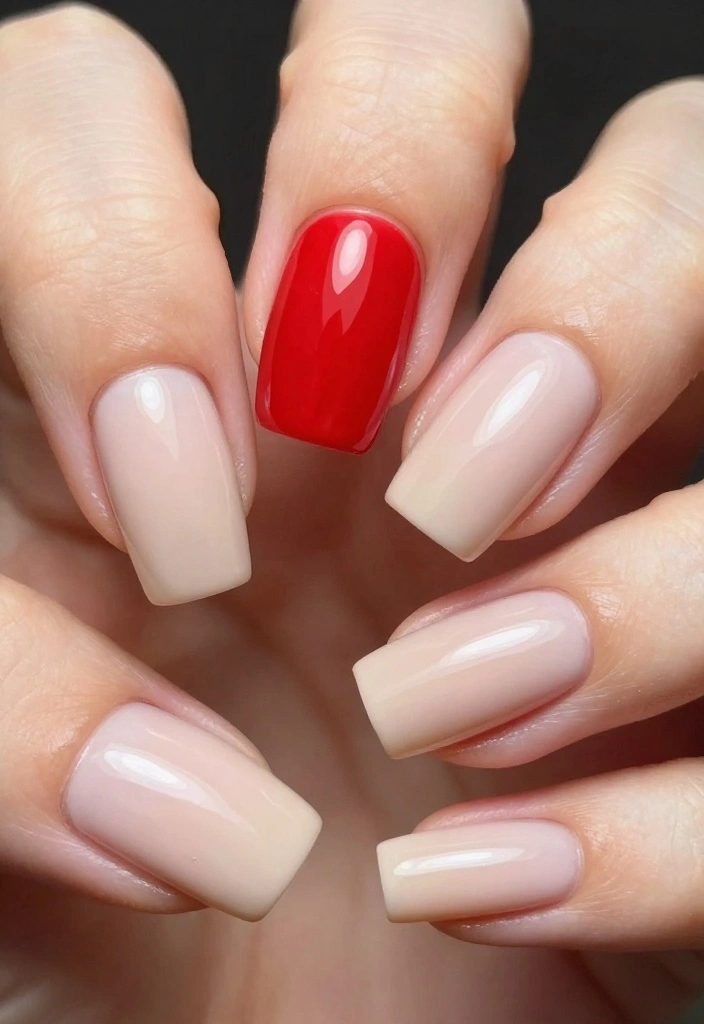
Statement nails are all about making an impact. By choosing one nail on each hand to feature a bold color or design, you can keep the rest simple for balance. This look is fantastic for special events or when you want to add a pop of color to your outfit.
Outfit Pieces:
– Base coat
– Two contrasting nail polishes (e.g., black and fuchsia)
Step-by-Step Instructions:
– Apply a base coat.
– Paint all nails with a neutral color.
– Choose one nail on each hand to paint with a bold color or design.
– Add embellishments for extra flair.
– Seal with a top coat.
Statement nails can be customized to match your outfit, making them a versatile choice for any occasion!
10. Metallic Shine
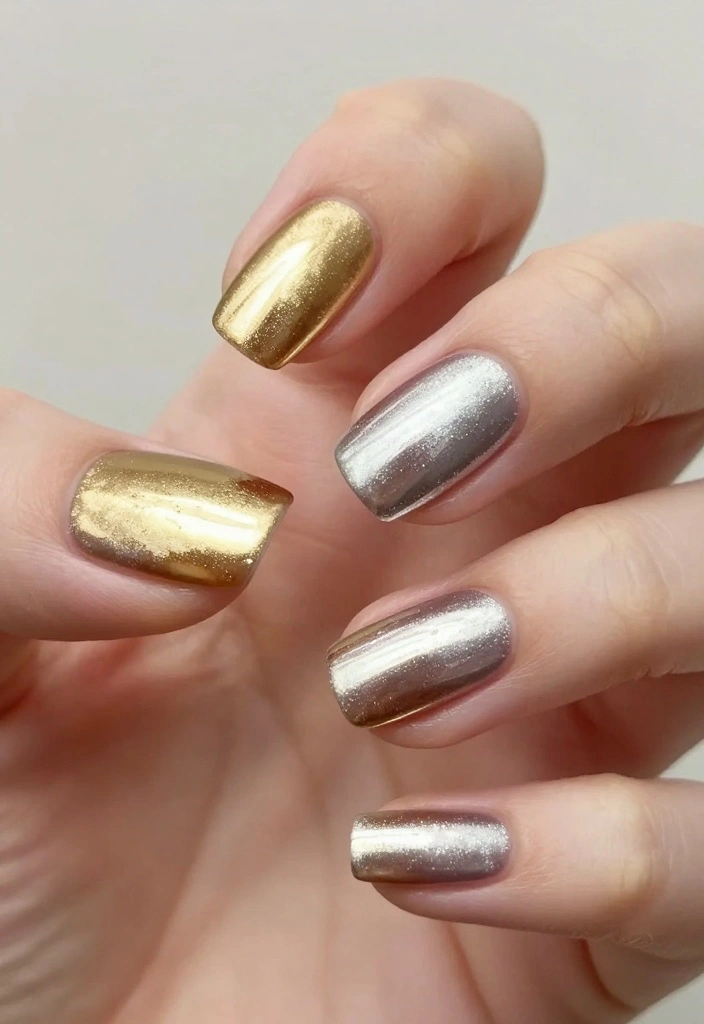
Metallic nails offer a sleek, futuristic vibe that’s perfect for making a statement. By using metallic polishes in shades like silver or gold, you can create a striking look. This design is ideal for parties or nights out when you want to stand out.
Outfit Pieces:
– Base coat
– Metallic nail polish (e.g., silver)
– Additional metallic shade (e.g., rose gold)
Step-by-Step Instructions:
– Apply a base coat for protection.
– Paint your nails with the first metallic shade and let it dry.
– Use a sponge to dab on the second shade for added texture.
– Finish with a top coat for a glossy effect.
Metallic nails can be paired with any outfit, adding a touch of glam wherever you go!
Fun fact: Metallic nails flash a futuristic vibe with just silver or gold polish—under party lights, your diy nails can read 60% shinier in photos. Two coats plus a top coat give lasting impact with minimal effort.
11. Seasonal Themes
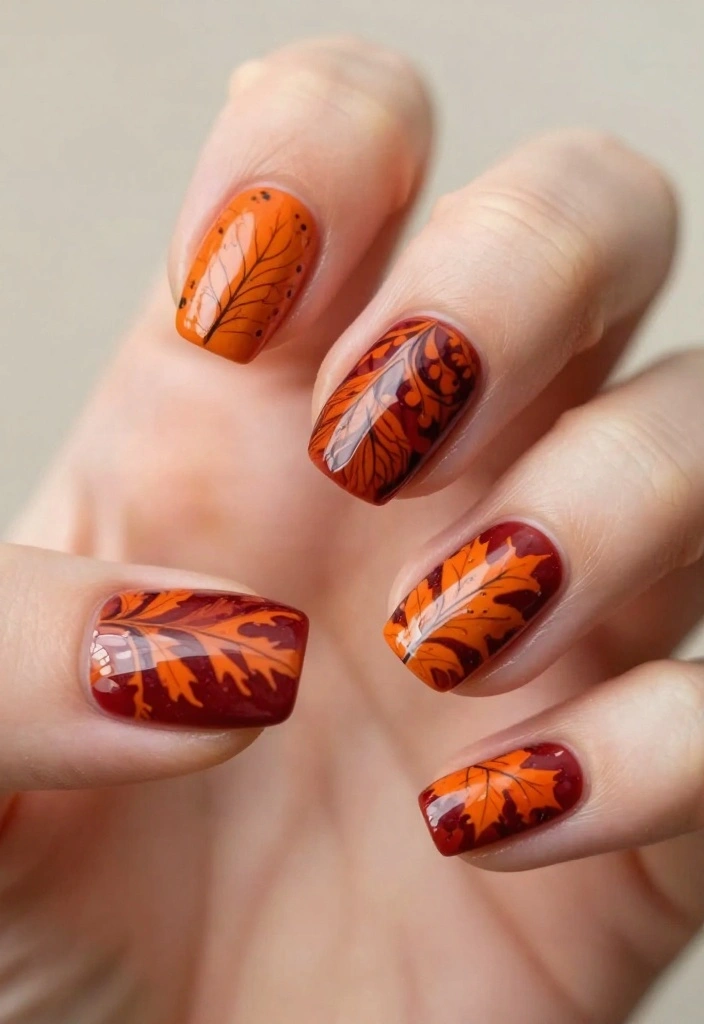
Seasonal nail art is a fun way to celebrate the changing seasons. Use colors that reflect the mood of each season—think pastels for spring, bright hues for summer, earthy tones for fall, and icy shades for winter. Incorporating seasonal motifs will enhance the theme beautifully.
Outfit Pieces:
– Base coat
– Seasonal colored nail polishes (e.g., orange for fall)
Step-by-Step Instructions:
– Apply a base coat.
– Choose your seasonal colors and paint your nails accordingly.
– Add seasonal designs with a thin brush or stickers.
– Seal with a top coat.
Let nature inspire your designs for extra creativity. Seasonal nails are a lovely way to embrace each time of year!
12. Nail Stamping
Nail stamping is an exciting way to create intricate designs without needing advanced skills. Using a stamping kit, you can easily transfer beautiful patterns onto your nails. This method is perfect for anyone who loves detailed designs but wants a simpler approach.
Outfit Pieces:
– Base coat
– Nail stamping kit (plate and stamper)
Step-by-Step Instructions:
– Apply a base coat and let it dry.
– Choose a design on the stamping plate and apply polish over it.
– Scrape off the excess polish and press the stamper onto the design.
– Transfer the design onto your nail and finish with a top coat.
Practice makes perfect, and soon you’ll be stamping like a pro. Nail stamping is a fun way to add flair to any look!
Conclusion
With these 12 DIY nail ideas, your nails will be a reflection of your unique style and personality! Embrace the creativity and have fun experimenting with colors, designs, and techniques. Nail art is all about self-expression, and with a little practice, you’ll transform your nail care game to new heights. Ready to show off your stunning creations?
Frequently Asked Questions
Question: What are some easy DIY nail ideas that will transform your look forever?
There are tons of easy diy nails ideas that can totally transform your look. Start with simple, low-damage options like a clean negative-space design, a soft gradient, or a chic accent stripe. Here’s a quick, actionable plan to nail at-home nail art without hurting your nail health.
Prep and protect: shape nails, push back cuticles, and wash hands. Apply a nourishing base coat to shield nails and prevent staining. Build color in thin coats, sealing the tip on each layer. Finish with a durable top coat and a fast-drying top coat or drops. Final touch: keep nails hydrated with cuticle oil and moisturizers. For at-home care, take breaks between designs, and avoid aggressive filing or picking to preserve natural nails.
Question: How can I keep my nails healthy while doing at-home nail art (diy nails)?
Keeping nails healthy while doing at-home nail art is totally doable with these tips. First, opt for nail-friendly formulas: diy nails shine when you choose non-toxic polishes and avoid harsh acetone. Hydrate: daily cuticle oil and hand cream support nail health. Use a protective base coat, and choose gentle removers. Give nails breaks between manicures and avoid excessive filing. When shaping, go with a fine grit file and gentle strokes to preserve the nail plate. Tools: use clean brushes and sanitation for safe at-home care. And finally, wear gloves when cleaning or doing dishes to minimize water exposure.
Question: What tools do I need for safe, salon-quality DIY nails at home to nail at-home care?
The essential toolkit for safe, salon-quality diy nails at home includes a glass or ceramic nail file (180-240 grit), a buff block, cuticle pusher, orange stick, cuticle oil, hand cream, base coat that strengthens nails, a top coat with long wear, your choice of nail polishes, non-acetone remover, cotton pads, and nail art supplies (dotting tool, striping tape, detailing brushes). If you want extensions, consider nail glue and tips. Hygiene matters: sanitize implements, store in a clean container, and use separate brushes for each color to prevent contamination. This is all part of good at-home care.
Question: How can I safely remove DIY nails at home without damaging nails or cuticles?
Safe removal is key to preserving nail health. Don’t peel or pick; this damages the nail plate. For regular polish: soak a cotton pad in acetone-free remover, place on the nail, and wrap with foil for 5-10 minutes if you can. Wipe away gently. For stubborn polish: lightly buff the surface to remove the top layer, then moisturize. If you used gels or hard-wear builds, consider a pro removal or do a careful soak-off at home. After removal: wash hands, apply cuticle oil, and massage in a rich hand cream to restore moisture as part of your at-home care routine.
Question: Do DIY nails last long enough for daily wear, and how can I extend their life?
Do DIY nails last long enough for daily wear? With correct technique, yes. Apply thin, even coats and seal the edges; finish with a strong top coat and reapply the top coat every 2-3 days. Avoid long soaks and use gloves for chores to protect the finish. Choose long-wear formulas and avoid aggressive peeling. Let nails breathe between aggressive designs to preserve nail health. With the right products and care, diy nails can look great for several days up to a full week or more depending on your activity.
Related Topics
diy nails
nail health
at-home care
minimalist design
nail art
quick tips
beginner friendly
seasonal nails
trendy styles
affordable beauty
easy designs
creative manicures
These nail ideas are so creative! I tried doing a marble effect once, and let’s just say my kitchen counter looked like a paint shop exploded! What’s your favorite design to try?
I love these ideas! I once tried to do nail art while binge-watching my favorite show, and I ended up with more polish on my phone than on my nails! 😂 Got any tips for multitasking?
Did you know that ancient Egyptians used to decorate their nails with henna? It’s amazing how nail art has evolved! Which of these DIY ideas do you think would impress Cleopatra?