Creating stunning nails at home has never been easier or more fun! With the rise of DIY culture, many of us are looking for creative ways to express ourselves, and what better way than through our nails? If you’ve been craving a fresh look or wanting to impress your friends, you’re in the right place. This post is all about natural acrylic nails that are not only easy to do but also incredibly chic.
Whether you’re a nail art newbie or a seasoned DIY manicure enthusiast, this guide is for you. You’ll find designs that range from simple to jaw-dropping, ensuring there’s something here for everyone. From gorgeous ombrés to playful tie-dye patterns, you’ll discover techniques that let your personality shine through your nails. My goal is to inspire you with 12 unique nail designs that will blow your mind and leave your friends asking for your secrets.
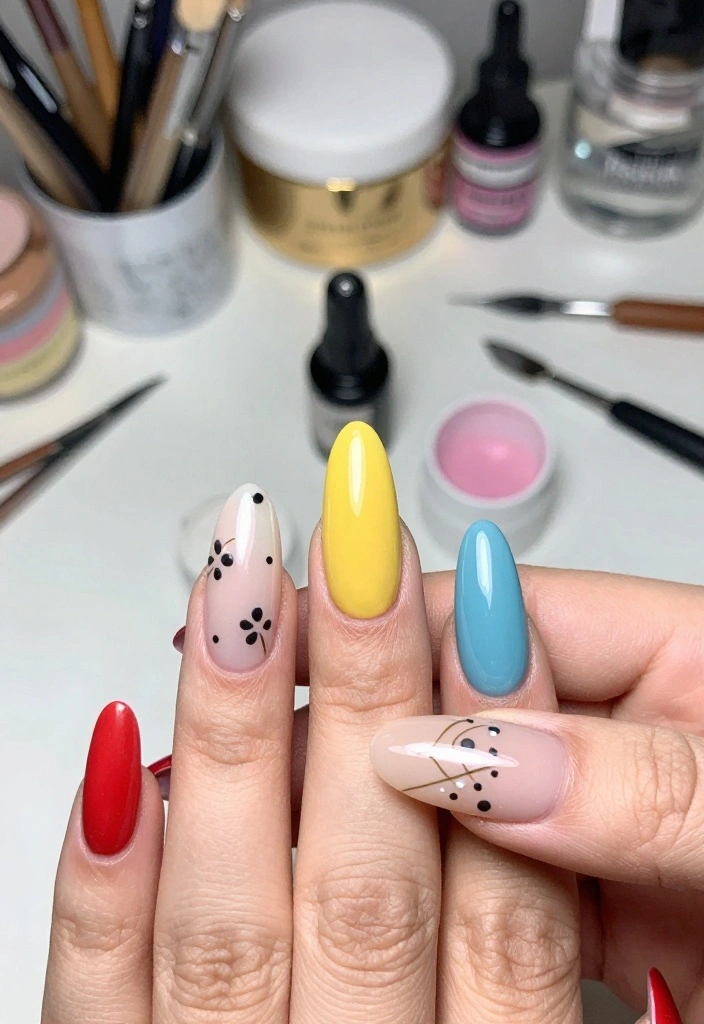
So, grab your nail supplies and get ready to elevate your nail game! You’re about to learn how to create stunning, salon-worthy nails without ever leaving your home. Let’s dive into these beautiful designs that are perfect for any occasion!
Key Takeaways
– Discover 12 eye-catching designs for DIY natural acrylic nails that are sure to impress.
– Each design is easy to follow, making it perfect for beginners and experienced nail artists alike.
– Learn about essential materials and techniques to achieve each look effortlessly.
– Get tips on how to personalize designs to reflect your unique style and preferences.
– Find inspiration to share your creations, making your nails a topic of conversation among friends.
Contents
- 1. Ombré Dream
- 2. Floral Frenzy
- 3. Marble Magic
- 4. Geometric Glam
- 5. Glitter Galore
- 6. Bold Stripes
- 7. Tie-Dye Delight
- 8. Negative Space Art
- 9. Color Block Bonanza
- 10. Neon Nights
- 11. Seasonal Styles
- 12. Custom Emoji Nails
1. Ombré Dream
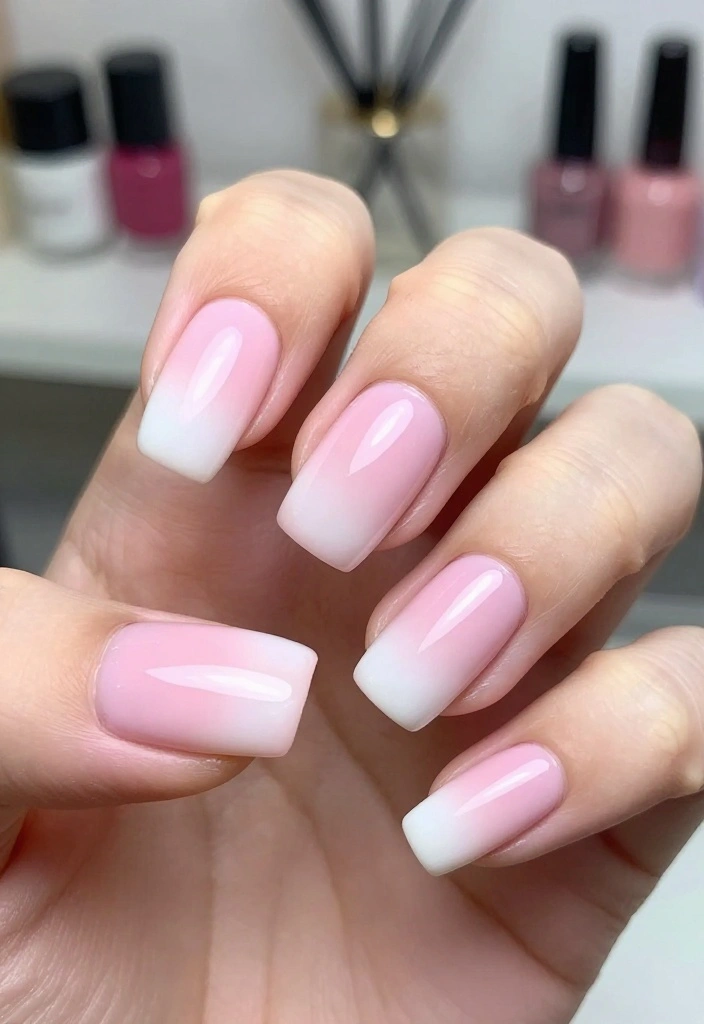
Ombré nails are an enchanting way to create a gradient effect on your fingertips. This design brings together two or more colors for a soft, blended look that feels dreamy and fresh. It works beautifully for both casual outings and more formal events, allowing you to express your style effortlessly.
Start with a pair of colors that harmonize—think soft pink paired with white or perhaps deep blue with lilac. Begin by applying a protective base coat and let it dry. For the ombré effect, use a makeup sponge to dab the lighter color at the tips of your nails, gently blending it into the darker shade as you move down toward your cuticles. Finish with a glossy top coat to lock in the beauty.
Outfit Pieces:
– Base coat and top coat
– Two nail polish colors (like soft pink and white)
– Makeup sponge
– Optional: latex barrier for clean edges
Styling Tips:
– Use a latex barrier around your cuticles for a tidy finish.
– Add a sprinkle of glitter for an extra magical touch.
– Be patient and allow each layer to dry thoroughly for the best results.
With a little practice, you’ll be ready to dazzle at any gathering, whether it’s a casual brunch or a night out. Swap in sparkly tips for a festive twist, or try a pastel palette for a softer vibe.
2. Floral Frenzy
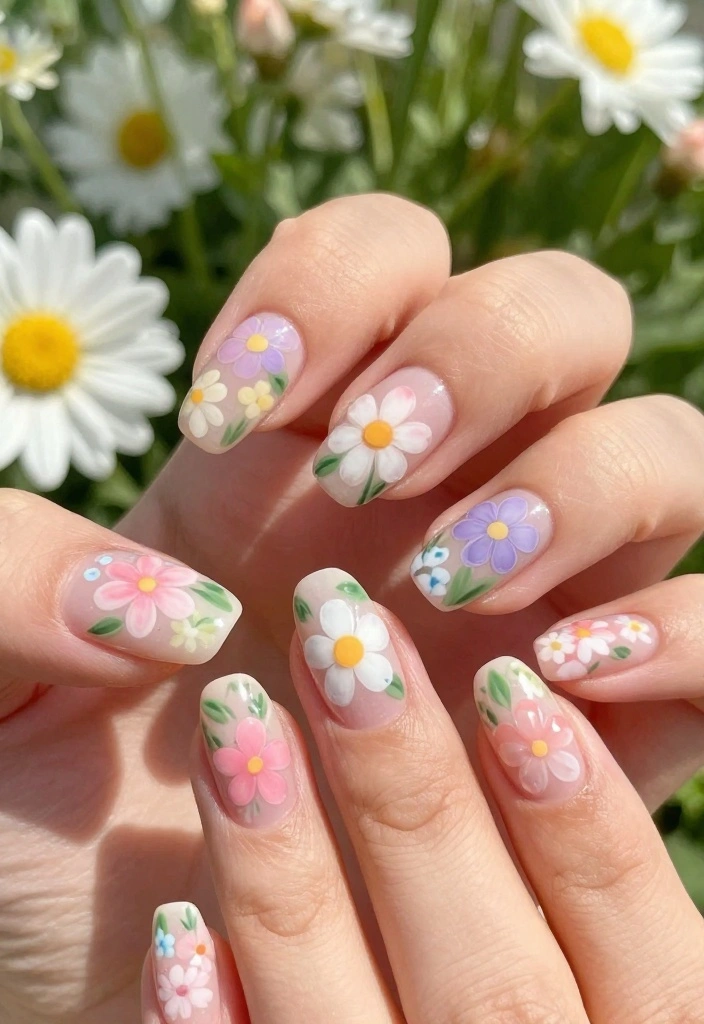
Floral nail art brings a touch of nature right to your fingertips! This design is perfect for spring and summer, capturing the essence of blooming flowers. It’s a great way to add color and vibrancy to your look, making it ideal for garden parties or sunny outings.
Begin with a neutral base coat to let your flower details really shine. Use a fine brush or dotting tools to create delightful petals in pastel shades like lavender, mint green, and peach. Tiny leaf accents can round out the garden theme beautifully. This style is perfect for those who want to showcase their feminine flair.
Outfit Pieces:
– Base coat and top coat
– Various nail polish colors (pastels or vibrant hues)
– Dotting tools or fine detail brushes
Styling Tips:
– Steady your hand or practice designs on paper first.
– Mix and match colors to create unique flower designs.
– Layer colors for depth and interest in your floral patterns.
These floral beauties are perfect for brunches, picnics, or even casual work days. Swap in bolder colors for a more striking floral design, or keep it soft for a delicate touch.
📹 Related Video: Real Flowers Inside Acrylic Coffin Nails
3. Marble Magic
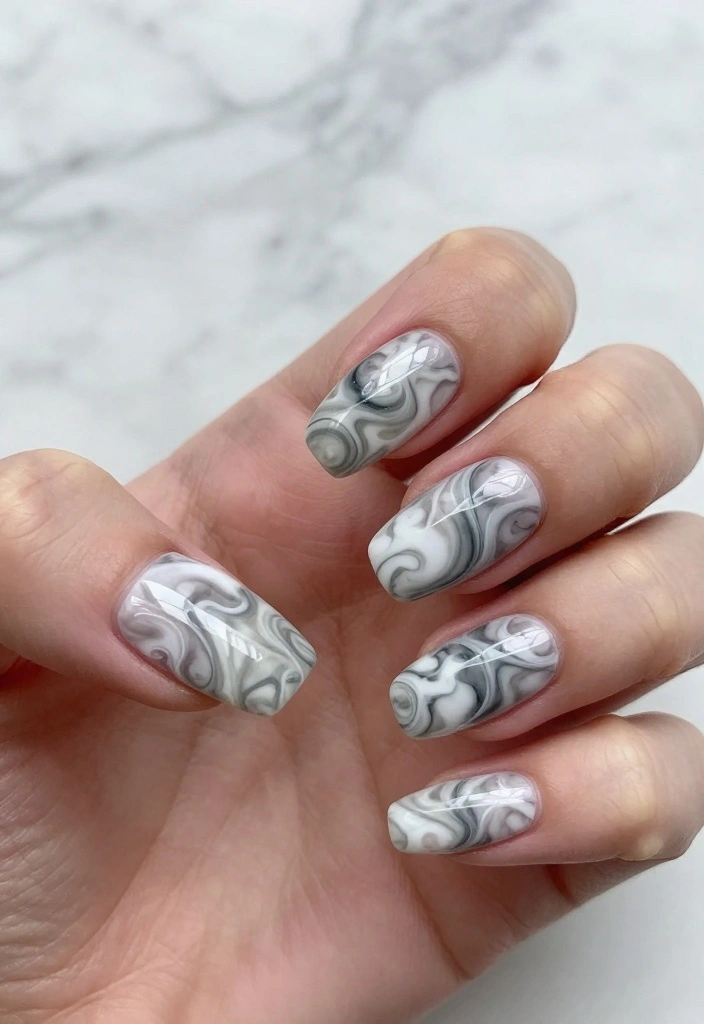
Marble nails offer a sophisticated twist to your nail art game. Mimicking the elegant swirls found in marble stone, this design can be customized in any color palette you desire. It’s a chic option that adds a touch of luxury, making it perfect for date nights or formal events.
Start with a classic white base, then use a small brush to swirl in gray, black, or any other colors you prefer. For detailed swirling, a toothpick works wonders, allowing for intricate designs that truly resemble real marble. A glossy finish will complete the look, adding depth and shine to your nails.
Outfit Pieces:
– Base coat and glossy top coat
– White and two additional nail polish colors (like gray and black)
– A toothpick or nail art brush
Styling Tips:
– Practice swirling techniques on paper before your nails.
– Get creative with color combinations to make your design unique.
– Consider using a matte top coat for a chic alternative.
These marble magic nails are suitable for upscale events, parties, or just when you want to feel a little more glamorous. Switch colors for seasonal vibes, or incorporate gold accents for added elegance.
💅 Effortless Nail Art for Moms
Transform your nail game with our DIY Nail Art Guide designed specifically for busy moms like you!
4. Geometric Glam
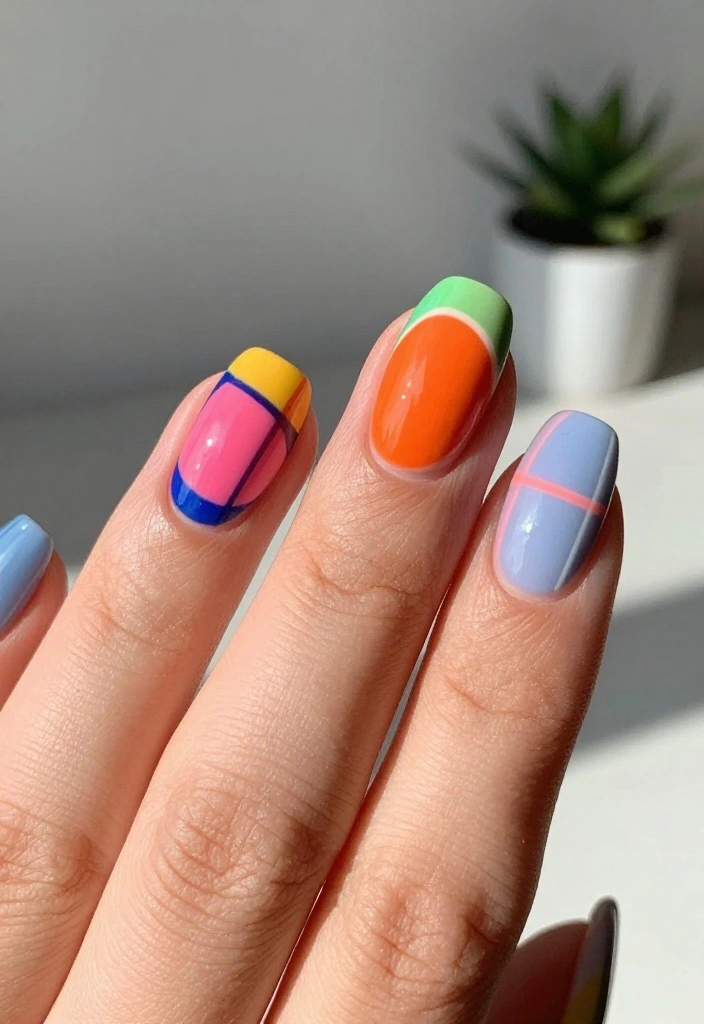
Geometric nail art is an edgy way to show off your personal style. This design utilizes clean lines and shapes, transforming your nails into a canvas of creativity. It’s perfect for the trendsetter who loves to make a statement, whether at work or out with friends.
Begin with a base coat of your favorite color, then use nail tape to create sharp, defined shapes. Fill those shapes with bold hues like bright blue, sunny yellow, or metallics for a glam touch. Peeling off the tape reveals crisp lines, and a top coat will seal the look beautifully.
Outfit Pieces:
– Base coat and top coat
– Multiple nail polish colors of your choice
– Nail tape for precision
Styling Tips:
– Use nail tape to achieve clean, precise designs.
– Experiment with various shapes like triangles, squares, and stripes.
– Try color-blocking techniques for added flair.
This geometric glam style is perfect for modern events, nights out, or whenever you want to stand out. Mix in different shapes for a playful twist or keep it minimalistic for an elegant look.
How To Choose Natural Acrylic Nails
When selecting natural acrylic nails for your DIY manicure, consider several important factors to achieve the best result. The right choice can elevate your look and impress your friends. Let’s break down the key criteria you should keep in mind.
1. Nail Shape
Choosing the right shape is essential for your natural acrylic nails. Common shapes include oval, square, almond, and stiletto. Each shape can complement different hand types and personal styles. For instance, oval shapes can elongate shorter fingers, while square shapes provide a chic and modern look. Think about what suits you best!
2. Length
The length of your acrylic nails impacts both the style and functionality. Long nails make a bold statement but can be harder to manage, especially for daily tasks. Shorter nails are easier to maintain, making them ideal for a more practical look. Measure your comfort level by trying different lengths before settling on the perfect one.
3. Material Quality
The quality of the acrylic material matters greatly. Look for products labeled as high-quality acrylic to avoid potential damage to your natural nails. Cheaper materials may chip or break easily, leading to a less polished appearance. Invest in reputable brands that offer durable acrylics for a long-lasting and beautiful finish.
4. Color and Design Options
Acrylic nails offer a range of color choices and designs to express your personality. You can pick solid colors, ombre effects, or intricate nail art styles like floral or geometric designs. Consider what fits best with your style and the occasion. If you’re new to nail art, start with simpler designs to build your confidence.
5. Application Method
Different application methods can yield varied results. Some kits come with self-adhesive options, while others require a more traditional approach with glue. If you’re a beginner, self-adhesive nails might be easier to handle. Make sure to read the instructions carefully to achieve the best results.
6. Removal Process
Lastly, consider how easy it will be to remove the nails. Some acrylics require special products or techniques for safe removal. Look for products that come with clear removal instructions to avoid damaging your natural nails. A safe removal process is crucial for maintaining healthy nails.
Pro Tip: Always keep a nail buffer and cuticle oil handy! Buffing helps your nails look smooth and polished, while cuticle oil keeps your natural nails healthy and hydrated. Regular maintenance will enhance the longevity of your natural acrylic nails and keep them looking fabulous!
By focusing on these essential criteria – nail shape, length, material quality, design options, application method, and removal process – you can confidently choose the perfect natural acrylic nails for your next DIY manicure. Enjoy expressing your creativity!
5. Glitter Galore
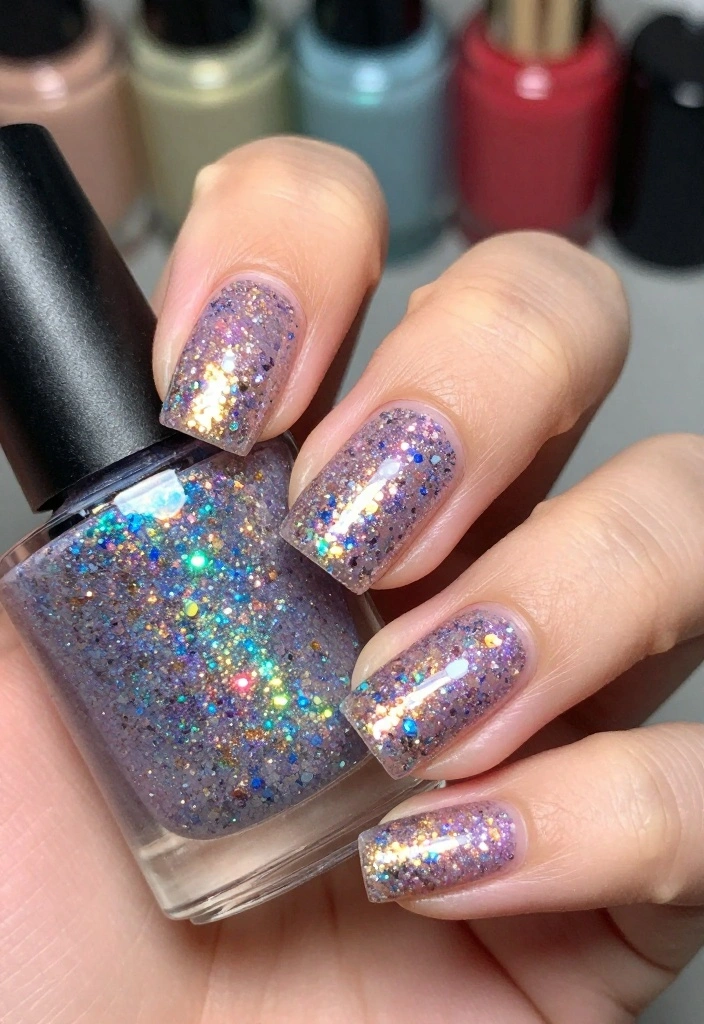
Who can resist a little sparkle? Glitter nails are the ultimate way to add glam to your look, perfect for parties or casual outings. The shine of glitter can elevate any outfit and make your nails the center of attention.
Start with a base color that either matches or contrasts with your glitter. After letting the base coat dry, apply a glitter polish on top. For more coverage, loose glitter can be dabbed on with a sponge or your fingers. Finish with a clear top coat to keep the sparkle intact and prevent chipping.
Outfit Pieces:
– Base coat and clear top coat
– Glitter nail polish or loose glitter
Styling Tips:
– Consider a peel-off base coat for easier removal later.
– Mix different colors of glitter for a unique effect.
– Let each layer dry completely to avoid smudging.
Your glittery masterpiece will shine at parties, festivals, or any occasion where you want to dazzle. Pair it with a bold outfit or keep it simple to let your nails shine.
Fun fact: Glitter nails can last up to 10 days on natural acrylic nails with a clear top coat. Just two coats of glitter plus proper sealing keep the shine bright at parties and casual days alike.
6. Bold Stripes
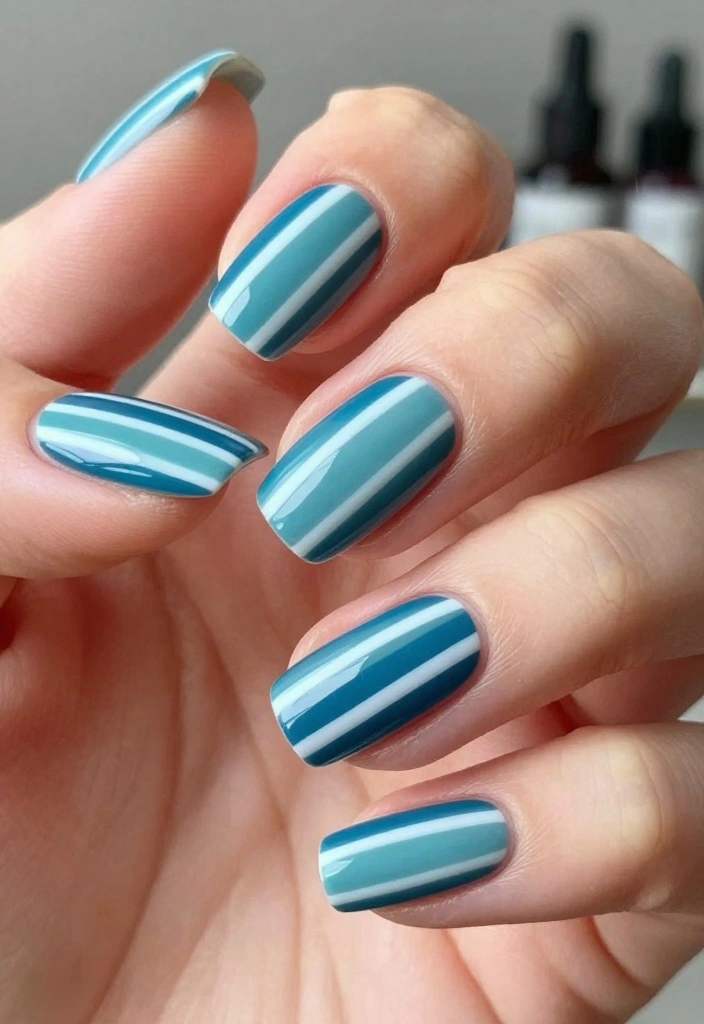
Bold stripes can add a fun twist to your nail art while keeping it classy. This design is adaptable to any color scheme, making it a versatile choice for any occasion. Whether you prefer bright hues or muted tones, stripes always make a statement.
Start with your chosen base color and allow it to dry completely before applying striping tape. Once the tape is securely in place, paint over it with contrasting colors to create striking stripes. After removing the tape, you’ll reveal clean, bold lines that catch the eye, topped off with a top coat for a polished appearance.
Outfit Pieces:
– Base coat and top coat
– Several nail polish colors of your choice
– Striping tape for precision
Styling Tips:
– Use thin tape for delicate, precise lines.
– Experiment with color combinations to reflect seasonal themes.
– Ensure each layer is dry to prevent smudging.
These striped nails are perfect for workdays, brunches, or nights out. Switch up the colors for a festive theme, or keep it monochrome for a sophisticated vibe.
7. Tie-Dye Delight
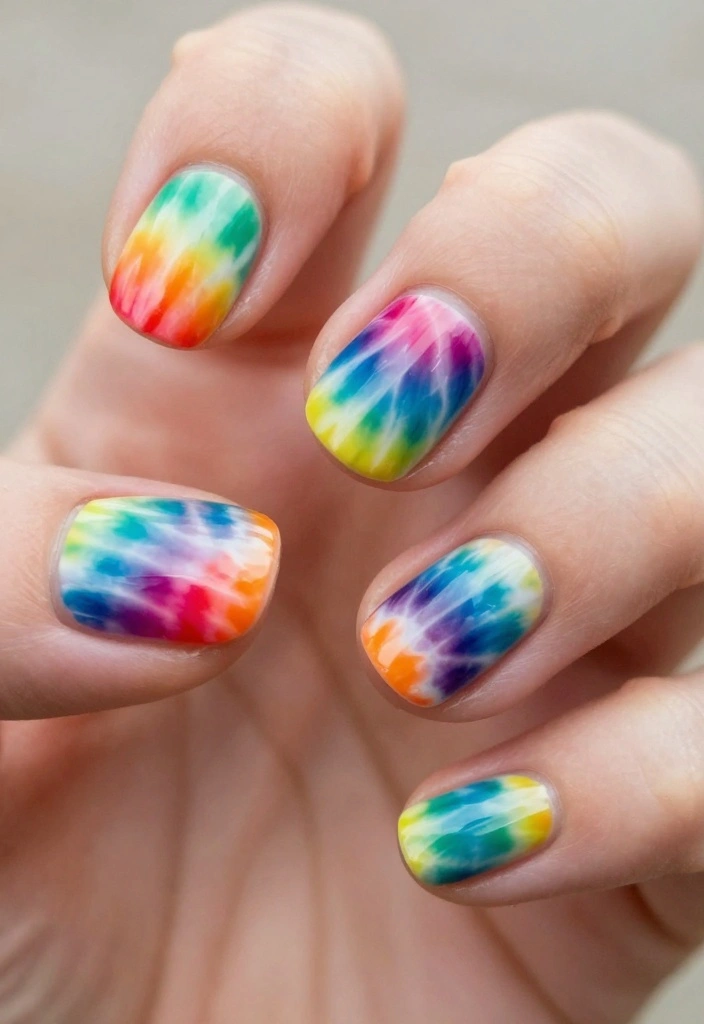
Embrace your inner flower child with tie-dye nails! This colorful and playful design is perfect for festivals or casual hangouts. Its fun and carefree aesthetic is sure to turn heads and make a statement.
Start with a white base coat, then dip a small brush into various colors to create swirls and patterns. The beauty of tie-dye lies in its randomness, so don’t stress about perfection! Once satisfied with your design, finish with a top coat to lock in the vibrant colors.
Outfit Pieces:
– Base coat and top coat
– Various bright nail polish colors
Styling Tips:
– Use vibrant colors for maximum impact.
– Experiment with different swirling techniques for unique patterns.
– Embrace the chaos; the more whimsical, the better!
Your tie-dye nails are perfect for casual outings, festivals, or when you want to express your fun-loving side. Swap colors for seasonal themes or add a glittery top coat for extra sparkle.
Tie-dye nails are your mood-boosting DIY hack—no perfection needed, just swirls of color on your natural acrylic nails. Pro tip: seal with a top coat and let your nails pop at festivals and casual hangouts.
8. Negative Space Art
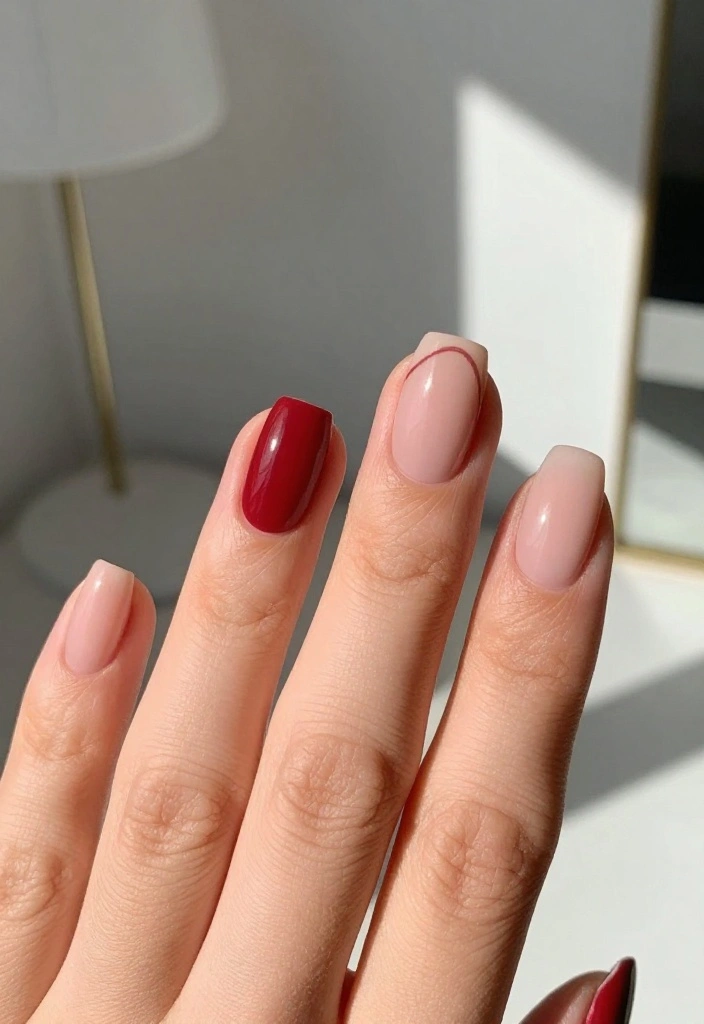
Negative space nail art is a modern trend that cleverly uses bare nail as part of the design. This minimalist approach is stylish and allows for creativity, making it perfect for those who appreciate a clean aesthetic.
Start with a clear base coat and decide on shapes or patterns that reveal your natural nail underneath. Use tape to secure your desired design, painting over the sections while leaving others bare. This contrast creates stunning visuals, especially when paired with bold colors! Seal everything with a glossy top coat for a refined finish.
Outfit Pieces:
– Base coat and top coat
– Two contrasting nail polish colors
– Nail tape for precision
Styling Tips:
– Plan your design in advance for the best outcome.
– Keep the color palette simple for a more striking effect.
– Clean around the edges for a neat finish.
This trendy negative space design is perfect for modern events or casual outings. Experiment with different shapes or use seasonal colors for added flair.
9. Color Block Bonanza
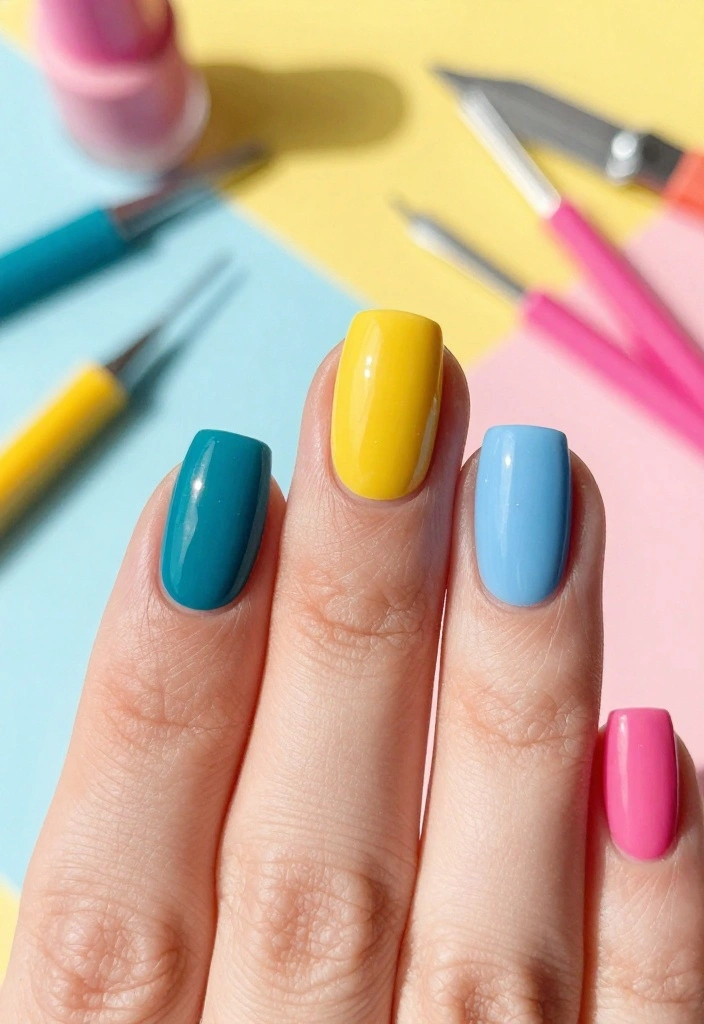
Color blocking is a fun and vibrant way to spice up your nails! This design uses bold, solid colors that contrast beautifully, making it playful and eye-catching. It’s an easy way to express your personality and creativity.
Begin with a base coat and let it dry. Choose two or three colors that complement or contrast well. Use tape to block off sections on your nails, painting each one a different color. Once finished, remove the tape to reveal your colorful masterpiece, topped off with a glossy coat for that extra flair.
Outfit Pieces:
– Base coat and top coat
– Two to three nail polish colors
– Nail tape for clean edges
Styling Tips:
– Opt for bold colors that stand out.
– Ensure each section is fully dry before applying tape.
– Look for color palette inspiration online to spark creativity.
Your color block nails are perfect for any occasion, from casual outings to special events. Mix and match colors for a festive feel, or keep it monochrome for a sleek, modern look.
Did you know color blocking with two to three bold colors makes nails pop in photos by up to 80%? Tape off sections for clean, crisp lines, then swap colors to express your personality. It’s a playful, DIY trick that turns simple nails into a color-block masterpiece.
10. Neon Nights
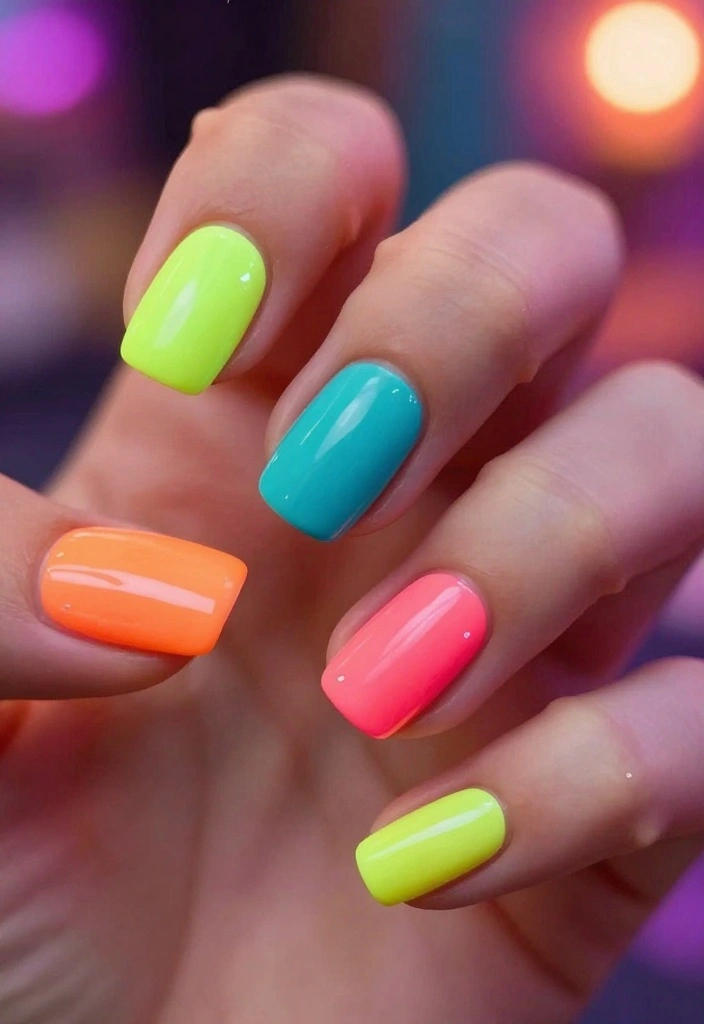
Neon nails are the ultimate way to stand out in a crowd! With bright, fluorescent colors, this design makes a bold statement, perfect for parties and summer festivals. If you want your nails to shine and grab attention, neon is the way to go.
Start with a base coat, allowing your nails to breathe before applying a vibrant neon color. For added creativity, use a sponge to create gradient effects or incorporate white designs for contrast. Finish with a glossy top coat to enhance that neon glow and keep your nails looking fresh.
Outfit Pieces:
– Base coat and top coat
– Neon nail polish colors
Styling Tips:
– Use a good primer for the best color payoff.
– Layer neon colors for a deeper hue if desired.
– Pair with black polish for striking contrast designs.
Your neon nails are ideal for parties, concerts, or any event where you want to shine. Mix different neon shades for a unique look, or keep it simple with a single bold hue.
11. Seasonal Styles
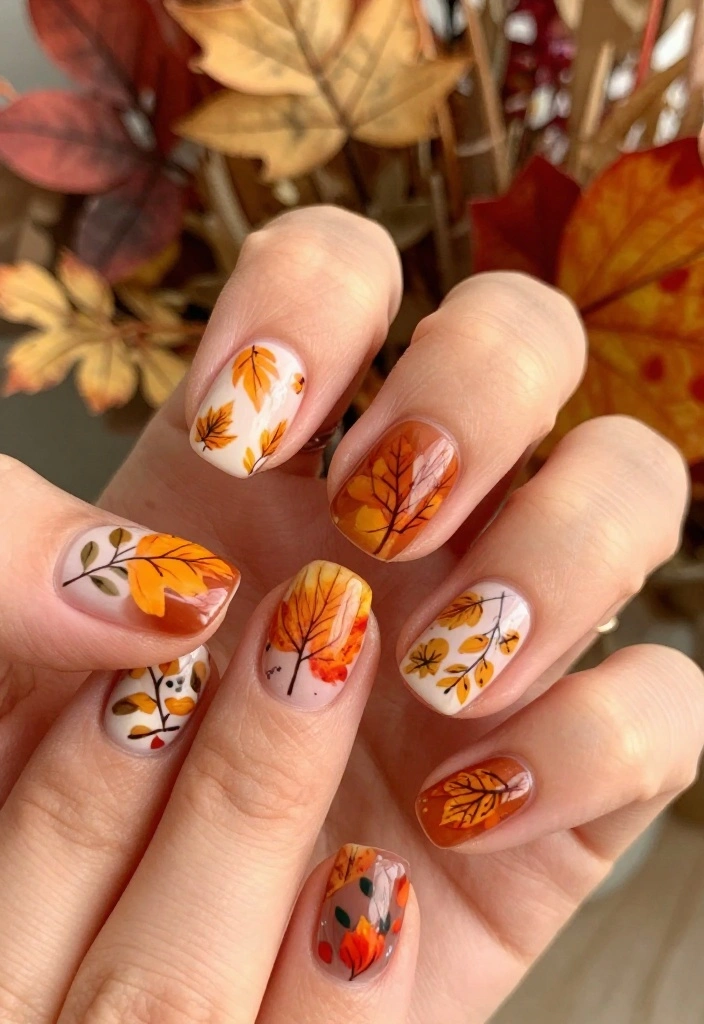
Celebrate the seasons with your nail art! Seasonal nail designs are a fun way to express the spirit of each time of year. From autumn leaves to winter snowflakes, your nails can reflect the mood of the moment.
For fall, think warm tones with leaf patterns; for winter, icy blues and snowflakes are perfect. Use nail art brushes or stickers to create your designs based on seasonal colors and themes. A base coat followed by creative patterns will breathe life into your nails for any occasion.
Outfit Pieces:
– Base coat and top coat
– Seasonal-themed nail polish colors
– Nail art tools or stickers
Styling Tips:
– Look for seasonal trends to inspire fresh designs.
– Incorporate fun elements like stickers or glitter.
– Ensure your designs last by sealing them with a good top coat.
Your seasonal nails are great for family gatherings, holiday parties, or just to enjoy the changing seasons. Adjust your designs as the seasons change for an ever-fresh look.
12. Custom Emoji Nails
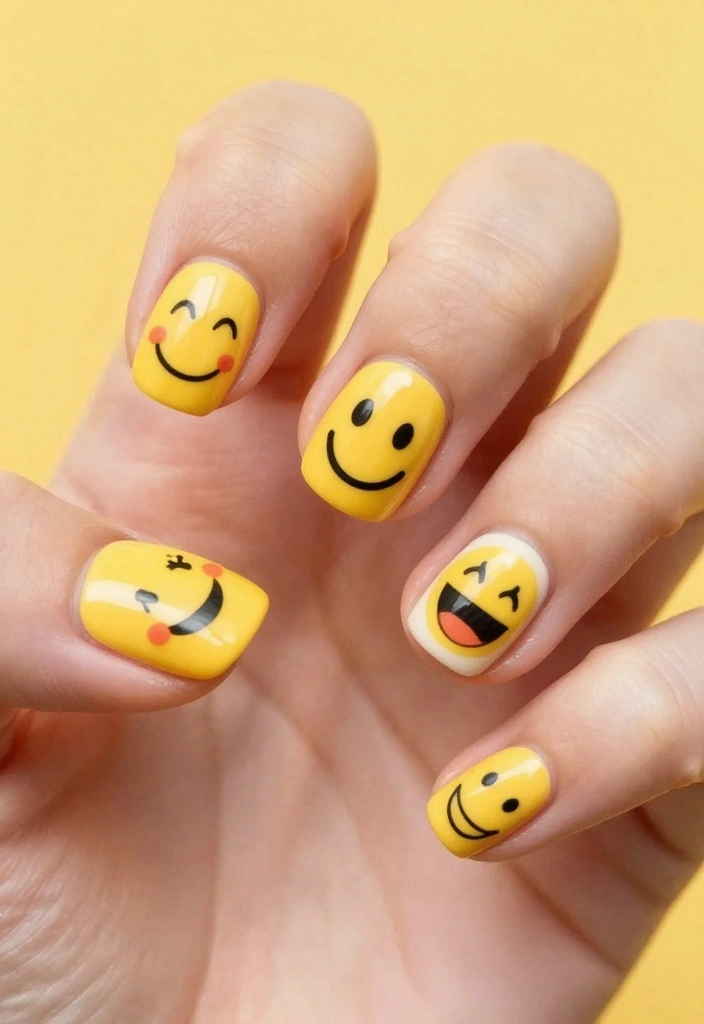
Expressing yourself has never been more fun! Custom emoji nails let you showcase your favorite emojis right on your fingertips, adding a playful twist to your look. This design is perfect for anyone who wants to showcase their personality in a creative way.
Start with a light base color, then use a small brush or dotting tool to create your chosen emojis. From smiley faces to hearts, the options are endless! Once your designs are complete, apply a top coat to ensure your vibrant emojis last longer and shine bright.
Outfit Pieces:
– Base coat and top coat
– Light and various colored nail polishes
– Dotting tools or fine brushes
Styling Tips:
– Consider using gel polish for a more durable finish.
– Choose emojis that represent your current mood or favorite expressions.
– Get creative with your designs to make them unique!
Your fun emoji nails are ideal for casual outings, parties, or just showing off your unique style. Mix and match emojis for endless creative possibilities!
Conclusion
DIY natural acrylic nails offer endless possibilities for creativity and self-expression. Whether you’re going for something bold and trendy or soft and elegant, the art of nail decoration allows you to showcase your personality in a fun way. So gather your supplies, unleash your creativity, and embark on your nail art journey!
Your nails can be a reflection of your mood and style, and with these twelve ideas, you’re sure to impress your friends. Which design will you try first? Let us know in the comments!
Frequently Asked Questions
What exactly are natural acrylic nails, and how can I DIY them at home for a natural look?
Natural acrylic nails blend clear or sheer powders with ultra-thin layers to mimic your own nails while adding strength. They’re lightweight and grow out with your natural nail, keeping a subtle, everyday look.
To DIY at home: start with clean, dry nails; push back cuticles; lightly buff the surface; choose a sheer shade or keep it clear; use a small bead technique and apply in ultra-thin layers, curing according to your product’s instructions; finish with a flexible, high-gloss top coat. For a touch of nail art, try tiny dots, a soft French tip, or minimalist marble. With practice, your DIY manicure skills will shine and you can create natural-looking nails that wow.
What tools and safety tips do I need for a DIY manicure with natural acrylic nails?
Essential tools include a fine nail file, buffer, cuticle pusher, brush for acrylic, a small dish, acrylic powder and monomer or an appropriate gel kit, and a good top coat. Work in a well-ventilated area and wear a mask to avoid inhaling acrylic dust.
Sanitize all tools before and after use, and keep your workspace clean. Practice thin layers to reduce lifting, and give your hands plenty of rest between coats. For added safety, follow the product instructions and rinse if you ever feel irritated. These precautions will help your natural acrylic nails look flawless in your next DIY manicure.
How can I customize nail art while keeping a natural acrylic look, and how long does it last?
You can customize the look with simple nail art that stays true to the natural vibe—think negative space designs, micro decals, sheer color pops, or a tiny marble accent. Start with a sheer base and finish with a durable top coat to extend wear.
When properly applied, natural acrylic nails can last about 1 to 2 weeks before a refill or maintenance, depending on your nail growth and activity. Regular maintenance and gentle handling will keep the look fresh for longer in your DIY manicure routine.
How should I prep nails to ensure smooth application and longevity of natural acrylic nails?
Prep is key. Begin with clean hands and nails, push back cuticles, and dehydrate the nail plate with a gentle cleanser or dehydrator. Lightly buff the surface to remove shine, choose the right nail shape, and apply a thin base layer to help adhesion. Avoid oils on the nail bed before application, and cap the free edge to prevent lifting. Finish with your top coat after the final layer to seal the surface. Proper prep makes your DIY manicure look even and last longer.
What common mistakes should beginners avoid when creating DIY natural acrylic nails?
Avoid applying thick layers, which look bulky and can lift. Do not skip dehydrate and prime steps, and never rush the filing to blend the tip into the natural nail. Poor cuticle prep can cause lifting, so gently push back cuticles and avoid trimming too aggressively. Use the right brush size and keep each layer thin; work in a well-ventilated space and follow product instructions. Finally, give each layer time to set and don’t neglect top coat sealing, or your natural acrylic nails won’t last as long in your DIY manicure.
Related Topics
natural acrylic nails
DIY manicure
nail art
home spa
beginner friendly
quick tips
trendy designs
affordable beauty
easy nail designs
seasonal nail art
creative nail techniques
fashionable nails
I loved this post! I’ve always wanted to try DIY nails but was nervous about messing it up. Have you ever had a nail disaster that made you laugh?
These ideas are amazing! I tried doing my own nails once and ended up with more polish on my hands than the nails. At least I looked like a walking art project! 😂
Did you know that the longest nail ever recorded was over 28 feet long? That’s a lot of maintenance! I can barely keep mine from breaking!