
As we slide into the spookiest time of year, there’s something about the crisp air and vibrant colors that gets us all buzzing with excitement. Halloween has me craving all things eerie and creative, especially when it comes to nail art. If you’re someone who loves to express yourself through fun and festive nail designs, you’re in for a treat! This post is all about getting your nails ready for the creepiest season with some fabulous DIY bat nails ideas that will make your fingertips flutter with delight.
Whether you’re prepping for a Halloween party, a night out with friends, or just want to embrace the seasonal spirit at home, these ideas are perfect for you. You’ll find inspiration that ranges from classic and spooky to cute and quirky. I’ve gathered 13 bat nails ideas that are creative, easy to follow, and sure to elevate your nail game. Get ready to unleash your inner nail artist and dive into some fun DIY designs that will leave everyone asking where you got your nails done!
Key Takeaways
– Variety of Designs: Explore 13 different bat nail ideas, each with a unique twist to match your style for Halloween.
– DIY-Friendly: All the designs are easy to follow, making them perfect for both beginners and seasoned nail art enthusiasts.
– Materials and Techniques: Each design includes simple materials and techniques to help you achieve the look without needing professional help.
– Seasonal Vibes: These bat nails ideas are perfect for getting in the Halloween spirit, adding a fun and spooky touch to your autumn aesthetic.
– Express Yourself: Nail art is a fantastic way to express your personality and creativity, so have fun mixing and matching these ideas!
Contents
- 1. Classic Black Bat Silhouettes
- 2. Glittery Bat Accent Nails
- 3. Cute Cartoon Bat Designs
- 4. Spooky Ombre Bat Nails
- 5. Bat and Moon Combo
- 6. Watercolor Bat Designs
- 7. Bat Wing Patterns
- 8. Reverse French Bat Nails
- 9. 3D Bat Nail Art
- 10. Bat-Themed Nail Wraps
- 11. Fall-Inspired Bat Nails
- 12. Neon Bat Nails
- 13. Minimalist Bat Nails
1. Classic Black Bat Silhouettes
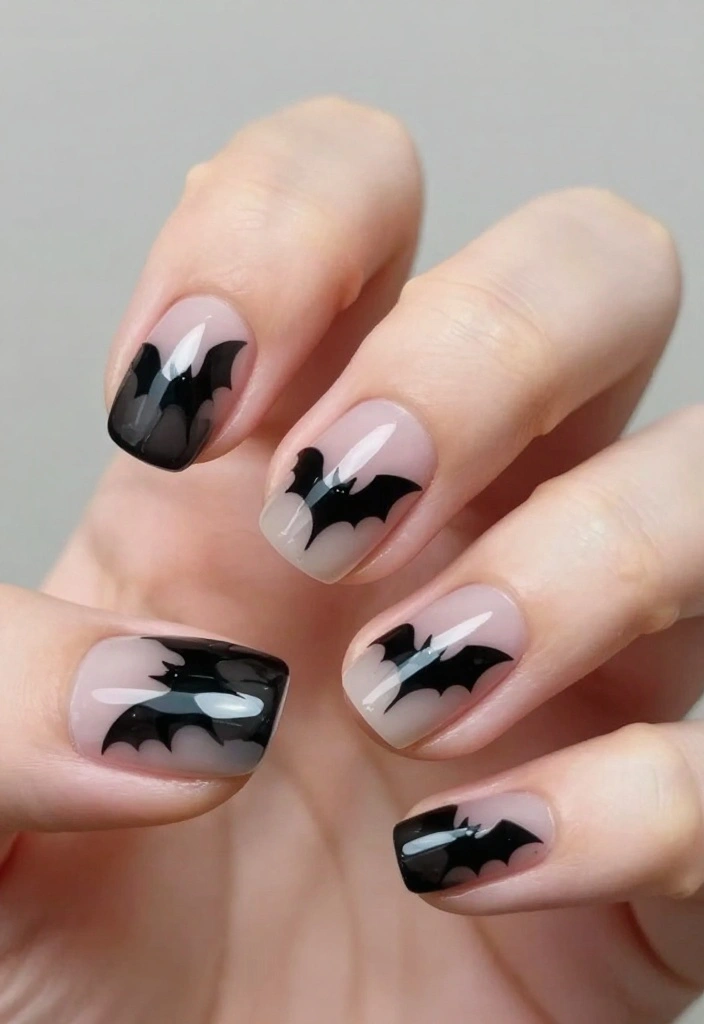
Nothing captures the essence of Halloween quite like classic black bats! This nail design features sleek black bat silhouettes set against a soft moonlit background. A base coat of gentle gray or beige creates the perfect canvas for the bats to stand out, making this design both captivating and festive. The stark contrast between the delicate background and the bold bats brings a striking visual effect that’s ideal for spooky celebrations.
Outfit Pieces:
– Soft gray or beige base coat
– Fine nail brush for detailing
– Black nail polish for bat shapes
– Optional: nail dotting tool for body shapes
Styling Tips:
– Ensure your base coat dries completely before adding the bats.
– Use a dotting tool for perfectly rounded bat bodies.
– Finish with a top coat to lock in your design and add shine.
This classic design is simple to replicate and versatile enough for any Halloween-themed event!
2. Glittery Bat Accent Nails
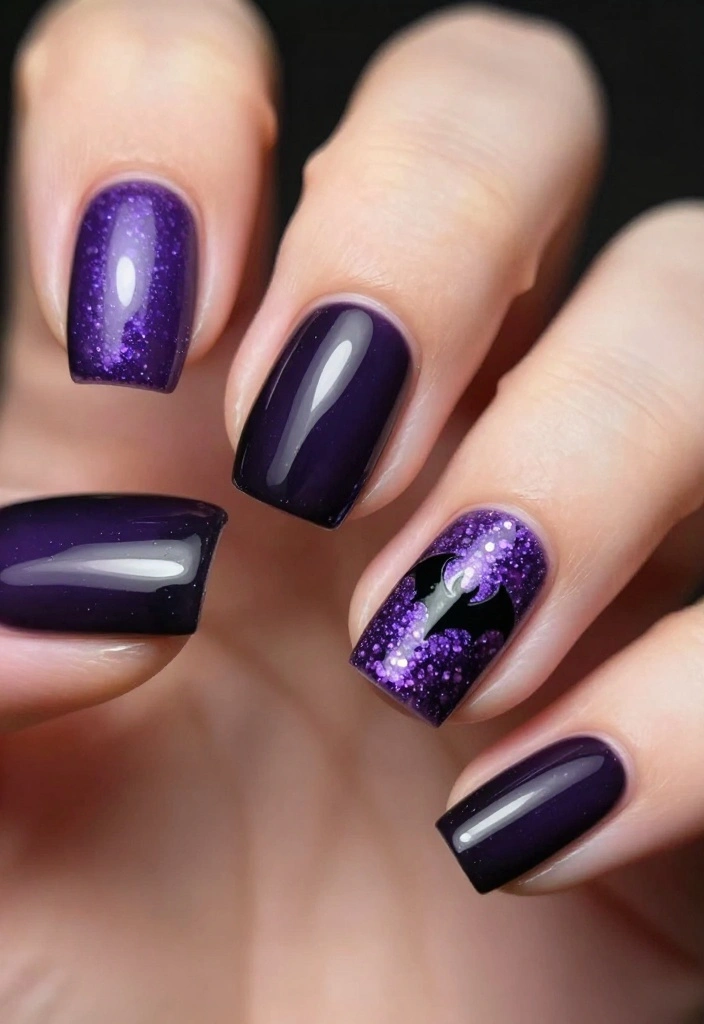
Add a dash of glam to your Halloween look with glittery bat accent nails! Begin with a rich base color like deep purple or black that sets a dramatic tone. Choose one or two accent nails on each hand to showcase the bats. After applying a layer of fine glitter on these accent nails, the bats painted over the glitter will provide a stunning contrast. This design effortlessly combines chic glamour with seasonal fun, making it perfect for parties!
Outfit Pieces:
– Deep purple or black base polish
– Fine glitter polish for accent nails
– Black nail polish for bat designs
Styling Tips:
– Use a glitter polish for easier application.
– Ensure the glitter is dry before painting the bats.
– Finish with a clear top coat for durability.
This design balances sparkle and spooky, making it a fun addition to your Halloween festivities!
3. Cute Cartoon Bat Designs
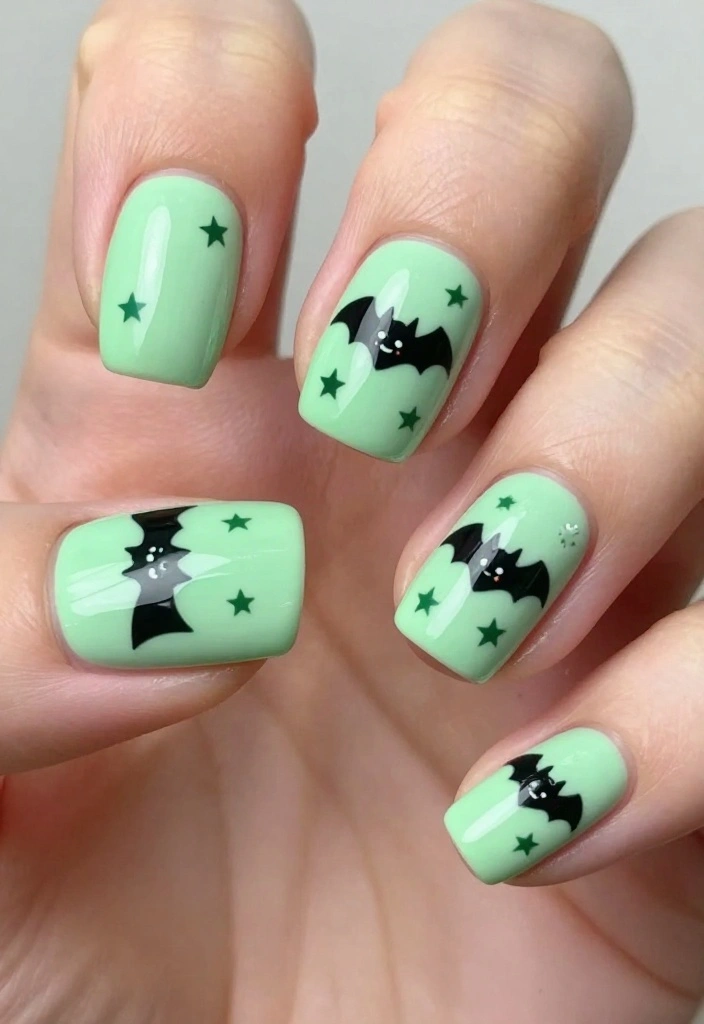
Bring a playful twist to Halloween with cute cartoon bat designs! Start with a pastel base color like mint green or lavender to set a cheerful tone. Once dry, use a nail art pen to draw adorable bat faces with wide eyes and tiny smiles on each nail. This lighthearted design is perfect for those who want to celebrate the season without the usual spookiness. A layer of top coat will not only add shine but also protect your charming artwork!
Outfit Pieces:
– Pastel mint green or lavender base polish
– Nail art pen for detailed designs
– Clear top coat for finishing
Styling Tips:
– Keep the bat faces simple to maintain a cute vibe.
– Use nail art pens for precision and control.
– Seal your design with a clear top coat for added protection.
This design is a whimsical and fun way to embrace Halloween!
How To Choose the Right Bat Nail Ideas
Choosing the perfect bat nail designs for the spooky season can be a fun yet challenging task. Here are some criteria to help you find the ideal bat nail art that fits your style and the mood of Halloween.
1. Style Preference
Determine what style suits you best. Do you prefer cute and cartoonish bats or dark and spooky silhouettes? Knowing your style will guide you in selecting designs that resonate with your personality. For a playful vibe, opt for cartoon designs. If you’re going for a more gothic look, classic black bat silhouettes or spooky ombre designs might be more fitting.
2. Nail Length
Consider the length of your nails. Some bat nail art designs look better on longer nails, while others can be adapted for shorter nails. For instance, intricate 3D bat designs may require more space, whereas minimalist bat nail art can work on shorties. If you have short nails, go for simpler designs or accent nails that still allow for a bat theme without overwhelming your look.
3. Occasion
Think about where you plan to show off your bat nails. If it’s for a casual Halloween party, fun designs like glittery bat accents or cute cartoon bats can be perfect. On the other hand, if you’re attending a more formal event, you might want to stick with elegant bat and moon combos or minimalist designs that still capture the Halloween spirit without being too loud.
4. DIY Skills
Assess your nail art skills before choosing a design. Some designs, like basic bat silhouettes or fall-inspired bat nails, are easier to create at home. If you’re not confident in your abilities, opt for designs that use nail wraps or simpler techniques. For more intricate designs, you might want to practice ahead of time or consider asking a friend to help you.
5. Color Palette
Select a color palette that complements your outfit and overall vibe. Classic black and orange are staples for Halloween, but don’t be afraid to experiment with unexpected colors like neon or pastel shades to make your bat nails pop. Matching your nail colors to your costume can elevate your whole look.
6. Materials and Tools
Make sure you have all necessary materials and tools for your chosen design. Common supplies include base and top coats, nail polish in various colors, nail art brushes, and decals or stencils. If you’re planning on using glitter or 3D elements, ensure you have the right adhesive as well. Having everything ready will make your nail art experience smoother and more enjoyable.
💡 Pro Tip: Don’t hesitate to mix and match different bat nail designs! For instance, you can combine classic black bat silhouettes with glittery accents on one or two nails for a playful twist. This way, you can showcase your creativity while keeping a cohesive theme.
Choosing the right bat nail design can make your Halloween celebrations even more exciting. By considering your style, nail length, occasion, DIY skills, color palette, and materials, you’ll be set for a spooktacular nail art experience! 🎃
4. Spooky Ombre Bat Nails
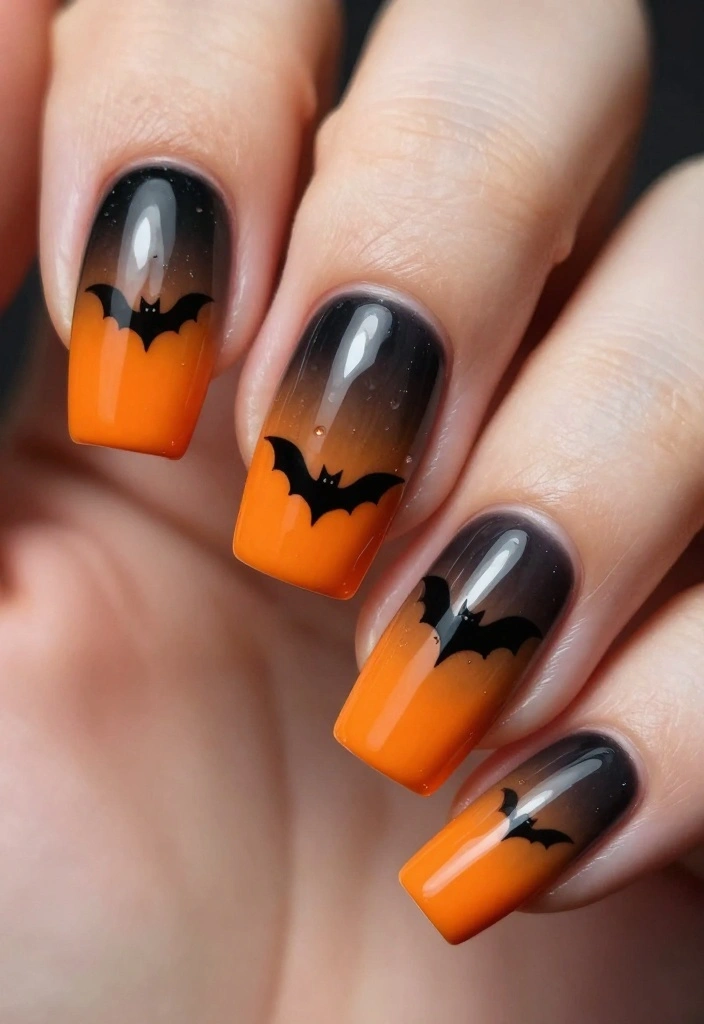
Embrace the trendy ombre effect with a spooky bat twist! Start with a dark shade at the base of your nails that gradually fades into a lighter color toward the tips, like black into fiery orange. Once the ombre is complete, use a thin brush to paint small bats soaring from the darker base. The gradient creates a mesmerizing backdrop that makes the bats appear to fly into the night sky!
Outfit Pieces:
– Dark polish for the base (black or deep purple)
– Lighter polish for tips (orange or shimmery purple)
– Thin brush for bat detailing
Styling Tips:
– Use a makeup sponge for a flawless ombre effect.
– Blend colors while they are still wet for an even transition.
– Seal with a top coat for a long-lasting finish.
This enchanting design is both captivating and eerie, perfect for getting into the Halloween spirit!
Spooky ombre bat nails make a statement. Start with a dark base that fades to a lighter tip, then paint tiny bats across the gradient. Pro tip: seal with a topcoat for night-sky drama.
💅 Nail Art Made Easy!
Transform your DIY nail art dreams into reality with this quick and easy guide designed for busy moms!
5. Bat and Moon Combo
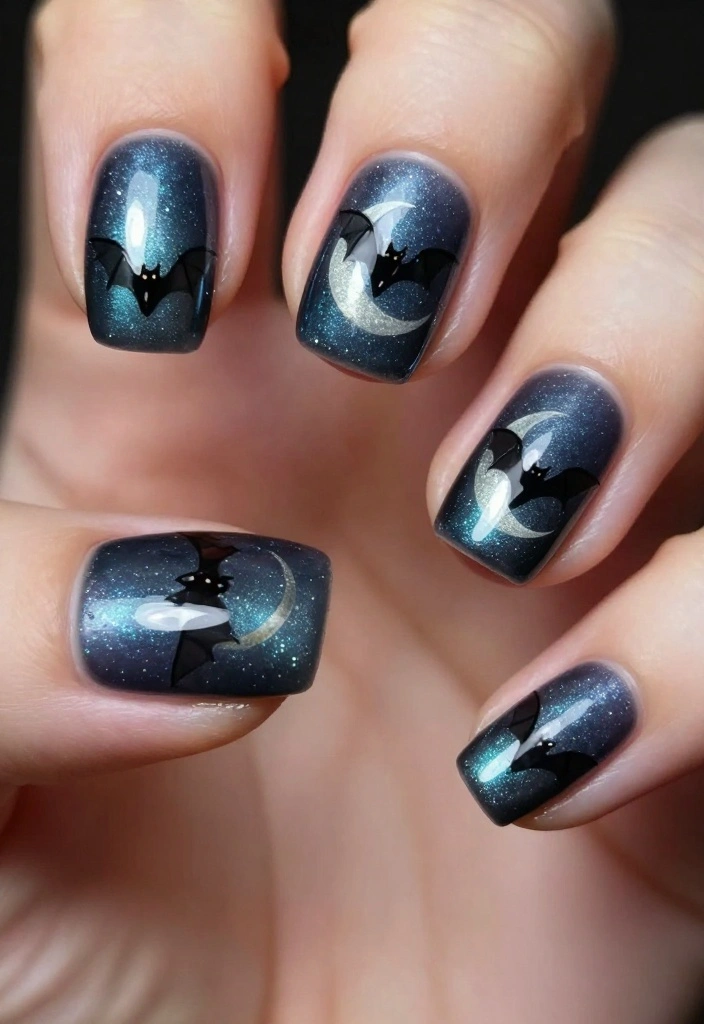
Craft a mystical scene on your nails with a bat and moon combo! Start with a deep navy blue or black base coat to set the mood. Then, paint a crescent moon in gold or silver on one side of your nail, adding small bats flying around it for added whimsy. This design captures the beauty of the night sky, merging spooky with artistic flair, making it ideal for creative spirits!
Outfit Pieces:
– Navy blue or black base polish
– Gold or silver polish for the moon
– Black polish for bat designs
Styling Tips:
– Use a dotting tool to create stars around the moon for extra detail.
– Ensure the base coat is completely dry before painting the moon and bats.
– Finish with a top coat to secure your artwork.
This design beautifully captures the magical essence of Halloween nights!
📹 Related Video: SPOOKY HALLOWEEN Haunted House, Bat ‘n Moon Nails :::… ☆ Jennifer Perez of Mystic Nails ☆
6. Watercolor Bat Designs
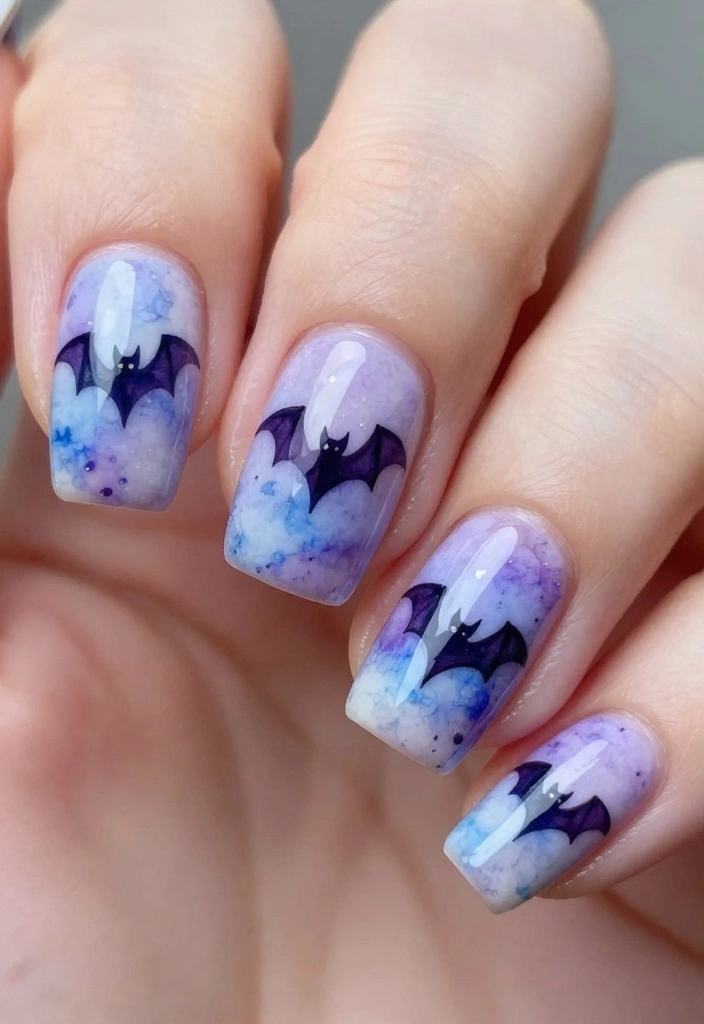
Capture a dreamy vibe with watercolor bat designs, perfect for Halloween! Start with a white or pale base coat, then use a sponge to dab on colors like purple, blue, and gray to achieve a soft watercolor effect. Once dry, paint small bat silhouettes over the colorful backdrop. This technique adds depth and uniqueness to your nails, ensuring they stand out in a crowd.
Outfit Pieces:
– White or pale base polish
– Sponge for watercolor effect
– Black polish for bat designs
Styling Tips:
– Use non-waterproof nail polish for easier blending.
– Layer colors while they are slightly wet for better results.
– Seal with a top coat for added shine and protection.
This watercolor technique creates nails that are both sophisticated and spooky, making it a perfect Halloween choice!
7. Bat Wing Patterns
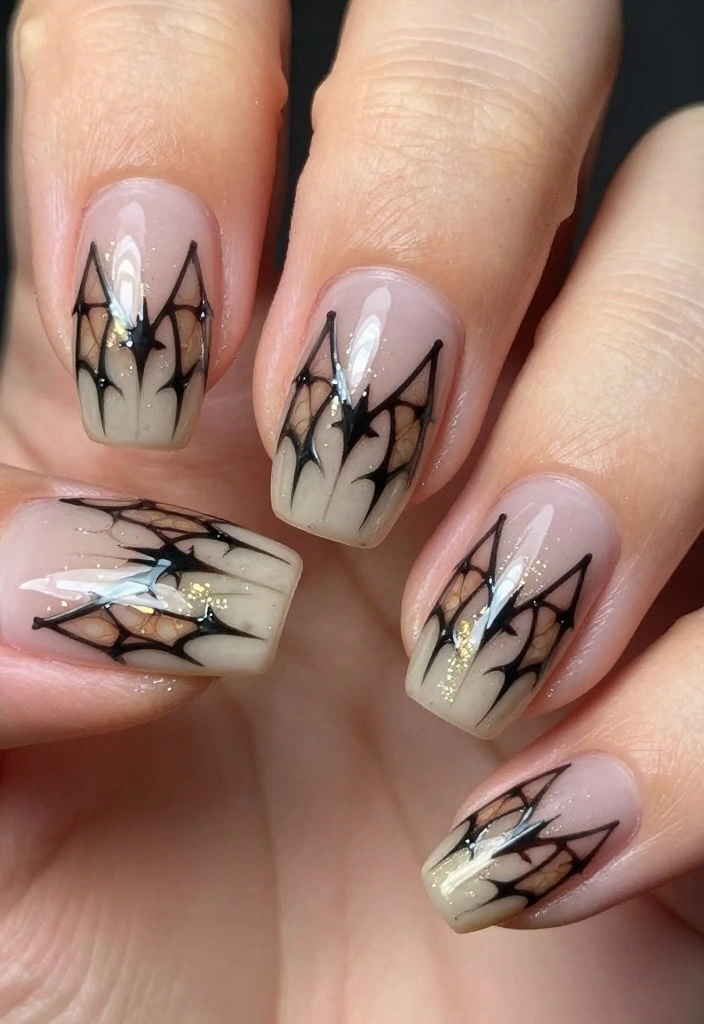
Transform your nails into bat wings with a creative design! Begin with a light base color like beige or soft pink. Using a fine brush, create bat wing patterns that stretch across your nails, adding lines for texture to mimic real wings. This design offers a clever yet subtle nod to Halloween, perfect for those who appreciate understated creativity.
Outfit Pieces:
– Light beige or pale pink base polish
– Fine brush for detailed designs
Styling Tips:
– Experiment with different colors for wing details to add contrast.
– Practice wing shapes on paper before applying to nails.
– Seal your design with a top coat for longevity.
This design is both chic and stylish, making it a great choice for any occasion!
8. Reverse French Bat Nails
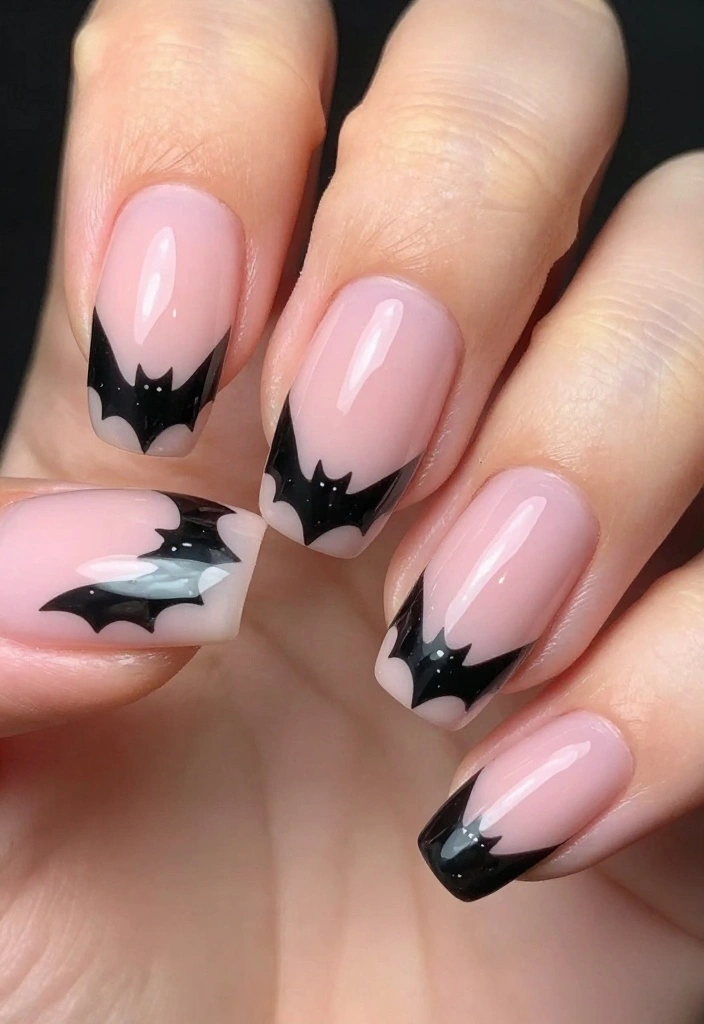
Put a spooky spin on the classic French manicure with reverse French bat nails! Start with a light pink or nude base coat. Instead of the traditional white tips, use black polish to create bat shapes at the base of your nails. This design adds a playful Halloween touch while remaining stylish and subtle.
Outfit Pieces:
– Light pink or nude base polish
– Black polish for bat designs
– Nail tape for clean lines
Styling Tips:
– Use nail tape to achieve sharp, clean lines.
– Experiment with colors to match your outfit or mood.
– Finish with a top coat for added shine and durability.
This design is both chic and fun, making it perfect for any occasion!
9. 3D Bat Nail Art
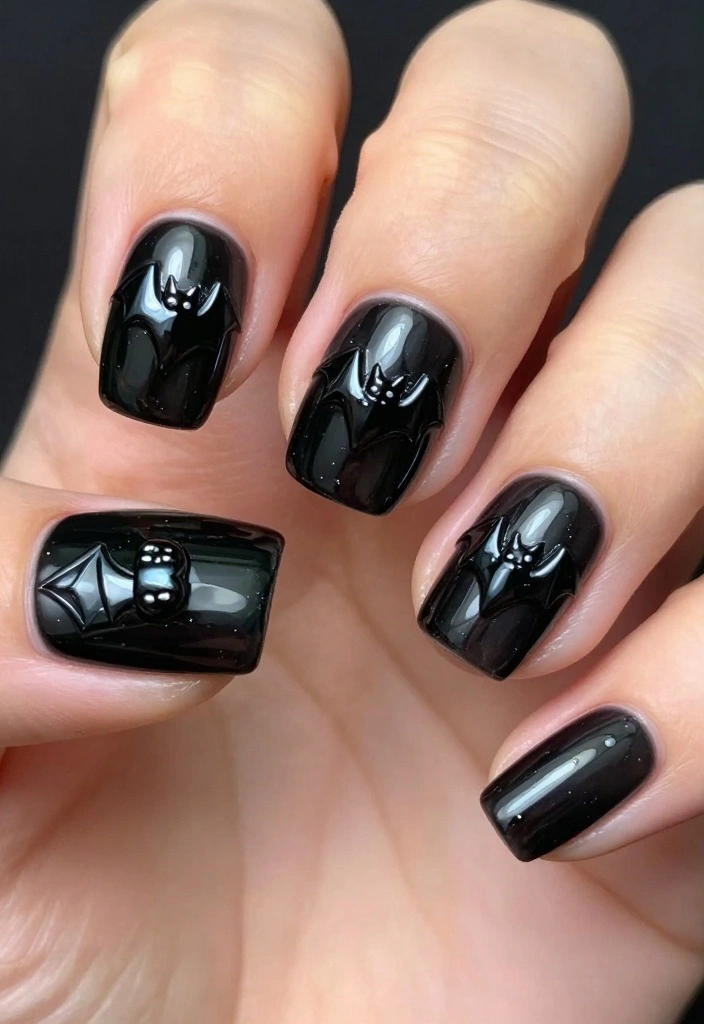
Elevate your bat nails with 3D bat nail art for a standout look! Start with a solid base color and, once it’s dry, attach tiny bat charms or stickers to a couple of accent nails for added dimension. The 3D elements catch the light and attention, making this design the perfect statement piece for Halloween gatherings.
Outfit Pieces:
– Solid base color polish
– Tiny bat charms or stickers
– Nail glue for securing 3D elements
Styling Tips:
– Ensure your base coat is completely dry before adding 3D elements.
– Use nail glue for a stronger hold on charms.
– Seal with a top coat to keep everything secure.
This design is bold and playful, sure to make a memorable impression!
Fun fact: 3D bat nails catch light from every angle, making your manicure pop with just two accent nails. Add tiny bat charms or stickers, seal with nail glue, and watch the shimmer turn heads at Halloween gatherings.
10. Bat-Themed Nail Wraps
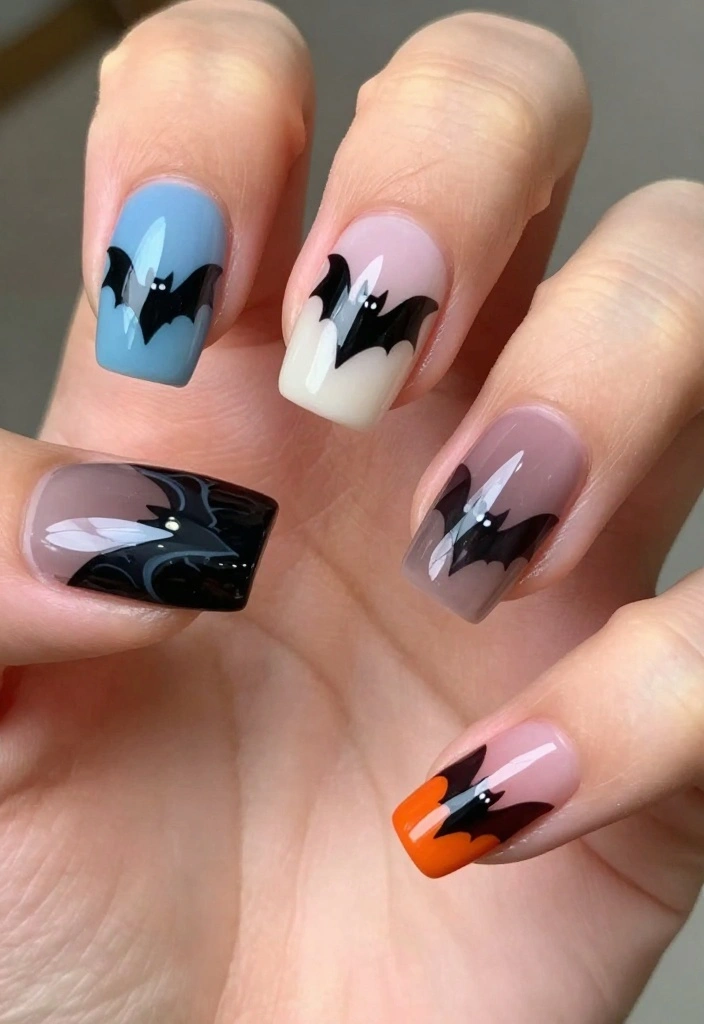
For a quick and stylish option, bat-themed nail wraps are a fantastic choice! These pre-designed stickers can be easily applied to your nails for an instant Halloween look. Select from various patterns featuring bats or spooky scenes. Just peel, stick, and finish with a top coat for a durable finish. This method is perfect for those pressed for time but still wanting fabulous bat nails!
Outfit Pieces:
– Quality bat-themed nail wraps
– Top coat for finishing
Styling Tips:
– Choose high-quality wraps for better adhesion.
– File the edges after applying for a neat appearance.
Nail wraps are a fun and hassle-free way to celebrate Halloween without the mess!
11. Fall-Inspired Bat Nails
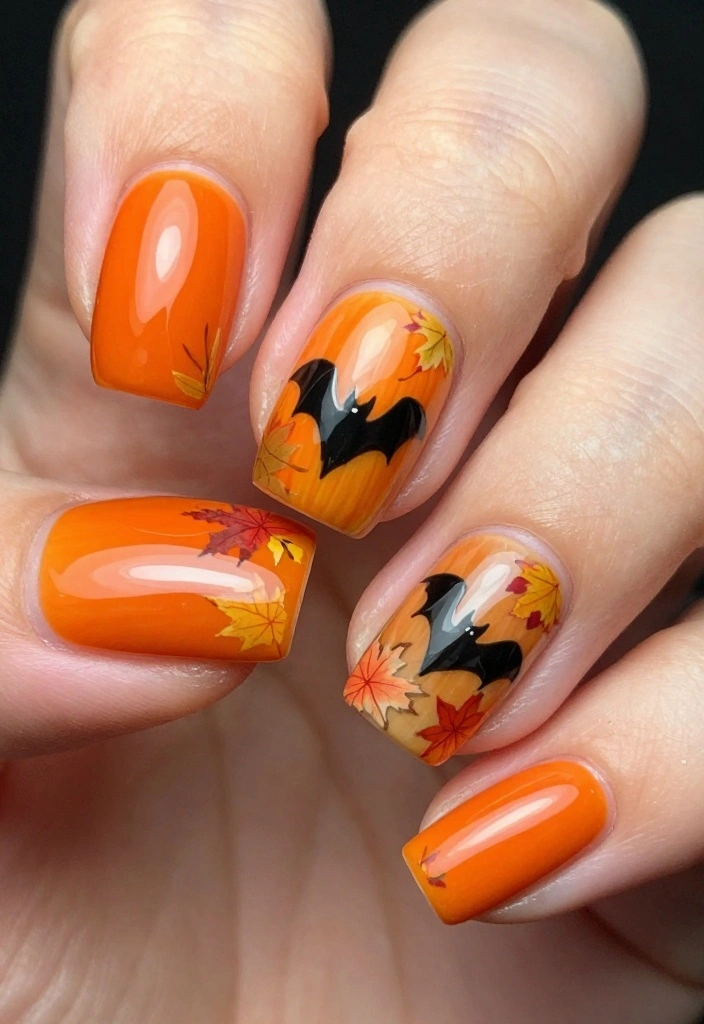
Celebrate the fall season with nails that blend autumn colors and bats! Start with a vibrant base coat in pumpkin orange or deep burgundy. After it dries, paint small black bats swooping amidst colorful falling leaves in warm shades of yellow and brown. This design beautifully unites the essence of autumn with Halloween, making it a perfect seasonal highlight!
Outfit Pieces:
– Pumpkin orange or deep burgundy base polish
– Various colors for leaves (yellow, brown)
– Black polish for bat designs
Styling Tips:
– Use a fine brush for detailed leaf designs.
– Experiment with different leaf shapes and sizes for variety.
– Seal with a top coat to enhance durability.
This design is vibrant and seasonal, capturing the spirit of fall beautifully!
12. Neon Bat Nails
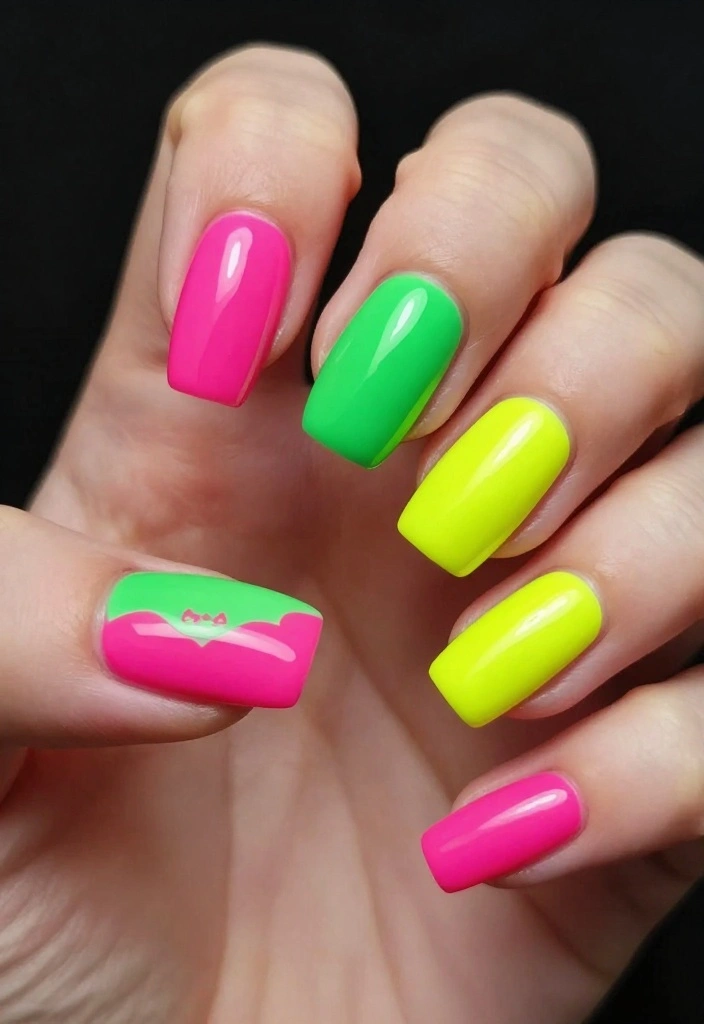
Make a bold statement with neon bat nails that are sure to turn heads! Start with a classic black base and use neon polishes in striking colors like pink, green, and yellow to craft vibrant bat shapes. The neon colors against the dark backdrop create a stunning contrast that’s perfect for Halloween parties or night outings. This design is for those who love to stand out and express their festive spirit!
Outfit Pieces:
– Black base polish
– Neon nail polishes (pink, green, yellow)
Styling Tips:
– Mix neon polishes well for maximum color impact.
– Consider using a matte top coat for a modern finish.
This bold design is sure to make a statement and bring a festive flair to your Halloween plans!
Fun fact: Neon bat nails grab attention instantly—80% of party-goers notice bold nails before outfits. When you pair a black base with pink, green, or yellow bats, you’ll never blend in. It’s bold, festive, and totally share-worthy for Halloween nights.
13. Minimalist Bat Nails
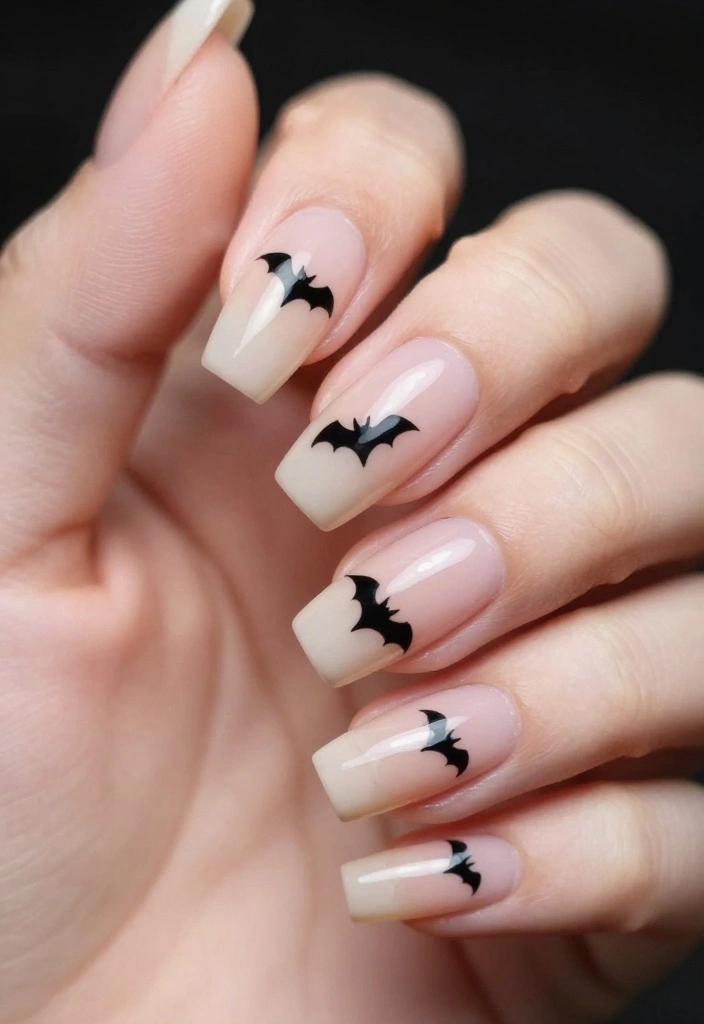
For a refined take on Halloween, consider minimalist bat nails! Using a nude or clear base, paint tiny, subtle bat designs at the tips or sides of your nails with a very fine brush. This design is perfect for those who appreciate a chic and understated Halloween look while still celebrating the season.
Outfit Pieces:
– Nude or clear base polish
– Fine brush for bat details
Styling Tips:
– Embrace the less-is-more philosophy by keeping designs simple.
– Select a neutral base to accentuate the bat details.
– Seal your design with a top coat for a polished finish.
This minimalist design is an elegant way to bring a touch of Halloween to your style!
Conclusion
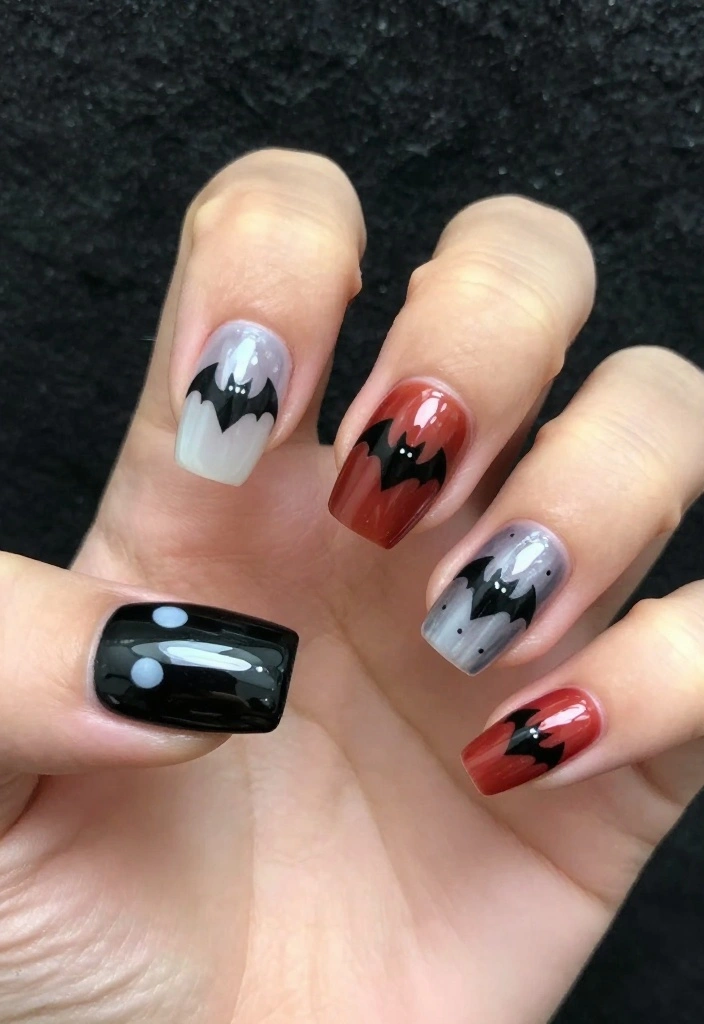
With these 13 DIY bat nail ideas, you’re all set to embrace the spooky season in style! Each design offers a unique way to express your creativity and celebrate Halloween, whether you prefer something elegant, cute, or downright bold. So gather your nail art supplies and get ready to show off your killer style. Happy nail painting!
Frequently Asked Questions
What exactly are bat nails and why are they a top DIY nail trend this season?
Bat nails are nail designs featuring bat silhouettes or bat-inspired details drawn on your nails. They are a playful nail trends staple that fits the spooky season perfectly and are easy to customize with your favorite colors. To start, pick a base shade you love, then add a tiny bat silhouette near the cuticle or across the nail. You can keep it simple with a single bat on each nail or go full silhouette across several nails.
Pro tip: use a fine brush or a stamping plate to get clean shapes, seal with a top coat, and mind your drying time.
With DIY creativity, you can make bat nails match any outfit and party theme.
What supplies do I need to create DIY bat nails at home?
Here’s a starter kit for beginners: base coat, top coat, two nail polishes (a dark shade for bats and a lighter shade for the base), a fine detail brush or nail art pen, a dotting tool, a bat stamping plate or decals, tape or stencils, remover and cotton pads, a cuticle pusher, and a clean-up brush. Optional: a matte top coat for a spooky matte finish or rhinestones for extra flair.
Remember to sanitize tools and patch-test polishes before use for DIY safety.
Can you walk me through a simple bat nails design for beginners?
Absolutely! Try this easy version:
1) Prep nails: file, buff, push back cuticles, and apply a base coat.
2) Paint a solid base color and let it dry.
3) Draw a tiny bat silhouette with a fine brush or stamp it using a bat plate.
4) Optional: add small white dots for eyes.
5) Clean up edges with a brush dipped in remover.
6) Seal with a glossy top coat and let it dry.
Tip: practice shapes on a piece of paper first, and consider a single bat accent on each nail to keep things simple and cute while you learn the DIY technique.
How can I customize bat nails for different nail lengths and shapes?
Short nails? Place a compact bat near the tip or near the cuticle for a cute, subtle look. Long nails? Create a bigger bat or arrange a tiny bat on every nail for a dramatic effect. For almond or square shapes, adapt the wings to follow the nail’s curve and use negative space to keep designs legible. You can also use decals or stickers to scale the size without extra effort.
In all cases, aim for cohesive color choices and keep the bat nails design balanced with your overall outfit and current nail trends.
How do I remove bat nails safely and keep nails healthy after Halloween season?
Removal should be gentle and gradual. Soak cotton pads in acetone or use the foil-wrapping method to dissolve polish without pulling on the nails. After removal, wash hands, apply a nourishing cuticle oil and a rich hand cream. Give nails a break between themed sets, use a strengthening base coat, and hydrate from within to protect your nail bed.
Bonus: file nails back to their natural shape and consider a nourishing mask or overnight oil treatment to maintain healthy nails between DIY bat nails projects.
Related Topics
bat nails
nail art
DIY nail designs
Halloween nails
easy nail art
trendy nails
seasonal nail trends
creative nail ideas
beginner friendly
spooky season
nail design techniques
quick nail tutorials
I love these DIY bat nails! I tried something similar last year, but my bats ended up looking more like flying squirrels. Have you ever had a nail art fail like that?
These bat nails are so cute! I can just picture my friends asking if I’m ready for Halloween. I wonder if I can get my cat to keep them safe from the trick-or-treaters! Why did the bat miss the party? Because he couldn’t find his way out of the cave!
Did you know that bats can eat up to 1,200 mosquitoes in an hour? Just imagine how many bats you’d need to keep those pesky bugs away while showing off your nail art!
I once tried to paint pumpkins on my nails for Halloween and ended up with a messy orange blob! But it made for a funny story when I showed them off. Have you had any funny nail art moments?
For anyone trying these DIY bat nails, I recommend using a good top coat to keep your art from chipping. It really makes a difference in how long your nails last!