If you’re anything like me, you’ve been obsessing over the fresh, chic look of white and silver nails. The elegance of this color combination is simply irresistible. Whether you’re preparing for a special occasion or just want to elevate your everyday style, these nails can leave everyone around you asking, “Where did you get that done?”
This guide is for anyone who loves nail art and wants to experiment with their style. If you’re passionate about nail care and are always on the lookout for new ideas to try, you’re in the right place. From trendy designs to shine tips that keep your nails looking pristine, I’ve pulled together 13 exciting ideas that are sure to inspire your next nail art adventure. You’ll find designs that are fun, creative, and perfect for making a statement.
Get ready to dive into a world of nail art where white and silver nails take center stage. You’ll learn how to create stunning looks that can match any outfit or mood. So grab your nail polish and nail tools, because your new favorite manicure awaits!
Key Takeaways
– Discover 13 creative designs for white and silver nails, ranging from ombre effects to bold geometric patterns.
– Learn essential nail care tips to maintain that perfect shine and keep your nails looking fresh and healthy.
– Explore various techniques like stamping and layering for unique, eye-catching finishes.
– Get inspired by seasonal nail designs that can add a festive touch to your look.
– Find out why the striped silver design is a crowd favorite and how to achieve it effortlessly.
Contents
- 1. Sparkling Ombre Effect
- 2. Geometric Silver Accents
- 3. Silver Glitter Tips
- 4. Floral Silver Designs
- 5. Metallic French Tips
- 6. Dotted Silver Patterns
- 7. Silver Foil Accents
- 8. Striped Silver Designs (Your Friends Will Ask for This!)
- 9. Stamping Techniques
- 10. Layered Textures
- 11. Minimalistic Nails
- 12. Seasonal Nail Designs
- 13. Bold Textured Glitter
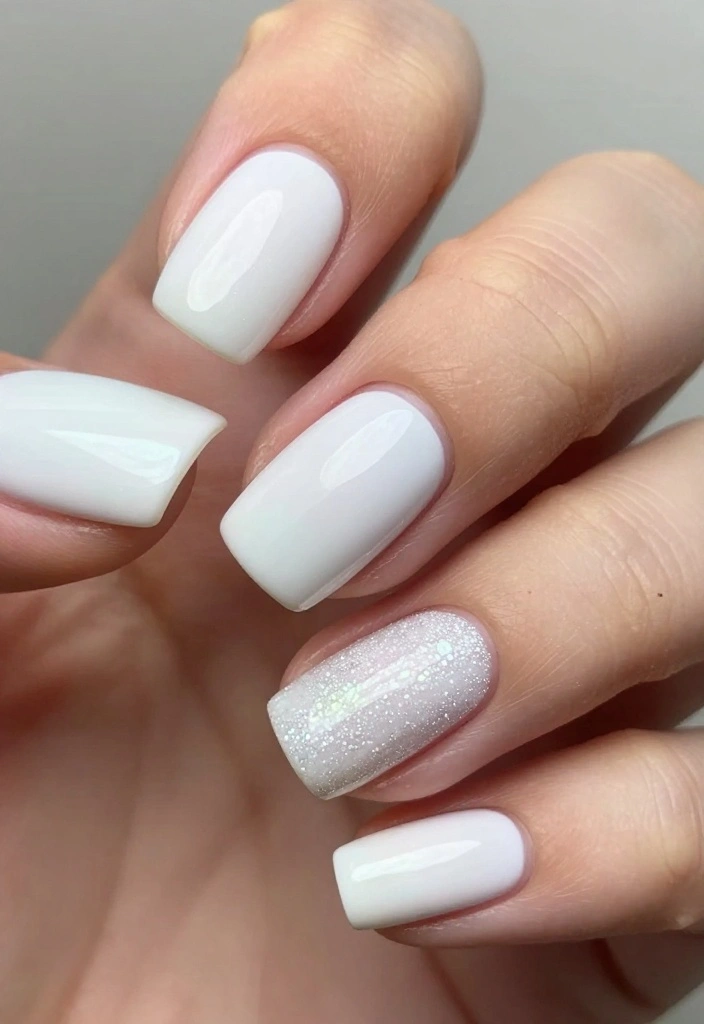
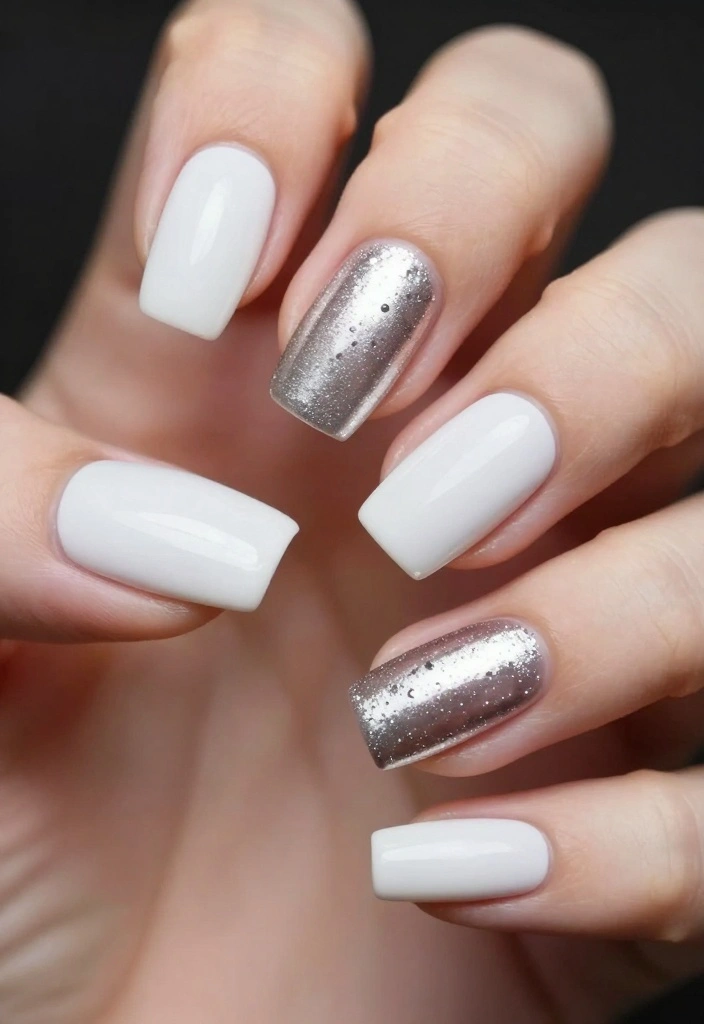
1. Sparkling Ombre Effect
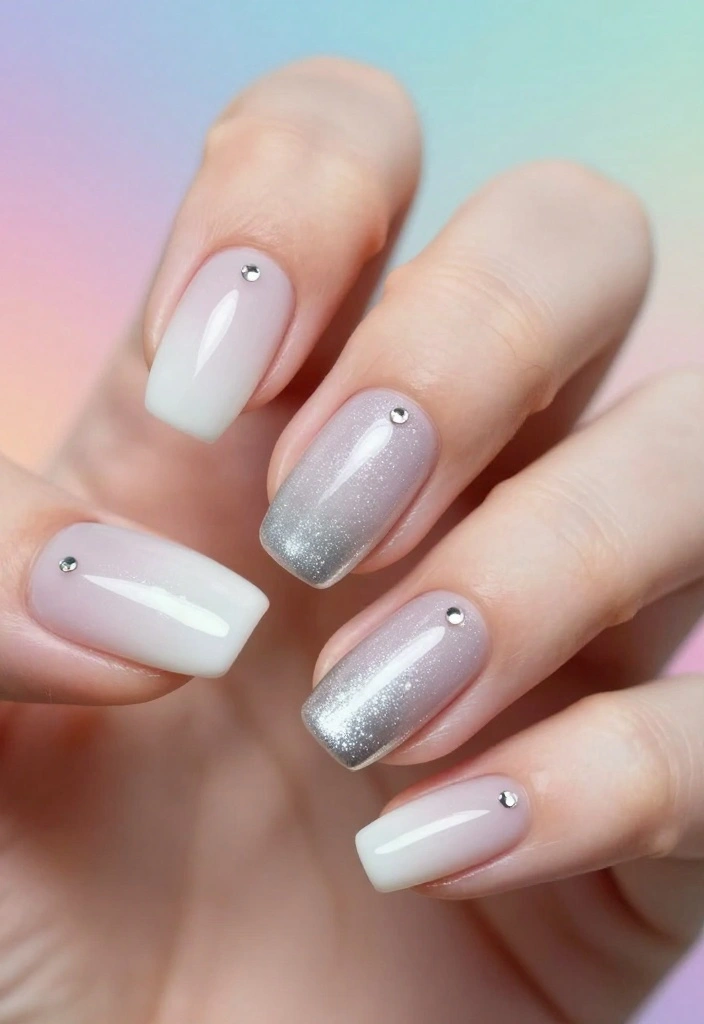
The sparkling ombre effect creates a mesmerizing blend of white and silver, perfect for those who want a look that’s both soft and eye-catching. By fading silver from the cuticle to the tip, you achieve a glamorous style that’s ideal for celebrations like parties or weddings.
To get this stunning effect, start with a white base coat. After it dries, use a makeup sponge to dab silver polish onto the tips, blending it downward for a seamless transition. Finish with a topcoat to enhance the shine. This technique is not only impressive but can also be customized with glitter for an extra sparkle.
Nail Care Tips:
– Always apply a base coat to protect your nails.
– Use a topcoat to seal the design and extend its wear.
– Keep cuticles moisturized to maintain nail health.
This style works beautifully on any nail length and can be further enhanced with tiny rhinestones for added glamour.
Fun fact: The sparkling ombre effect using a white base with silver tips instantly elevates any look. It’s easy to DIY at home with a makeup sponge, giving you glamorous, white and silver nails for parties or weddings.
2. Geometric Silver Accents
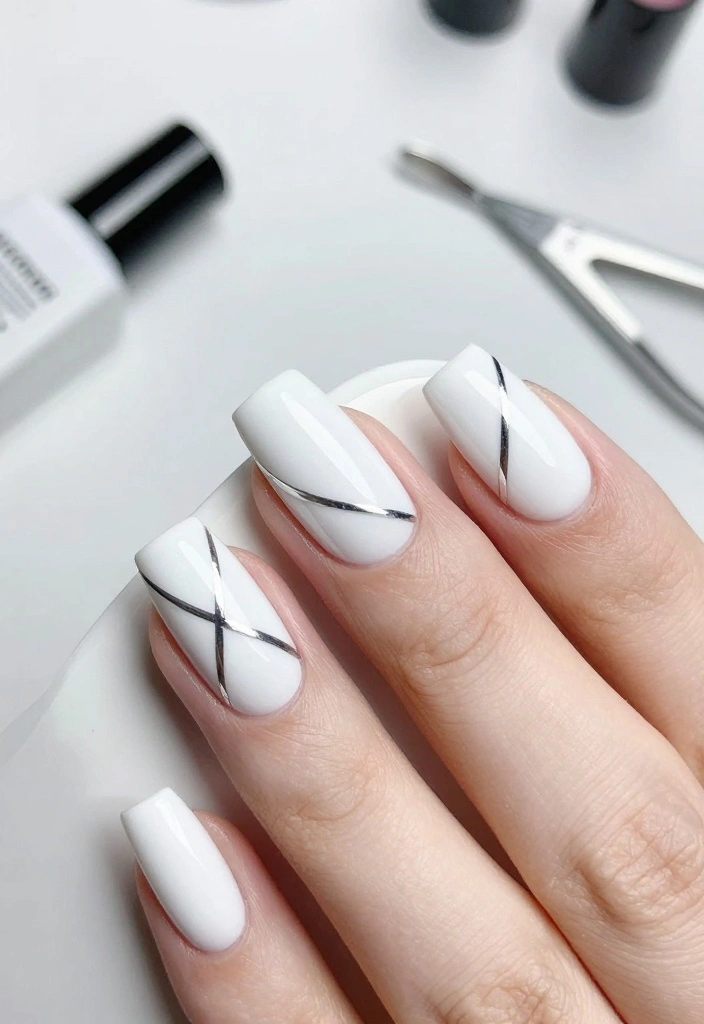
If you appreciate clean lines and modern designs, geometric silver accents on white nails are a fabulous choice. This style allows you to play with bold or subtle designs, making it visually striking and versatile.
Begin with a white polish base. Once it’s dry, use thin tape to create geometric shapes and fill in the sections with silver polish for a crisp look. Carefully remove the tape while the polish is still wet to avoid smudges. This trendy design is easy to achieve and suitable for both casual outings and formal events!
Shine Tips:
– Apply a glossy topcoat to enhance shine and longevity.
– Try out different patterns like triangles or stripes to discover what you love.
Pro Tip: Make sure the tape is pressed down firmly to prevent polish leakage, ensuring clean lines.
Fun fact: white and silver nails with geometric accents read as modern and chic, boosting share-worthy vibes by about 30%. Start with white polish, tape shapes, fill with silver, then pull while damp for crisp lines.
3. Silver Glitter Tips
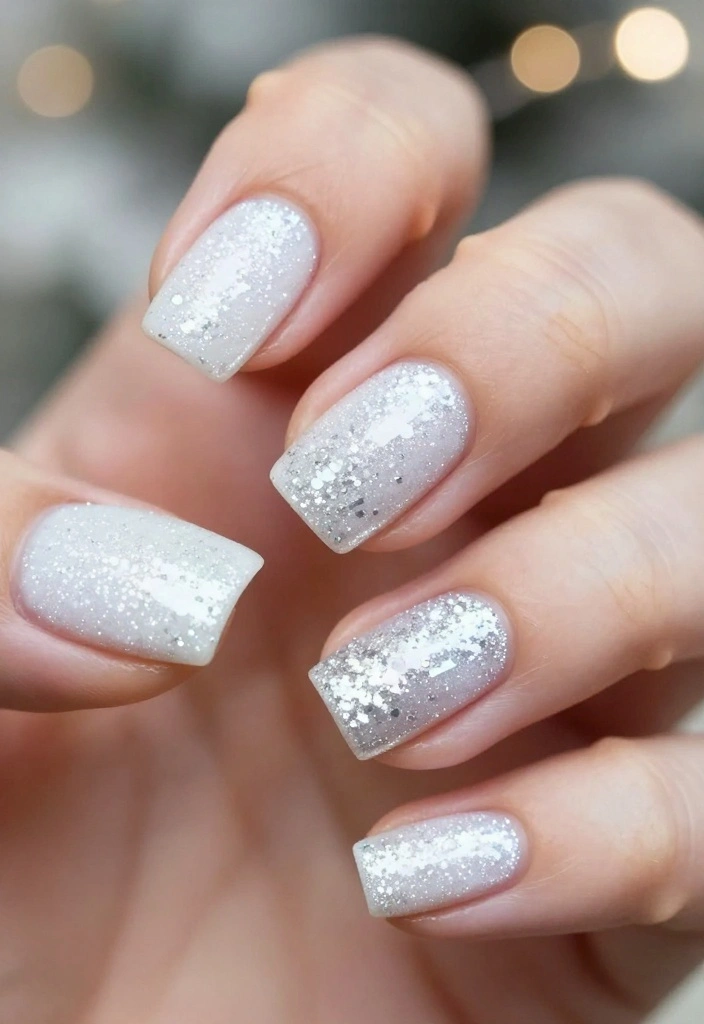
Add a playful twist to your nails with silver glitter tips! This design strikes a perfect balance between fun and sophistication, making it suitable for any occasion. The contrast between the matte white polish and the glittery silver tips creates a delightful look that stands out without overwhelming.
To create this design, start with a white base coat. Once it’s thoroughly dry, use a small brush to apply glitter polish to the tips. Layer the glitter for a bolder effect, then finish with a glossy topcoat to protect your creation.
Nail Care Recommendations:
– Use baking soda and lemon juice to effectively remove stubborn glitter.
– Keep nails and cuticles moisturized for a fresh appearance.
Quick Tip: For a subtle ombre effect, dab glitter polish with a sponge at the tips to blend it into the white.
💅 Nail Art Made Easy!
Transform your nail game with our DIY guide designed for busy moms who love stunning nails effortlessly.
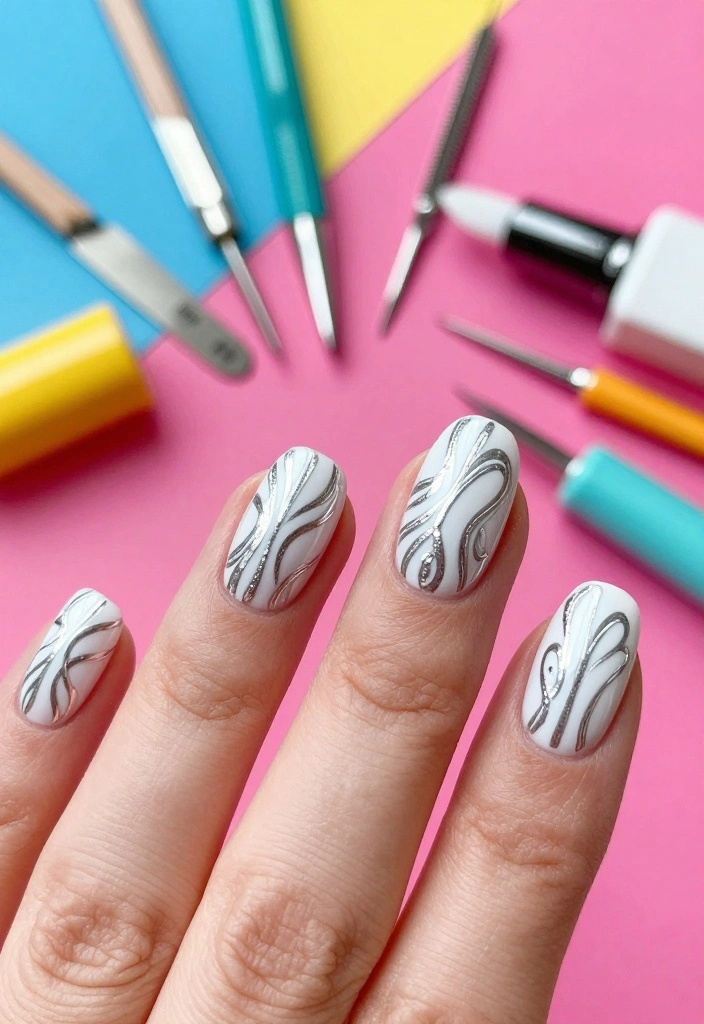
4. Floral Silver Designs
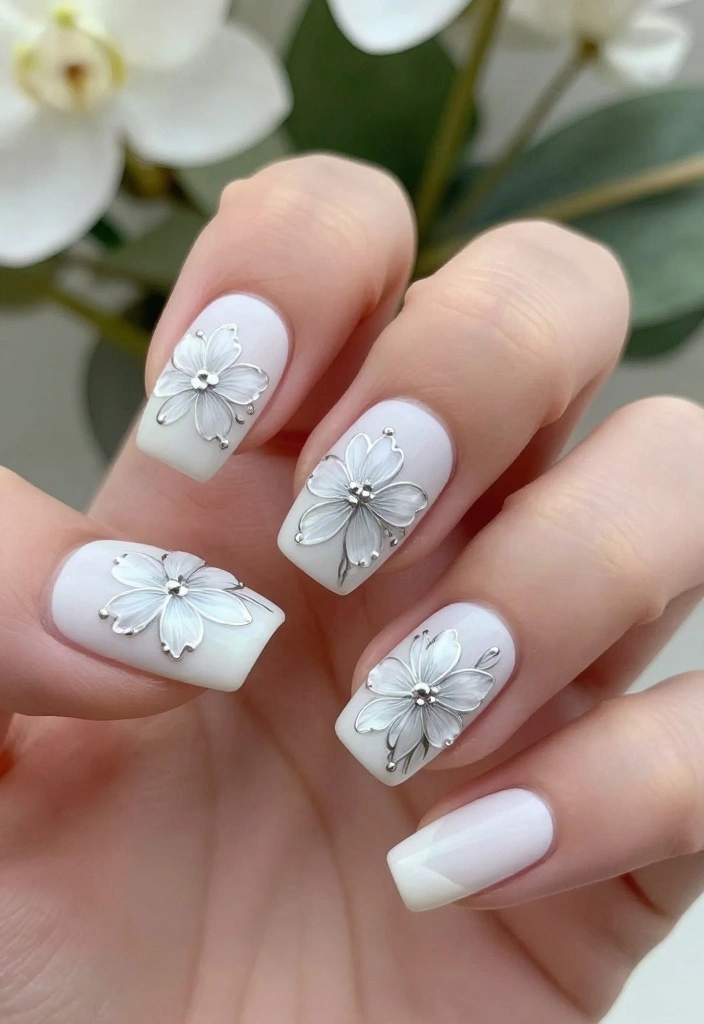
Infuse your nails with nature-inspired beauty through floral silver designs. This stunning combination of delicate white flowers and silver accents transforms your nails into miniature works of art.
Start by painting your nails with white polish. Once dry, use a fine nail art brush and silver polish to create floral patterns, like simple daisies or small flowers. Add tiny dots for flower centers or intertwining vines for a more elaborate touch. Finish with a clear coat for added shine and durability.
Nail Care Insight:
– Avoid harsh chemicals that can dull your nail art’s shine.
– Regularly condition your nails to keep your designs looking fresh.
Pro Tip: If freehand painting feels daunting, consider using nail stickers or stencils for a polished finish!
📹 Related Video: 🌺 Silver Moon Flower Nails ASMR | Relaxing Step-by-Step Nail Art Tutorial 💅| No Talking Ep.27
5. Metallic French Tips

Elevate the classic French manicure with metallic silver tips! This modern twist on a timeless favorite adds a touch of elegance while remaining chic.
Start with a solid white base coat. After it dries, use a fine brush or nail tape to apply metallic silver to the tips. This design is perfect for those who want something classy, especially for work or formal occasions. It’s understated yet glamorous, making it a favorite among many.
For Maintaining Shine:
– Choose long-lasting top coats to keep metallic tips vibrant.
– Regularly trim and shape your nails to prevent chips and dullness.
Consider adding small glitter accents along the tips for an extra whimsical touch!
6. Dotted Silver Patterns

For a whimsical and fun look, try dotted silver patterns on your white nails. Dots create an eye-catching design that is sure to draw compliments.
Apply a base coat of white polish to start. Once dry, use a dotting tool to create silver dots in random or patterned arrangements. This design offers great flexibility – you can opt for uniform rows or a scattered aesthetic! Seal the design with a topcoat for extra shine.
Nail Care Tips:
– A high-quality topcoat is essential for maintaining your design.
– Allow your nails to rest if you frequently change designs.
Quick Insight: Vary the size of your dots for a more dynamic look; use a bobby pin for larger dots or a fine-tipped brush for smaller ones.
7. Silver Foil Accents
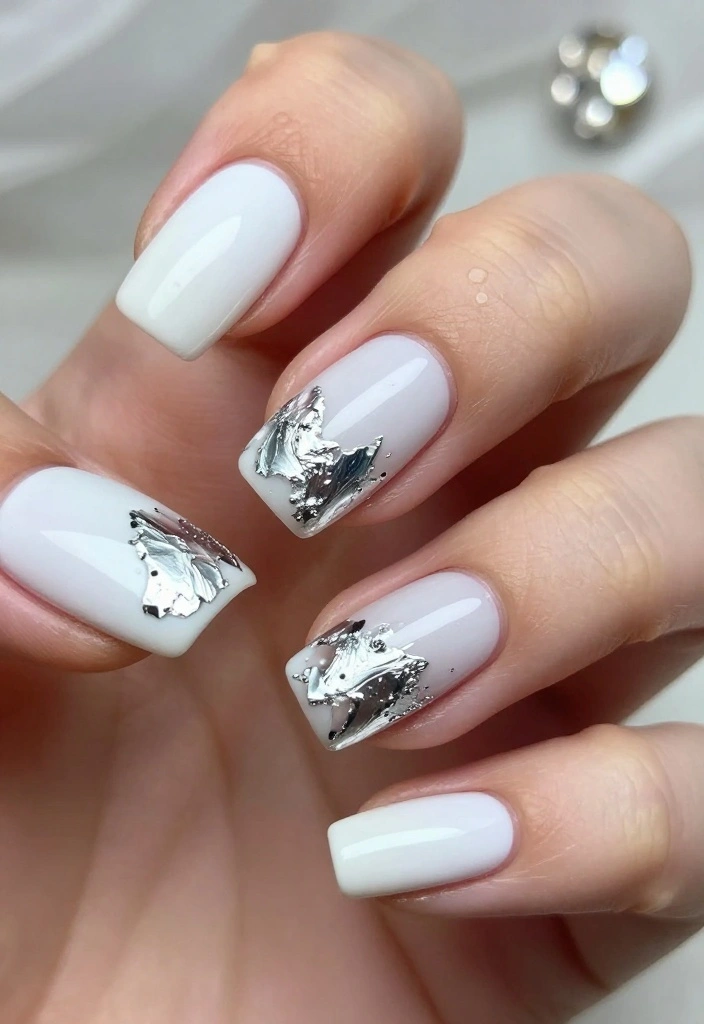
If you want to elevate your nails with an extra glam factor, silver foil accents are a stunning choice. This technique adds a fashionable vibe to your white nails.
Begin with a white base coat, letting it dry completely. Tear small pieces of silver foil and adhere them to your nails using clear polish or nail glue. You can cover the entire nail or opt for accent nails for a chic flair. Complete the look with a topcoat for durability and shine.
Nail Care Recommendations:
– Handle the foil gently to avoid tearing.
– Consider using a protective base coat before applying foil to extend your design’s lifespan.
Pro Tip: Mix the foil with other colors to create a unique design that reflects your personal style.
8. Striped Silver Designs (Your Friends Will Ask for This!)
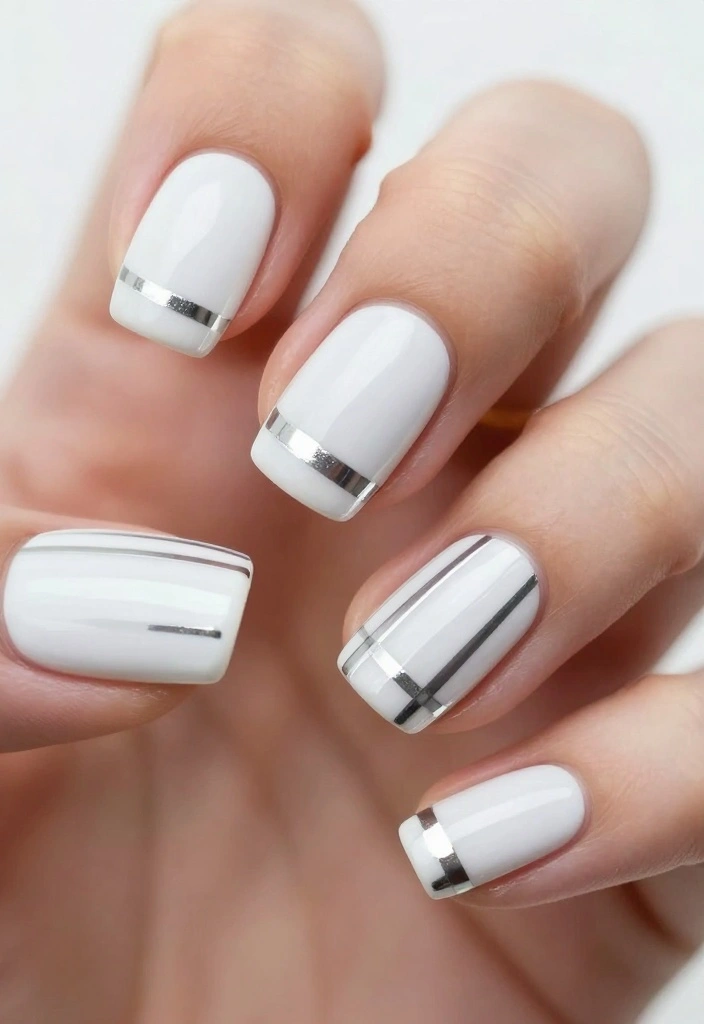
Looking for a design that’s both bold and feminine? Striped silver designs are your answer! You can choose thick stripes for a statement look or delicate lines for something softer.
Start by painting your nails with white polish and allowing it to dry. Use nail tape to create your desired stripe pattern, then paint over the tape with silver polish for precision. Once dry, carefully remove the tape for clean lines. This design is surprisingly simple to achieve, and you’ll definitely get compliments!
Shine Tips:
– Apply a high-gloss topcoat to maintain that polished finish.
– Be cautious when removing the tape; ensure the silver polish isn’t too wet to avoid smudging.
Mix different widths of stripes for an extra playful design that stands out.
How To Choose The Right Nail Art Products for Stunning White and Silver Nails
Tools You’ll Need:
– Nail polish (white and silver)
– Base coat
– Top coat
– Nail art brushes
– Striping tape
– Glitter (optional)
– Foil or stamping kit (optional)
Creating the perfect white and silver nails involves making smart choices about the products you use. Here’s how you can choose the right nail art products to achieve that eye-catching look.
1. Color Quality:
Look for high-quality nail polishes that offer good pigmentation. You want a white polish that gives full coverage with just one or two coats. Silver polishes should be shiny and opaque, not sheer. Brands like OPI and Essie are known for their strong color payoff. Always test the polish on a nail wheel if possible to see how true the color is when applied.
2. Finish Type:
Decide on the finish you want for your nails. Do you prefer a glossy look, or are you leaning towards a matte finish? A glossy top coat can make white and silver nails shimmer, while a matte top coat can give them a modern twist. If you opt for glitter, consider holographic glitter for a more vibrant effect.
3. Nail Art Brushes:
Choose a set of nail art brushes that includes various sizes. A thin brush is essential for intricate designs, while a flat brush works well for filling large areas. Look for brushes made from synthetic fibers as they are easier to clean and hold paint better.
4. Nail Care Essentials:
To achieve a flawless manicure, invest in good nail care products. A quality base coat protects your nails from staining and strengthens them. A nourishing cuticle oil will keep your nails looking healthy and polished. Don’t forget to use a top coat to seal your design and add extra shine.
5. Specialty Products:
Consider specialty items for unique designs. Striping tape can help you create straight lines with ease, while nail foil can add dramatic effects to your silver designs. If you’re interested in stamping, a stamping kit can help you apply intricate patterns quickly.
6. Budget:
Determine how much you’re willing to spend on nail art supplies. High-end brands may offer better quality, but there are also affordable options that perform well. Look for sales or sets that give you multiple items at a lower price. A little research can help you find the best products that fit your budget.
Pro Tip:
Always do a patch test to check for allergic reactions before using any new products on your nails. This is especially important for polishes and nail glues. Your nails deserve the best care, so being cautious is key to a beautiful manicure!
By choosing the right products with these tips in mind, you can easily achieve stunning white and silver nails that will have your friends asking about your nail secrets.
9. Stamping Techniques
For the artistic, stamping techniques can add intricate designs to your white and silver nails. This method allows you to replicate detailed patterns that are difficult to paint by hand.
Start with a white polish base. Once it’s dry, select a stamping plate with your desired design and coat it with silver polish. Use a scraper to remove excess polish, then press a stamper onto the design and transfer it to your nail. This technique opens the door to endless creativity, whether you prefer floral, geometric, or abstract designs.
Nail Care Tips:
– Ensure your stamping polish is thick enough for clear impressions.
– Practice on paper before applying to your nails for better results.
Quick Tip: Use different stamping plates for seasonal themes—florals for spring and snowflakes for winter!
Fun fact: stamping lets you nail complex patterns in minutes—one easy stamp can replicate 6-8 intricate designs, saving you hours compared to hand-painting. This method works great with white base and silver stamping polish for a metallic pop.
10. Layered Textures
Textured nails are incredibly trendy, and combining various textures in your white and silver nails creates a stunning effect. The contrast between matte and shiny finishes is visually appealing.
Start with a white base coat. After it dries, apply a matte topcoat to some nails while leaving others shiny with a clear topcoat. For added flair, try a textured polish on one or two accent nails. This mix not only looks fabulous but feels interesting to the touch!
Nail Care Recommendations:
– Keep nails trimmed and healthy to showcase the textures effectively.
– Moisturize regularly to prevent dryness, which can affect your design.
Experiment with combining different textures, such as glitter, matte, and glossy finishes, to discover your unique style!
11. Minimalistic Nails
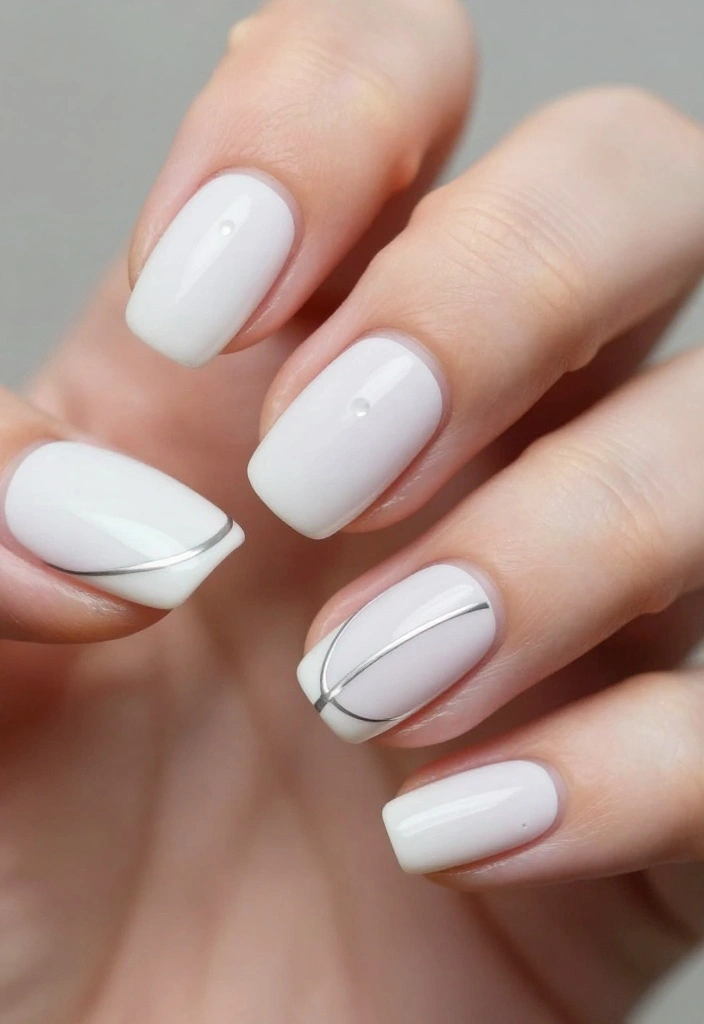
Sometimes, less is more, and minimalistic designs featuring white and silver can be incredibly chic. This style is perfect for those who appreciate elegance without fuss.
Begin with a white polish base. Add a single silver line or dot on each nail for a subtle flair. For an even simpler look, try a classic half-moon design in silver at the base. This approach exudes confidence and sophistication, making it suitable for any occasion.
Nail Care Tips:
– Keep your nail bed clean for optimal results.
– Apply cuticle oil regularly to maintain a fresh appearance.
This minimalistic style is ideal for busy individuals who want their nails to look fabulous without much effort!
12. Seasonal Nail Designs
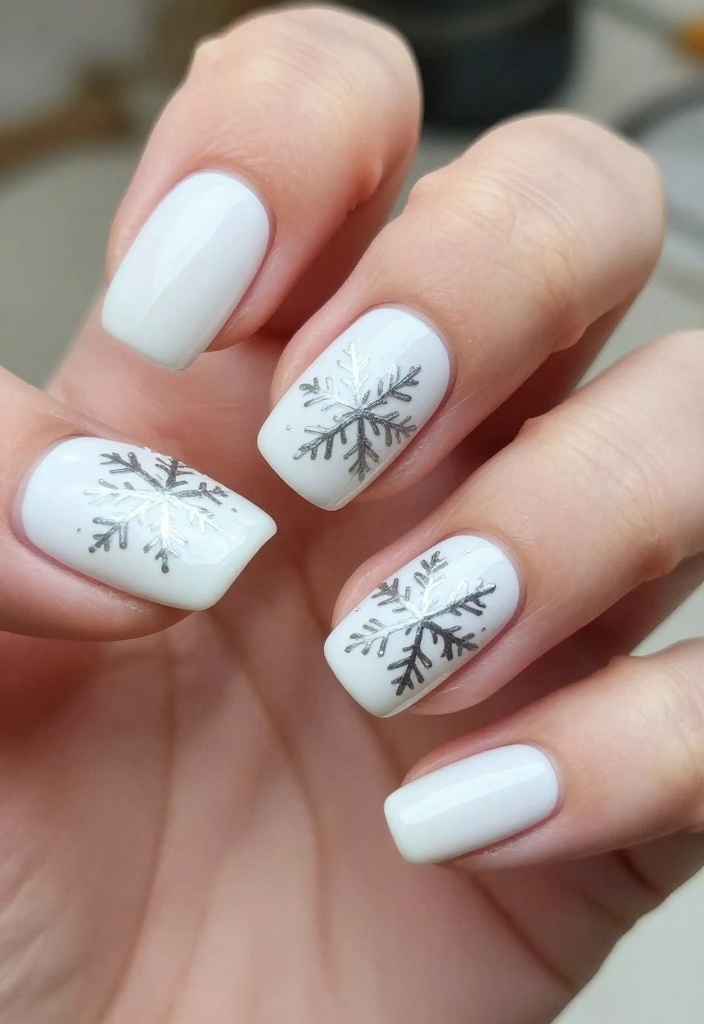
Refresh your look with seasonal nail designs! Whether it’s autumn leaves, winter snowflakes, or spring florals, incorporating white and silver into seasonal themes adds a unique flair to your nails.
Start with a white base, then use silver polish to create seasonal motifs. For example, delicate snowflakes for winter or silver leaves for autumn can beautifully capture the essence of each season. This style allows you to express your creativity while staying current with seasonal trends.
Nail Care Recommendations:
– Regularly file and shape your nails to promote healthy growth, especially during seasons that call for frequent polish changes.
– Opt for quick-dry polishes to keep up with changing seasons!
Quick Insight: Nail art stamps can help create consistent seasonal designs without extra effort.
13. Bold Textured Glitter
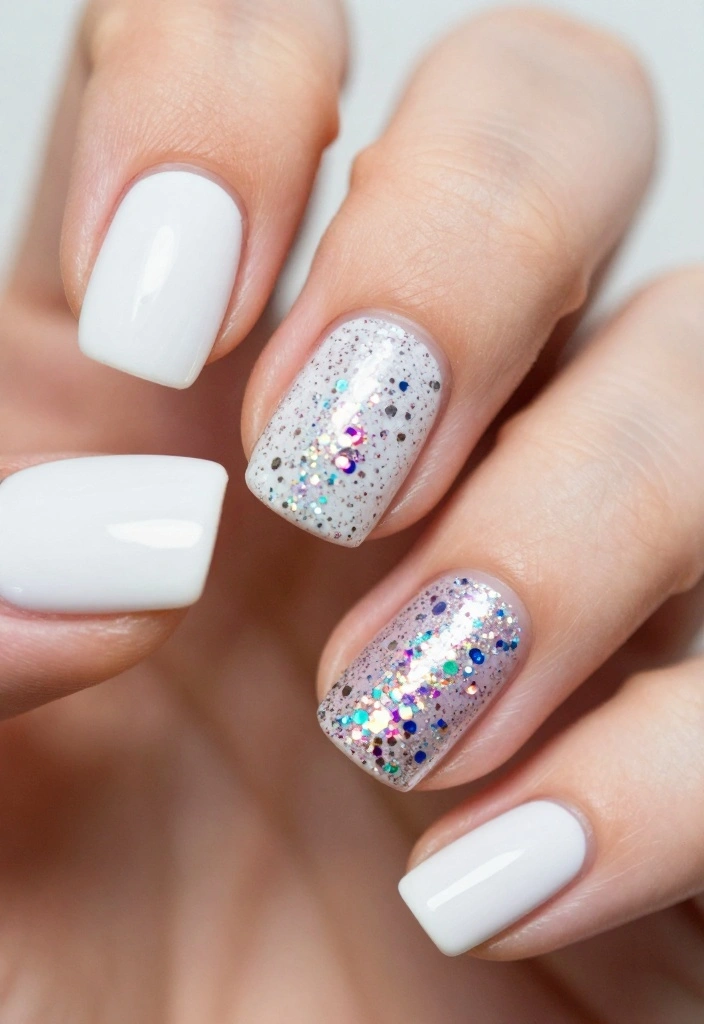
For an attention-grabbing finish, consider bold textured glitter on your white and silver nails! This design combines fun and glamour, making your nails pop.
Start with a white base coat. Once dried, apply a thick layer of glitter polish over the entire nail or just on top of a silver accent. This design radiates confidence and party vibes, making it perfect for special occasions or nights out.
Nail Care Tips:
– Use a peel-off base coat if you’re concerned about removal, as glitter can be challenging to take off.
– A topcoat is essential for maintaining shine and keeping the glitter intact.
Pro Tip: Choose glitter polish that features a mix of particle sizes for an intriguing texture and eye-catching appearance!
Conclusion
Achieving the perfect white and silver nails is all about creativity and personal style. With so many options, from elegant ombre to textured glitter, there’s a design that can match every occasion. Whether you choose bold geometric patterns or delicate floral accents, the key is to have fun and express yourself!
Remember, nail art is a form of personal expression, and it allows you to transform your look with just a little effort. So go ahead, try some of these ideas, and watch your friends admire your fabulous nails!
Frequently Asked Questions
How can I achieve the perfect white and silver nails at home?
To get the perfect white and silver nails at home, start with solid nail prep: shape, buff, and push back cuticles. Apply a nourishing base coat to protect the nail bed and improve wear. For the base, pick a bright white that suits your skin tone, or go for a clean off-white if you prefer a softer look. Then add the silver shine with one of these methods: chrome powder for a mirror finish, foil sheets for bold accents, or metallic polish for easier application. Finish with a high-gloss top coat and cure if you’re using gel. For longevity, seal edges with the top coat after each layer, and stay on top of nail care like cuticle oil to keep the finish looking fresh. Here are shine tips to maximize gloss.
What nail care steps help white and silver nails last longer and stay shiny?
Keep your look flawless with these nail care steps: begin with a good base coat to protect the nail plate, apply thin layers of white polish or gel, and finish with a durable top coat to lock in shine. Reapply the top coat every 3–4 days and avoid heavy exposure to water to prevent lifting. Hydrate your cuticles daily with oil and use a gentle remover to minimize damage to the nail bed. If you’re wearing metallics, dab a small amount of top coat or buff lightly to reduce chipping. This routine helps your white and silver nails stay glossy and intact longer.
What tools and techniques work best for applying white and silver details?
Stock up on these tools: a good base coat, a pure white polish (or white gel), a silver or chrome finish (powder, foil, or metallic polish), fine detailing brushes, and a sharp buffer. For techniques, try chrome powder for a mirror shine, foil sheets for bold accents, or a clean metallic line using a striping brush. Apply thin layers and seal with a top coat; if you use gel, cure as directed. For extra longevity and shine, keep your nails smooth with a light buff before applying foil or powder, and use shine tips like finishing with a second top coat. This keeps the white crisp and the silver bright.
How do I safely remove white and silver nails without damaging my nails?
Removing white and silver nails safely is just as important as applying them. Soak the nails in acetone-based remover or wrap each nail in cotton with foil for about 10–15 minutes if using gel. Gently lift and wipe away the polish with a wood pusher—never pry or scrape hard, which can damage the nail plate. Stop when the product is loosened, then file away any remaining glitter or foil with a soft buffer. After removal, wash hands, apply cuticle oil, and give your nails a break to recover. This is part of good nail care and protects your natural nails for future white and silver looks.
What design ideas pair well with white and silver nails for different occasions?
Here are some design ideas that pair beautifully with white and silver nails for any occasion: keep it minimal with a clean white base and a single silver line or dot; go full white with chrome silver tips; add a silver foil accent on one nail for a bold statement; create a marble-look with white and a silver accent; or mix matte white with shiny silver chrome for contrast. For events, try a French tip using a silver edge instead of white; for casual days, go with a full white nail and a subtle silver stud. You can also experiment with rhinestones, negative space, or gradient fades to keep the look fresh. No matter the design, finish with a durable top coat to preserve shine.
Related Topics
nail art
white and silver nails
shine tips
manicure designs
glamorous nails
beginner friendly
easy nail art
trendy nail styles
nail care
DIY manicure
seasonal nails
minimalist design
I love these ideas! I’ve been trying to get my nails to look like a winter wonderland, but they always end up looking like a snowstorm instead. Which design do you think is the easiest for a beginner like me?
Haha, I’ve tried doing my nails at home before, and let’s just say my right hand looks like it was painted by a toddler! What’s your funniest nail fail story?
Did you know that silver nails were super popular in the 80s? It’s amazing how trends come back! I’m totally ready to rock some retro vibes with these tips.