The holiday season has me dreaming about all things sparkly, especially when it comes to nail art. There’s something magical about how a little glitter can instantly elevate your festive look. Whether you’re attending a cozy family gathering or a glamorous holiday party, the right nails can tie your whole look together. That’s why I created this post – to share some dazzling designs that will make your nails the talk of the season.
If you’re a nail art enthusiast or just someone who wants to add a bit of sparkle to your holiday outfit, you’re in the right place. This post is perfect for anyone looking to impress friends and family with beautiful, festive nails. From classic colors to fun designs, there’s something here for everyone who loves to embrace the holiday spirit with flair.
You’ll discover 13 fabulous ideas for sparkly Christmas nails that will inspire your next manicure. Each design is not only stunning but also easy enough to do at home or take to your favorite nail salon. Get ready to wow with creative styles like classic red with gold glitter and elegant ombre glitter nails. Your holiday look will be both chic and festive, making you feel confident and ready to celebrate.
Key Takeaways
– Explore 13 unique sparkly Christmas nail designs to elevate your holiday look, perfect for any celebration.
– Discover how classic colors and glitter can transform your nails into festive art.
– Find inspiration for designs that suit every style, from elegant to playful.
– Learn tips on nail care to keep your nails healthy and ready for the holiday season.
– Get insights into current winter nail trends, so you can stay ahead in the festive nail game.
Contents
- 1. Classic Red with Gold Glitter
- 2. Icy Blue with Silver Snowflakes
- 3. Glitter Gradient
- 4. Festive French Tips
- 5. Glittery Candy Cane Stripes
- 6. Elegant Gold Foil Accents
- 7. Ombre Glitter Nails
- 8. Christmas Tree Nail Art
- 9. Warm Winter Sweater Patterns
- 10. Snowy Winter Nights
- 11. Christmas Lights Inspired Design
- 12. Winter Wonderland Marble Effect
- 13. Shimmering Holiday Showcase
1. Classic Red with Gold Glitter
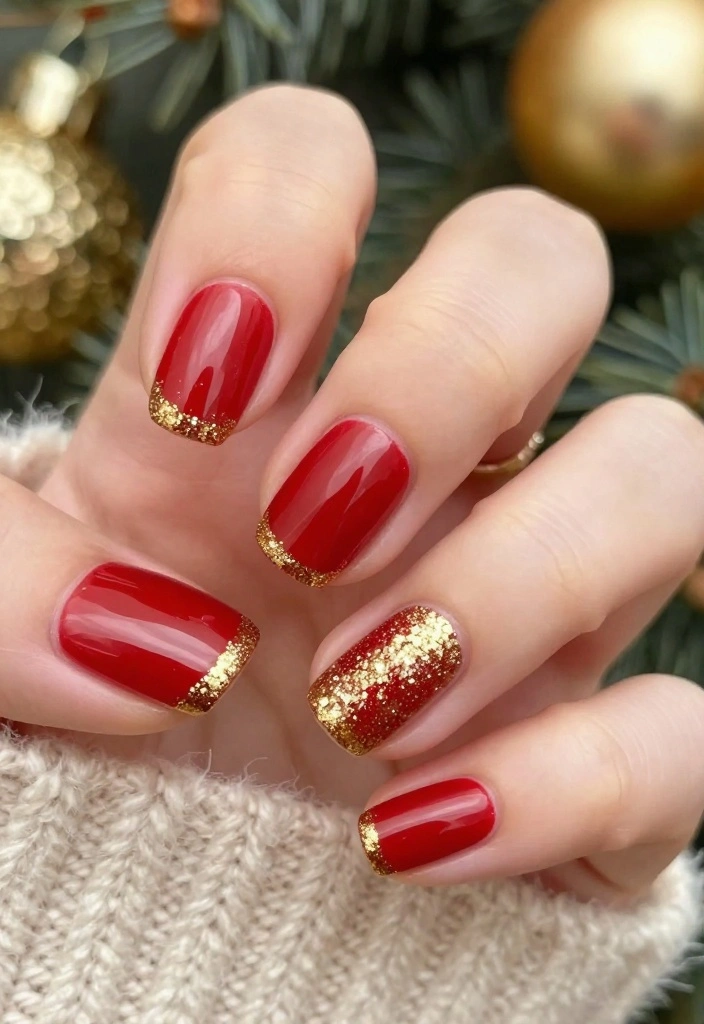
You can’t go wrong with the timeless allure of deep red paired with shimmering gold for the holidays. This nail design features a rich, glossy red hue complemented by sparkling gold glitter, creating a striking visual contrast. It’s an elegant choice that effortlessly elevates your festive look, making it ideal for holiday parties and family gatherings.
To achieve this look, start with a protective base coat. Apply two coats of your favorite red polish and let it dry completely. Using a fine brush, add gold glitter to the tips or opt for a glitter topcoat for a more blended sparkle. Finish with a topcoat to enhance durability.
– Experiment with various shades of red to discover the perfect fit for your style.
– For extra charm, consider incorporating festive nail art stickers or jewels on your ring finger.
Fun fact: Classic red with gold glitter boosts the look of sparkly Christmas nails by about 20% in perceived sparkle when you seal it with a topcoat. Two coats of deep red plus glitter create a glossy, lasting finish for holiday parties.
📹 Related Video: TUTORIAL | EASY RED AND ROSE GOLD GLITTER | BALLERINA/COFFIN GEL NAILS
2. Icy Blue with Silver Snowflakes

Channel the frosty beauty of winter with icy blue nails adorned with delicate silver snowflakes. This design captures the chill of the season, making it a fantastic choice for holiday celebrations. The wintry aesthetic pairs beautifully with your winter wardrobe, ensuring you’ll stand out at any festive gathering.
Start by applying a base coat, then follow up with a light blue polish. Once dry, use a white nail art pen to create intricate snowflake designs. Enhance the look with a shimmering silver topcoat that adds a touch of sparkle.
– Practice your snowflake designs on paper before painting them on your nails for better precision.
– Consider adding rhinestones to the center of the snowflakes to make them pop even more.
How To Choose Sparkly Christmas Nails
Choosing the right sparkly Christmas nails can elevate your holiday look and spread cheer. With so many options available, it’s important to consider a few key factors. Here’s a guide to help you select the perfect design for your festive season.
1. Consider Your Skin Tone
Your skin tone plays a big role in how nail colors appear. Warm undertones look great with golds and reds, while cool undertones often shine with silvers and blues. Test a few colors on your nails before committing to ensure they complement your natural tones.
2. Think About Your Outfit
Your nails should enhance your holiday attire, not clash with it. If you’re wearing a classic red dress, opt for a red glitter that matches. If your outfit is more playful, such as a vibrant green or silver ensemble, choose colors that will bring out those shades.
3. Choose the Right Length and Shape
Nail shape and length can impact the overall effect of your sparkly nails. Longer nails often look more glamorous and allow for intricate designs, while shorter nails may be more practical for everyday wear. Decide which shape—oval, square, or stiletto—suits your style best and complements your lifestyle.
4. Look for Quality Products
Consider the quality of your nail polish and products. High-quality glitter polishes often last longer and provide a more dazzling effect. Check for brands that prioritize nail care and use non-toxic formulas. This ensures your nails remain healthy while looking fabulous.
5. Explore Current Trends
Stay updated on winter nail trends for inspiration. Ombre glitter, candy cane stripes, or festive French tips are all popular this season. Browse social media platforms like Instagram and Pinterest for fresh ideas, and don’t hesitate to mix and match trends to create a unique look.
6. Plan for Nail Care
Don’t forget about nail care! Healthy nails will enhance the look of your sparkly designs. Keep your nails hydrated with cuticle oils and moisturizers. Regularly file and shape them to prevent breakage, especially if you’re opting for longer styles.
Pro Tip: Before applying your sparkly nail design, use a base coat to protect your nails and ensure easy removal later. This small step can save your nails from staining and damage, especially when using bold colors.
With these tips in mind, you’ll be set to choose the most stunning sparkly Christmas nails that reflect your personality and style. Whether you go for classic elegance or a playful design, your nails can truly shine this holiday season!
3. Glitter Gradient
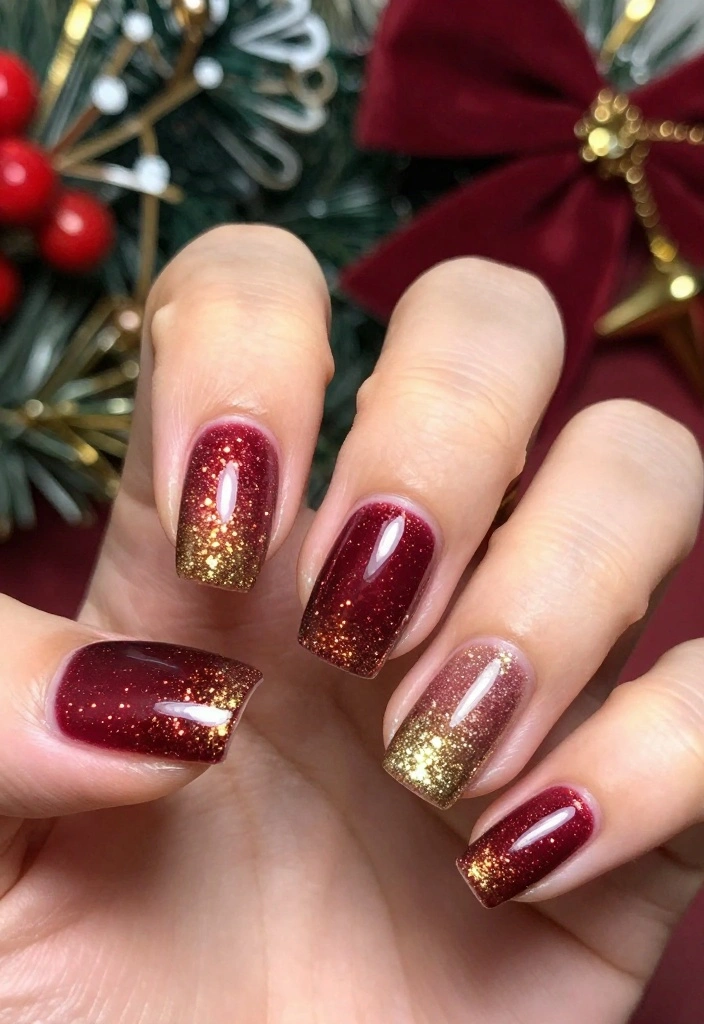
A glitter gradient is a fabulous way to bring festive flair without overwhelming your look. This design features a gradual blend from a solid base color to a sparkling finish at the tips, offering a subtle yet stunning effect. It allows you to express your holiday spirit while maintaining elegance, making it perfect for any occasion.
Begin with a base coat, apply two coats of a deep color like burgundy or emerald green, and let them dry. Use a makeup sponge to dab glitter onto the tips, blending it down towards the base for a smooth transition. Seal everything with a topcoat for lasting shine.
– Mix different glitters to create a unique look that matches your holiday wardrobe.
– Experiment with various base colors to keep your style fresh and fun.
4. Festive French Tips
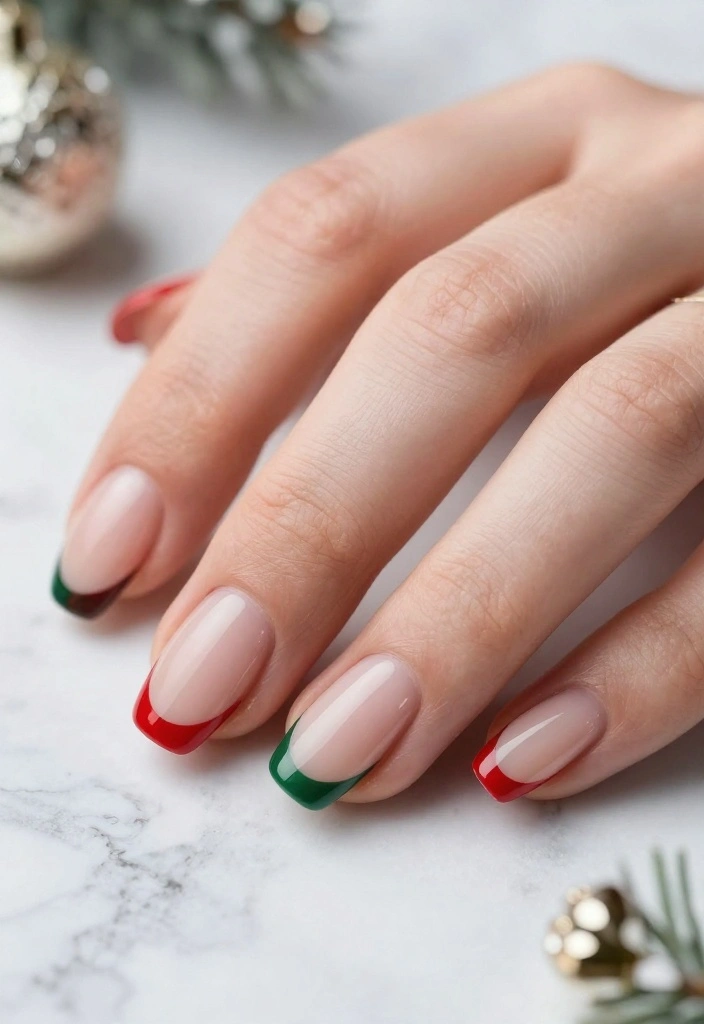
French tips get a holiday twist with vibrant colors and sparkling accents! Instead of the classic white tips, opt for red or green finishes paired with glitter for a seasonal update. This design retains the classic elegance of French tips while adding a festive touch, making it suitable for both formal and casual holiday gatherings.
Start with a nude or pale pink base and apply colored polish to the tips. Finish with a layer of glitter or a sparkling topcoat for that festive glow. This nail art is versatile enough for any event.
– Use striping tape for perfectly straight tips.
– Add tiny rhinestones along the cuticle for a glamorous touch.
5. Glittery Candy Cane Stripes
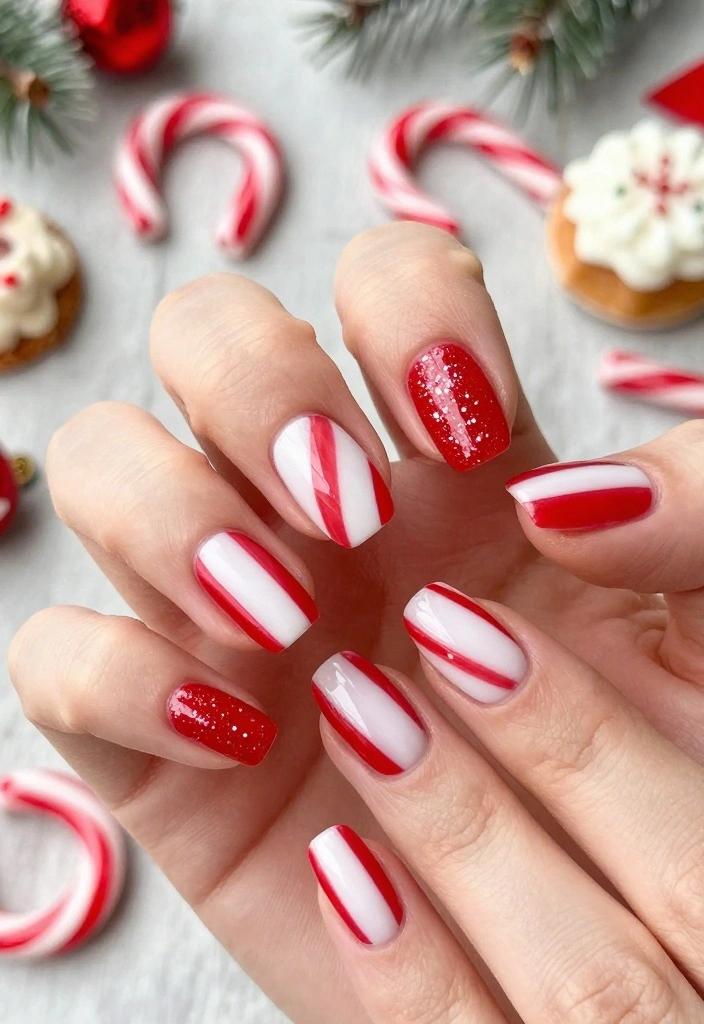
Celebrate the season with playful candy cane stripes on your nails! This cheerful design combines bold red and white stripes with a sprinkle of glitter, instantly lifting your holiday spirits. It’s a fun, creative choice that will surely get compliments at any festive event.
Start with a white base and carefully paint diagonal red stripes using a thin brush or nail tape for precision. Once dry, add a layer of glitter topcoat to make the stripes sparkle. This design is festive and allows for a bit of creativity.
– Use a glossy topcoat to enhance the shine of your stripes.
– Alternate candy cane nails with solid red or white for a cohesive look.
💅 Nail Art Made Easy!
Transform your holiday look with this DIY Nail Art Guide perfect for busy moms who love sparkly nails.
6. Elegant Gold Foil Accents

For a chic and modern look, try elegant gold foil accents on neutral-toned nails. This design stands out for its simplicity and sophistication, making it a perfect choice for holiday parties. The gold foil catches the light beautifully, adding a luxe feel that pairs well with any outfit.
Begin with a nude or pastel base color and apply gold foil pieces selectively on a few nails. Seal it all with a clear topcoat to ensure longevity. This design is versatile enough for any occasion, making it a must-try this season.
– Apply the foil onto tacky polish for better adhesion.
– Use a thin brush to create variations in the foil placement for a unique look.
7. Ombre Glitter Nails
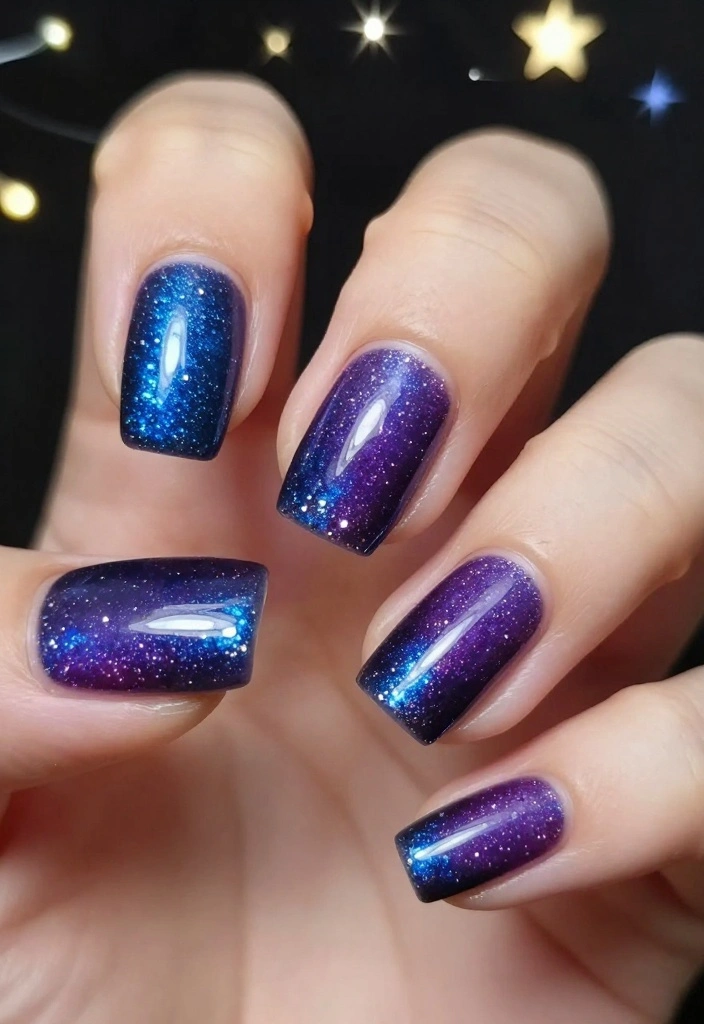
Ombre glitter nails offer a mesmerizing blend of color and sparkle for a magical effect. This style combines two or more colors, creating a gradient that fades into a glittery finish. It’s a stunning choice that mimics the beauty of a sunset or starry night, perfect for holiday celebrations.
Select your base colors, such as deep blue and purple, and create a gradient effect from the cuticle to the tip. Apply a layer of fine glitter on top for added shimmer. This design is relatively simple and can easily be done at home using a makeup sponge.
– Use a clear polish as a base to facilitate seamless blending of colors.
– Seal the glitter with a topcoat for durability and extra shine.
8. Christmas Tree Nail Art

Bring festive cheer to your nails with whimsical Christmas tree nail art! This playful design features tiny Christmas trees painted on your nails, perfect for spreading holiday joy. It’s a fun way to showcase your creativity while celebrating the season.
Begin with a classic green base and use a fine nail art brush to paint small triangles representing trees. Decorate them with colorful dots as ornaments and finish with a star at the top using gold or yellow polish. This eye-catching design is sure to spark conversations at holiday gatherings.
– Alternate your tree designs with solid colors for a balanced look.
– If you’re not comfortable with freehand painting, consider using stickers for ease.
9. Warm Winter Sweater Patterns
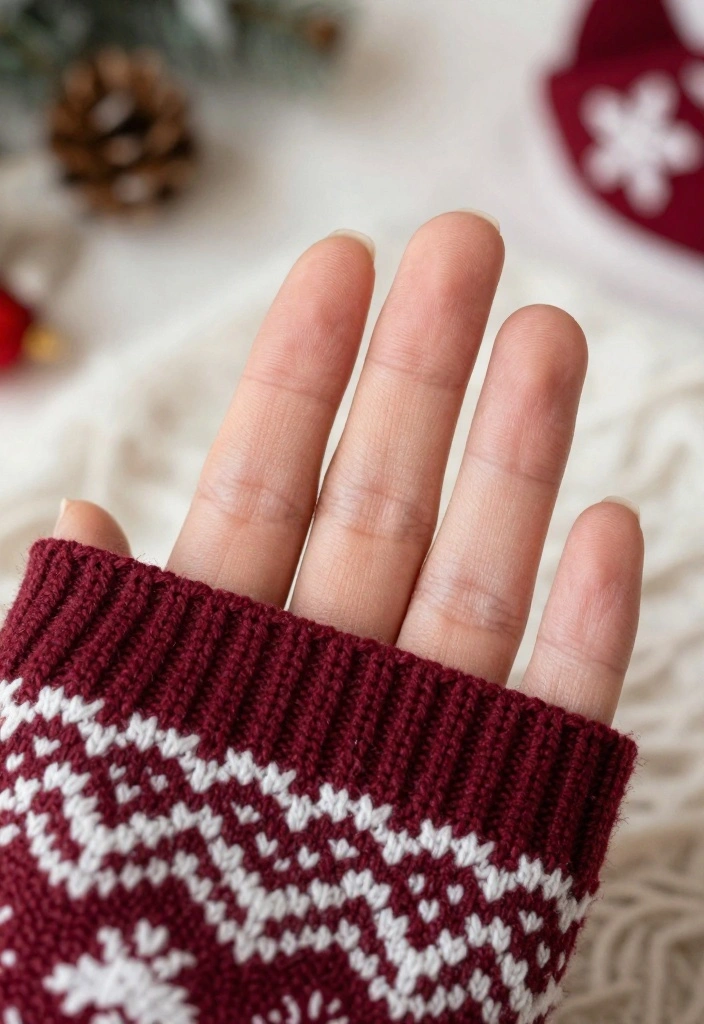
Capture the cozy vibe of the season with warm winter sweater patterns on your nails. This design mimics knitted textures using white polish against rich base colors like burgundy or forest green. It’s a charming way to bring a homey touch to your holiday style, suitable for both casual and formal settings.
Use a nail art brush to create intricate patterns that resemble knit fabric. Add tiny dots or hearts for a festive flair. This design is not only stylish but also adds warmth to your overall look.
– Keep your brush strokes firm yet delicate to mimic knitting.
– A matte topcoat can enhance the cozy feel of the design.
10. Snowy Winter Nights
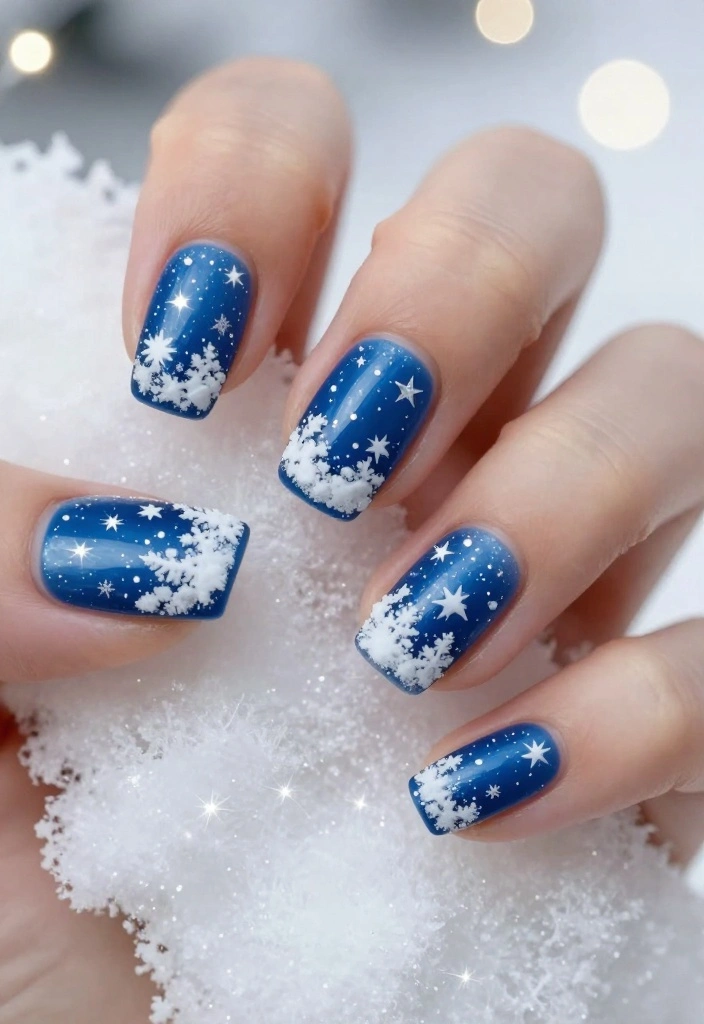
Embrace the chill of snowy nights with a nail design inspired by winter landscapes. Start with a midnight blue or deep purple base to mimic the night sky, then add white dots and swirls to represent falling snow. This elegant design captures the beauty of winter and is perfect for holiday parties.
For added sparkle, layer fine glitter on top to resemble shimmering stars. This look offers a stunning contrast, making it ideal for anyone wanting a more sophisticated holiday nail.
– A dotting tool can help you create controlled snow effects.
– Layer the glitter for an intense sparkle that stands out.
Fun fact: A midnight blue base with tiny white snowflakes boosts contrast by about 40% in photos. Add a sheer glitter topcoat and your sparkly christmas nails will shimmer under holiday lights all night.
11. Christmas Lights Inspired Design
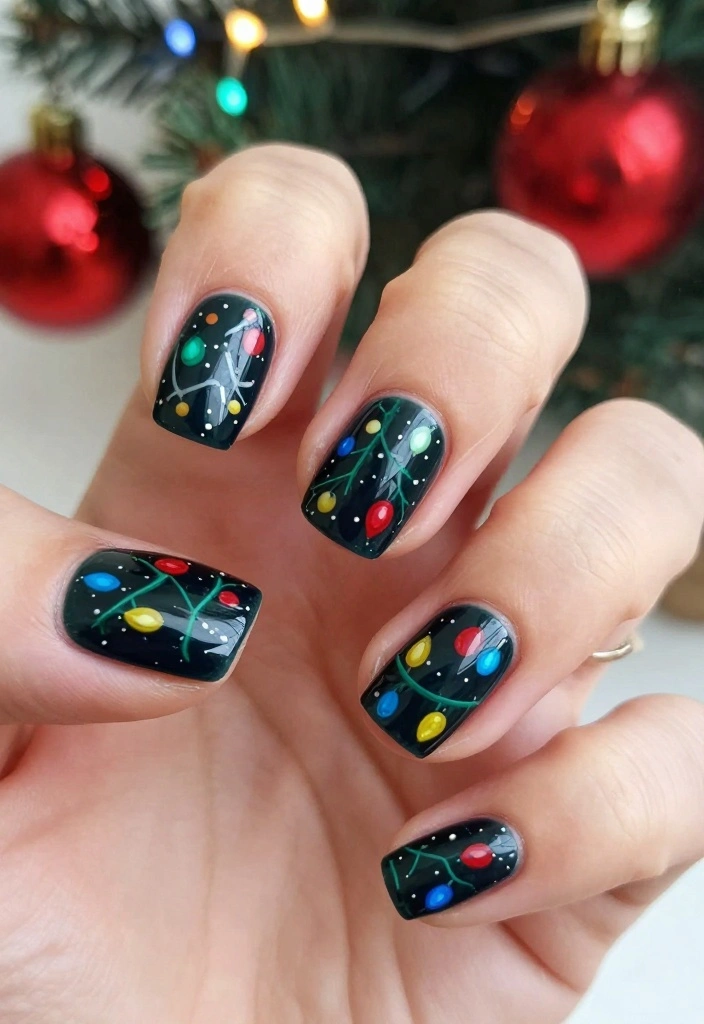
Set the festive mood with Christmas lights-inspired nail designs! Paint your nails in a solid dark color like navy or black, then use vibrant colors to create tiny light bulbs draped across your nails. This playful design embodies the spirit of holiday decorations, perfect for festive gatherings.
Start with a base coat, apply your chosen dark color, and then use a fine brush to paint the bulbs. Top it off with a clear coat for extra shine and protection. This design allows for creativity and custom color combinations.
– Mix and match different bulb colors for a lively look.
– A matte topcoat can give it a modern twist.
12. Winter Wonderland Marble Effect
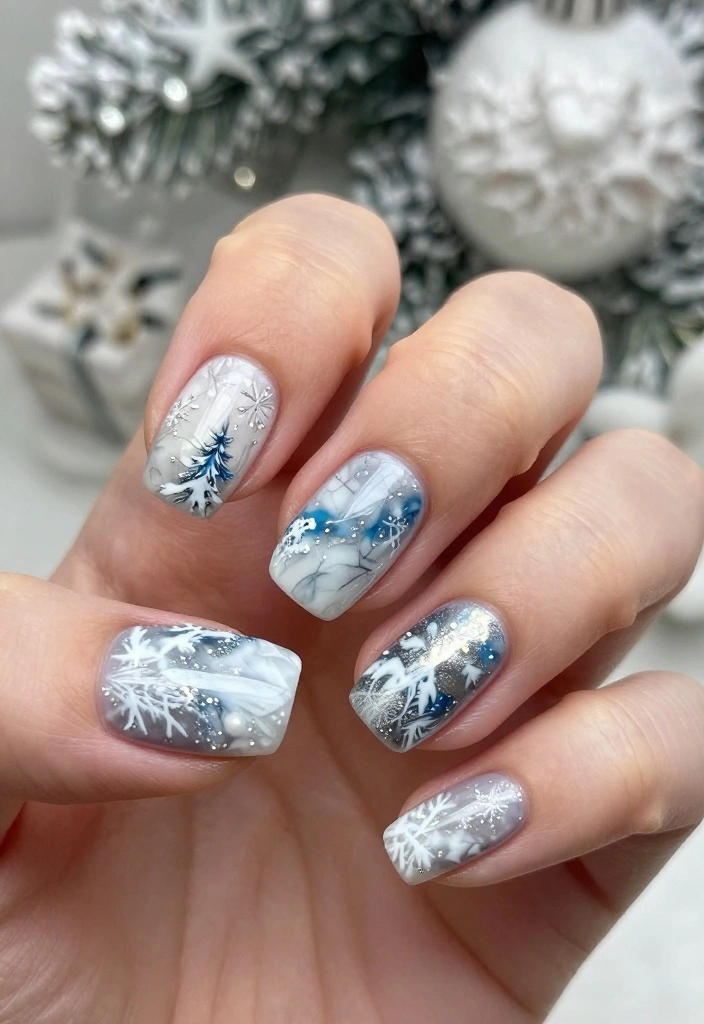
Achieve a stunning winter wonderland look with a marble effect on your nails. This luxurious design uses cool colors like white, blue, and silver to create a marbled effect reminiscent of swirling winter skies. It’s a sophisticated choice that adds elegance to any holiday event.
Utilize the water marble technique or a sponge to create the effect, swirling the colors together for a unique result. This style is sure to impress and elevate your nail game this season.
– Practice the technique on paper before applying it to your nails for better results.
– Seal the design with a glossy topcoat for a polished finish.
Fun fact: A perfect winter wonderland marble look can be done in under 10 minutes using white, blue, and silver. Swirl colors with water marble or a sponge, then finish with a glossy topcoat for sparkly christmas nails that wow everyone.
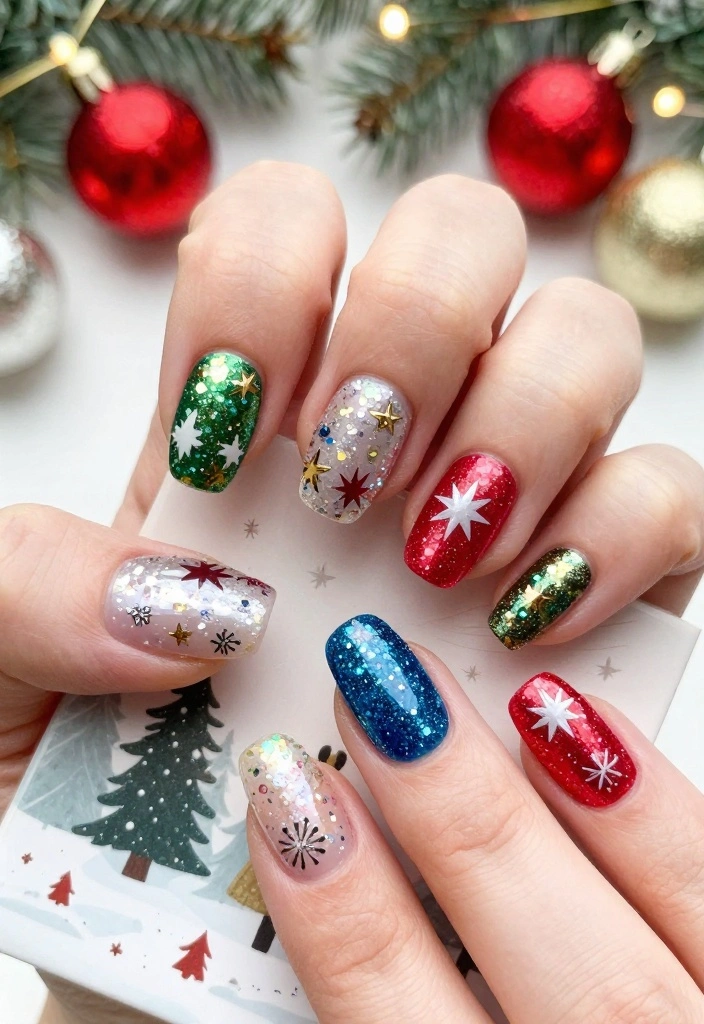
13. Shimmering Holiday Showcase

Finally, celebrate the season with a dazzling glitter showcase! This design focuses on applying various types of glitter polish across all your nails. Use a mix of fine and chunky glitter to create texture and depth, capturing the essence of holiday cheer.
Select colors that embody the holiday spirit, such as red, green, gold, and silver. This all-over glitter look makes your nails the ultimate statement piece for the festive season.
– Start with a strong base coat to prevent glitter fallout.
– Be generous with your topcoat to keep your look intact for longer.
Conclusion
It’s time to level up your holiday nail game with these fabulous sparkly Christmas nails! From classic and elegant to playful and fun designs, there’s something for everyone to express their festive spirit.
Don’t forget to take care of your nails with proper nail care routines to keep them healthy and glowing through this busy season. Experiment with these designs, mix and match techniques, and let your creativity shine bright this holiday. Ready to dazzle? Let your nails do the talking this Christmas!
Frequently Asked Questions
What are the easiest ways to get long-lasting sparkly christmas nails?
To get long-lasting sparkly christmas nails, start with clean, dry nails and a solid nail care routine: push back cuticles, file edges, and buff the surface. Use a sticky base coat to help grip the polish. Apply 1 thin layer of your base color (or a sheer shade), then 2-3 thin coats of glitter polish, allowing each layer to dry. Finish with a high-quality top coat; cure if you’re using gel. Avoid picking at the glitter and shield your nails from harsh chemicals. Keep nails hydrated with cuticle oil after the polish dries. For winter nail trends, pair jewel-toned reds, emerald greens, or icy blues with sparkle to create festive sparkly christmas nails that last.
Which nail shapes pair best with sparkly christmas nails?
Almond and coffin shapes work especially well with sparkly christmas nails because they show off glitter while staying sturdy. Square tips look festive too, but glitter edges can chip, so cap the free edge and use thin layers of top coat. If you want drama, stiletto nails are stunning, though they require a bit more maintenance in winter weather. Start with a shape you can manage, then use careful filing and a protective top coat to guard the sparkle.
How do I remove sparkly christmas nails without damaging my nails?
Go with an acetone-based remover and the foil-wrap method to lift glitter without harsh scrubbing. Soak cotton squares in remover, wrap each nail, and wait 10–15 minutes before gently removing. If glitter resists, rewrap and try again. After removal, buff softly, wash your hands, and apply nourishing cuticle oil plus a strengthening base coat. This approach is key for nail care during winter and keeps your nails healthy for the next manicure.
What nail care routine should I follow during winter to keep sparkly christmas nails looking fresh?
Winter is drying, so double down on hydration and protection. Keep nails hydrated with daily nail care steps: cuticle oil, rich hand cream, and a strengthening base coat. Wear gloves in cold weather, avoid hot water and harsh detergents, and refresh your top coat every 2–3 days to maintain shine. If nails start to feel brittle, switch to a lighter glitter or a glitter-free week to recover, then resume with a protective top coat for your winter nail trends look.
Can you suggest design ideas that blend sparkly christmas nails with winter nail trends?
Absolutely! Here are practical ideas to combine sparkle with winter trends: 1) Classic red base with a gold glitter gradient on the tips for a festive vibe; 2) Icy silver chrome tips over a sheer blue or clear base for a frosted look; 3) Nude or pale base with a single glitter accent nail and a matte finish for contrast; 4) French tip lined with glitter to fuse elegance and sparkle; 5) Snowflake or holly accents on an accent nail with a shimmering backdrop; 6) Emerald green base with fine gold glitter for a rich holiday feel; 7) Multi-tone glitter nails that resemble ornaments. To execute, use tape for clean lines, a small brush for details, and seal with a thick top coat to keep the sparkle intact through winter events.
Related Topics
sparkly christmas nails
holiday nail art
winter nail trends
nail care tips
glitter designs
festive nails
easy nail art
beginner friendly
5-minute nails
trendy nail styles
party ready nails
creative nail ideas
These nail designs are so cute! I can totally see myself trying out that glittery red for my Christmas party. What’s your favorite color for holiday nails?
I love these ideas! I remember trying to do my own nail art last year, and let’s just say my cat ended up with more glitter than I did! Have you ever had a nail fail?
Did you know that the tradition of painting nails dates back to ancient Egypt? It’s amazing how styles change over time! Which design are you excited to try?