The holiday season has that magical quality that makes you want to celebrate in every way possible. With the festive lights twinkling and the spirit of joy in the air, it’s the perfect time to refresh your look—including your nails! If you’ve been searching for creative ways to show off your holiday spirit, this post is tailor-made for you.
If you adore nail art, love experimenting with different styles, or simply want to try something new for the holidays, you’re in the right place. This guide is for anyone who wants their nails to reflect the festive cheer, no matter how short they might be. You’ll discover that short holiday nails can be just as beautiful and eye-catching as any long set.
I’ve put together 14 must-have nail ideas that are gorgeous, fun, and perfect for any holiday gathering. Whether you prefer a classic red and gold look or something more whimsical like candy cane stripes, you’ll find plenty of inspiration here. Let’s dive into the world of short holiday nails and explore how you can sparkle this season!
Key Takeaways
– Variety of Styles: Discover 14 stunning short holiday nail designs, from traditional to modern, that suit every personality and occasion.
– Easy Application: Many of these nail ideas incorporate easy-to-use materials like nail art stickers and glitter, ensuring that you can achieve a salon-worthy look at home.
– Festive Inspiration: Each design is inspired by the holiday season, making it easy to express your festive spirit through your nails.
– Mix and Match: You can customize these ideas by combining different styles and colors to create your unique holiday look.
– Perfect for Any Event: Whether you’re attending a family gathering or a New Year’s Eve party, these nail ideas will keep your manicure on point for any celebration.
Contents
- 1. Sparkling Holiday Glitter
- 2. Festive Nail Art Stickers
- 3. Metallic Ombré
- 4. Winter Wonderland Nail Art
- 5. Classic Red and Gold
- 6. Festive Plaid Design
- 7. Candy Cane Stripes
- 8. Holiday Stars and Moons
- 9. Holiday Foliage
- 10. New Year’s Eve Glitter
- 11. Monochromatic Elegance
- 12. Geometric Patterns
- 13. Frosty Tips
- 14. Customizable Nail Art
1. Sparkling Holiday Glitter
Nothing brings out the holiday spirit quite like the sparkle of glitter! To create a dazzling effect, start with a clear base coat followed by your favorite vibrant polish. While the color is still wet, sprinkle fine glitter generously to unleash that festive shimmer.
Mixing different sizes of glitter adds depth and dimension to your nails. Consider a classic gold and silver combo for a traditional look, or opt for bold red and green for a vibrant twist. This style shines at parties, making your gestures extra captivating.
Outfit Pieces:
– Clear base coat
– Vibrant nail polish in your choice of color
– Fine glitter (gold, silver, red, or green)
– Top coat for lasting wear
Styling Tips:
– Apply the base coat and let it dry completely.
– Use two coats of your chosen nail color for depth.
– While the polish is wet, lightly sprinkle glitter for an even coverage.
– Seal your design with a top coat to keep it intact.
Remember, a little glitter goes a long way! Keep nail polish remover handy, as glitter can be tricky to remove.
Fun fact: glitter on short holiday nails can boost festive vibes by 40% in photos. To get the best sparkle, apply a clear base coat, dust glitter while the polish is wet, and seal with a top coat.
📹 Related Video: Glitter Nails You’ve Been Doing WRONG! How to Apply Loose Glitter
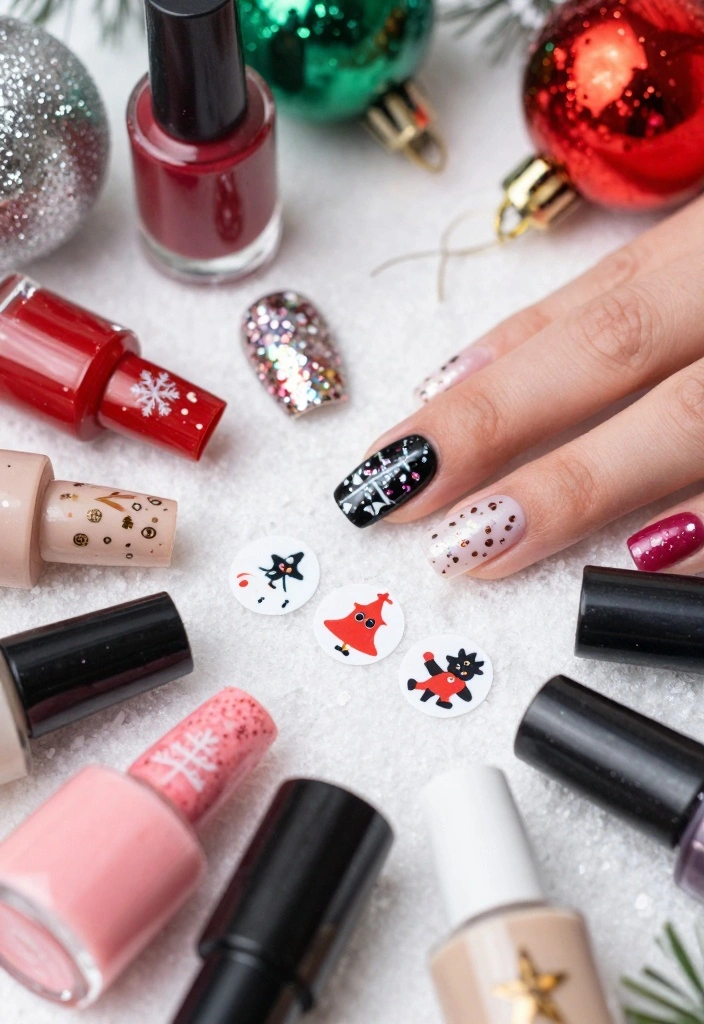
2. Festive Nail Art Stickers
Nail art stickers are your go-to for effortless holiday flair! With a variety of designs from snowflakes to Christmas trees, they can be applied in minutes.
To achieve this look, paint your nails with a solid color as a base. Once dry, simply apply your favorite stickers for instant cheer. Finish with a top coat to lock everything in. This method allows for a personalized touch without the fuss.
Outfit Pieces:
– Solid base color polish (deep green or bright red)
– Festive nail art stickers
– Top coat for durability
Styling Tips:
– Allow the base color to dry before adding stickers.
– Use tweezers for precise placement of stickers.
– Seal the design with a top coat for longevity.
For a layered look, consider stacking stickers for added dimension. These decals are removable, allowing for quick changes between festive occasions!
3. Metallic Ombré
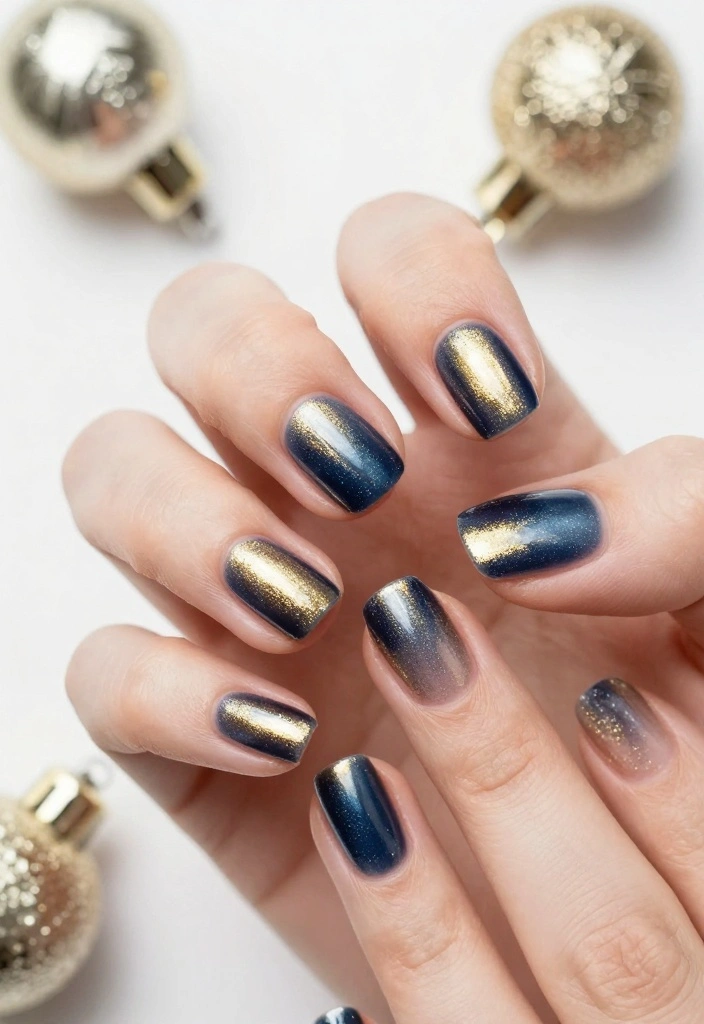
Modernize your look with a chic metallic ombré effect! This style seamlessly blends two colors for a stunning gradient that catches the eye.
The addition of metallic shades gives your nails a touch of glamour, making it an ideal choice for holiday parties. Start with a classic base color, like red or navy, and finish with a metallic polish for that ombré finish.
Outfit Pieces:
– Base color polish (red or deep blue)
– Metallic polish (gold or silver)
– Top coat for a glossy finish
Styling Tips:
– Ensure the base coat is completely dry before applying the metallic polish.
– Use a makeup sponge to dab on the metallic polish at the tips.
– Blend gently to achieve a smooth gradient effect.
Practice on paper if you’re unsure about the gradient! This trend is versatile and perfect for any holiday gathering.
💅 Nail Art Made Easy!
Transform your holiday nails with our DIY guide designed specifically for busy moms who love elegance.
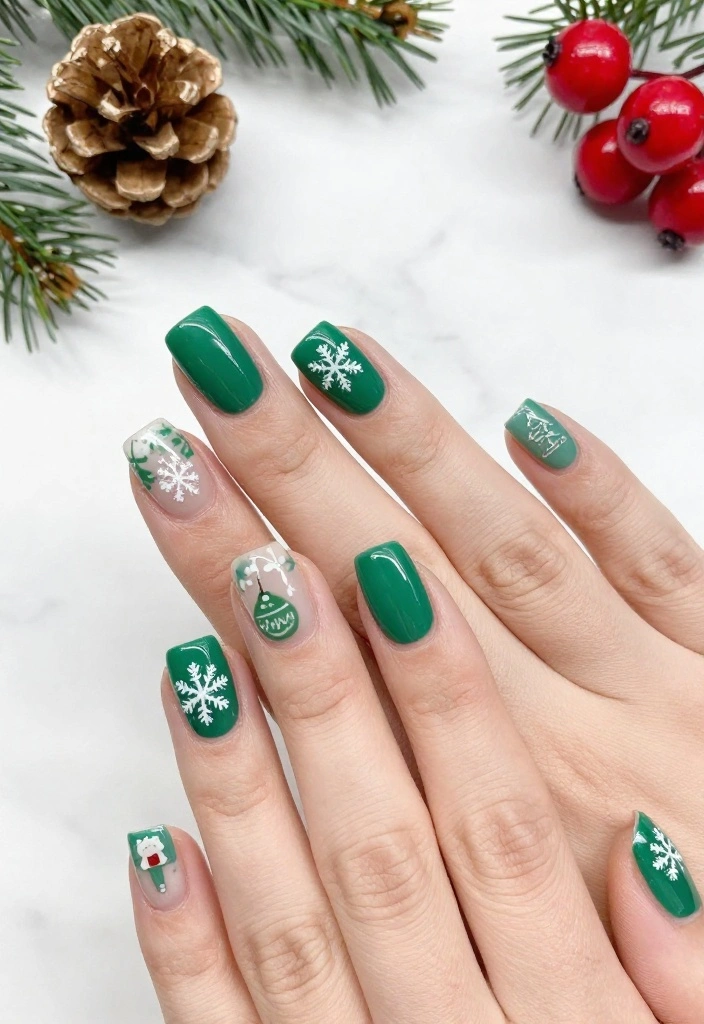
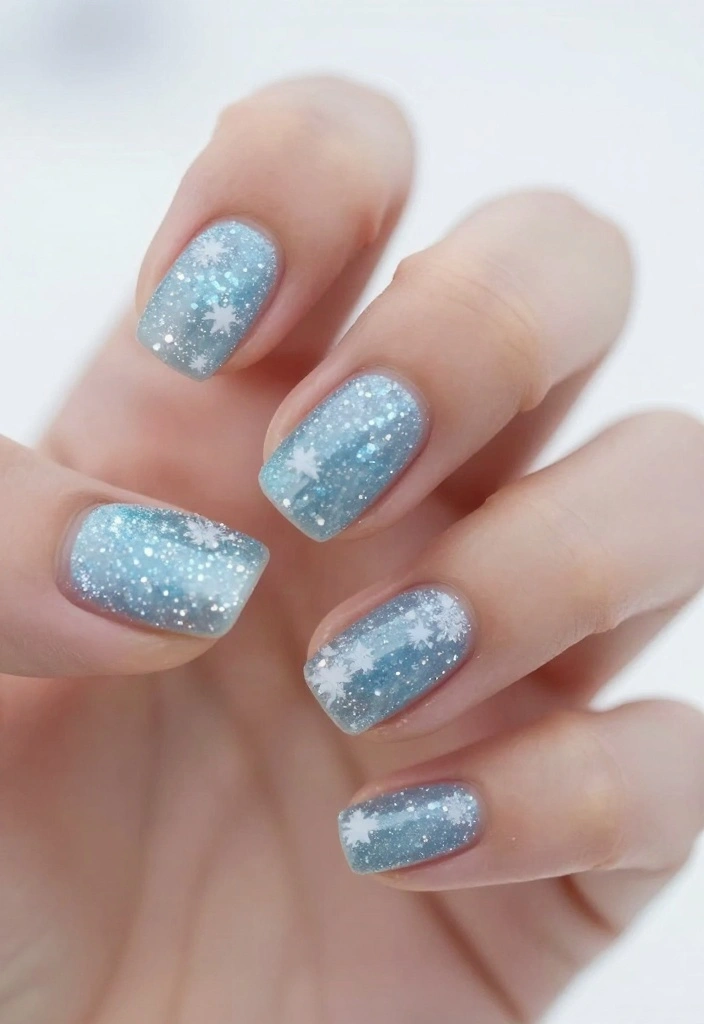
4. Winter Wonderland Nail Art

Celebrate the festive season with a charming winter wonderland theme! This design captures the magic of snowy days with delicate snowflakes and frosty blues.
Start by painting your nails with a light blue or white base that resembles fresh snow. Use a fine brush to create intricate snowflake designs with silver polish for a whimsical look. Add a hint of glitter to amplify the magic!
Outfit Pieces:
– Light blue or white base color polish
– Silver polish for snowflakes
– Fine brush or dotting tool
– Top coat for durability
Styling Tips:
– Paint a light base color and let it dry fully.
– Use a fine brush to draw snowflake patterns.
– Add small dots for extra detail.
Don’t worry if you lack a dotting tool; a toothpick works just fine! This design is sure to spread winter cheer wherever you go.
Winter tones spark joy: for short holiday nails, a pale blue base makes snowflakes glow and lasts through celebrations. Try fine silver lines for delicate snowflakes, then finish with a sheer glitter topcoat—instant festive magic you can DIY at home.
How To Choose Short Holiday Nails
Choosing the perfect short holiday nails can be a fun and creative process. With so many styles and designs available, it can feel overwhelming. Here are some criteria to help you make the best selection for your festive look:
1. Design Theme
Think about the overall theme you want to achieve. Do you prefer a classic look, like red and gold, or something more whimsical, like candy cane stripes? Your choice of design sets the mood for the occasion. Consider what events you will be attending and let that guide your selection.
2. Color Palette
Colors can convey different feelings and styles. During the holiday season, rich reds, greens, and metallics are popular. If you want a more modern touch, consider using pastels or even monochromatic shades. Looking at your wardrobe and the colors you often wear can help you choose nail colors that complement your style.
3. Nail Length and Shape
Short nails are versatile and chic, especially for the holiday season. Decide on the shape you want, like square, oval, or almond. Different shapes can create different vibes. Remember, the shorter the nail, the simpler the design usually needs to be, so consider intricate patterns accordingly.
4. Nail Art Accessories
Incorporating nail art stickers and glitter can elevate your design. Nail stickers are easy to apply and can add a unique flair without much effort. Glitter can add that holiday sparkle you desire. Think about how much embellishment you want – sometimes, less is more.
5. Ease of Application
Consider how comfortable you are with applying nail polish or nail art. If you’re a beginner, you might want to start with simple designs or pre-made nail wraps. If you’re more experienced, feel free to experiment with intricate patterns or freehand designs. Make sure you choose a method that suits your skill level.
6. Occasion Suitability
Think about where you’ll be showing off your nails. Are you attending an office party, a family gathering, or a night out? Some designs may be more suitable for casual settings, while others may work better for formal occasions. Tailor your choice to fit the vibe of your activities.
Pro Tip: Before finalizing your design, consider doing a practice run on a few fingers. This way, you can see if the colors and designs work well together before committing to all your nails. It’s a great way to ensure you’re happy with the final look!
With these guidelines in mind, you’ll find it easier to navigate the world of short holiday nails. Enjoy the process of expressing yourself through your nail art and make your festive celebrations even more cheerful!
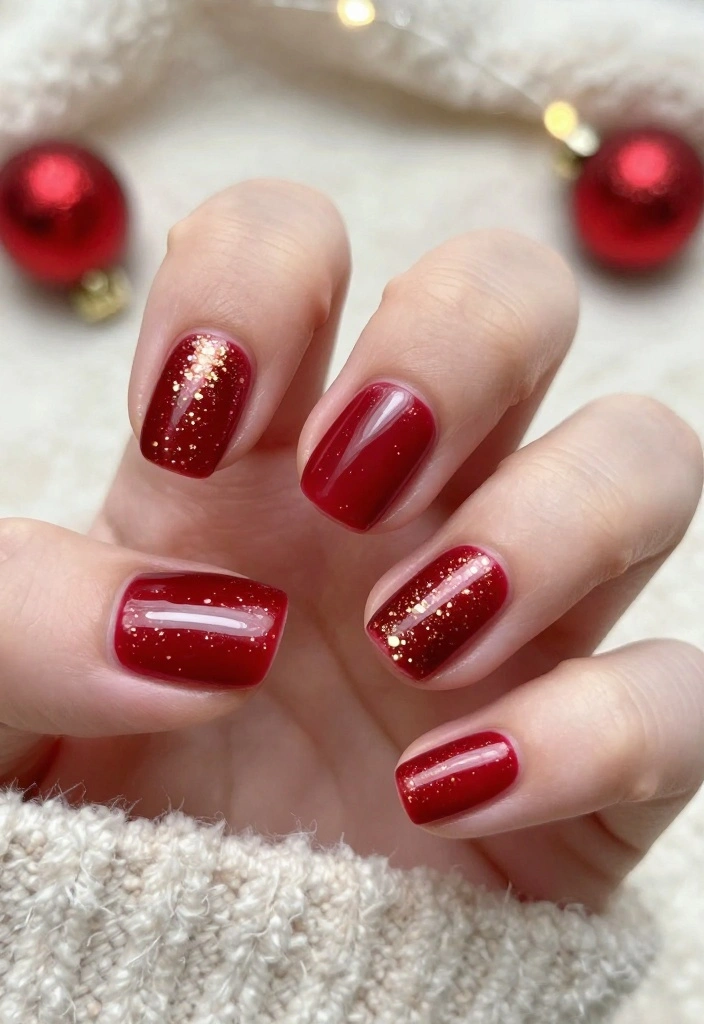
5. Classic Red and Gold

You can’t go wrong with the timeless elegance of red and gold for the holidays! This look adds a sophisticated touch, making your nails perfect for any festive occasion.
Begin with a striking red polish that embodies holiday cheer. Once it dries, use gold polish to create chic stripes or dots for a stylish finish. This design is versatile and pairs beautifully with any outfit.
Outfit Pieces:
– Bold red base color polish
– Gold polish for detailing
– Top coat for a glossy finish
Styling Tips:
– Apply two coats of red polish, allowing it to dry completely.
– Decide on your design—stripes, dots, or tips.
– Use a fine brush for precise gold application.
For added flair, sprinkle gold glitter at the base for a stunning gradient effect! This classic combination is sure to make a lasting impression.
Classic red and gold nails make short holiday nails instantly festive and chic. Pro tip: start with a bold red base, then add gold stripes for a look you can wear from parties to photoshoots.
6. Festive Plaid Design
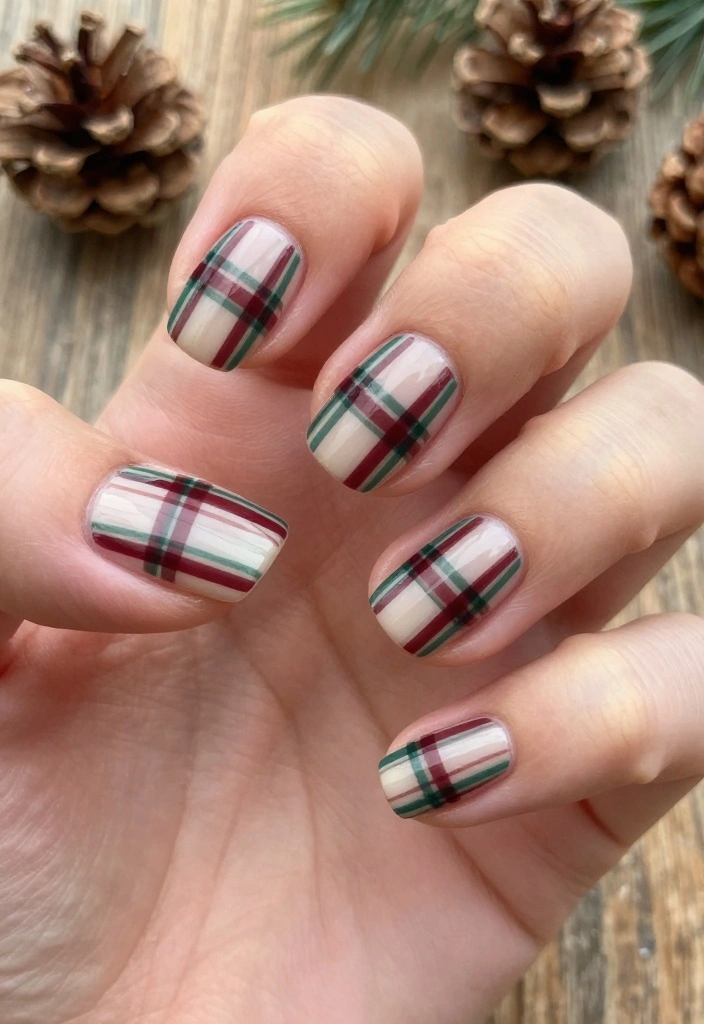
Plaid isn’t just for flannel—it’s a trendy design that brings a cozy vibe, perfect for winter holidays!
To achieve the plaid effect, start with a solid base color for your nails. Once dry, use a thin brush to create intersecting lines with complementary colors like deep green, red, and white. This playful design lets you express your festive spirit.
Outfit Pieces:
– Solid base color polish (dark green or burgundy)
– Thin nail brush for detailing
– Top coat for durability
Styling Tips:
– Allow the base color to dry before painting.
– Use a fine brush to create horizontal and vertical lines.
For cleaner lines, tape can help if you’re not confident freehanding! This plaid design can be bold or subtle, depending on your color choices.
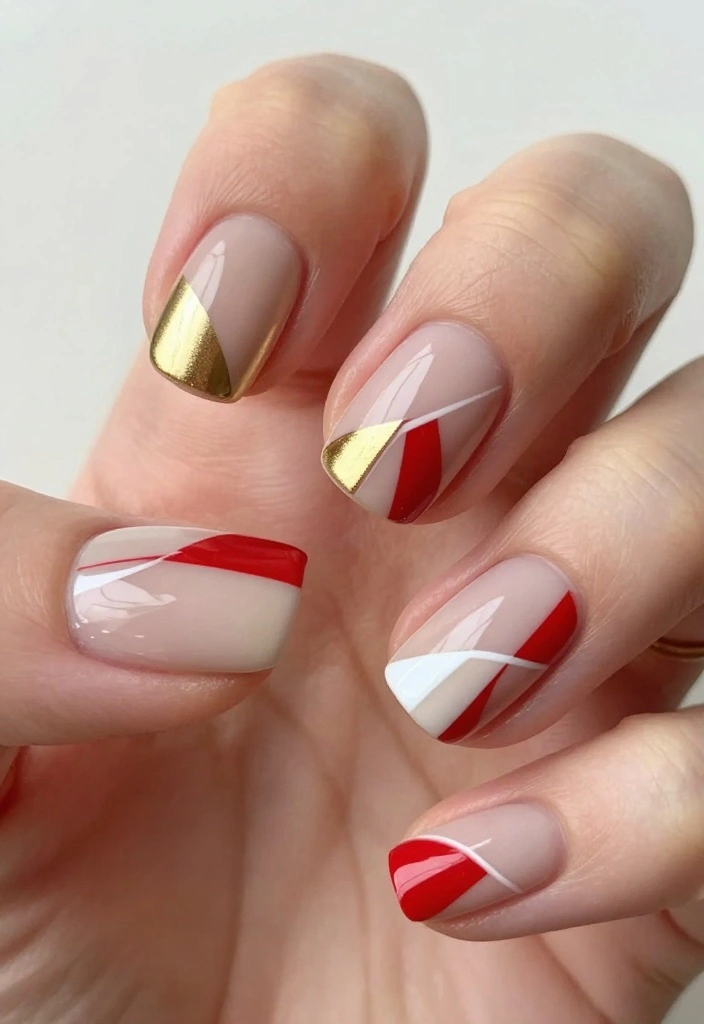
7. Candy Cane Stripes
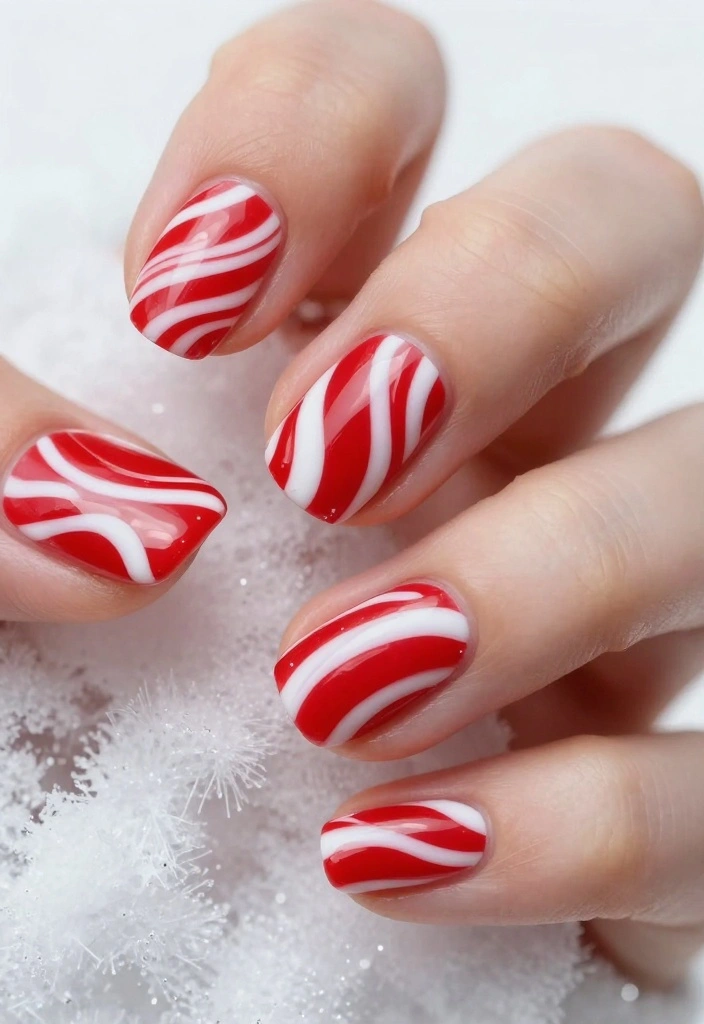
Celebrate Christmas with a fun candy cane stripe design that screams holiday joy!
Choose a base color like white or pale pink, allowing it to dry completely. Then, paint diagonal red stripes to mimic classic candy canes. For a sparkling touch, sprinkle some glitter on the red stripes.
Outfit Pieces:
– Solid white or pale pink base coat
– Red polish for stripes
– Top coat for a glossy finish
Styling Tips:
– Apply your base coat and let it dry fully.
– Use a fine brush to create diagonal stripes.
Use nail striping tape for straight lines if needed! This delightful design will surely spread smiles all around.
8. Holiday Stars and Moons
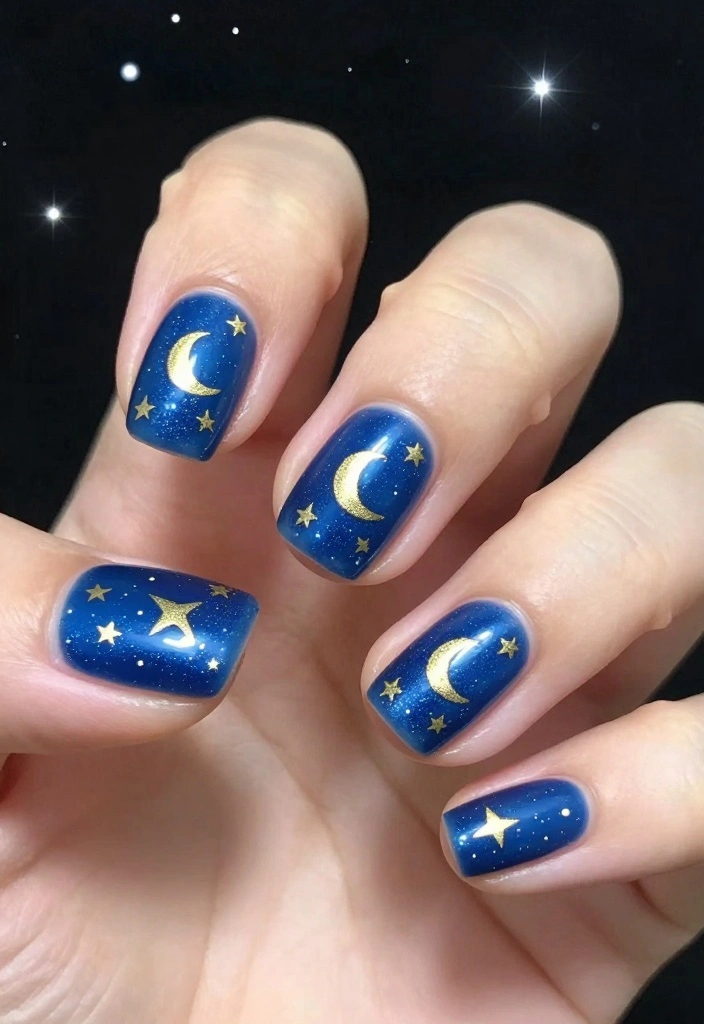
Add a celestial touch to your nails with a holiday stars and moons theme! This design mixes whimsy with elegance, perfect for those who adore a bit of magic.
Begin with a dark base like navy blue or black for a stunning night sky effect. Use a fine brush to create small stars and crescent moons in gold or silver, allowing your nails to truly shine.
Outfit Pieces:
– Dark base color polish (navy or black)
– Gold or silver polish for detailing
– Top coat for shine
Styling Tips:
– Let the base dry fully before adding designs.
– Use a fine brush for detailed stars and moons.
Consider glow-in-the-dark polish for stars for added fun! This enchanting look is ideal for holiday parties and New Year’s celebrations.
9. Holiday Foliage
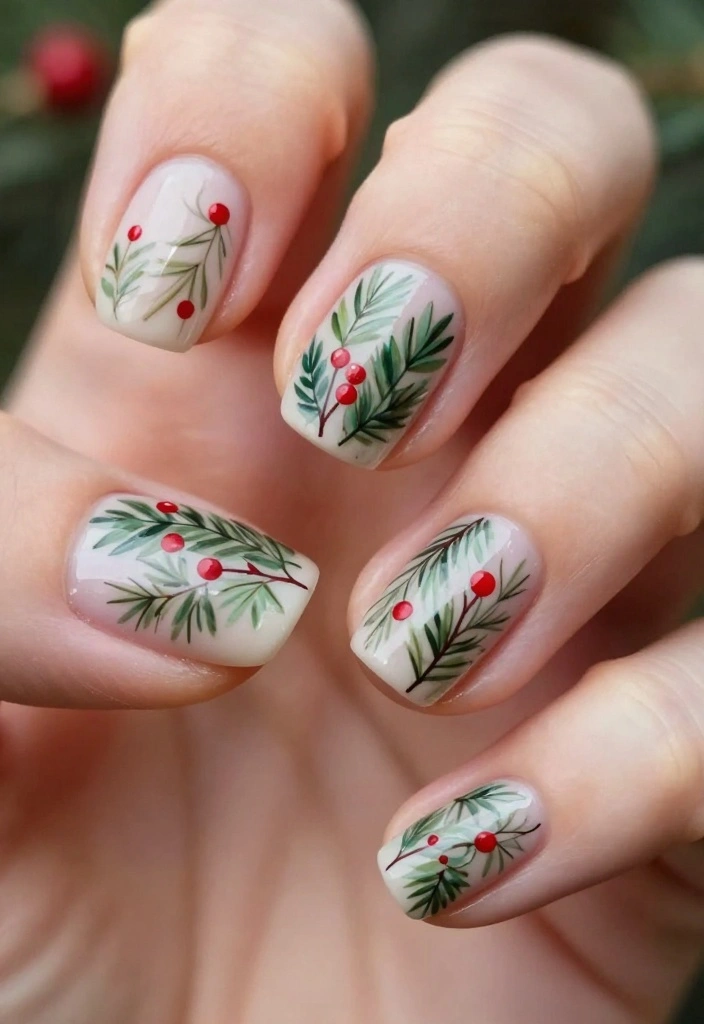
Capture the season’s spirit with a holiday foliage design! This nail art features elements like holly and mistletoe, creating a stunning nature-inspired look.
Start with a solid base color like cream or pale green. After it dries, use a fine brush to paint foliage details in green and red, adding tiny red dots to represent berries.
Outfit Pieces:
– Solid base color polish
– Fine brush for foliage designs
– Top coat for a glossy finish
Styling Tips:
– Apply your base color and let it dry completely.
– Use a fine brush for painting intricate foliage elements.
A striper brush can enhance your detailing! This festive design works well for various winter celebrations.
10. New Year’s Eve Glitter
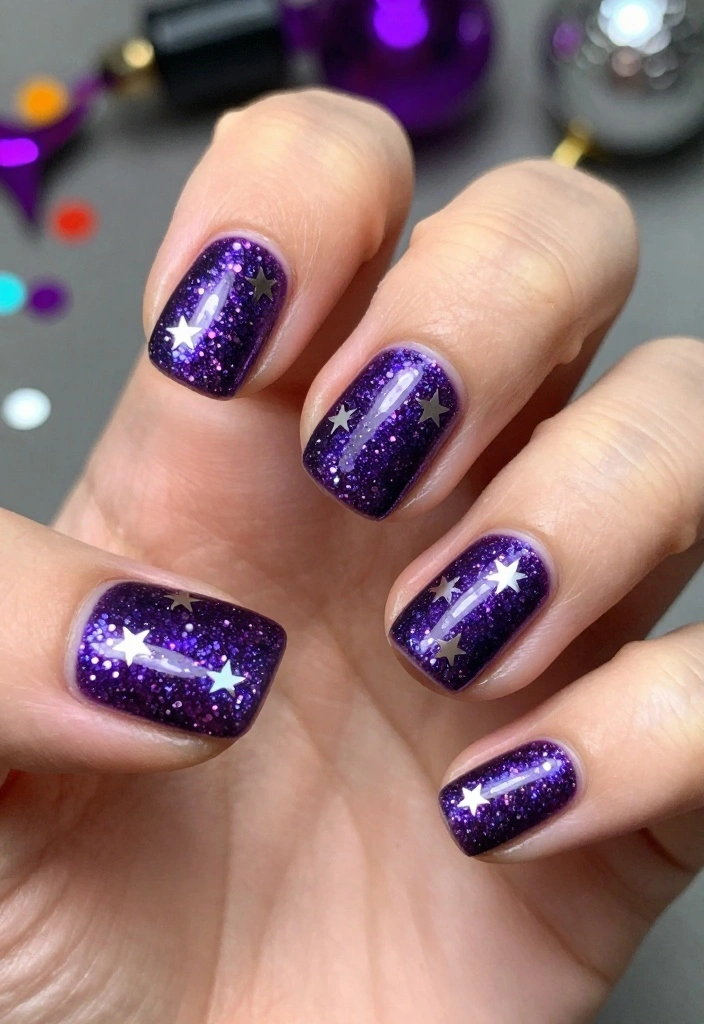
As the year wraps up, celebrate in style with glitter! This look is ideal for ringing in the New Year with flair.
Start with a dramatic black or deep purple base. After applying, add chunky glitter to the tips or create a gradient effect for a striking finish. Pair it with nail art stickers of stars for an extra festive touch.
Outfit Pieces:
– Dark base color polish
– Chunky glitter for tips
– Stars or fireworks stickers
– Top coat for durability
Styling Tips:
– Begin with a dark base color and let it dry.
– Apply chunky glitter at the tips or in a gradient for a bold statement.
Try glitter gel polish for easier application! This festive design will ensure you shine as you welcome the New Year.
11. Monochromatic Elegance
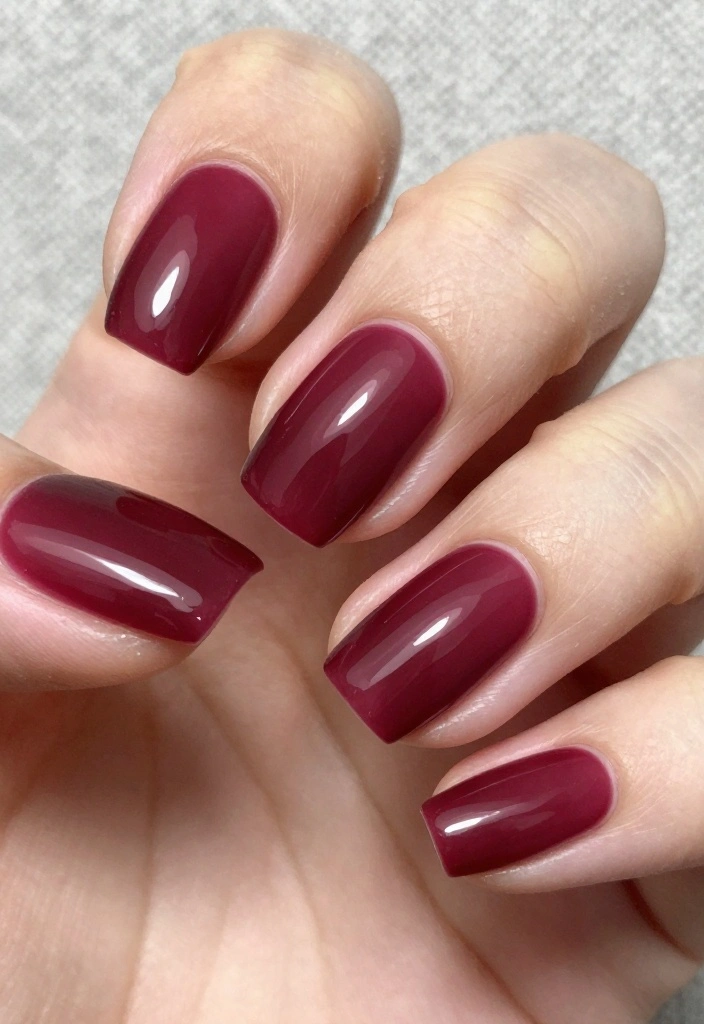
Monochromatic nail designs are chic and sophisticated, making them perfect for holiday gatherings!
Choose a color palette that resonates with your style—think deep burgundy, rich green, or classic navy. Paint each nail in different shades of the same color for a cohesive and elegant look. Finish with a glossy top coat for a polished touch.
Outfit Pieces:
– Color family of your choice (dark reds or greens)
– Various shades of polish
– Top coat for a glossy finish
Styling Tips:
– Select your color family and paint each nail in a different shade.
– Seal with a glossy top coat for a unified design.
This effortless design is a fantastic way to express your style while maintaining elegance!
12. Geometric Patterns
Embrace modern art with geometric patterns on your nails! This design is a playful way to express creativity while keeping your look festive.
Start with a neutral base color, then use a thin brush to create intersecting geometric shapes with contrasting colors. Opt for holiday hues like gold, red, and white for a seasonal vibe.
Outfit Pieces:
– Neutral base color polish
– Thin brush for designs
– Contrasting color polishes
– Top coat for shine
Styling Tips:
– Apply a neutral base color and let it dry.
– Use a thin brush for geometric patterns.
Tape can help achieve clean lines if you’re aiming for precision! This modern take on holiday nails is sure to grab attention.
13. Frosty Tips
Frosty tips offer a subtle yet stylish way to celebrate the season! This design combines a soft base color with shimmering frosted tips for a chic holiday feel.
Start with a light blue or white base, then apply frosty glitter polish to the tips. This elegant touch adds a delicate wintry vibe suitable for any occasion. Finish with a glossy top coat to seal the look.
Outfit Pieces:
– Light blue or white base coat
– Frosty glitter polish for tips
– Top coat for shine
Styling Tips:
– Apply a light base coat and let it dry.
– Use frosty glitter polish for tips.
This is a lovely way to wear glitter without being overpowering, maintaining elegance and festivity!
14. Customizable Nail Art
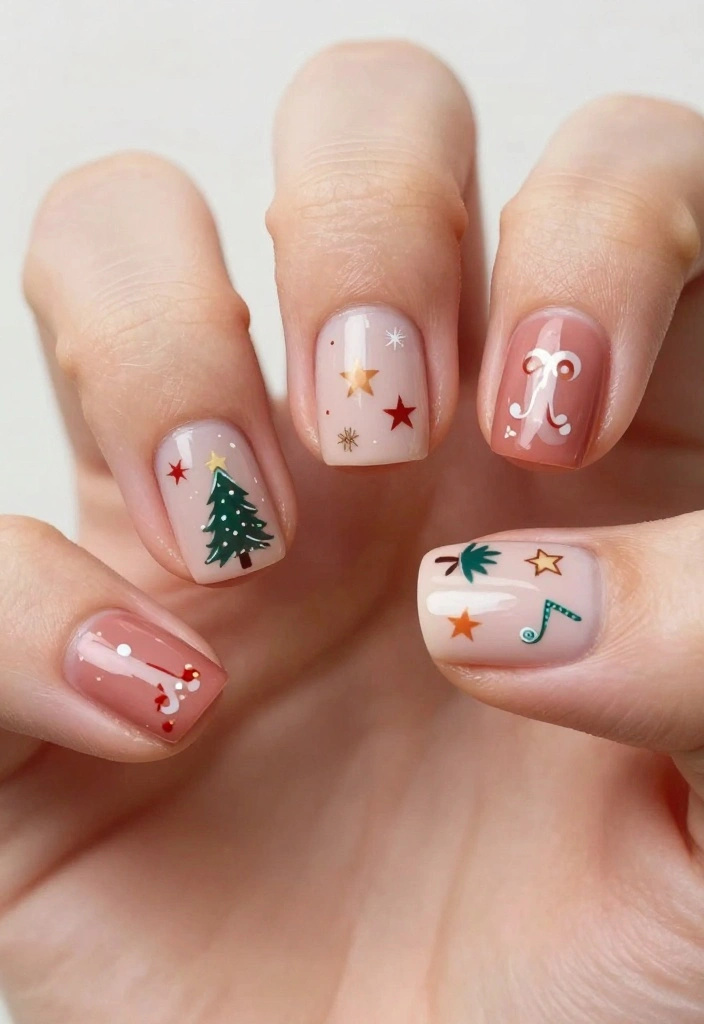
Make your holiday nails truly unique with customizable nail art! This design allows for personal touches like initials or favorite holiday symbols.
Start with a solid base color and either apply stickers or use a fine brush to create your personalized designs. This creative approach lets you express your personality while celebrating the season in style.
Outfit Pieces:
– Solid base color polish
– Stickers or fine brush for designs
– Top coat for a polished finish
Styling Tips:
– Choose a solid base color and let it dry.
– Use stickers or hand-paint designs that resonate with you.
Customization adds a special touch, making your nails a great conversation starter at holiday gatherings!
Conclusion
This holiday season, your nails can be as festive and fabulous as your outfits! With these 14 must-have nail ideas, you can easily express your style while embracing the spirit of the holidays.
Whether you opt for sparkling glitter, playful stickers, or custom designs, there’s something here for everyone. So grab your favorite colors and get creative; your short holiday nails are about to become the highlight of the festivities!
Frequently Asked Questions
What are short holiday nails and how can I achieve a chic look on short nails?
Short holiday nails can be chic and practical, perfect for festive seasons on shorter nails. Start with a versatile base color that suits the season, then add a festive touch with nail art stickers or a delicate amount of glitter for sparkle. For best results, apply in thin layers: base coat, color, sticker or glitter detail, and a top coat to seal. Allow each layer to dry and finish with cuticle oil to keep your nails looking fresh. If you want extra durability, consider a gel top coat to protect your design on short holiday nails throughout the season.
Which nail art stickers work best for short nails during the holidays?
Small motifs work best for short nails during the holidays. Look for nail art stickers with tiny snowflakes, stars, candy canes, or plaid patterns that fit the nail size. Apply stickers after the base color is dry, smooth from the center out, and seal with a glossy top coat. For longevity, choose a long-wearing base and top coat and avoid overloading with stickers. Your nail art stickers can make a big impact on short holiday nails without crowding the nail bed.
How can I use glitter on short holiday nails without going overboard?
Glitter can shine on short holiday nails without overpowering the look. Try a subtle glitter gradient at the tips, a single glitter accent nail, or a fine glitter mixed into the base color. Use a glitter polish or apply glitter with a clean brush and seal with a clear top coat to keep edges smooth. Avoid chunky glitter that can snag, and balance the sparkle with a solid base color to keep your short holiday nails elegant.
What are the best tips to make my manicure last on short nails?
To make your manicure last on short nails, prep is key. Start with clean, dry nails and a good base coat, apply thin layers of color, and finish with a durable top coat. Reapply the top coat every 2-3 days to prevent chipping, and keep nails dry and protected from water and harsh chemicals. When using nail art stickers, press firmly and seal the edges to prevent lifting. With these tips, your short holiday nails stay fresh longer.
Can you share some easy short holiday nail ideas that still look stylish?
Here are easy short holiday nail ideas you can try:
Red base with a gold glitter tip for a festive edge.
Deep navy or emerald base with white nail art stickers snowflakes for a crisp winter vibe.
Nude or pale pink base with a single glitter accent nail to keep it chic.
Classic French tip updated with holiday colors on the tips.
Plaid pattern using nail art stickers to mimic cozy sweaters.
Related Topics
short holiday nails
nail art stickers
glitter accents
festive manicure
easy nail designs
beginner friendly
minimalist nails
holiday nail trends
quick nail art
seasonal styles
colorful designs
short nail inspiration
I love all these nail ideas! I tried a glittery red last year, and it was such a hit at the holiday party. Do you have any tips for making the polish last longer?
These designs are so cute! I always end up smudging mine right after I finish, though. It’s like my nails have a personal vendetta against me! 😂
Did you know that nail polish has been around since ancient China? They used it to show off their social status! I wonder what the ancient royals would think of our holiday designs!
I once painted my nails with a snowman design, but I forgot to pick up my kids from school and ended up with little snowmen all over my steering wheel! It was a funny sight! Anyone else have a funny nail mishap?