The holiday season is here, and with it comes a wave of festive cheer and creativity! If you’re like many, you’re probably looking for ways to express that holiday spirit. One of the most fun and accessible ways to do this is through nail art. Christmas nail designs can elevate your look and get you in the mood for the season. So, I created this post to share some easy and quick designs that even beginners can tackle.
If you enjoy DIY projects or simply want to try something new, this guide is perfect for you. It’s for anyone who loves personal expression through fashion and wants to bring a little holiday magic to their fingertips. You don’t need to be a pro to create stunning Christmas nails. With just a few colors and techniques, you can create beautiful designs that will impress your friends and family.
In this post, you’ll discover 14 quick and easy Christmas nail designs. Each design is beginner-friendly, allowing you to feel accomplished and festive in no time. Whether you’re going for classic red nails with glitter tips or playful snowmen faces, these designs are sure to add a bit of joy to your holiday celebrations. Let’s dive into some delightful ideas that will have your nails looking merry and bright!
Key Takeaways
– You don’t need advanced skills to create beautiful Christmas nail designs; these ideas are beginner-friendly and fun.
– Each design uses simple tools and colors that you likely already have at home, making it easy to get started.
– The styles range from classic looks to playful themes, ensuring there’s something for everyone.
– You can mix and match designs or colors to create a unique look that fits your personality.
– Nail art adds a festive touch to your holiday celebrations, helping you feel connected to the holiday spirit.
Contents
- 1. Classic Red with Glitter Tips
- 2. Frosty Snowflakes
- 3. Candy Cane Delight
- 4. Christmas Tree Glam
- 5. Simple Santa Hats
- 6. Snowman Faces
- 7. Holiday Stripes
- 8. Gingerbread Men
- 9. Reindeer Antlers
- 10. Mistletoe Magic
- 11. Joyful Ornaments
- 12. Simple Holly Accents
- 13. Festive Watercolor Art
- 14. Twinkling Starry Nights
1. Classic Red with Glitter Tips

Classic red nails are a timeless choice for the holiday season. A vibrant red base sets the festive tone, while glittery tips add a playful touch of sparkle. This design seamlessly blends elegance with fun, making it ideal for any Christmas gathering or festive event.
Applying a layer of glitter at the tips creates a lovely contrast in texture that elevates the entire look, allowing for a polished yet festive style.
Perfect for holiday parties, family gatherings, or even a cozy night out, this design shines in any setting.
Outfit Pieces:
– Bright red nail polish (high-shine finish)
– Fine glitter polish for tips (gold or silver)
– Clear top coat for lasting shine
Styling Tips:
– Start with a base coat to protect your nails before applying color.
– Ensure the red polish is completely dry before adding glitter.
– Apply glitter only to the tips for a chic ombre effect.
– Finish with a clear top coat to seal everything.
Versatile and eye-catching, this design is sure to impress at any holiday event. Swap in a different base color for added variety or let the glitter take center stage!
📹 Related Video: QUICK AND SIMPLE CHRISTMAS NAIL ART DESIGN| CLASSIC RED XMAS NAIL TUTORIAL| SNOWFLAKE NAILS
2. Frosty Snowflakes
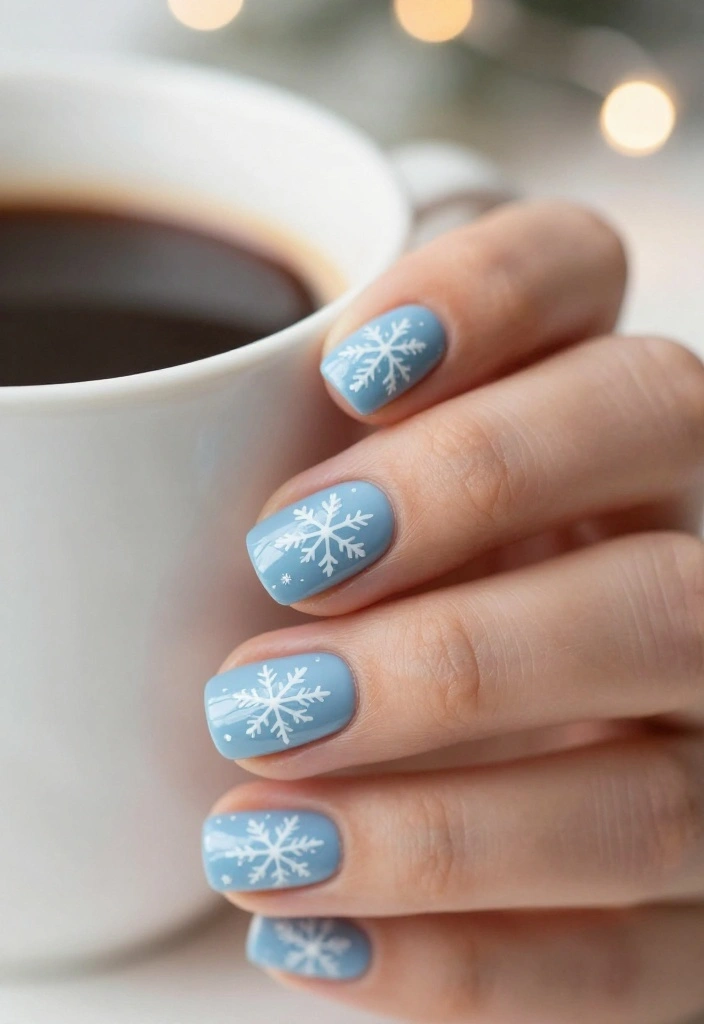
Capture the essence of winter with delightful snowflake designs on your nails. This playful look brings the beauty of a winter wonderland right to your fingertips. It’s not only charming but also simple enough for beginners to tackle, making it a great choice for the season.
The light blue base mimics the sky while the white snowflakes add a crisp contrast, creating a lovely visual balance.
This design is perfect for holiday parties or when you want to add a touch of winter magic to your everyday look.
Outfit Pieces:
– Light blue nail polish (soft, pastel shade)
– White polish for snowflakes (matte or glossy)
– Silver polish for detailing (optional)
– Clear top coat for protection
Styling Tips:
– Use a dotting tool or a fine brush to create unique snowflake patterns.
– Practice your snowflakes on paper if needed.
– Add a silver outline for extra depth and dimension.
This design is fun and festive, perfect for spreading holiday cheer wherever you go!
How To Choose the Right Christmas Nail Designs
Choosing the perfect Christmas nail designs can elevate your holiday spirit! With so many styles to choose from, it’s essential to consider a few key factors. Here’s how you can make the best choice for your festive nails:
1. Nail Length and Shape
Before deciding on a design, think about your nail length and shape. Longer nails can accommodate intricate designs, while shorter nails may look best with simpler patterns. For example, if you have oval or almond-shaped nails, you can try designs that play with curves and angles. Meanwhile, square nails are ideal for classic art styles.
2. Color Palette
Christmas is all about vibrant colors! Consider a palette that embodies the holiday spirit. Traditional colors like red, green, gold, and white are always popular. You can mix and match shades to create a unique design. For instance, a classic red with glitter tips can add a festive touch, while a frosty blue paired with silver can give a winter wonderland vibe.
3. Skill Level
As a beginner, it’s crucial to choose designs that match your nail art skills. Start with simple patterns like holiday stripes or simple Santa hats. These designs are easy to replicate and require minimal tools. Once you feel more confident, you can progress to more complicated designs, like snowman faces or gingerbread men. Remember, practice makes perfect!
4. Tools and Materials
Make sure you have the right tools and materials for your chosen designs. Basic supplies include nail polish, a top coat, a base coat, and nail art brushes or dotting tools. If you’re trying designs with intricate details, consider getting nail art stickers or stamps for easier application. Also, ensure you have a steady hand and patience!
5. Occasion and Personal Style
Think about when and where you’ll be showcasing your nails. Are you attending a cozy family gathering or a glamorous holiday party? Your choice of design should reflect the occasion. If you prefer a subtle look, go for simple holly accents. For a more extravagant appearance, try designs like Christmas tree glam or twinkling starry nights. Also, always incorporate your personal style—your nails should be an expression of who you are!
6. Time and Effort
Lastly, consider how much time you’re willing to invest. Some designs, like festive watercolor art, can take longer to perfect, while others, such as mistletoe magic, are quick and straightforward. If you’re short on time, opt for designs that can be completed in under an hour. This way, you can enjoy your festive nails without the stress.
Pro Tip: If you’re unsure about your design, try practicing on a nail wheel or some fake nails first. This practice can help you get a feel for colors and techniques without the pressure of doing it on your natural nails.
By following these steps, you’ll be well on your way to choosing the perfect Christmas nail designs. Happy decorating, and may your holiday nails shine bright!
3. Candy Cane Delight
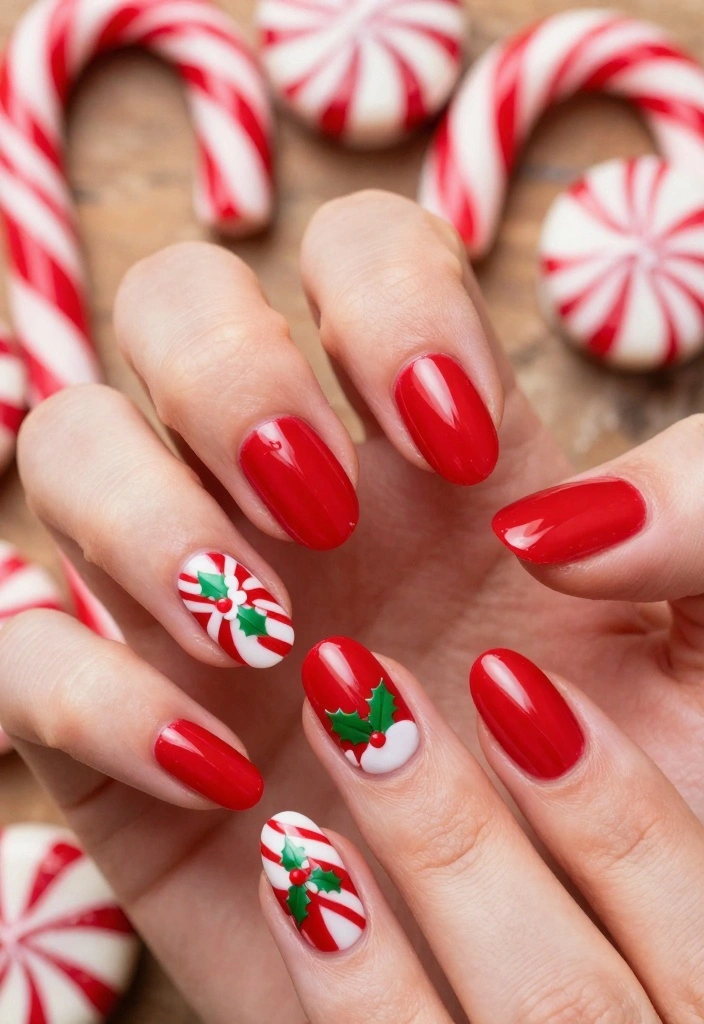
Embrace the festive spirit with adorable candy cane-inspired nails! This design is not only cute but also super enjoyable to create. The vibrant red and white color scheme evokes holiday cheer, making it a standout choice for any celebration.
The diagonal stripes mimic the classic candy cane, creating a fun and playful vibe that’s perfect for Christmas.
This design shines at holiday gatherings, family celebrations, or even casual outings with friends.
Outfit Pieces:
– Bright red nail polish (classic shade)
– White nail polish (smooth finish)
– Clear top coat for longevity
Styling Tips:
– Ensure the red base is dry before adding white stripes for the best results.
– Use a thin brush or nail tape for perfectly straight lines.
This festive design brings sweetness to your holiday look and is sure to be a favorite among friends and family!
4. Christmas Tree Glam

Deck your nails with festive Christmas trees for a charming seasonal look! This creative design is perfect for those who enjoy a bit of crafting. The vibrant green base paired with colorful decorations captures the joyful spirit of the holidays.
The triangle shape of the trees creates a playful silhouette, while the colorful ornaments add a touch of whimsy.
This design is perfect for Christmas parties, family gatherings, or any holiday celebration where you want to showcase your festive spirit.
Outfit Pieces:
– Shimmering green nail polish (vibrant shade)
– Colors for ornaments (red, gold, silver, or any bright hues)
– Clear top coat for a glossy finish
Styling Tips:
– Use a fine brush to create the tree shape and add colorful dots for ornaments.
– If you’re unsure, practice drawing your tree designs on paper first.
These adorable trees will surely be a hit and add a delightful touch to your holiday style!
💅 Quick Nail Art Guide for Moms
Transform your holiday nails effortlessly with our DIY Nail Art Guide designed for busy moms like you!
5. Simple Santa Hats
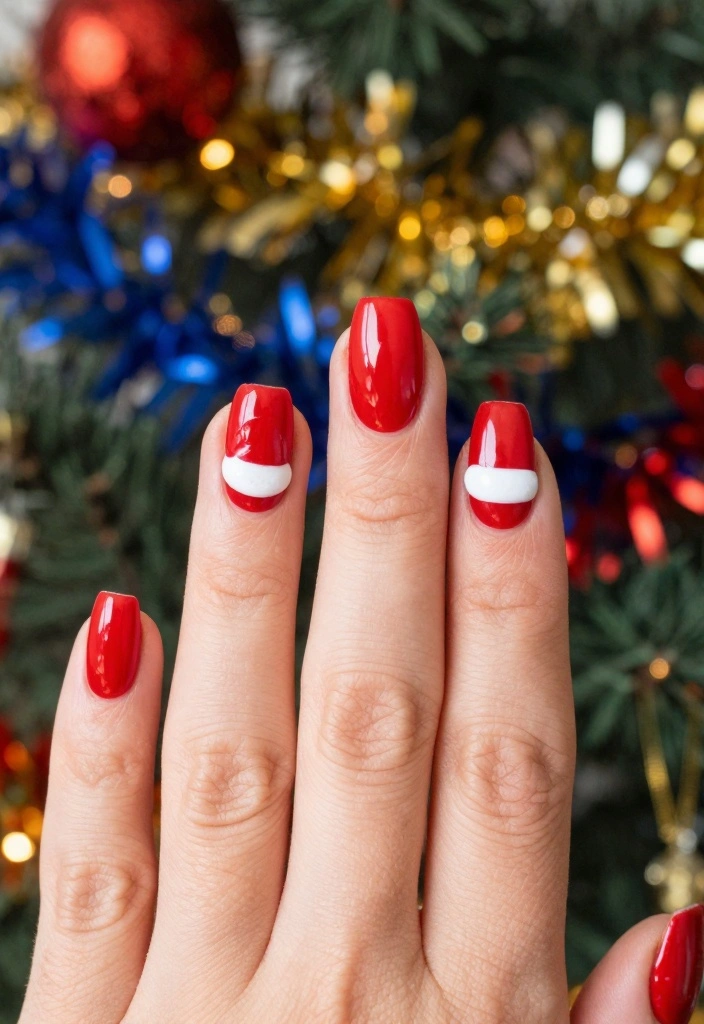
Celebrate the season with cute Santa hat designs that are easy and fun to create! This charming nail art adds a whimsical touch to your holiday look while being perfect for beginners. The bright red and white colors evoke the festive spirit beautifully.
The simple design captures the essence of Christmas, making it a joyful addition to your holiday celebrations.
This design is perfect for Christmas parties or casual holiday gatherings where you want to spread some cheer.
Outfit Pieces:
– Bright red nail polish (classic Christmas color)
– White nail polish for the hat brim and pom-pom
– Clear top coat for durability
Styling Tips:
– Paint all nails red as the base.
– Use a fine brush to create the fluffy brim and the pom-pom.
These playful Santa hats will bring smiles and festive cheer to your holiday celebrations!
6. Snowman Faces
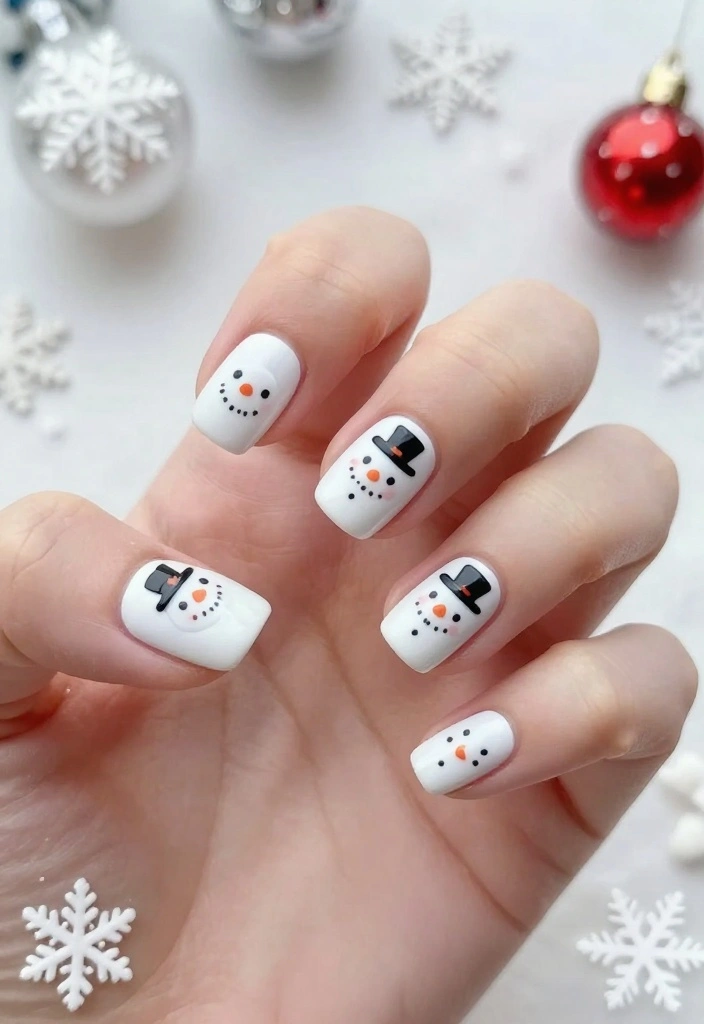
Who can resist the charm of a cheerful snowman? Snowman face designs are a delightful way to bring smiles to your nails this season. This design is not only adorable but also easy enough for anyone to create, making it a holiday favorite.
The white base coat enhances the playful look of the snowmen, while the black and orange details add character and charm.
This design is perfect for holiday gatherings, festive parties, or simply to brighten your day with a bit of whimsy.
Outfit Pieces:
– White nail polish (smooth finish for the base)
– Black polish for eyes and hat
– Orange polish for the carrot nose
– Clear top coat for protection
Styling Tips:
– Create snowman faces using one or two dots as a base.
– Add tiny hats for extra fun and creativity.
This playful design is sure to spread holiday cheer and is perfect for those looking to add a bit of joy to their nails!
Snowman faces on nails are a mood booster—easy to DIY and totally adorable. With a white base and tiny black eyes, these christmas nails designs shine in minutes and spark smiles all season.
7. Holiday Stripes
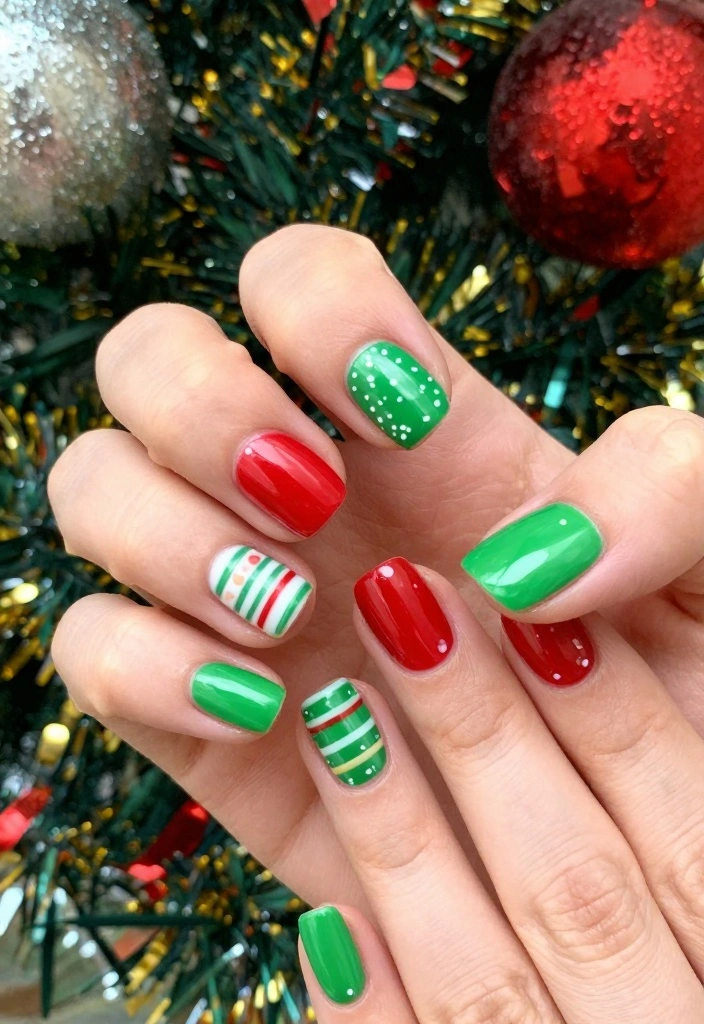
Get into the holiday spirit with vibrant stripes that are perfect for any festive occasion! This design is incredibly easy to create and allows for endless color combinations, making it a versatile choice for the season.
The mix of colors can reflect your holiday mood, whether you prefer classic red and green or something more unique like gold and silver.
This design is ideal for holiday parties, family gatherings, or any time you want to add a festive touch to your look.
Outfit Pieces:
– Base color of your choice (white, red, or green)
– Alternate colors for stripes (gold, silver, or metallic shades)
– Clear top coat for shine
Styling Tips:
– Use tape for neat, straight lines or go freehand for a more relaxed look.
– Don’t stress about perfection; the charm is in the uniqueness!
This cheerful design captures the holiday spirit beautifully and will surely impress everyone!
Holiday stripes prove that chic can be simple. With just two colors and a steady hand, your christmas nails designs shine for any party. Mix red and green, or sparkle gold and silver; it’s all about playful, wearable festivity.
8. Gingerbread Men

Celebrate the season with adorable gingerbread man designs on your nails! This whimsical look is perfect for anyone who loves sweets and brings a fun twist to your holiday manicure. The light brown base combined with colorful icing details creates a delightful treat for your fingertips.
This design is not only cute but also allows for creativity, making it an enjoyable project for beginners.
Perfect for holiday parties, family get-togethers, or when you simply want to show off your festive spirit.
Outfit Pieces:
– Light brown nail polish (soft, warm shade)
– White polish for icing details
– Colors for additional decorations (red, green, etc.)
– Clear top coat for a polished finish
Styling Tips:
– Use nail brushes for precision when painting your gingerbread men.
– If you make a mistake, simply paint over it with the base color and try again.
This scrumptious design will surely add a fun flair to your holiday celebrations!
9. Reindeer Antlers

Add a touch of whimsy to your nails with cute reindeer antlers! This design is charming and easy to create, making it perfect for those who want to celebrate the holiday spirit in a fun way. The brown base mimics the reindeer’s color, while the antlers offer a playful contrast.
This design is great for festive gatherings, Christmas parties, or any occasion where you want to showcase your holiday cheer.
With a little creativity, you can personalize your reindeer nails to reflect your style and spirit.
Outfit Pieces:
– Brown nail polish (warm, earthy tone)
– Black polish for antlers
– Red polish for the nose (optional)
– Clear top coat for a lasting finish
Styling Tips:
– Use a thin brush to create the delicate antler shapes.
– Experiment with different colors for a unique twist.
This cute design is sure to bring smiles and is perfect for celebrating the joys of the season!
10. Mistletoe Magic
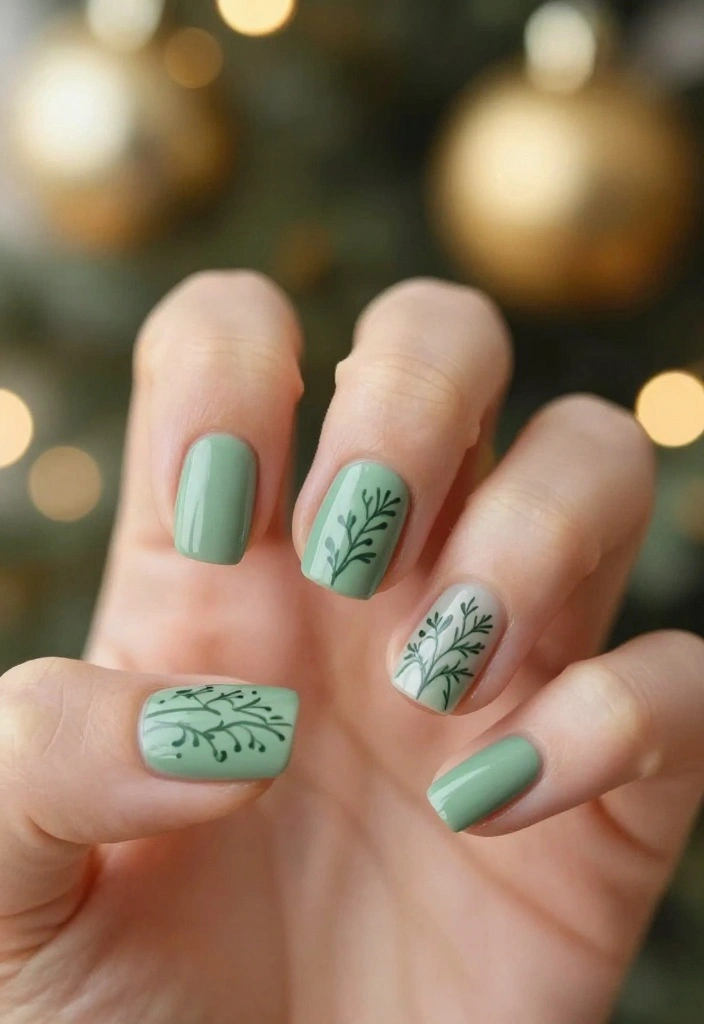
Bring a touch of romance to your nails with charming mistletoe designs! This elegant nail art adds a festive spirit while remaining classy and sophisticated. The soft green base paired with pops of red creates a beautiful contrast that captures the essence of the holiday season.
This design is perfect for holiday parties, romantic gatherings, or whenever you want to feel festive and chic.
With a little creativity, you can customize your mistletoe art for a unique flair.
Outfit Pieces:
– Soft green nail polish (calm, peaceful shade)
– Red polish for berries
– Gold polish for added accents (optional)
– Clear top coat for protection
Styling Tips:
– Use a dotting tool or fine brush to create the mistletoe leaves and berries.
– Mix colors for a unique look and feel.
This classy design is both festive and elegant, making it perfect for any holiday occasion!
11. Joyful Ornaments
Decorate your nails with joyful ornament designs that celebrate the holiday spirit! This fun and colorful design allows for creativity and self-expression. The dark blue or purple base enhances the vibrancy of the ornaments, making them pop beautifully.
This design is perfect for holiday parties, family gatherings, or whenever you want to spread a little cheer.
It’s easy to customize with your favorite colors, allowing you to create a unique look.
Outfit Pieces:
– Dark blue or purple nail polish (deep, rich shade)
– Colors for ornaments (red, gold, silver, etc.)
– Clear top coat for durability
Styling Tips:
– Paint small circles for ornaments, adding silver or gold lines for hooks.
– If you have nail stickers, they can simplify the process.
This cheerful design will surely elevate your holiday spirit and bring joy to your celebrations!
12. Simple Holly Accents
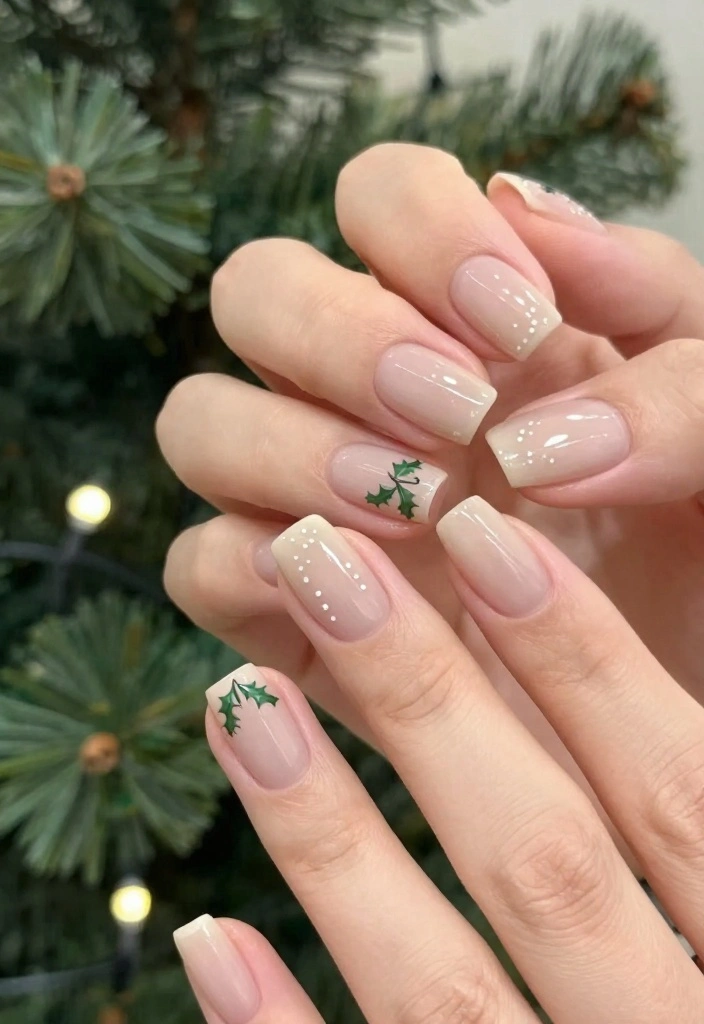
Keep your holiday nails simple yet festive with lovely holly accents! This design is easy to create and looks beautiful on any nail shape. The combination of a nude or light base with vibrant green and red captures the classic holiday spirit perfectly.
This elegant design is perfect for those who want a more understated holiday look while still feeling festive.
Ideal for office parties, family gatherings, or casual holiday outings, this design suits a variety of occasions.
Outfit Pieces:
– Nude or light polish for the base
– Green polish for holly leaves
– Red polish for berries
– Clear top coat for a polished finish
Styling Tips:
– Practice your holly shapes on paper to perfect your technique.
– Consider adding rhinestones for an extra touch of glam.
This elegant design is a beautiful way to celebrate the season without being overly flashy!
13. Festive Watercolor Art
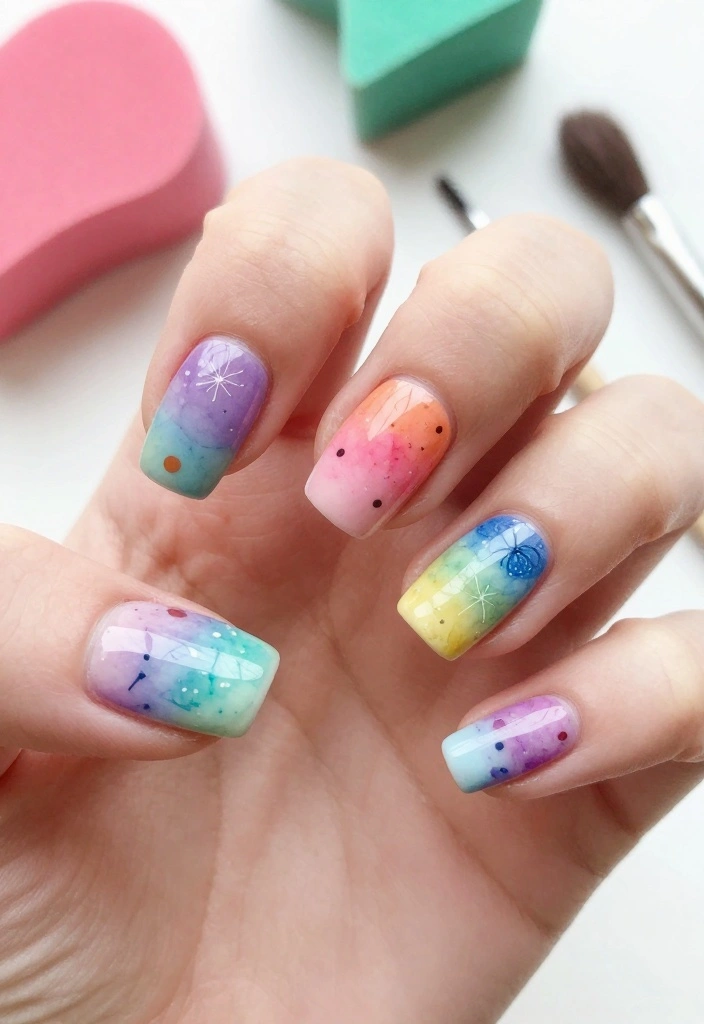
Unleash your creativity with stunning watercolor nail art that embodies the holiday spirit! This design is artistic and allows for a unique expression of color and style. The blending of hues creates a soft, dreamy effect perfect for the festive season.
Starting with a white base allows the colors to shine, making this design a striking choice for holiday celebrations.
This artistic design is perfect for holiday parties, family gatherings, or any occasion where you want to stand out.
Outfit Pieces:
– White nail polish for the base
– Various colors for watercolor effect (red, green, gold)
– Clear top coat for protection
Styling Tips:
– Use a sponge to dab on colors for a watercolor effect.
– Don’t hesitate to mix colors for a custom look.
This beautiful design will surely captivate attention and is a perfect way to express your artistic side during the holidays!
Fun fact: 72% of holiday nail art lovers say watercolor nails read as more festive in photos, thanks to the soft color blend. Try layering red, green, and gold for a unique christmas nails designs look that pops at gatherings.
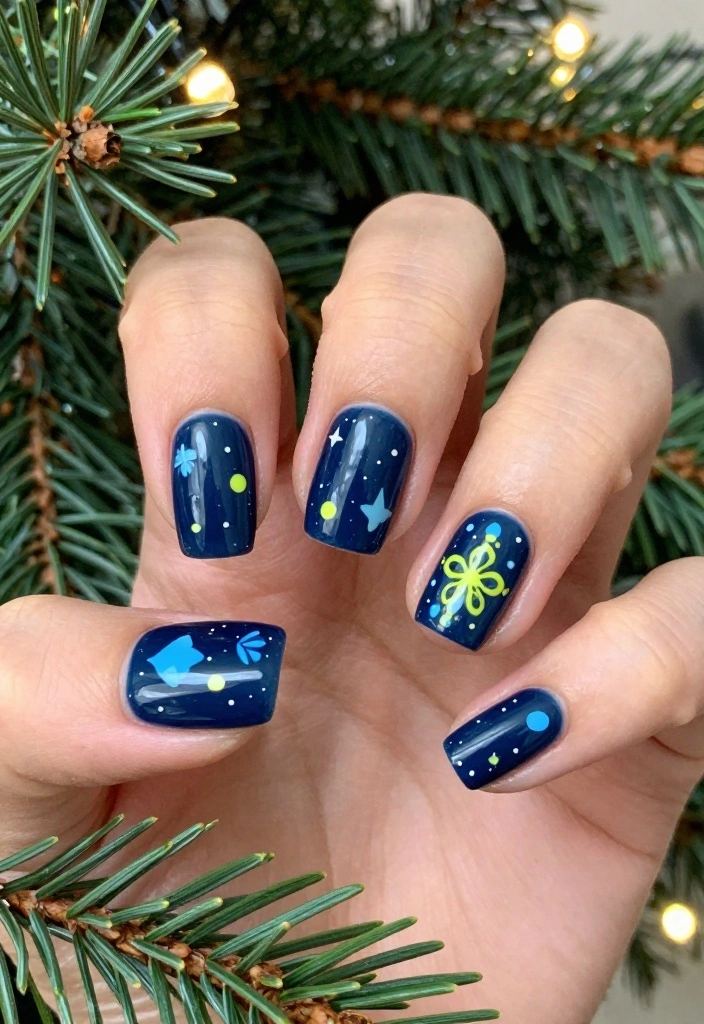
14. Twinkling Starry Nights
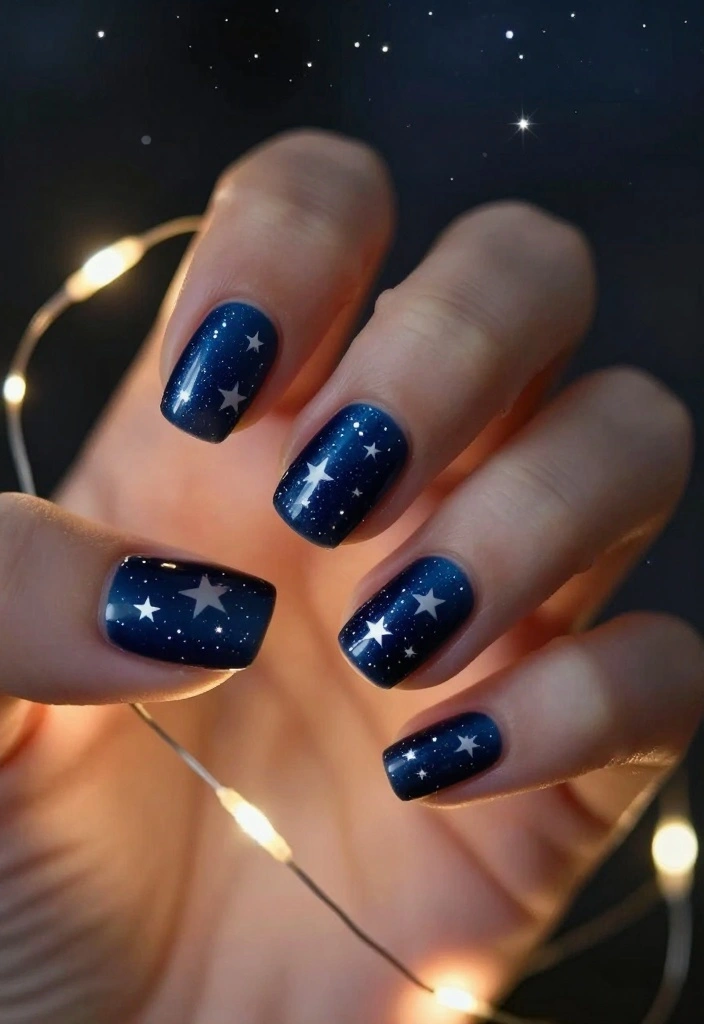
End your holiday nail art journey with enchanting starry night designs! This dreamy look captures the magic of the season, making it a beautiful and whimsical choice for your nails. The deep navy or black base creates a striking backdrop for the shiny stars and moon.
This design is ideal for cozy nights in, festive events, or any occasion where you want to add a little sparkle.
With a touch of creativity, you can personalize your starry night to reflect your unique style.
Outfit Pieces:
– Deep navy blue or black nail polish (rich, dark shade)
– White and gold polish for stars and moon
– Clear top coat for a glossy finish
Styling Tips:
– Use a fine brush to paint tiny stars and dots for added detail.
– Incorporate glitter polish for a dazzling effect.
This whimsical design is perfect for celebrating the magic of the season and will surely make your nails shine!
Conclusion
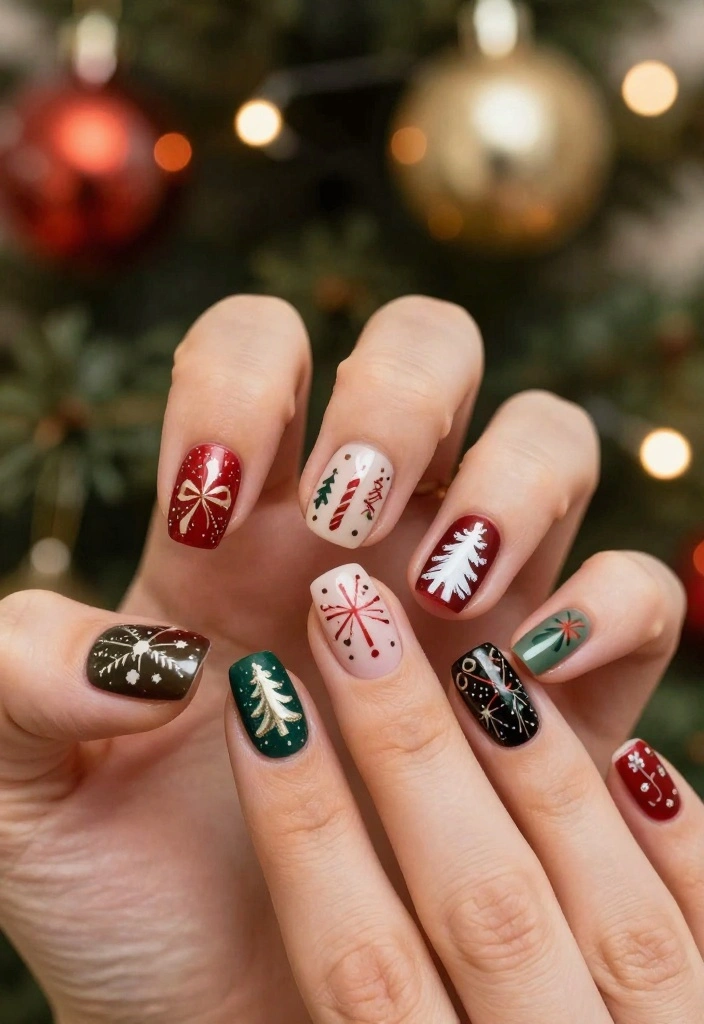
There you have it! A delightful array of Christmas nail designs that are perfect for beginners and bound to bring joy to your holiday season.
Whether you choose a classic red with glitter tips or get crafty with adorable snowmen, these designs are easy to replicate and sure to impress. Don’t forget that the spirit of the season is all about creativity and fun, so let your nails reflect your joy. Challenge yourself to try a few designs and share your favorites with friends and family!
Frequently Asked Questions
What are some quick and easy christmas nails designs for beginners?
These christmas nails designs are perfect for beginners because they use simple techniques with common tools.
Try a red base with a single white snowflake accent nail, or green nails with white polka dots to evoke the holiday spirit. Use a dotting tool or a toothpick for dots and a thin brush or tape for clean stripes.
Finish with a fast drying top coat to seal your design and add shine. Practice on a swatch nail first to build confidence.
How can I practice nail art for beginners without fancy tools?
Perfect question for nail art for beginners—you can start with items you already have. A dotting tool can be substituted with a bobby pin or the end of a toothpick, and tape or a sticky strip helps create clean lines. Keep it simple with stripes, dots, or a candy cane look. Allow each layer to dry, then finish with a protective top coat.
What supplies will I need to recreate these designs at home?
Gather a practical starter kit for these christmas nails designs: base coat, top coat, red, white, and green polishes, nail tape or striping tape, a dotting tool (or a toothpick), and a small brush for freehand details. Optional glitter or foil adds sparkle. Use a quick-dry top coat for faster results and lasting shine.
How can I add holiday spirit to my nails without complicated designs?
Keep it simple but festive. Create one accent nail with a tiny snowflake or candy cane stripe, or try a plaid look with two colors and a striping brush. Add a sprinkle of glitter on tips or a glossy finish for extra charm. By sticking to 1–2 motifs, your holiday spirit reads clearly on every nail.
How long do these beginner friendly christmas nails designs last and how can I make them last longer?
With proper prep and sealing, you can get about 5–7 days of wear from these christmas nails designs. Start with clean nails and push back cuticles, gently buff the surface, apply a thin base coat, apply 2 thin color coats with a mid layer to avoid streaks, and finish with a top coat. Reapply the top coat every 2–3 days, and avoid prolonged water exposure; wear gloves for chores to extend life.
Related Topics
christmas nails designs
holiday nail art
nail art for beginners
easy nail designs
festive nail ideas
quick tips
beginner friendly
seasonal nail art
simple designs
nail art techniques
winter nail styles
DIY nail art
These nail designs are so cute! I tried a simple snowflake design last year, and it turned out to be a huge hit at the holiday party. What’s your favorite design from the list?
I love these ideas! Last Christmas, I tried to paint reindeer on my nails, but they ended up looking like weird squirrels instead! Do you have any funny nail fails?