Spring is here, and that means it’s time to bring a little bloom to your nails! I’ve been totally obsessed with DIY nail art lately, especially when it comes to the breathtaking beauty of sakura nails. The delicate cherry blossom designs are not only stunning but also perfect for brightening up your look as the flowers start to bloom. I created this post to share my love for these floral-inspired designs and inspire you to try your hand at nail art that captures the essence of spring.
If you’re someone who enjoys expressing your creativity through fashion, especially nail art, this one’s for you. Whether you’re a nail art novice or a seasoned pro, you’ll find something in this guide that speaks to your style. From elegant ombre effects to fun and colorful neon designs, there’s a little bit of everything tailored for your needs.
Get ready to dive into 16 amazing DIY nail tutorials that are not just pretty but also easy to follow. You’ll discover techniques that will leave everyone in awe of your beautiful sakura nails! With these tips and tricks, you’ll be able to transform your nails into a canvas that celebrates the beauty of cherry blossoms. So, roll up your sleeves, grab your nail polish, and let’s create some stunning nail art together!
Key Takeaways
– Discover 16 unique sakura nail tutorials that cater to different styles and skill levels, ensuring there’s something for everyone.
– Each tutorial is designed to be easy to follow, so you can confidently create stunning nail art at home.
– Explore various techniques, from watercolor effects to 3D flowers, to add depth and character to your nail designs.
– Get inspired by seasonal trends that incorporate sakura motifs, bringing a fresh look to your nail art.
– Enjoy practical tips and tools that will help you achieve salon-quality nails without breaking the bank.
Contents
- 1. Elegant Pink Sakura Ombre
- 2. Minimalist Sakura Blossoms
- 3. Watercolor Sakura Nails
- 4. 3D Sakura Flowers
- 5. Sparkling Sakura Glitter
- 6. Soft Pastel Sakura Gradient
- 7. Geometric Sakura Patterns
- 8. Neon Sakura Nails
- 9. Sakura Water Marble Nails
- 10. Abstract Sakura Line Art
- 11. Vintage Sakura Nails
- 12. Textured Sakura Nails
- 13. Classic French Sakura Tips
- 14. Gradient Cherry Blossom Nail Wraps
- 15. Sakura-Inspired Nail Art Stickers
- 16. Seasonal Sakura Nails
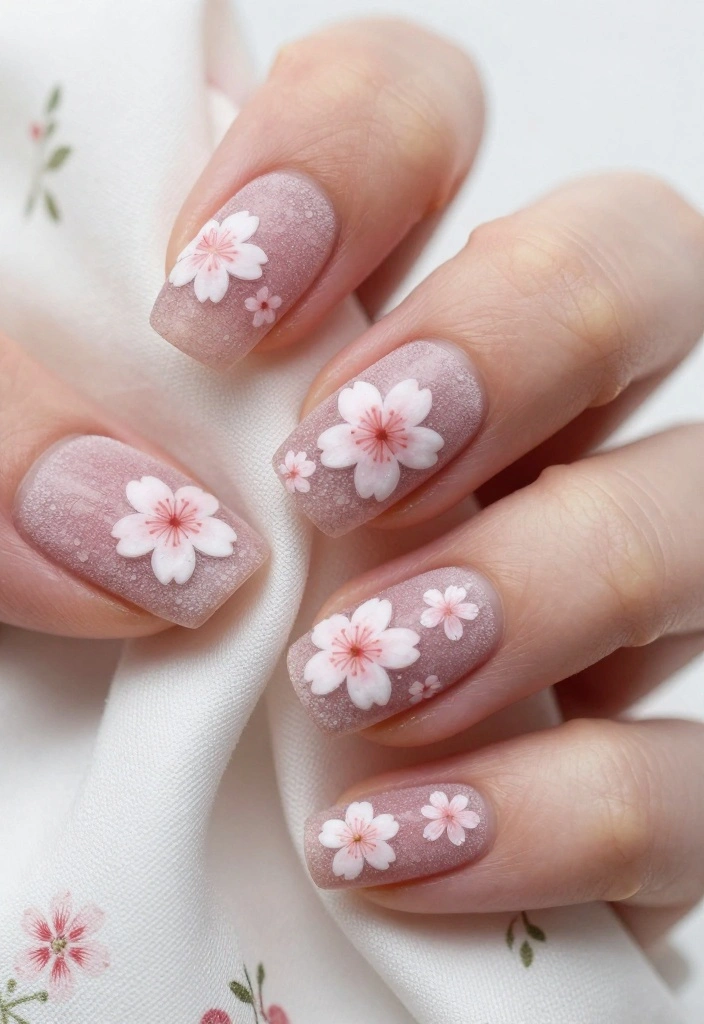
1. Elegant Pink Sakura Ombre

Kick off your nail art journey with a stunning ombre that flows from a gentle pink to a pure white, capturing the essence of cherry blossoms in bloom. This design strikes a perfect balance between chic and subtle, making it suitable for both casual outings and special occasions. You’ll love how effortlessly it transitions from day to night.
What You’ll Need:
– Light pink nail polish
– White nail polish
– Makeup sponge
– Top coat
– Nail art brush
Steps:
1. Begin with a base coat to protect your nails.
2. Coat your entire nail with the light pink polish and allow it to dry completely.
3. On a makeup sponge, place both pink and white polish side by side.
4. Gently dab the sponge onto your nail, blending the colors for a beautiful ombre effect.
5. Seal the look with a top coat for added shine and durability.
This design is simple yet eye-catching, making it a versatile choice for any event. The ombre effect offers a modern twist, allowing you to express your personal style beautifully.
📹 Related Video: Vanilla Sakura 🌸🍦 Gel Ombre 3D Sakura Flowers Bling Coffin Nails Design
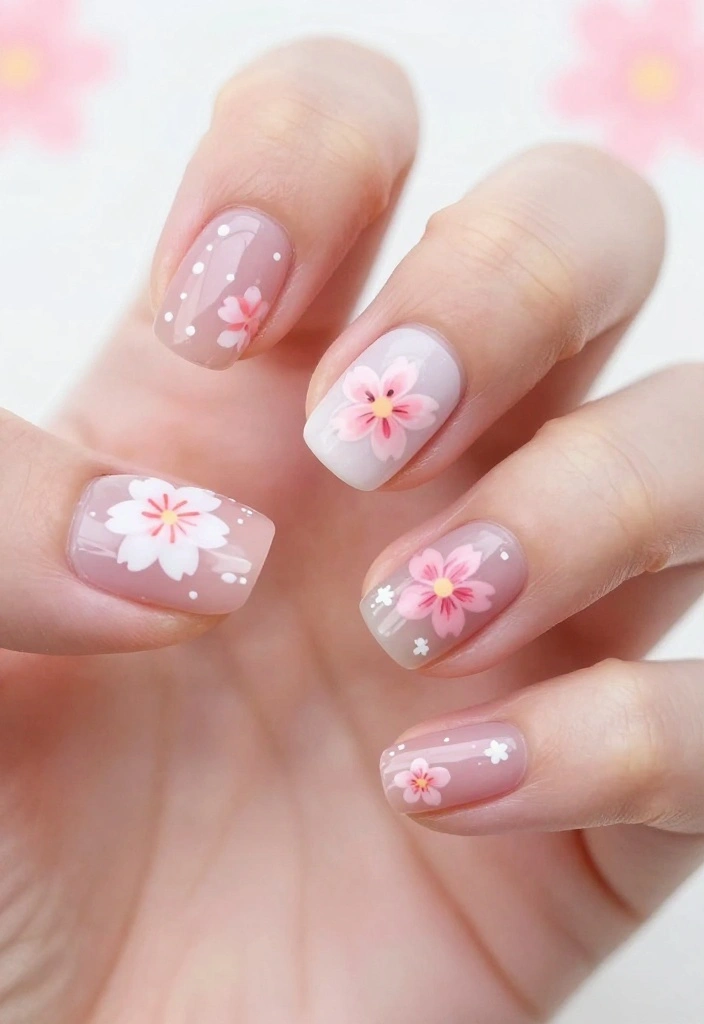
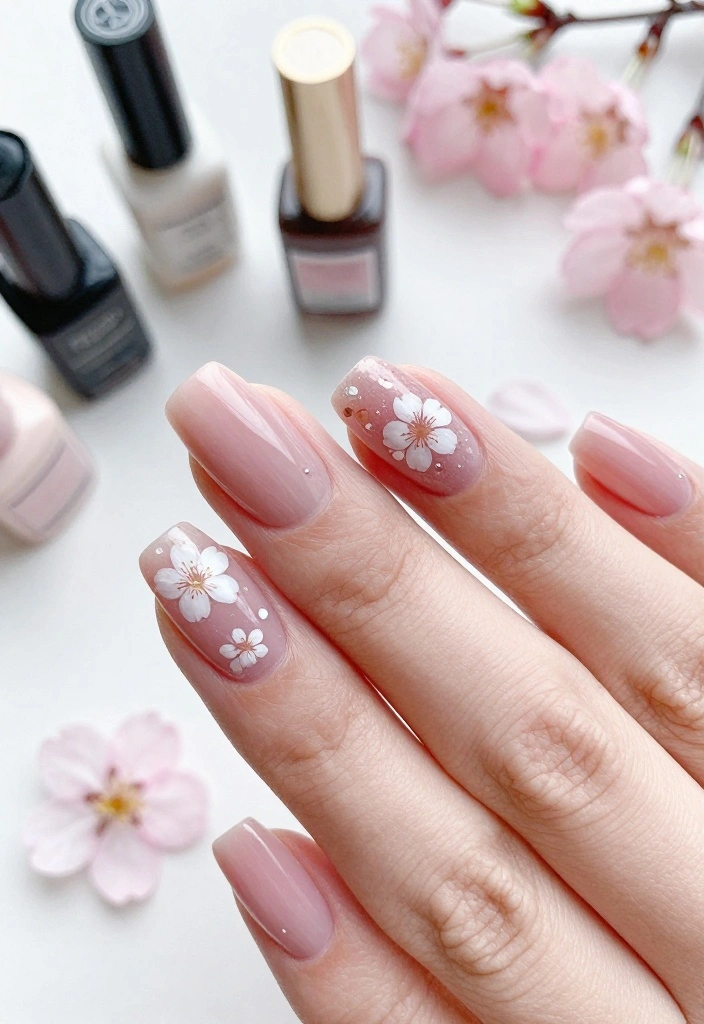
2. Minimalist Sakura Blossoms
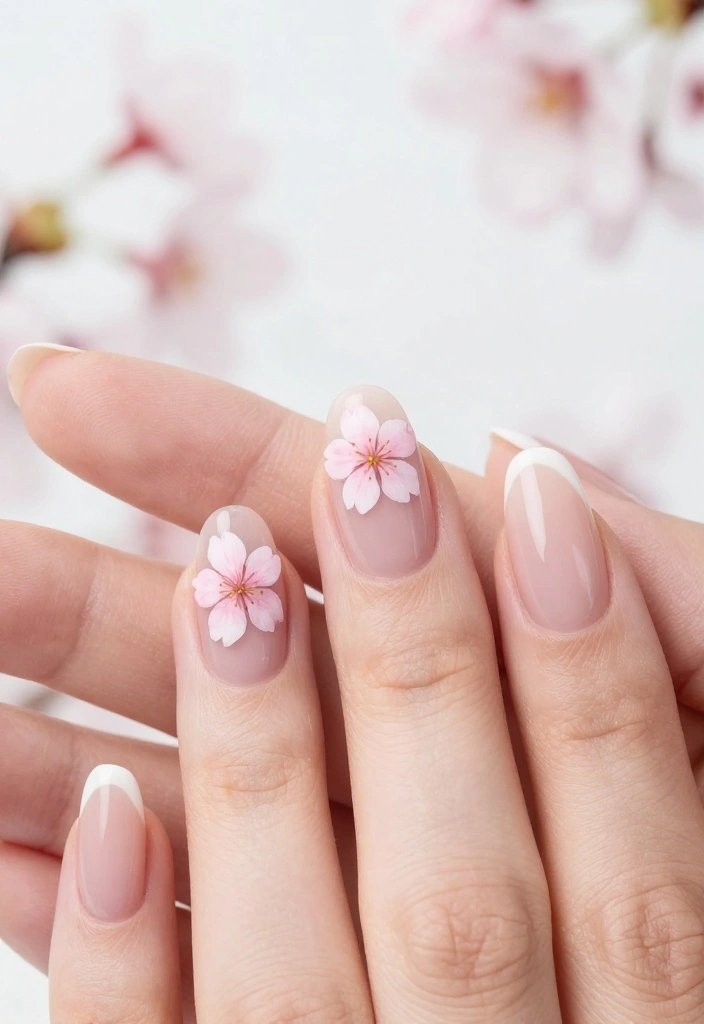
If simplicity is your style, these minimalist sakura blossoms are just for you! This understated design brings a touch of elegance without being overpowering, making it perfect for both professional environments and casual evenings out. You’ll enjoy how it enhances your look without taking center stage.
What You’ll Need:
– Nude nail polish
– Pink and white acrylic paint or nail polish
– Thin nail art brush
– Top coat
Steps:
1. Start with a nude base coat on your nails.
2. Use the thin brush to create tiny cherry blossom shapes at the tips of your nails with pink polish.
3. Add delicate white dots in the center of each flower for extra detail.
4. Finish by sealing your artwork with a glossy top coat.
This design captures the beauty of sakura blossoms in a subtle way, making it an effortless choice for any occasion.
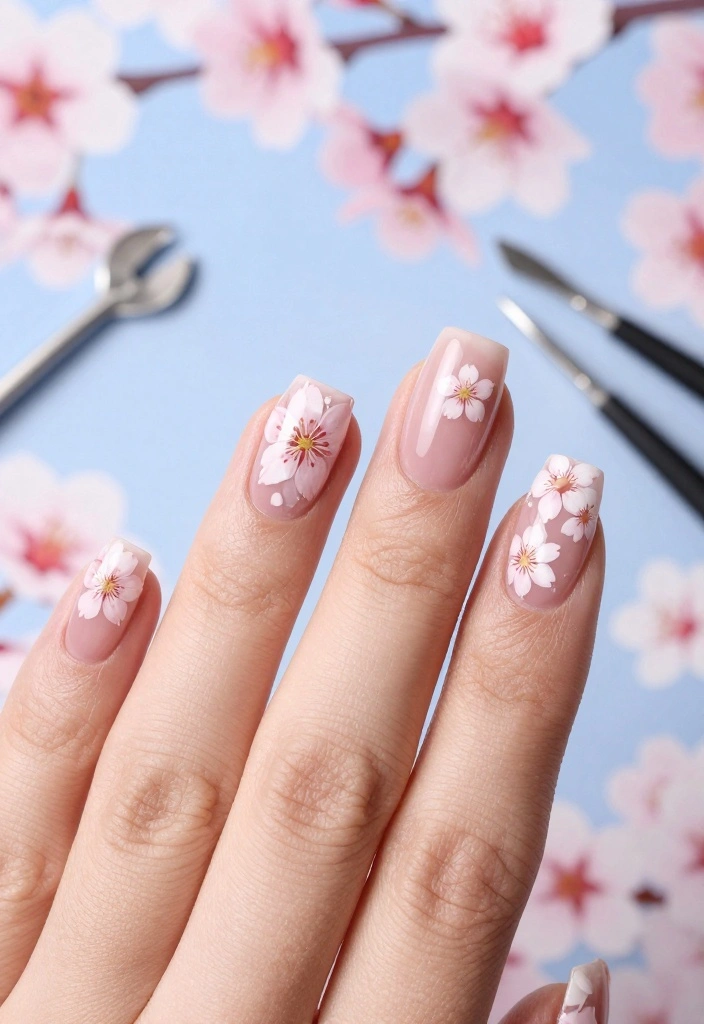
3. Watercolor Sakura Nails
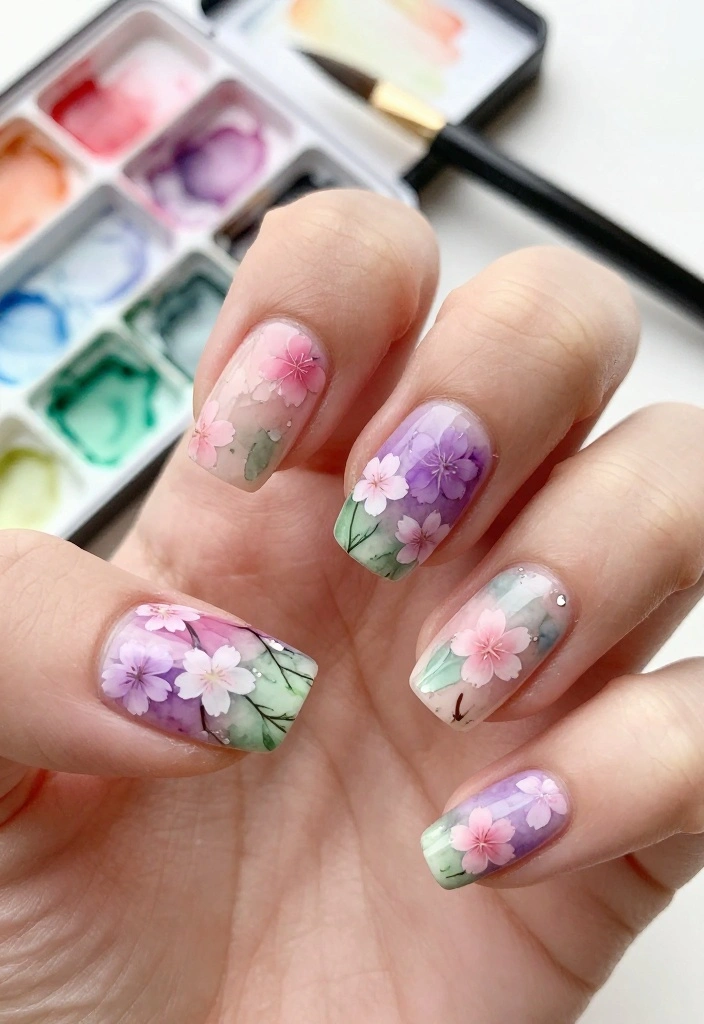
Infuse your nails with a splash of color using this watercolor sakura design! The soft blend of hues makes each nail feel like a unique piece of art, perfect for showcasing your creative side. This style is ideal for springtime or whenever you want to brighten your look.
What You’ll Need:
– White nail polish
– Nail polish in various shades of pink, purple, and green
– Small paintbrush or water brush
– Top coat
Steps:
1. Apply a white base coat to your nails for a clean canvas.
2. Dip your brush into different colored polishes and lightly stroke them onto your nails, blending the colors for a watercolor effect.
3. Use a small brush to paint cherry blossoms in select spots as accents.
4. Seal your masterpiece with a top coat for lasting wear.
This technique is forgiving and fun, allowing for a creative mix of colors that will definitely turn heads!
4. 3D Sakura Flowers
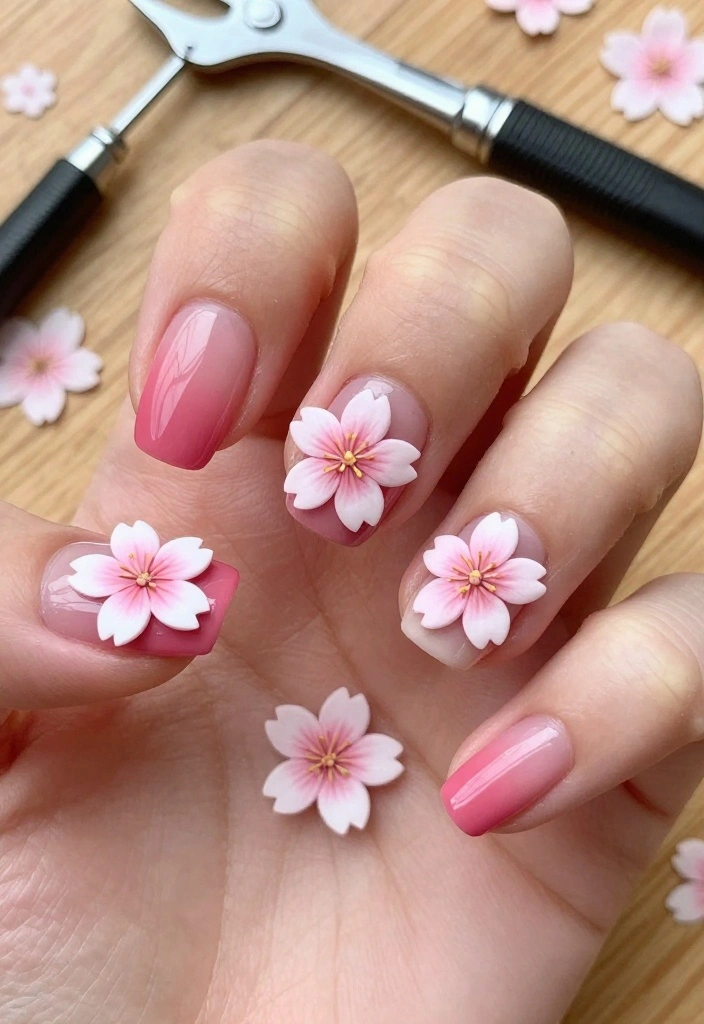
Elevate your sakura nails with stunning 3D flower accents! This design adds real texture and depth, making your nails truly pop and inviting admiration. Perfect for special events or when you want to make a statement, these nails will surely catch eyes.
What You’ll Need:
– Base nail polish (your preferred color)
– Acrylic nail art clay or 3D flower embellishments
– Top coat
Steps:
1. Apply your chosen base polish and let it dry completely.
2. Shape small flowers using the acrylic clay or adhere pre-made embellishments onto your nails.
3. Secure the flowers in place with a top coat to ensure they stay intact.
3D sakura flowers not only look breathtaking but also provide a tactile experience that will have everyone admiring your nails up close!
💅 Perfect Your DIY Nail Art!
Unlock the secrets to stunning nail designs with our DIY Nail Art Guide, perfect for busy moms on the go!
5. Sparkling Sakura Glitter

Add a glamorous touch to your sakura nails with shimmering glitter! This design beautifully merges the elegance of cherry blossoms with sparkling accents, making it ideal for parties or festive gatherings. You’ll love how this style lights up the room.
What You’ll Need:
– Light pink or nude base coat
– Fine pink glitter
– Cherry blossom nail stickers or decals
– Top coat
Steps:
1. Begin with a base coat to prepare your nails.
2. Apply a generous layer of fine pink glitter on top.
3. Once the glitter dries, position cherry blossom decals on your nails.
4. Seal everything with a top coat for durability.
This design is fun and easy to create, making it a go-to favorite for any nail enthusiast!
How To Choose the Right Tools for Sakura Nails
Choosing the right tools for your DIY sakura nails can make a huge difference in your nail art experience and results. To help you create stunning designs, here’s a guide on what to consider when selecting your nail art tools.
1. Nail Polish Quality
Using high-quality nail polish is key for achieving vibrant sakura nails. Look for brands that offer rich pigment, smooth application, and quick drying time. This will ensure your designs are bright and last longer without chipping.
2. Nail Art Brushes
Invest in a good set of nail art brushes to create intricate sakura designs. Detail brushes are particularly useful for painting delicate flowers. Choose brushes with fine tips for precision and various sizes to add depth to your artwork. Make sure to clean them thoroughly after each use to maintain their shape and performance.
3. Dotting Tools
Dotting tools are essential for creating the perfect sakura flowers. These come in different sizes, allowing you to create tiny dots for flower centers and larger dots for petals. Look for tools with a comfortable grip for easier handling while you work on your designs.
4. Nail Art Stickers and Decals
If you’re looking for an easier way to achieve beautiful sakura nails, consider using nail art stickers or decals. These can save you time and provide a professional look without needing advanced skills. Choose stickers that are easy to apply and made from durable materials for the best results.
5. Top Coat
A good top coat is a must for sealing your design and adding shine. Opt for a fast-drying top coat that enhances your sakura nail art while providing protection against chips and scratches. This will help your artwork last longer and keep your nails looking fresh.
6. Nail Care Products
Taking care of your nails is just as important as the art itself. Invest in nail care products like cuticle oil and nail strengtheners to keep your nails healthy. This will not only help your sakura nails look better, but will also ensure they remain strong and less prone to breakage.
Pro Tip: Before starting your nail art, gather all your tools and products in one place. This will save you time and keep your workspace organized, ensuring a smoother nail art session!
By considering these factors and selecting the right tools, you can create beautiful sakura nails that turn heads and leave everyone in awe. Happy nail painting!
6. Soft Pastel Sakura Gradient
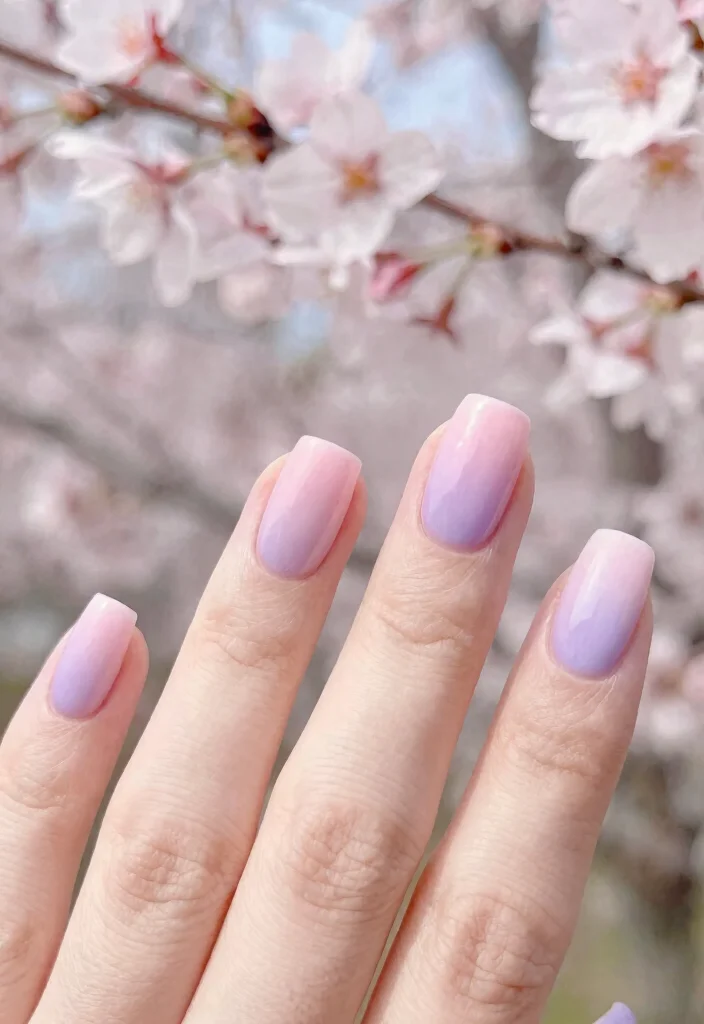
Gradient designs never go out of style, and when paired with soft pastel sakura hues, they create a dreamy effect! This gentle gradient evokes the beauty of cherry blossoms under a clear sky, perfect for springtime and cheerful occasions.
What You’ll Need:
– Base coat
– Soft pastel shades (pink, blue, and lavender)
– Makeup sponge
– Top coat
Steps:
1. Start with your base coat for a smooth foundation.
2. Paint your nails in the softest pastel shade as a base color.
3. Use a makeup sponge to dab on the other two pastel shades, creating a gradient effect from cuticle to tip.
4. Finish with a glossy top coat.
This design offers a whimsical touch to your nail art, making it a charming choice for any spring event.
Fun fact: sakura nails with a soft pastel gradient elevate any spring look. Most DIYers can achieve a chic gradient in just 15 minutes with a makeup sponge, base coat, and top coat.
7. Geometric Sakura Patterns
Merge modern design with nature in this geometric sakura nail art! Sharp lines and angles offer a contemporary twist on traditional cherry blossom motifs, resulting in a unique look that stands out. This style is perfect for those who appreciate modern aesthetics.
What You’ll Need:
– Base colors (pick any vibrant shade)
– Nail tape
– Nail art brush
– Pink and white polish
– Top coat
Steps:
1. Start with a vibrant base color of your choice.
2. Once dry, use nail tape to create geometric patterns on your nails.
3. Fill in the sections with pink and white polish to represent sakura flowers.
4. Carefully peel off the tape and apply a top coat.
This blend of geometric shapes and floral design brings a fresh edge to your sakura nails, making them trendy and distinctive!
Did you know that 62% of DIY nail art fans say geometric sakura patterns read as more modern than classic petals? Try sharp lines with pink and white polish to make your sakura nails feel bold and totally share-worthy.
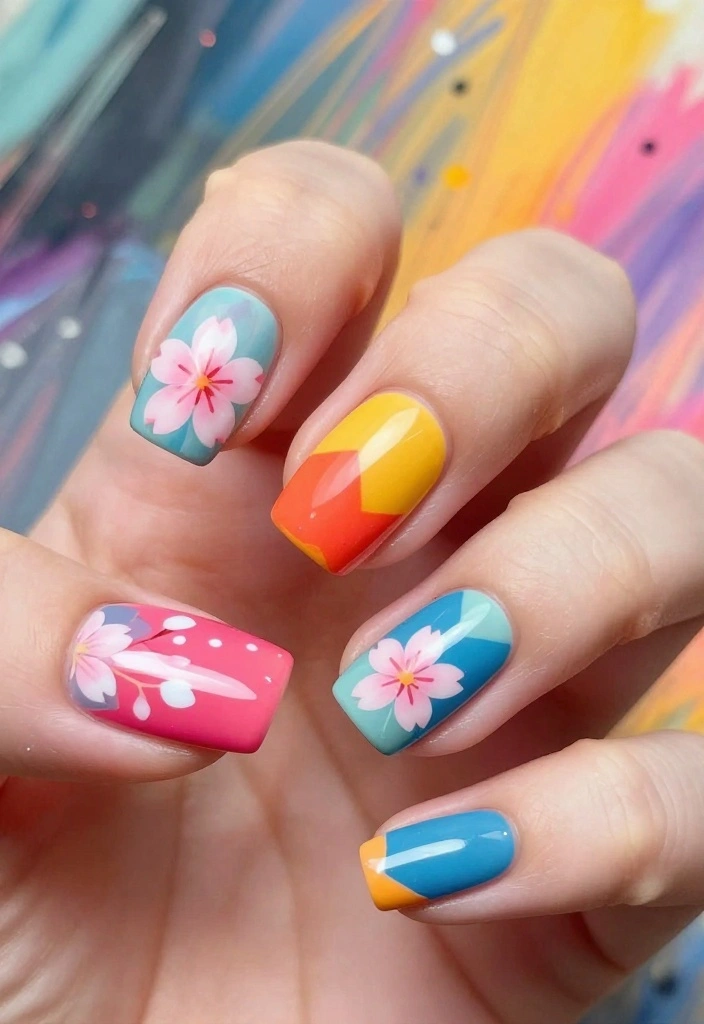
8. Neon Sakura Nails

Want to make a bold statement? Neon sakura nails are the perfect choice! Bright and vibrant, this design is ideal for summer festivals and lively nights out. You’ll love how these nails grab attention and spark conversations.
What You’ll Need:
– Neon nail polishes (pink, green, yellow, etc.)
– White nail polish
– Thin nail brush
– Top coat
Steps:
1. Apply a white base coat for a bright backdrop.
2. Use neon polishes to paint small cherry blossom flowers on your nails.
3. Outline each flower with a thin brush for added emphasis.
4. Seal with a top coat to enhance shine.
These nails are not only fun and vibrant but also a guaranteed conversation starter wherever you go!
9. Sakura Water Marble Nails
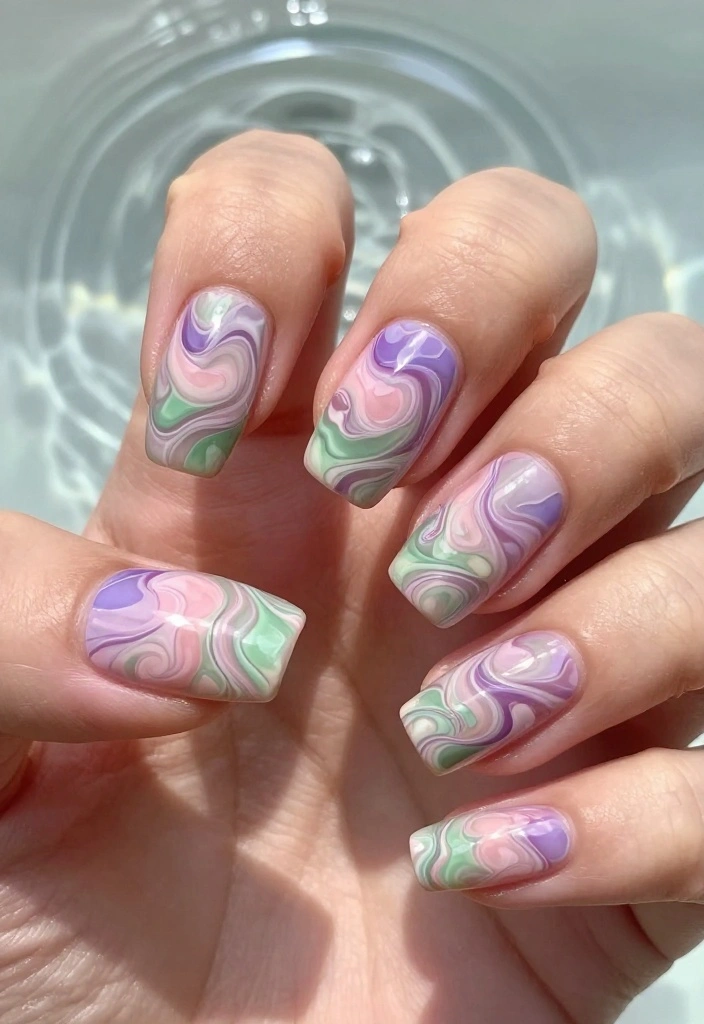
Prepare to impress with mesmerizing water marble sakura nails! This technique creates swirling patterns that resemble beautiful works of art. Ideal for those who love intricate designs, these nails will undoubtedly leave everyone in awe.
What You’ll Need:
– White base coat
– Various nail polishes (pink, purple, and green)
– A cup of water
– Nail art stick
– Top coat
Steps:
1. Fill a cup with room temperature water.
2. Drop different colors of polish onto the water, swirling them together with a stick.
3. Dip your nail into the pattern and slowly pull it out.
4. Clean around your nails and finish with a top coat.
This intricate design is a beautiful way to express your artistic flair, making your nails a true conversation piece!
10. Abstract Sakura Line Art
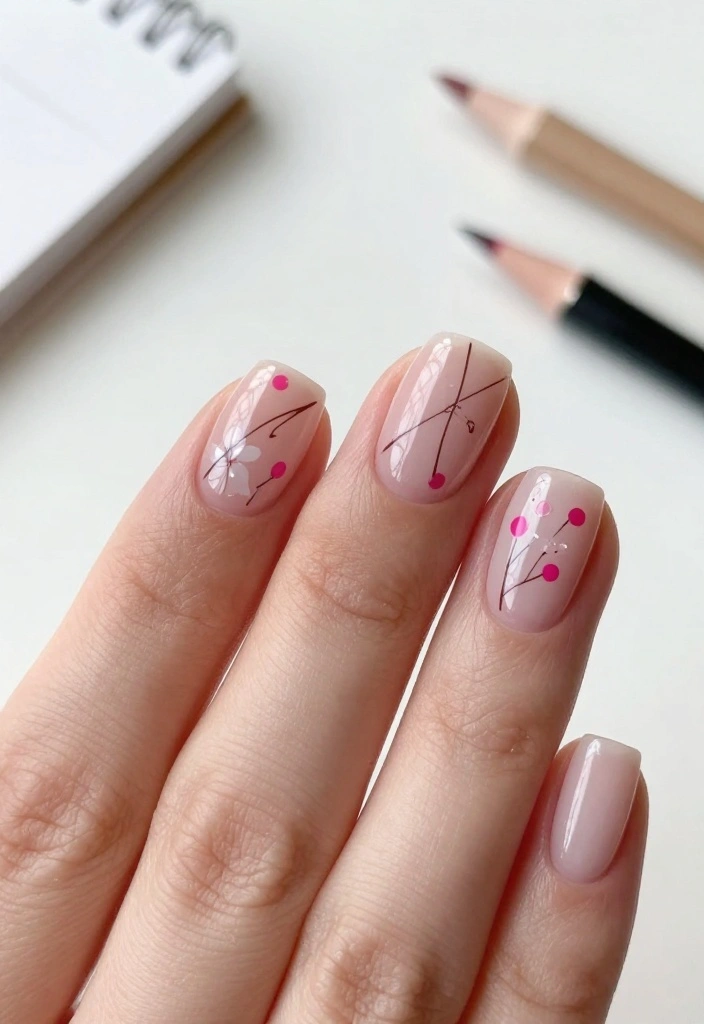
For a chic and artistic approach, try abstract sakura line art! This modern design features cherry blossoms defined by minimal lines and dots, resulting in a sophisticated and unique look. Perfect for those who appreciate minimalist aesthetics, this design is sure to turn heads.
What You’ll Need:
– Clear or nude base coat
– Black and pink nail polish
– Thin nail art brush
– Top coat
Steps:
1. Start with a nude or clear base coat.
2. Using the thin brush, create simple line art that represents sakura flowers on your nails.
3. Add accents of pink dots for an artistic touch.
4. Seal it all with a top coat.
This abstract design is stylish and perfect for anyone who enjoys a minimalist vibe!
11. Vintage Sakura Nails
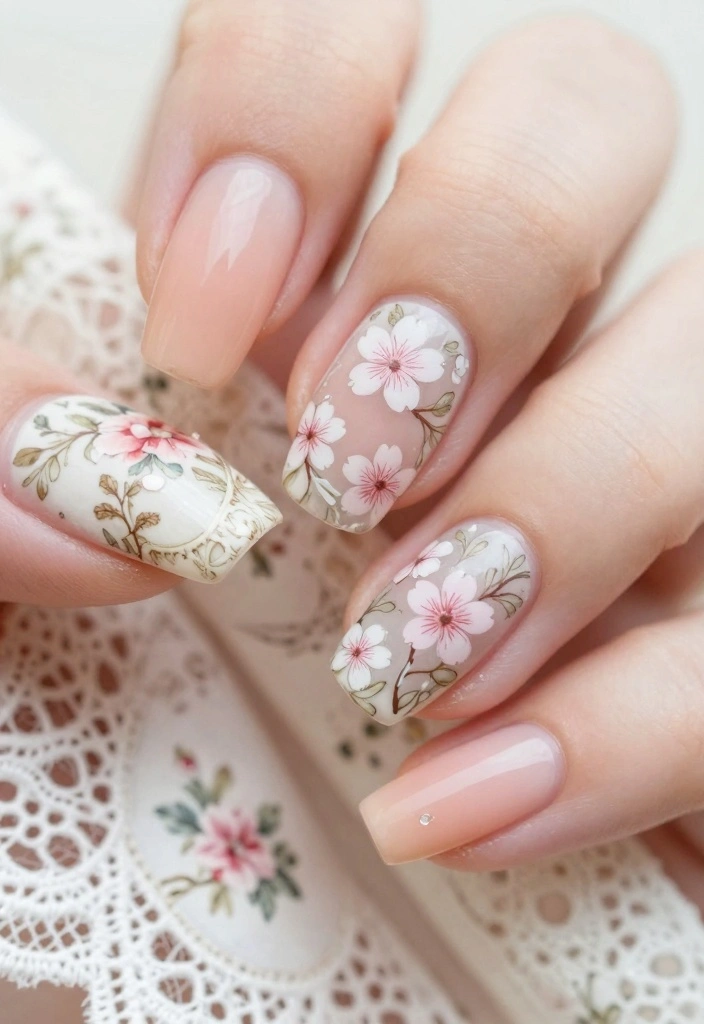
Embrace the elegance of the past with vintage sakura nails! This style features muted colors and intricate designs reminiscent of classic floral patterns, allowing you to channel timeless beauty. Ideal for those who love a vintage aesthetic, these nails will add a touch of nostalgia to your look.
What You’ll Need:
– Soft pastel nail polishes (peach, cream)
– Dark green polish for leaves
– Fine brush for detailing
– Top coat
Steps:
1. Start by applying a base color, such as soft peach.
2. Use the fine brush to paint sakura flowers in a vintage style using white and pink.
3. Add dark green leaves around the flowers for contrast.
4. Finish with a top coat for shine.
These nails beautifully pay homage to nostalgia while still looking fresh and chic!
12. Textured Sakura Nails
Add intriguing dimension to your sakura nails with textured designs! This technique incorporates finishes like velvet or matte to elevate your nail art game. Textured nails are stylish and fun to touch, making them an exciting choice for anyone wanting to stand out.
What You’ll Need:
– Base nail polish (any color you prefer)
– Velvet or matte top coat
– Cherry blossom decals
Steps:
1. Apply a base coat of any polish color you choose.
2. After drying, use a velvet or matte top coat to create unique texture.
3. Decorate a few nails with cherry blossom decals for added flair.
4. Seal everything with a clear top coat for protection.
Textured designs not only look stylish but also serve as a fun conversation starter!
13. Classic French Sakura Tips
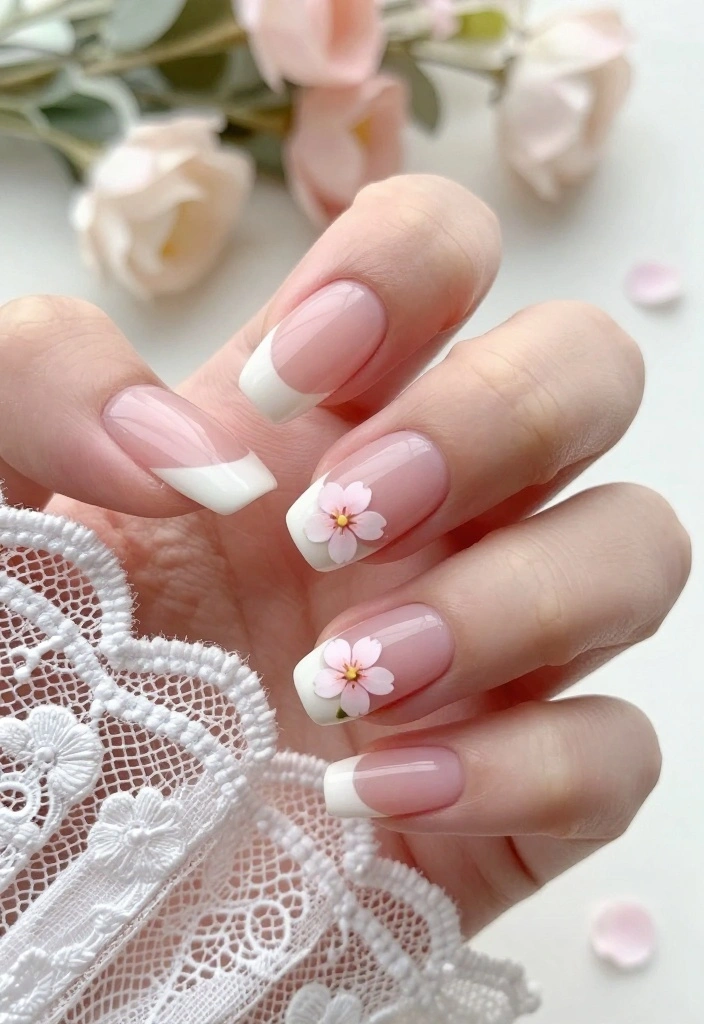
Combine the timeless appeal of French tips with delightful sakura designs! This classic style gets a refreshing twist with floral accents, perfect for weddings or formal events. You’ll love how this look blends elegance with a touch of nature.
What You’ll Need:
– White nail polish
– Light pink polish
– Thin brush for details
– Top coat
Steps:
1. Start with a clear base coat and let it dry.
2. Paint white tips on your nails for that classic French elegance.
3. Use a thin brush to add small pink sakura flowers at the base of each nail.
4. Seal with a glossy top coat.
This design beautifully marries the classic with the charming, making it an enchanting choice for any special occasion!
14. Gradient Cherry Blossom Nail Wraps
For a quick and stunning look, try gradient cherry blossom nail wraps! These pre-designed wraps are easy to apply and feature beautiful sakura designs, perfect for anyone on the go. You’ll appreciate how they provide an effortless beauty that looks polished.
What You’ll Need:
– Sakura-themed nail wraps
– Base coat
– Top coat
Steps:
1. Prep your nails with a base coat for longevity.
2. Select the right size of the sakura wrap for each nail.
3. Apply the wraps, smoothing them down and trimming any excess.
4. Finish with a top coat to seal everything.
Nail wraps make achieving beautiful sakura nails accessible and quick for everyone!
15. Sakura-Inspired Nail Art Stickers
Simplify your nail art with sakura-inspired nail stickers! These adorable stickers can instantly transform your nails, adding an artistic touch without the hassle. This quick and easy method is perfect for anyone wanting to achieve a lovely nail design in minutes.
What You’ll Need:
– Base nail polish of your choice
– Sakura nail stickers
– Top coat
Steps:
1. Start by applying a base coat to your nails.
2. Once dry, choose your favorite sakura stickers and place them on your nails.
3. Seal the stickers with a top coat for durability.
These stickers make decorating your nails super easy and fun, giving you a beautiful look in no time!
Sakura nails can bloom in minutes with these sakura-inspired nail stickers. Just press on a sticker, seal with top coat, and you’re ready. The look is cute, easy, and totally share-worthy.
16. Seasonal Sakura Nails
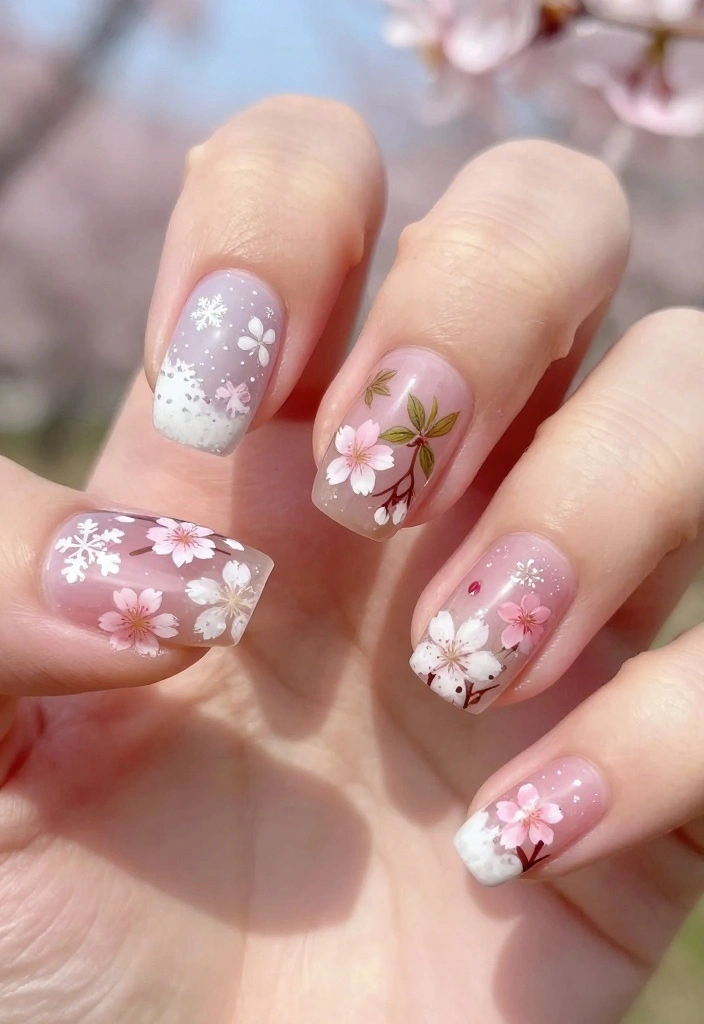
Celebrate the changing seasons with a design that adapts sakura blossoms to various seasonal themes! This versatile style allows you to reflect the beauty of each season, making it a fun way to showcase your creativity year-round.
What You’ll Need:
– Base colors for each season (white for winter, vibrant colors for summer)
– Nail art brushes
– Seasonal embellishments (like snowflakes or leaves)
– Top coat
Steps:
1. Begin with a seasonal base coat that suits the time of year.
2. Use brushes to create sakura elements that reflect the season—think snowflakes intertwined with blossoms for winter!
3. Enhance your look with any seasonal embellishments.
4. Finish with a top coat for durability.
This design highlights your creativity and beautifully adapts to any time of year, making it an exciting way to wear sakura nails!
Conclusion
There you have it! Sixteen stunning DIY sakura nails tutorials that will surely inspire your next manicure. Whether you like minimalistic, bold, or intricate designs, there’s something here for everyone to enjoy.
Get ready to unleash your creativity and express your love for cherry blossoms through your nails. Which design will you try first? Remember, the world of nail art is all about fun and self-expression!
Frequently Asked Questions
What exactly are sakura nails and how can I recreate the look at home with DIY nail art?
Sakura nails celebrate cherry blossom-inspired petals and soft pink tones. To recreate the look at home with DIY nail art, start with a clean base and a soft pink or nude base coat. Then paint tiny sakura petals using white and pale pink polish with a fine brush or dotting tool, add a small yellow dot for the center, and seal with a glossy top coat. If you’re new to nail art, decals or stamping can simplify the process, and practicing on a nail wheel helps a lot. The article’s 16 DIY Sakura Nails tutorials offer step-by-step nail tutorial options for every skill level.
What supplies and tools are essential for easy sakura nails tutorials?
Here’s a practical starter kit for easy nail art: base coat, a soft pink or nude polish for the base, white and pale pink polishes for petals, a thin brush or dotting tool for petals, a fine liner brush if you want outlines, a small black or brown for subtle details (optional), a yellow dot for centers, top coat, nail file/buffer, and cleanser for cleanup. You can also grab nail art stickers or decals for flawless sakura nails if you want even quicker results. With these supplies, you’ll be ready to dive into any of the 16 sakura nails tutorials or other easy nail art designs.
Which sakura nail designs are easiest for beginners and how can I practice?
For beginners, start with a single sakura flower accent on one or two nails, or tiny clusters using a dotting tool. You can also use decals. Practice on a plastic nail wheel or a swatch stick before you touch your hands. Build confidence by mastering the petal shape with simple dots, then layer petals for dimension. Finish with a small dot center and a top coat. The 16 tutorials in the article include beginner-friendly options and some step-by-step nail tutorial ideas that gradually increase difficulty.
How long do sakura nails last and how to care for them to extend wear?
With proper prep and top coat, DIY sakura nails can last about 5–7 days for regular nail polish, longer with gel or UV versions. To extend wear: start with clean, oil-free nails; use a high-quality base coat and thin, even layers; cap the free edges; seal with a durable top coat and reapply the top coat every 2–3 days; avoid harsh detergents, wear gloves for chores; keep nails hydrated with cuticle oil to prevent cracking; touch up small chips promptly. If you follow these care tips, your sakura nails will stay lovely throughout the week.
Are the sakura nails tutorials in the article step-by-step and beginner-friendly?
Yes—this article packs 16 DIY sakura nails tutorials with clear, step-by-step instructions, photos or diagrams, and tips to simplify even tricky petals. Whether you’re after easy nail art or a more intricate blossom design, you’ll find options suitable for nail tutorial beginners and seasoned DIYers alike. Start with the simplest design, gather your supplies, and follow along—the blossoms will bloom on your nails in no time.
Related Topics
sakura nails
nail tutorial
DIY nail art
floral design
easy nail art
beginner friendly
spring nails
stylish designs
quick tips
nail art techniques
trending nail art
creative nails
I loved this post! The Sakura nails are so beautiful, and I can’t wait to try some of these designs. Do you think they’ll last through my usual clumsiness with nail polish?
These tutorials are amazing! I tried a similar design last week and ended up looking like I had a paint fight with my cat. Maybe I should stick to the simpler ones!
Did you know that cherry blossoms actually bloom for only about a week? That’s why these nail designs are so special—they capture that fleeting beauty!
I once attempted a floral nail design and ended up with more polish on my fingers than my nails! It was a total mess, but I laughed the whole time. Have you had any funny nail art fails?