Winter is a magical time filled with cozy nights, festive celebrations, and, of course, beautiful nail art! As the temperatures drop and the snow begins to fall, many of us find ourselves craving ways to express our winter spirits. There’s something about this season that makes you want to adorn your fingertips with stunning designs that capture the essence of winter wonder. That’s why I’ve put together this post featuring 17 must-try winter nail art patterns.
If you’re a fashion lover who adores nail art, this guide is for you! Whether you’re gearing up for holiday parties, cozy get-togethers, or just want to brighten your winter days, you’ll find nail designs that fit every occasion. From subtle elegance to playful patterns, there’s something here to inspire your next manicure. You’ll discover ideas that are trendy, fun, and easy to achieve at home or with the help of a nail artist.
Get ready to dive into a world of creativity! You’ll get detailed descriptions of each winter nail art pattern along with tips and tricks to make them shine. By the end of this post, you’ll be equipped with fresh ideas and techniques that will have your nails looking fabulous all winter long.
Key Takeaways
– Discover 17 unique winter nail art patterns that suit any occasion, from festive parties to casual outings.
– Explore designs like Snowflake Symphony and Cozy Knit Patterns that bring the season’s charm to your nails.
– Learn simple tips to recreate these nail art ideas at home or with your favorite nail technician.
– Find insights on seasonal colors and materials to enhance your winter nail art game.
– Get inspired to mix and match designs for a personalized touch that reflects your winter style.
Contents
- 1. Snowflake Symphony
- 2. Cozy Knit Patterns
- 3. Icy Ombré
- 4. Holiday Cheer
- 5. Frosted Tips
- 6. Winter Wonderland
- 7. Jewel Tones
- 8. Minimalistic Winter
- 9. Starry Night
- 10. Metallic Magic
- 11. Whimsical Animals
- 12. Geometric Shapes
- 13. Candy Cane Stripes
- 14. Sparkling Glitter
- 15. Nature’s Touch
- 16. Classic Red
- 17. Frosted Ombré
1. Snowflake Symphony

Snowflakes are the quintessential symbol of winter, embodying beauty and delicacy. This design can range from simplistic white flakes on a nude background to intricate, hand-painted snowflakes on a shimmering blue base. The contrast between colors enhances the snowflakes, making them stand out beautifully, especially when paired with a touch of glitter that mimics the sunlight glimmering on fresh snow.
To create this look:
– Start with a base coat to protect your nails.
– Apply a light blue or white nail polish.
– Use a fine brush or dotting tool to create snowflakes with white or silver polish.
– Finish with a topcoat for durability and shine.
A fun twist could be mixing matte and glossy finishes to add depth to your nails.
2. Cozy Knit Patterns
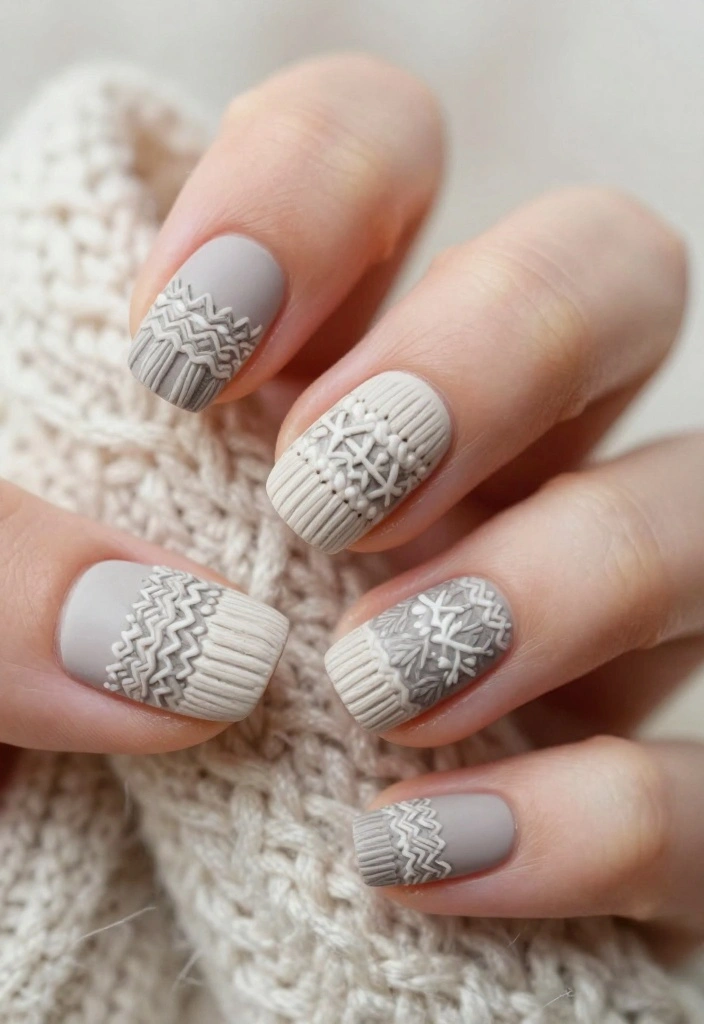
Capture the essence of winter warmth with cozy knit patterns on your nails. This design mimics the texture of your favorite knitted sweater, using soft beige or light gray as a base. The addition of white speckles can reflect the look of wool, creating an inviting and stylish appearance. It’s a perfect nod to the season’s comfort while remaining chic.
To achieve this:
– Apply a base coat for protection.
– Use a beige or gray polish as a base.
– Create knit patterns by layering lines and dots with a thin nail art brush or a stamping plate.
– Top with a matte finish for that true knitwear effect.
This pattern is great for casual outings or cozy gatherings.
3. Icy Ombré

The ombré technique can be brilliantly adapted for winter looks, blending cool tones like icy blue, silver, and white. This chic design captures a serene feel, making it suitable for a variety of occasions. The gradual color transition can evoke the beauty of winter landscapes, adding a touch of elegance to your style.
Here’s how to create it:
– Start with a base coat.
– Use a makeup sponge to blend two or three colors from the base of the nail to the tips.
– Add a layer of glitter polish for extra flair.
– Seal it with a high-gloss topcoat for a shiny finish.
This design is reminiscent of glistening ice, perfect for holiday events or winter celebrations.
4. Holiday Cheer

Embrace the festive spirit with playful holiday-themed nail art! Incorporate elements like candy canes, gifts, and holly for a vibrant, fun look. This design is sure to elevate your style for family gatherings and Christmas parties alike, spreading joy and cheer wherever you go.
For a festive look:
– Apply a bright red base polish.
– Create alternating stripes using white polish for a candy cane effect.
– Add tiny green dots for holly or stars for a festive touch.
– Finish with a glossy top coat.
Mix and match with other holiday colors like green and gold for a varied look!
📹 Related Video: 5 Christmas Nail Decoration Ideas #tutorial | Best Holidays Nail Art Compilation
💅 Nail Art Made Easy!
Transform your busy schedule with our DIY Nail Art Guide tailored just for moms who love style.
5. Frosted Tips

Frosted tips present a refreshing twist on the classic French manicure. Instead of traditional white, opt for icy blue or glittery silver to evoke a frosty feel. This elegant choice works beautifully for work or formal gatherings, ensuring your nails look chic and polished.
To create frosted tips:
– Start with a sheer pink or nude base.
– Apply a frosty blue polish to the tips of your nails.
– Add a layer of glitter polish for added sparkle.
– Seal with a topcoat for durability.
This look captures the essence of winter perfectly while remaining sophisticated.
6. Winter Wonderland
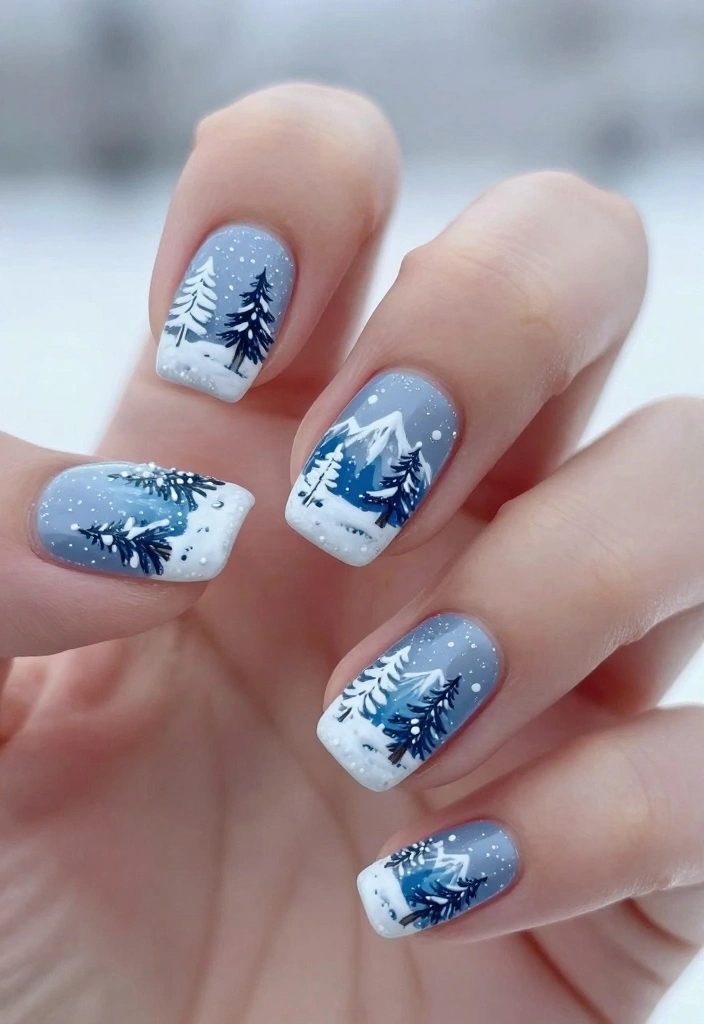
Bring the enchanting beauty of winter landscapes to your nails! Using shades of white, blue, and silver, you can create a stunning design that evokes a snowy day. Incorporating elements like trees, snowflakes, or mountains adds a unique touch, making your nails a conversation starter.
How to create this:
– Paint an opaque white base.
– Use fine brushes to paint tiny winter scenes, like trees or snow-covered hills.
– Add a sprinkle of fine glitter to mimic falling snow.
– Finish with a glossy topcoat to seal your art.
This design is perfect for nature lovers and those who appreciate winter scenery.
7. Jewel Tones

Introduce rich jewel tones like emerald green, deep sapphire, or royal purple to your winter nail art for a touch of elegance. These luxurious colors are perfect for holiday parties or special occasions, and pairing them with metallic shades can elevate the look even further.
To achieve this elegant style:
– Apply a base coat for protection.
– Paint a jewel tone of your choice for even color application.
– Add gold or silver accents with stripes or dots for extra glam.
– Finish with a glossy topcoat.
This design exudes sophistication, making you stand out in any crowd.
8. Minimalistic Winter

Sometimes, simplicity speaks volumes. A minimalistic design using soft colors and simple patterns can be both sophisticated and stylish. Think muted tones combined with tiny geometric shapes that reflect the serene beauty of winter.
To create a minimalistic design:
– Choose a muted color palette, like soft gray and pale pink.
– Paint your nails in a solid color.
– Use a fine brush to add tiny shapes, such as dots or lines, in contrasting colors.
– Seal with a matte topcoat for a chic finish.
This style is great for those who prefer understated elegance in their nail art.
How To Choose the Right Winter Nail Art Patterns
Choosing the perfect winter nail art patterns can be an exciting yet overwhelming task. With so many designs trending this season, you’ll want to ensure you pick one that aligns with your style and the occasion. Here’s a simple guide to help you make the best choice for your winter nail art.
1. Consider Your Style
Before diving into patterns, think about your personal style. Do you lean towards bold, vibrant designs or prefer subtle, minimalist looks? Assess your wardrobe too; some patterns might clash with your outfits while others complement them beautifully. Picking a style that resonates with you will make you feel confident and chic.
2. Think About the Occasion
Winter is a time for various gatherings, from holiday parties to cozy get-togethers. The occasion can dictate your choice of nail art. Festive designs like snowflakes or holiday cheer patterns may shine at a party, while softer options like cozy knit could be perfect for a casual coffee with friends. Align your nail art with the event to enhance your overall look.
3. Explore Color Schemes
Winter colors are rich and varied. Consider hues like deep reds, icy blues, or shimmering silver. Jewel tones are making a splash this season, providing a luxurious feel. You can also opt for classic colors like white and black, which are versatile and timeless. Think about the colors that you love wearing and how they can be incorporated into your nail art.
4. Assess Your Skill Level
Not every nail art design requires expert skills. If you’re a beginner, opt for simpler patterns like frosted tips or candy cane stripes that you can recreate easily at home. More advanced designs, like intricate geometric shapes or whimsical animals, might require practice or a professional touch. Choose a design that matches your comfort level for the best outcome.
5. Think About Nail Length and Shape
Your nail length and shape can influence how a design looks. Longer nails can showcase intricate designs beautifully, while shorter nails may benefit from simpler patterns. Oval, square, or almond shapes can also affect which designs look best. If you have a specific design in mind, visualize how it will translate on your nail shape and length.
6. Seasonal Trends
Stay updated with current trends in nail art. Social media platforms like Instagram and Pinterest are fantastic for discovering what’s hot right now. Look for patterns and designs that are gaining popularity, as these can inspire your choice and keep your look fresh and fashionable.
Pro Tip: Always test a design on a single nail before committing to all ten. This allows you to see how the design looks on your nails and make adjustments if necessary. Enjoy experimenting with different combinations and find what you love most!
By carefully considering these factors, you’ll be well on your way to choosing winter nail art patterns that not only look amazing but also feel authentic to your personal style. Happy nail painting!
9. Starry Night
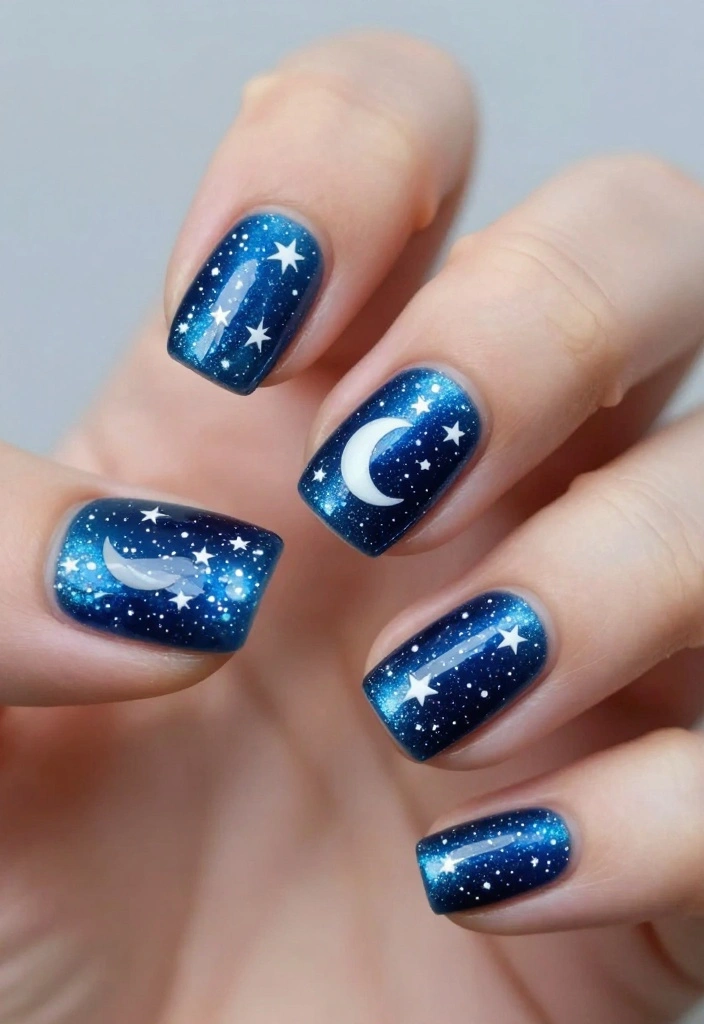
Capture the enchanting magic of the night sky with a starry night nail design. A deep blue background adorned with tiny stars and moons creates a dreamy look, perfect for those who love to gaze at the stars.
To create this enchanting look:
– Start with a dark blue base coat.
– Use a fine brush to paint small stars and moons with white or yellow polish.
– Adding glitter enhances the starry effect beautifully.
– Seal with a glossy topcoat to keep your design intact.
This whimsical design is ideal for night events or simply for the dreamers among us.
10. Metallic Magic

Metallic nail designs can introduce a futuristic vibe, perfect for winter parties. Think shiny chrome or holographic effects that catch the light beautifully. This bold choice is ideal for the fashion-forward individual looking to make a statement.
To achieve this look:
– Start with a base coat for protection.
– Apply a metallic polish in your chosen color, such as silver or rose gold.
– Nail foils or chrome powder can enhance the shiny effect.
– Finish with a glossy topcoat to amplify the shine.
This design offers a striking contrast to the soft, muted colors typically associated with winter.
This winter nail art isn’t just about color—it’s about catching light and making a statement. Metallic chrome and holographic finishes turn a simple mani into party-ready wear. Pro tip: start with a base coat, seal with a glossy topcoat, and let the shine do the talking.
11. Whimsical Animals
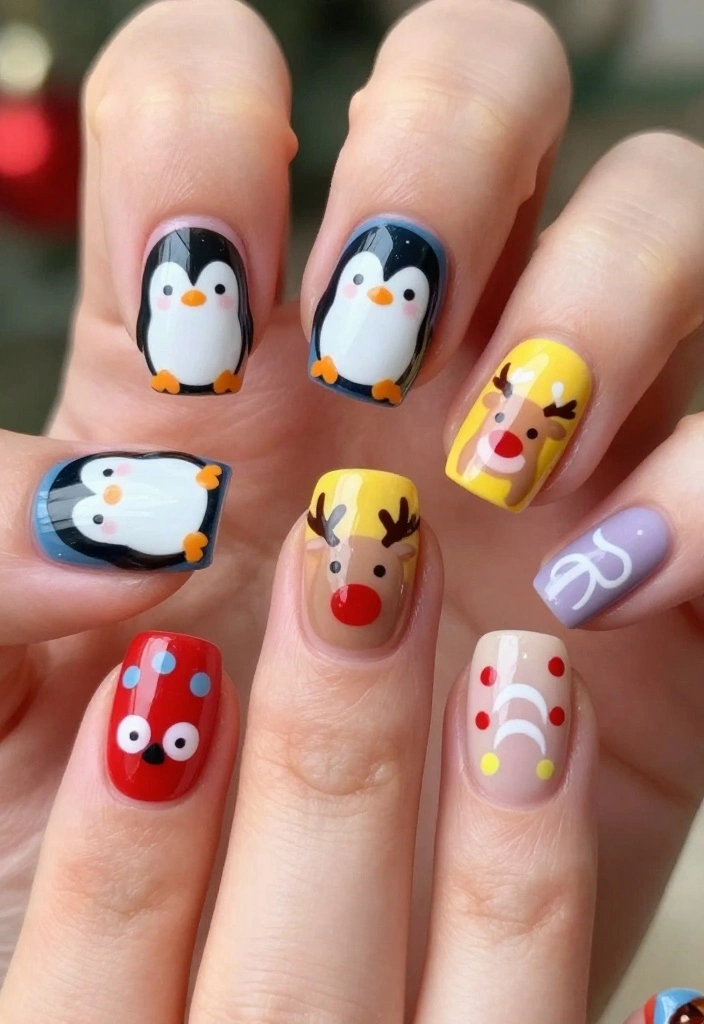
Add a playful touch to your winter nail art with adorable animal designs, like penguins, reindeer, or polar bears. These cute characters can bring a smile to your face and warmth to the chilly season, making your nails a delightful focal point.
To create animal designs:
– Start with a base coat of your choice.
– Paint tiny animal faces on one or two accent nails using small brushes.
– Use pastel or vibrant shades for a lively appearance.
– Seal your artwork with a topcoat to keep it protected.
This design is perfect for casual outings or holiday gatherings, infusing joy into your winter look.
12. Geometric Shapes
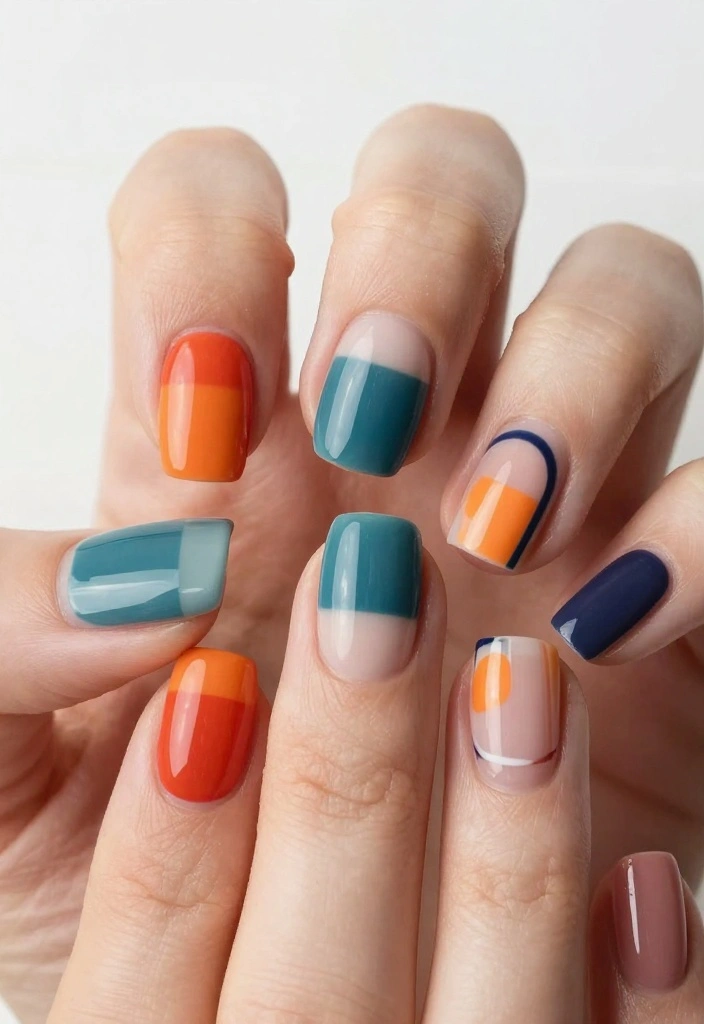
Add a modern flair to your nails with geometric designs. Combining sharp lines and blocks of color can create a striking winter look that stands out. This design is versatile and can work with any color palette, from traditional winter whites to bold and bright shades.
To achieve this design:
– Start with a base coat.
– Use tape or a nail brush to create shapes like triangles, squares, or stripes.
– Fill in with contrasting colors for a bold appearance.
– Seal with a topcoat for longevity.
This is ideal for those who appreciate contemporary art and want to showcase it on their nails.
13. Candy Cane Stripes
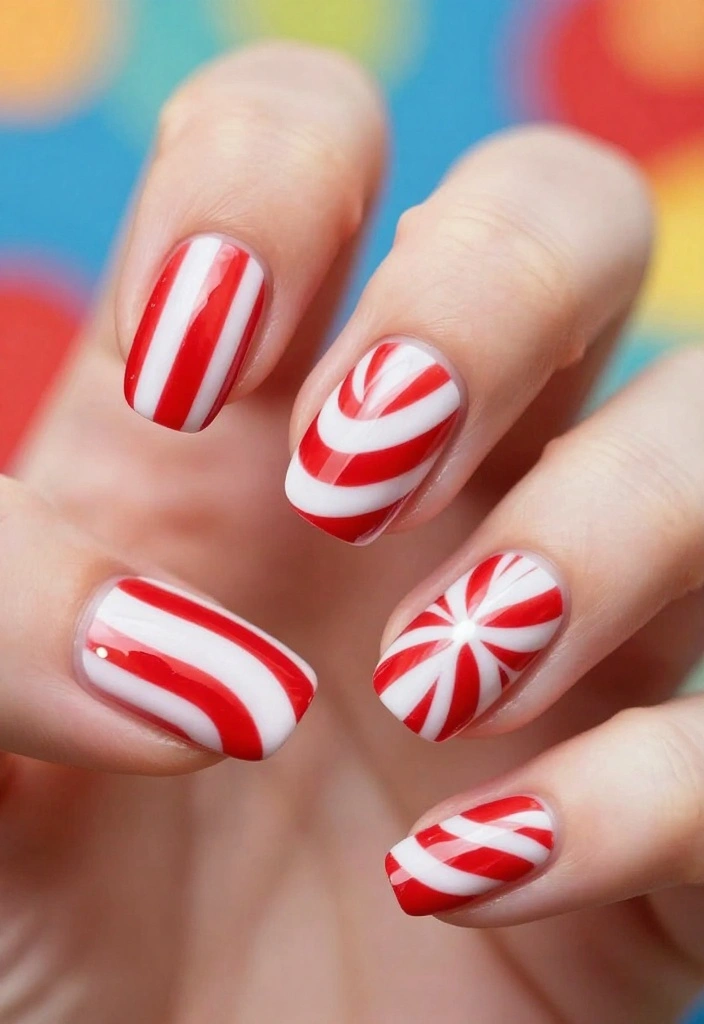
Celebrate the joy of holiday sweets with candy cane stripes on your nails! This playful, vibrant design perfectly embodies the festive spirit, making it ideal for holiday celebrations.
To create this look:
– Start with a white or red base coat.
– Use a thin nail art brush or striping tape to create the stripe pattern.
– Alternate red and white for a classic candy cane appearance.
– Finish with a glossy topcoat for a polished look.
It’s a joyful design that captures the essence of the season!
14. Sparkling Glitter
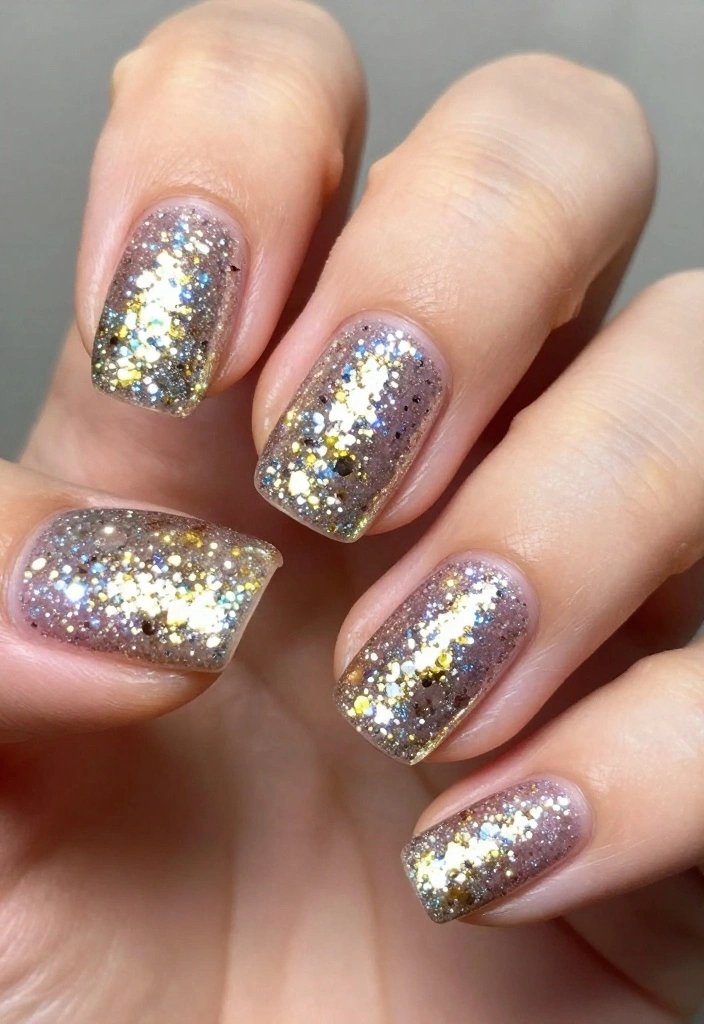
Nothing says celebration like a touch of glitter! A full glitter nail or accent nails can add a dazzling sparkle to any winter outfit. Opt for silver, gold, or iridescent glitter for a glamorous effect that shines bright.
For a glittery look:
– Apply a base coat for protection.
– Use a solid color base beneath the glitter for better coverage.
– Apply a thick layer of glitter polish or use loose glitter for a dramatic effect.
– Seal with a topcoat to keep it shiny and smooth.
This design is perfect for parties and festive gatherings, adding a touch of sparkle to your season.
15. Nature’s Touch
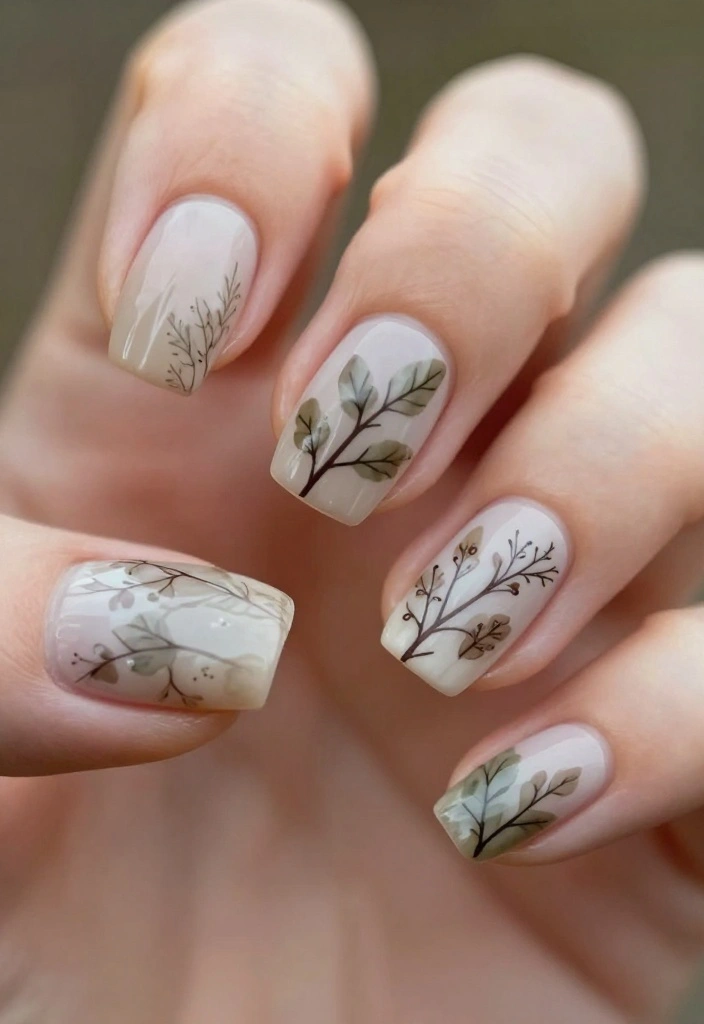
Embrace the beauty of nature with leaf or twig designs on your nails. Using earthy colors that reflect the natural world, you can create a unique design that pays homage to the winter season.
To create nature-inspired nails:
– Paint a neutral base, such as beige or light brown.
– Use a fine brush to paint small branches or leaf designs.
– Add details with lighter shades to create depth.
– Finish with a matte or glossy topcoat.
This design connects you with nature, making it perfect for winter outdoor adventures!
16. Classic Red

You can never go wrong with classic red nails, especially in winter! A bold red manicure is timeless and enhances any outfit, instantly making you feel confident and chic.
To create this classic look:
– Start with a base coat for protection.
– Apply two coats of your favorite red polish for full coverage.
– Finish with a glossy topcoat for a brilliant shine.
This design is perfect for any occasion, from holiday parties to date nights, ensuring your nails look fabulous.
Did you know two coats of classic red nail polish, sealed with a glossy topcoat, stay chip-free for up to 7 days in winter nail art? This bold red manicure instantly elevates any outfit and boosts confidence for any occasion.
17. Frosted Ombré
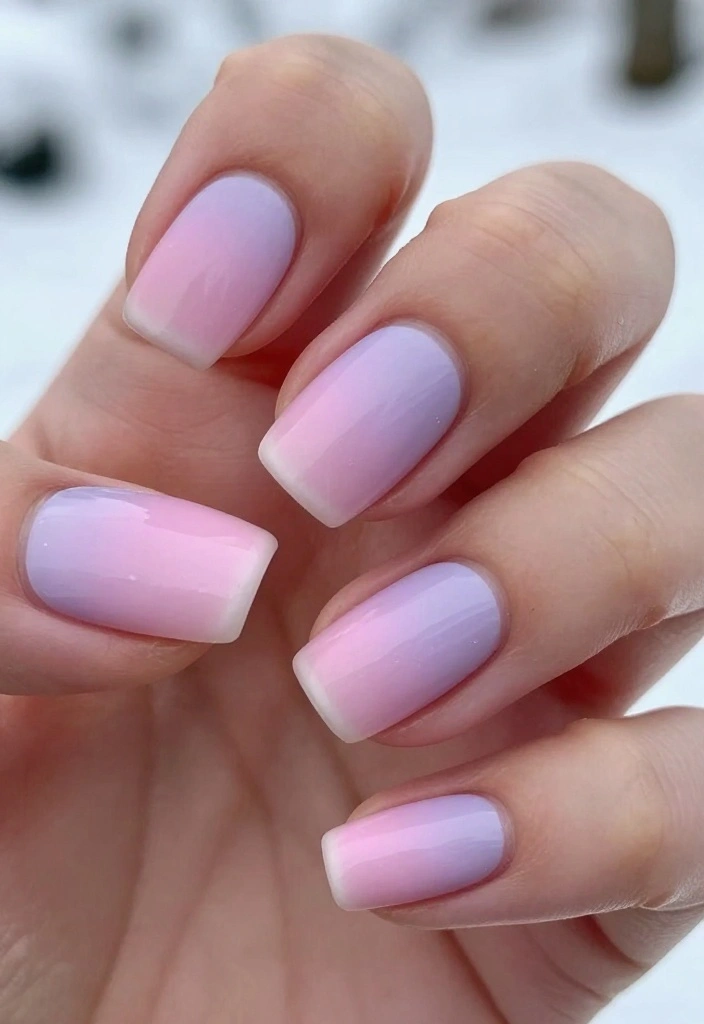
For a fresh twist on the ombré trend, try the frosted ombré look! This combines soft colors with a frosted effect, beautifully evoking winter mornings. Blending light shades creates a seamless transition that feels both modern and chic.
How to get this design:
– Start with a clear base coat.
– Choose two or three pastel colors, like soft pink and lavender.
– Blend the colors from the tips to the base using a sponge for a smooth effect.
– Add a frosted topcoat for that wintery touch.
This look is subtle yet stylish, perfect for any winter occasion.
Fun fact: Frosted ombré nails shine best with 2–3 pastel shades and a frosted topcoat. The soft blend creates a modern, wintry glow that looks polished in minutes and wears nicely for days. Try this quick technique on your next mani for chic, effortless style.
Conclusion

Choosing the right winter nail art can transform your look and express your style. Whether you opt for elegant designs, playful patterns, or minimalist touches, these winter nail art ideas will make your nails the highlight of the season. Try a few of these patterns, and you’ll certainly find the perfect match for any winter occasion, keeping your nails stylish and festive all season long.
Frequently Asked Questions
What are the most popular winter nail art patterns this season?
This season’s winter nail art patterns bring cozy textures and festive vibes like snowflakes, plaid, frosted tips, candy cane stripes, holly berries, and shimmering glitter accents. To recreate at home: pick one pattern per manicure, start with a solid base color (deep navy, rich red, or classic white), and use a fine brush or stamping plate for details. Finish with a glossy top coat for longevity. Need a quick approach? Try a one-stroke snowflake on an accent nail or a tape-masked plaid on a single finger. Regular touch-ups and proper layering help these designs last beyond party season.
How can I recreate these winter nail art designs at home without a professional manicure?
You can master many patterns with simple tools. Start with well-prepped nails and a solid base coat. For snowflakes, use white polish and a fine brush or a stamp. For plaid, apply two contrasting colors and use striping tape to create lines. For candy cane, paint red and white stripes diagonally on an accent nail, and seal with top coat. For glitter frost, dab fine glitter with a makeup sponge for a frosty gradient. Pro tips: clean up with nail polish remover on a brush, let layers dry fully before adding details, and use a quick-dry top coat to avoid smudges.
What colors work best with winter nail art patterns and how should I pair designs?
Classic winter palettes shine: midnight navy, deep emerald, wine red, crisp white, and metallic silver or gold. For patterns, use high-contrast combinations (white snowflakes on blue, red stripes on white) to make details pop. You can mix a bold solid on several nails and reserve an accent nail for a design. Matte finishes also look chic with minimal patterns; for a glam touch, add a thin line of glitter over a glossy base. Whatever you choose, ensure winter nail art remains the focus by keeping the rest of the look clean in outfits and jewelry.
How long does winter nail art last and how can I extend wear?
With proper prep and sealing, winter nail art can last 5–10 days depending on pattern and activity. Prolong wear by starting with a clean, oil-free nail bed, using a strong base coat, and sealing everything with a robust top coat every couple of days. Avoid hot water and harsh chemicals that can dull patterns. If a design chips, do a quick touch-up on the affected nail and re-seal. You can also apply a clear top coat over the entire hand every 2–3 days for extra durability.
Are there beginner-friendly winter nail art designs that still look stylish for any occasion?
Absolutely. Simple stripes, negative space designs, and a single snowflake on an accent nail are perfect for beginners but still chic for any occasion. Start with a neutral base, then use a thin tape or a toothpick to paint clean stripes. For negative space, leave a small clear shape. For a snowflake, use a dotting tool to place small dots and connect with thin lines. Finish with a top coat for shine. These patterns let you master technique without overwhelming detail, and you can scale up complexity later. When in doubt, choose patterns and designs that align with your outfit and mood.
Related Topics
winter nail art
nail patterns
holiday designs
festive nails
beginner friendly
easy nail art
glitter accents
minimalist nails
trendy nail designs
colorful patterns
seasonal nail art
advanced techniques
These nail art ideas are so cute! I always struggle with keeping my nails festive in winter, but these patterns are super inspiring. What’s your favorite design from the list?
I tried the snowflake pattern last year, and let me tell you, I looked like I had a snowstorm on my fingers! At least my nails were the only thing cold, right?
Did you know that nail art dates back to ancient Egypt? They used to color their nails with henna! Just think about how long this trend has been around.
I once attempted a reindeer design for a holiday party, and it turned into a complete mess! Let’s just say my friends got a good laugh out of it. Have you ever had a nail art fail?