The holiday season brings a special kind of joy, doesn’t it? With twinkling lights, festive gatherings, and a sense of warmth in the air, it’s the perfect time to express your cheer through your nails. If you’ve been searching for fun ways to add a little sparkle to your look without spending hours at the salon, you’re in luck! This post is crafted just for you, filled with quick and easy Christmas holiday nail designs that will have your fingers looking fabulous in under 10 minutes.
Whether you’re a busy mom, a college student, or someone who simply loves to get creative, these nail designs are perfect for anyone wanting to embrace the holiday spirit. You don’t need to be a nail art expert to pull these off. With just a few simple steps, you can achieve beautiful, festive nails that will impress your friends and family at every holiday gathering. I’ve gathered 19 designs that are not only easy but also stunning, ensuring that you’ll find something that fits your style and mood.
So, if you’re ready to deck your nails with some holiday cheer, let’s dive into these simple yet beautiful Christmas nail ideas that will have you feeling festive in no time. You’ll have fun experimenting with colors and designs while creating joy and smiles this season!
Key Takeaways
– The list includes 19 quick and easy Christmas nail designs that can be done in under 10 minutes, perfect for anyone short on time.
– Designs range from classic looks like Classic Red with a Twist to playful styles like Elf Shoe Tips, catering to different tastes.
– Each design offers a unique way to embrace the holiday spirit without requiring advanced nail art skills.
– Step-by-step instructions ensure that anyone, regardless of experience, can achieve beautiful results easily.
– These festive nail ideas are great for holiday parties or simply to add some cheer to your everyday look.
Contents
- 1. Classic Red with a Twist
- 2. Frosted Snowflakes
- 3. Christmas Tree Tips
- 4. Glittery Gold and White
- 5. Candy Cane Stripes
- 6. Holly Jolly Accents
- 7. Simple Snow Ombre
- 8. Festive Glitter Dots
- 9. Elf Shoe Tips
- 10. Simple Reindeer Faces
- 11. Simple Christmas Ornaments
- 12. Minimalist Christmas Tree
- 13. Twinkling Lights
- 14. Gingerbread Men
- 15. Warm Sweater Knit
- 16. Holiday Paisley
- 17. Simple Starry Night
- 18. Simple Christmas Wreath
- 19. Festive French Tip
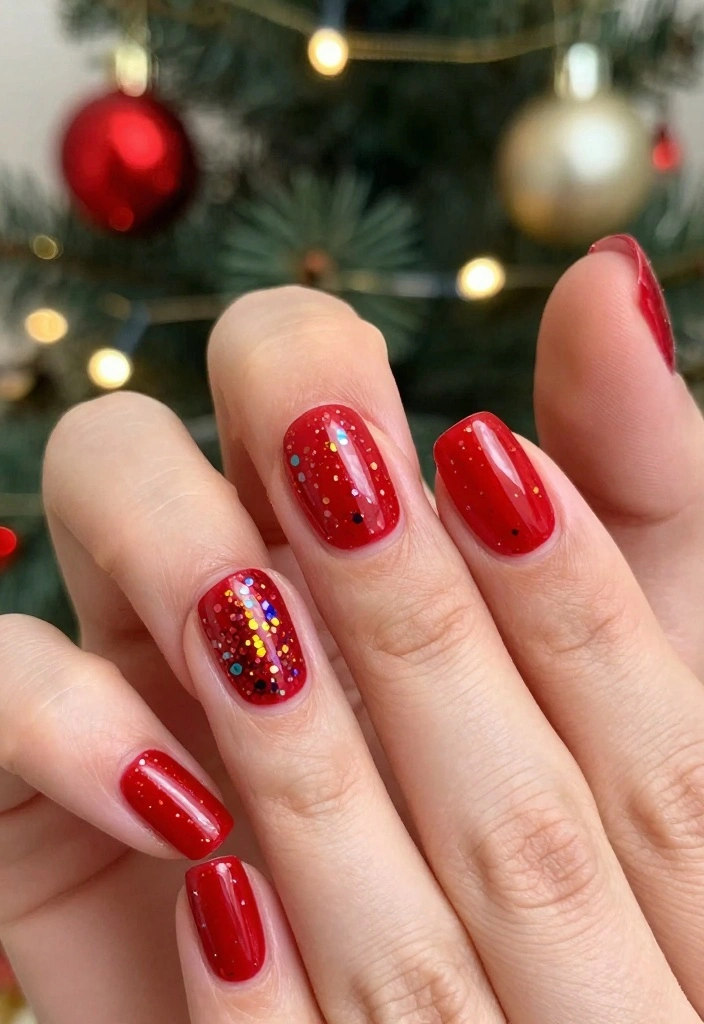
1. Classic Red with a Twist
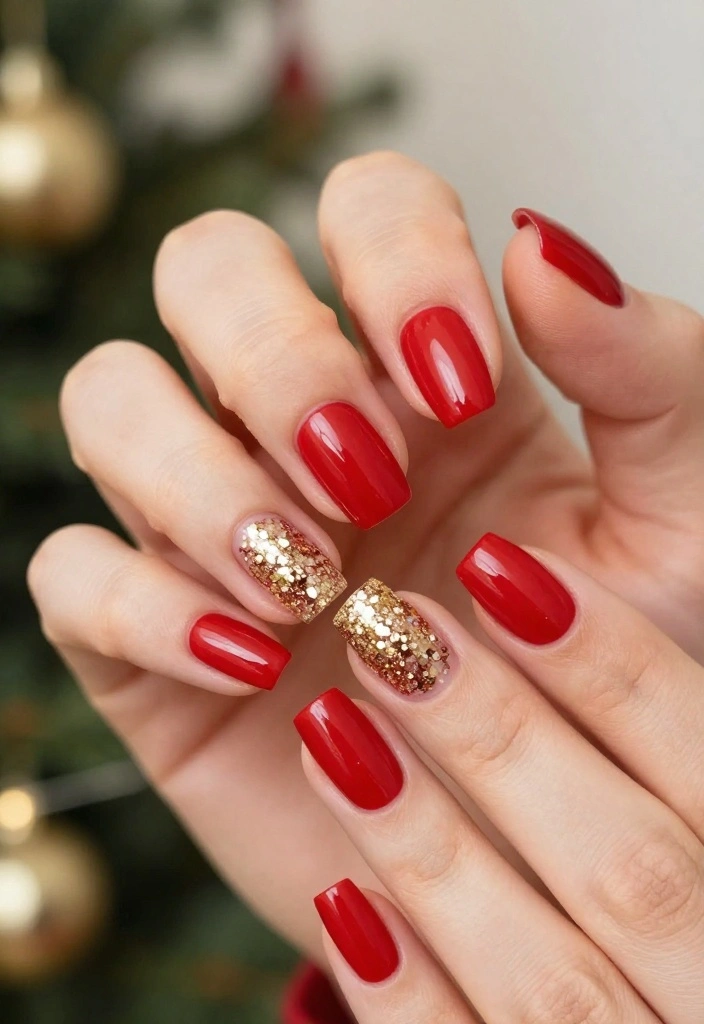
Red nails bring out the festive spirit of the holidays, and you can elevate this classic look with a fun touch. By adding an accent nail with sparkling gold glitter, you get a chic design that’s both elegant and playful. It’s a versatile choice that fits perfectly for holiday parties and cozy gatherings alike.
Outfit Pieces:
– Deep red nail polish
– Gold glitter for the accent nail
– Clear base coat and top coat
Styling Tips:
– Start with a base coat to protect your nails.
– Paint all nails in a rich red, leaving one for glitter.
– Apply gold glitter on the accent nail for a stunning effect.
– Finish with a top coat for shine and protection.
This design is perfect for festive events, and you can easily switch the glitter for a different color to match your outfit.
Classic red nails feel instantly festive, and the trick is simple: add one gold-glitter accent nail for christmas nails easy glamour. It’s quick, chic, and party-ready in minutes—perfect for busy holidays and cozy gatherings.
2. Frosted Snowflakes
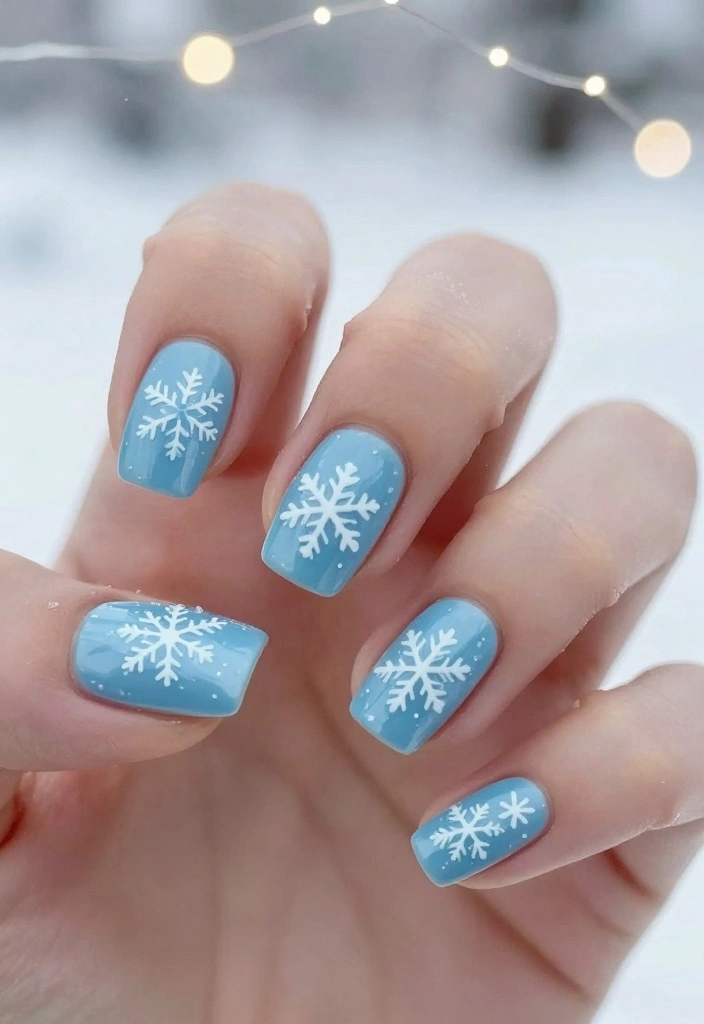
Capture the beauty of winter with frosted snowflake nails! A soft pastel blue base paired with delicate white snowflakes creates a serene and charming look. This design is not only beautiful but also easy to apply, making it ideal for holiday gatherings and winter celebrations.
Outfit Pieces:
– Pastel blue nail polish
– White polish for snowflakes
– Clear base coat and top coat
Styling Tips:
– Start with a clear base coat for smooth application.
– Paint all nails with pastel blue polish.
– Use a dotting tool or thin brush to create snowflakes with white polish.
– Seal your design with a top coat for durability.
This nail art is perfect for embracing a winter wonderland theme at all your holiday festivities.
How To Choose Easy Christmas Nail Designs
Choosing the right Christmas nail designs can make your holiday celebrations even more festive. With countless options available, it can be overwhelming. Here’s a simple guide to help you select nail designs that are both easy and beautiful, taking less than 10 minutes to create.
1. Consider Your Skill Level
Before diving into nail art, assess your skill level. If you’re a beginner, opt for simpler designs like candy cane stripes or glitter dots. More intricate designs, like reindeer faces or Christmas trees, might require more practice. Choose styles that match your comfort level to avoid frustration and ensure a fun experience.
2. Think About Your Nail Length and Shape
Your natural nail length and shape play a significant role in how a design will look. Long nails can showcase detailed artwork, while short nails might benefit from minimalist designs. For example, a simple snow ombre looks stunning on short nails, while a festive French tip adds elegance to longer nails. Choose designs that highlight your nails’ best features.
3. Select a Color Palette
The colors you choose can set the holiday mood. Traditional colors like red and green evoke Christmas spirit, while gold and silver can add a touch of glam. If you prefer something unique, consider using pastel shades or a monochromatic scheme. Think about how the colors will look together and ensure they fit the festive theme you want to achieve.
4. Gather Your Tools
Having the right tools is crucial for a successful nail design. Basic tools include nail polish, a top coat, a base coat, and nail art brushes. If you plan on adding details, nail dotting tools or striping tape can be helpful. Make sure you have everything ready before you start. This will save you time and make the process smoother.
5. Look for Inspiration
Find inspiration from various sources like social media, nail art blogs, or Pinterest. Browse through images to see what catches your eye. You might come across a design that combines elements from different styles. Don’t be afraid to mix ideas to create something unique that reflects your personality.
6. Plan Your Time
Since each design should take less than 10 minutes, plan accordingly. If you’re short on time, stick to designs that require fewer steps. For example, a simple design with a solid color topped with glitter can look stunning and be completed quickly. Consider timing each step to ensure you stay within your limit.
Pro Tip: Always finish your nail design with a good quality top coat. This not only adds shine but also protects your artwork, helping it last longer. Plus, it gives your nails that polished look, perfect for holiday gatherings!
Choosing the right easy Christmas nail designs involves understanding your skill level, nail shape, and color preferences. With the right tools and a little inspiration, you can create stunning nail art that enhances your holiday spirit. Enjoy the process, and don’t forget to have fun with your festive nails!
3. Christmas Tree Tips
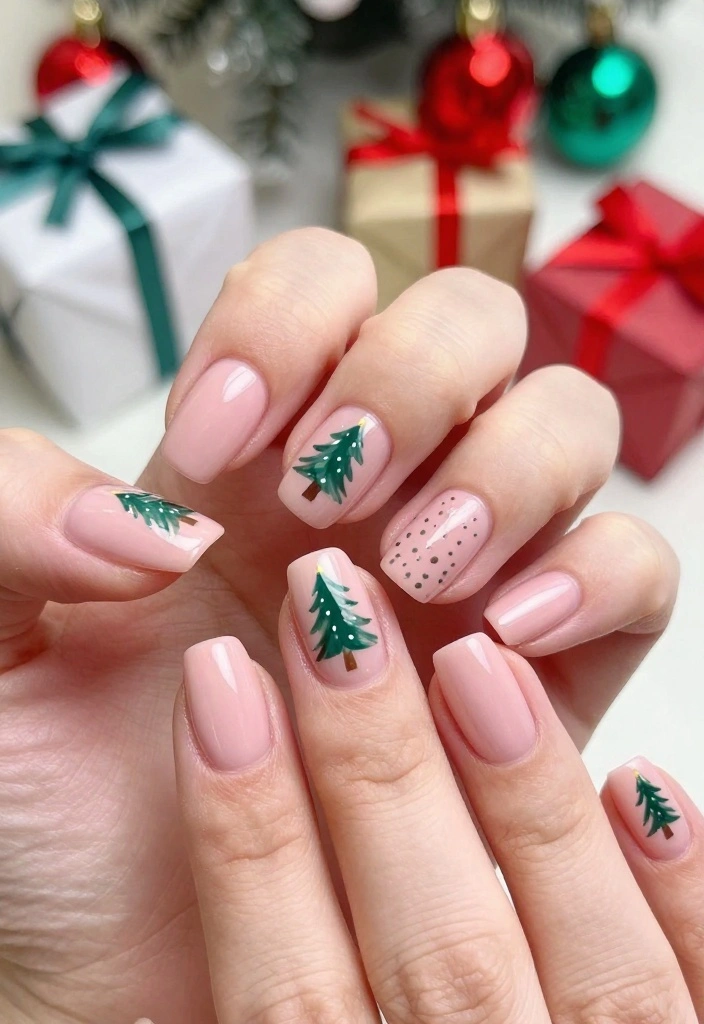
Infuse your nails with holiday cheer using tiny Christmas tree designs! A simple green tree painted on a nude or light pink base creates a festive yet understated look. This playful design is perfect for spreading holiday joy without being overly flashy.
Outfit Pieces:
– Nude or light pink nail polish
– Green polish for the tree
– Various colors for decorations
– Clear base coat and top coat
Styling Tips:
– Apply a nude base coat for a subtle backdrop.
– Use a fine brush to paint a small triangle for the tree.
– Add colorful dots to mimic ornaments.
– Finish with a glossy top coat for shine.
This cute design is sure to bring smiles at holiday parties or family gatherings!
📹 Related Video: 3 Easy Ways To Do Christmas Tree Nail Designs
4. Glittery Gold and White
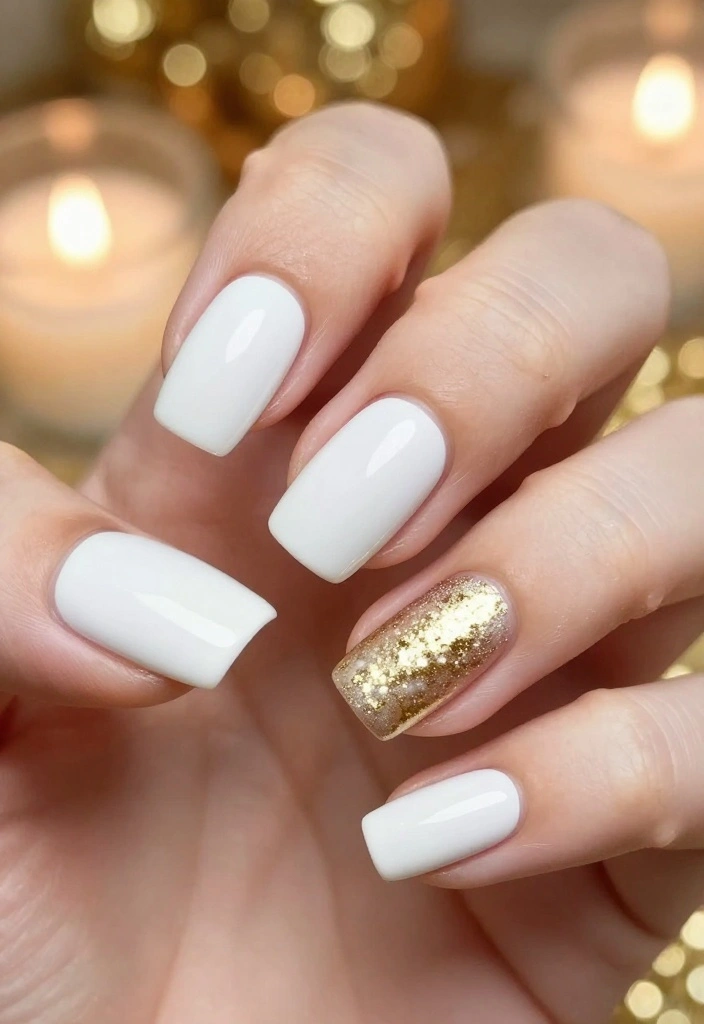
Combine the timeless elegance of gold with crisp white for a stunning holiday nail design. This look offers just the right amount of glam while remaining simple and easy to achieve, making it perfect for any festive occasion.
Outfit Pieces:
– White nail polish
– Gold glitter polish
– Clear base coat and top coat
Styling Tips:
– Start with a base coat of white polish for a clean canvas.
– Apply gold glitter tips to create an ombre effect.
– Seal it with a top coat for extra shine.
Whether you’re attending a holiday party or a cozy dinner, this design will elevate your look beautifully!
Fun fact: quick nail looks save holiday time—over 70% of festive photos feature nails done in under 10 minutes. With glittery gold and white, christmas nails easy still look luxe and polished for last-minute parties.
💅 Quick Nail Art for Moms
Transform your holiday nail game in minutes with our DIY guide designed for busy moms like you!
5. Candy Cane Stripes
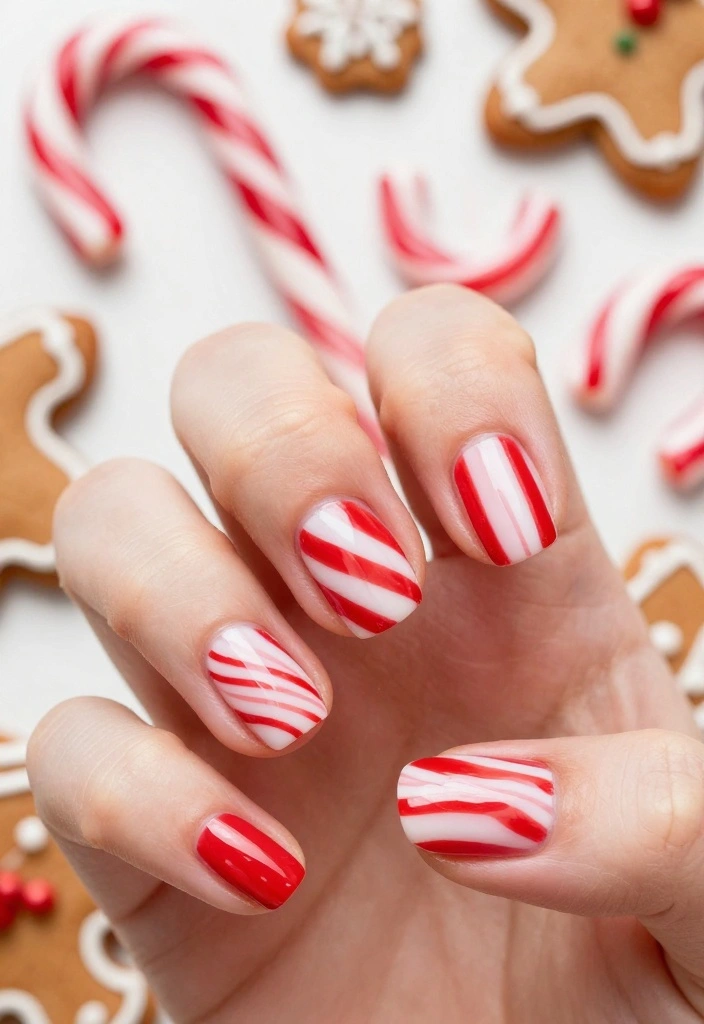
Bring the sweet spirit of Christmas to your nails with fun candy cane stripes! The classic red and white combination creates a playful look that’s sure to delight during the holiday season. This design is perfect for those who want to add a touch of festive flair to their style.
Outfit Pieces:
– Clear base coat
– White nail polish
– Red nail polish
– Striping tape or thin brush
Styling Tips:
– Start with a clear base coat for a smooth finish.
– Paint all nails in white polish, allowing them to dry.
– Use striping tape for perfect diagonal lines, then paint over with red polish.
– Remove the tape to reveal crisp stripes and finish with a top coat.
This adorable design is perfect for spreading holiday cheer wherever you go!
6. Holly Jolly Accents
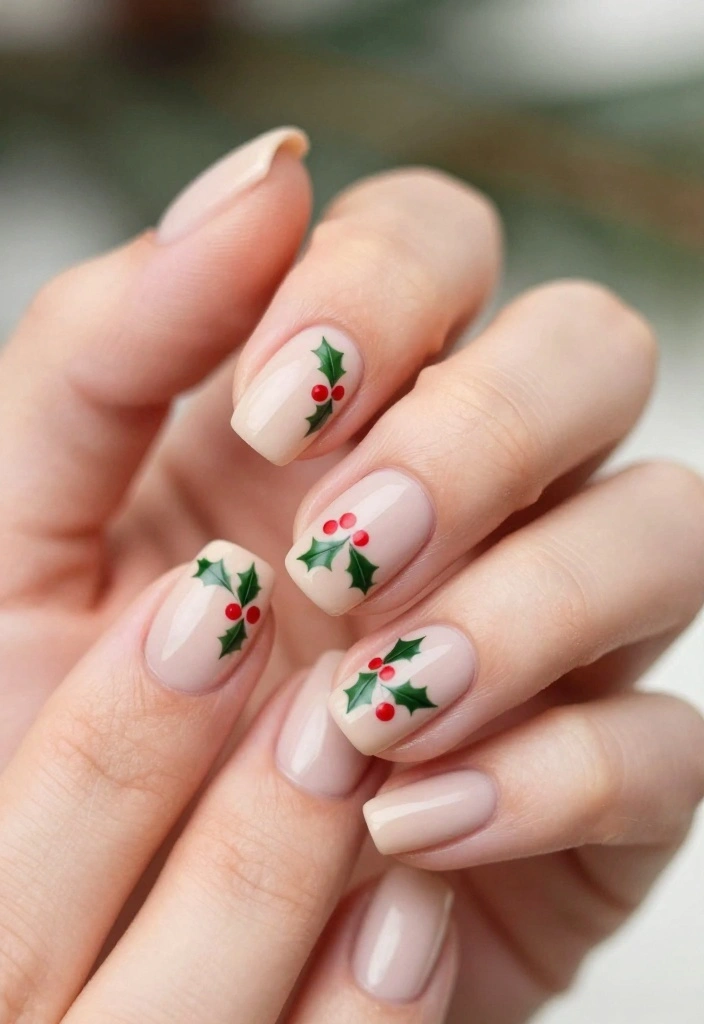
Add a touch of nature to your nails with charming holly leaf designs! This simple yet delightful look features small holly leaves and berries on a neutral background, capturing the essence of Christmas in a subtle way. It’s perfect for those who want a festive design without being too bold.
Outfit Pieces:
– Nude or neutral nail polish
– Green polish for leaves
– Red polish for berries
– Clear base coat and top coat
Styling Tips:
– Start with a nude base coat for an elegant backdrop.
– Use green polish to paint small holly leaves.
– Add red dots for berries to complete the look.
– Seal with a top coat for protection and shine.
This design is perfect for holiday gatherings where you want to express your festive spirit.
7. Simple Snow Ombre
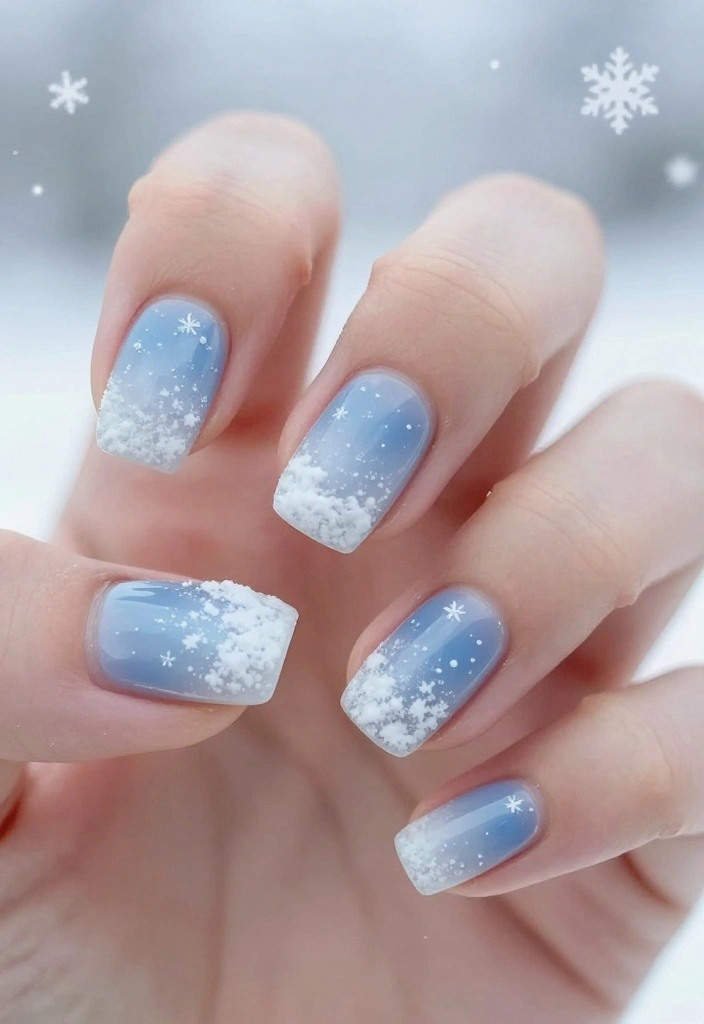
Achieve a snowy effect effortlessly with a simple ombre design! This style captures the beauty of winter in a minimalistic way, making it a quick and lovely option for the holiday season.
Outfit Pieces:
– Blue or white nail polish
– Clear base coat and top coat
Styling Tips:
– Start with a base coat of blue or white for a wintery look.
– Use a makeup sponge to dab on a gradient of white polish from the tips to mid-nail.
– Seal with a top coat for a glossy finish.
This design is a quick way to embody the magic of a snowy day during the holidays!
8. Festive Glitter Dots
Keep your nail art simple yet festive with playful polka dots! Using a dotting tool, you can create a cheerful design that adds a touch of sparkle to your look. This design is perfect for those who love fun and easy nail art during the holiday season.
Outfit Pieces:
– Solid color nail polish (red or green)
– Glitter polish in various colors
– Clear base coat and top coat
Styling Tips:
– Start with a solid color base for a vibrant background.
– Use a dotting tool to add glittery dots in different colors.
– Seal with a clear top coat for a polished finish.
This design strikes the perfect balance between fun and festive!
9. Elf Shoe Tips
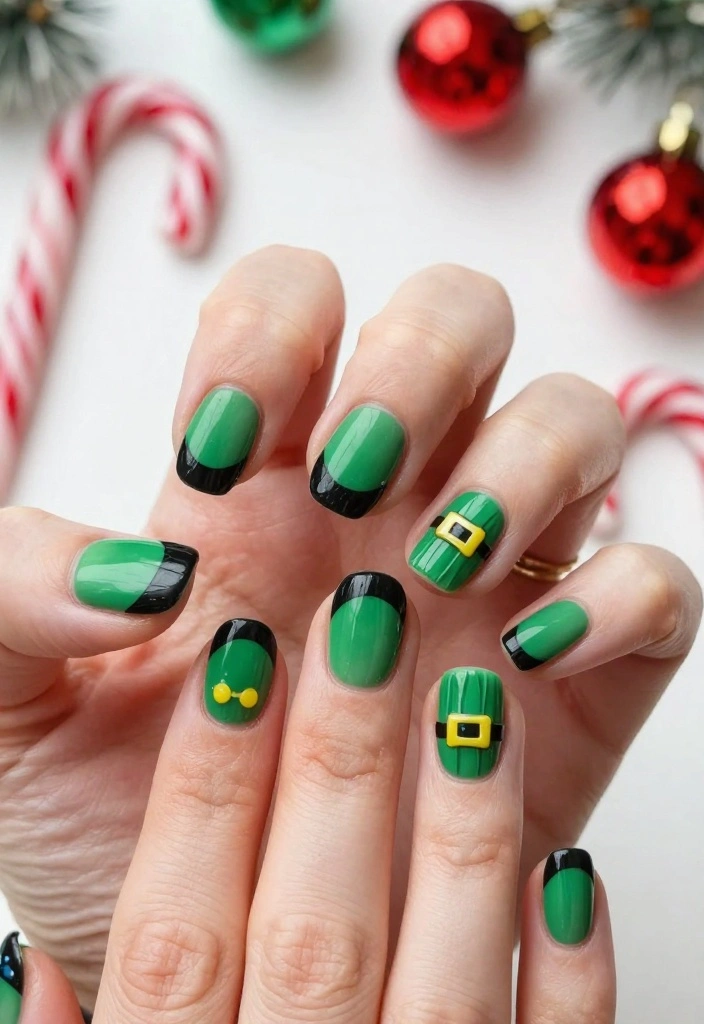
Embrace the whimsical side of the holidays with adorable elf shoe designs! This playful idea captures the spirit of Christmas cheer and adds a unique twist to your nails. It’s perfect for those who want to celebrate the festive season with a bit of fun.
Outfit Pieces:
– Green nail polish
– Black polish for the shoe
– Yellow polish for the buckle
– Clear base coat and top coat
Styling Tips:
– Start with a green base coat for a vibrant look.
– Create a curved line at the tips to mimic an elf shoe.
– Fill in with black and add a yellow dot for the buckle.
– Finish with a top coat for durability.
This whimsical design is perfect for capturing the quirky charm of the holidays!
Did you know elf shoe nails can be a 3-step, under-10-minute trick for christmas nails easy? With a green base, a tiny black shoe, and a yellow buckle, you’ll unlock a playful look that’s fast and totally shareable.
10. Simple Reindeer Faces
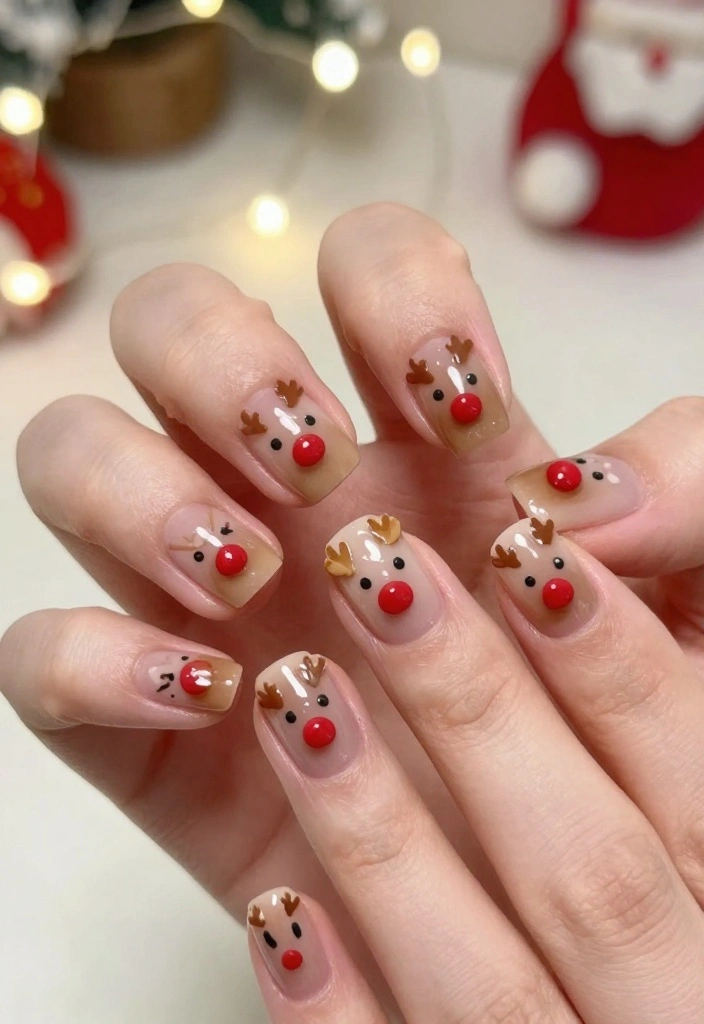
Create adorable reindeer faces on your nails to showcase the magic of Christmas! This design is not only cute but also easy to execute, making it a great choice for holiday fun. It’s perfect for anyone looking to add a whimsical touch to their festive look.
Outfit Pieces:
– Light brown nail polish
– White polish for eyes
– Black polish for pupils
– Clear base coat and top coat
Styling Tips:
– Start with a light brown base for a warm backdrop.
– Use white polish to create eyes and black for pupils.
– Draw tiny antlers with a fine brush.
– Seal everything with a clear top coat for shine.
This design showcases festive fun and is sure to bring smiles to all your holiday gatherings!
11. Simple Christmas Ornaments
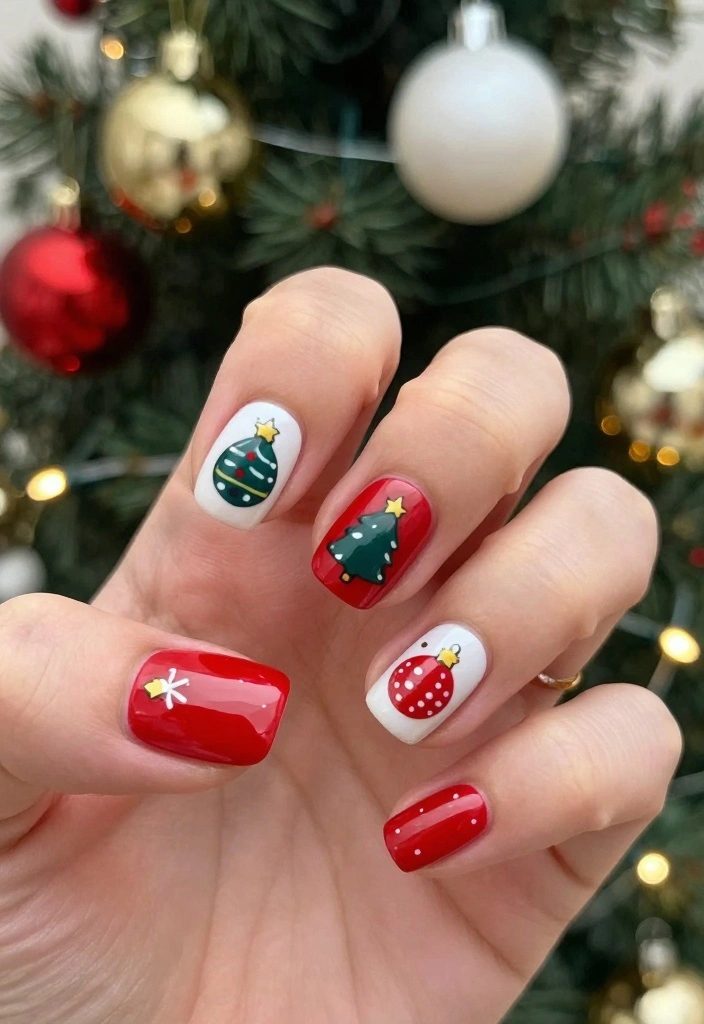
Deck your nails with beautiful Christmas ornaments for a festive touch! This design is simple yet vibrant, making it ideal for holiday parties. It allows you to showcase your creativity while celebrating the season’s joy.
Outfit Pieces:
– Red or green nail polish
– Various colors for ornaments
– Clear base coat and top coat
Styling Tips:
– Apply a solid base color for a bright background.
– Use a fine brush to create small ornament shapes.
– Add tiny silver or gold tops to the ornaments.
– Seal with a top coat for shine and durability.
This design embodies the joy of the season and adds a cheerful vibe to your holiday celebrations!
12. Minimalist Christmas Tree
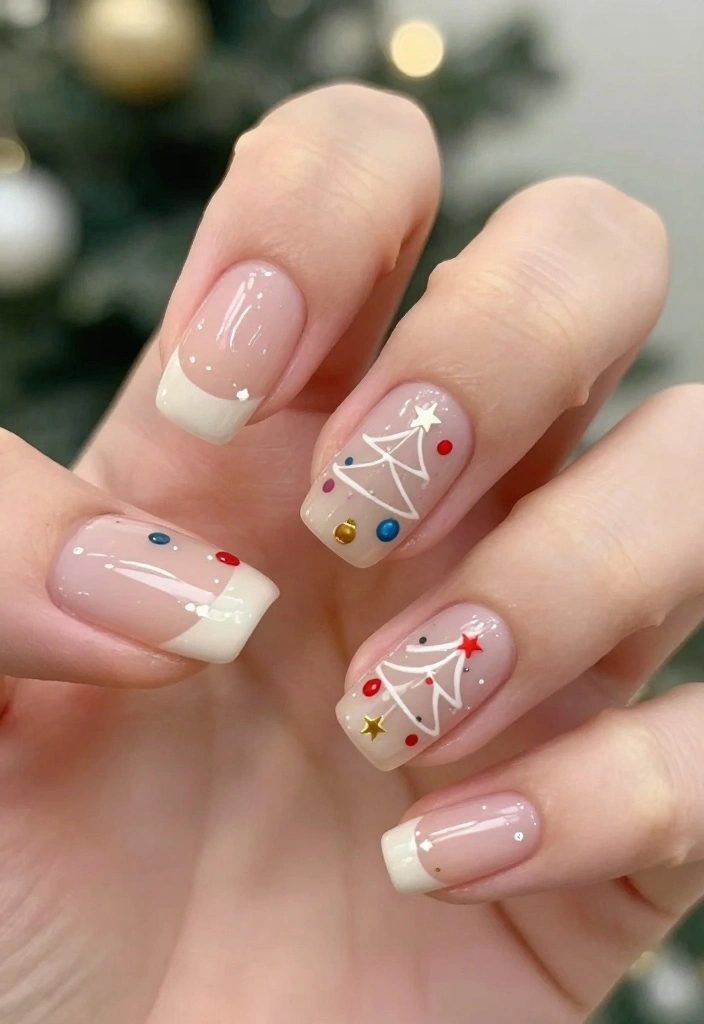
For a subtle yet festive touch, try a minimalist Christmas tree design! This simple look is impactful and perfect for those who prefer understated beauty during the holidays. It’s a classy option that fits any occasion.
Outfit Pieces:
– Nude nail polish
– Dark green polish for the tree
– Clear base coat and top coat
Styling Tips:
– Start with a nude base coat for a chic look.
– Use dark green polish to create a simple triangle shape for the tree.
– Add small dots for ornaments and a tiny star on top.
– Finish with a clear top coat to protect your design.
This design is perfect for any holiday gathering where you want to keep it subtle yet festive!
13. Twinkling Lights
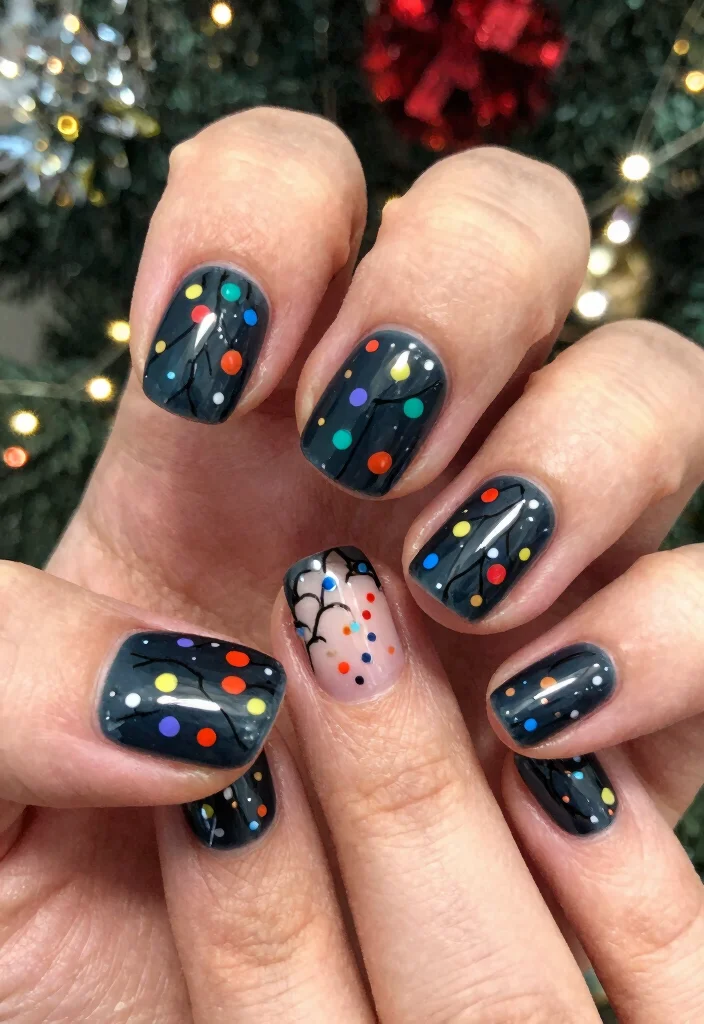
Capture the magic of holiday lights with a fun nail design! This vibrant look is both playful and festive, making it ideal for the Christmas season. It’s a great way to showcase your festive spirit without being over the top.
Outfit Pieces:
– Dark base color (navy or black)
– Various colors for the lights
– Clear base coat and top coat
Styling Tips:
– Start with a dark base to make the colors pop.
– Create thin lines for wires using a fine brush.
– Dot colorful polish along the lines for lights.
– Seal everything with a top coat for durability.
This design beautifully represents the festive spirit of the season and is perfect for holiday parties!
14. Gingerbread Men
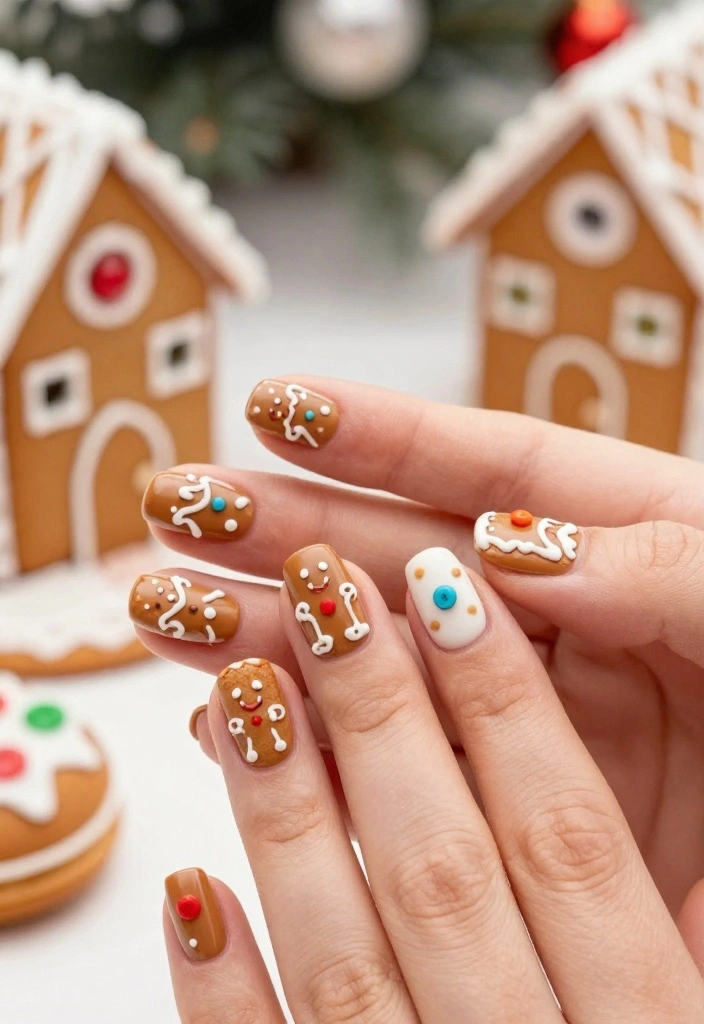
Adorn your nails with cute gingerbread men for a sweet holiday twist! This design is perfect for anyone who loves festive treats and wants to add a fun element to their look. It’s easy to create and sure to bring smiles during the holiday season.
Outfit Pieces:
– Light brown nail polish
– White polish for icing
– Various colors for buttons
– Clear base coat and top coat
Styling Tips:
– Start with a light brown base for a gingerbread backdrop.
– Use white polish to create icing details on the gingerbread men.
– Add colorful dots for buttons and eyes.
– Seal everything with a glossy top coat for shine.
This design will definitely stand out and spread holiday cheer wherever you go!
15. Warm Sweater Knit
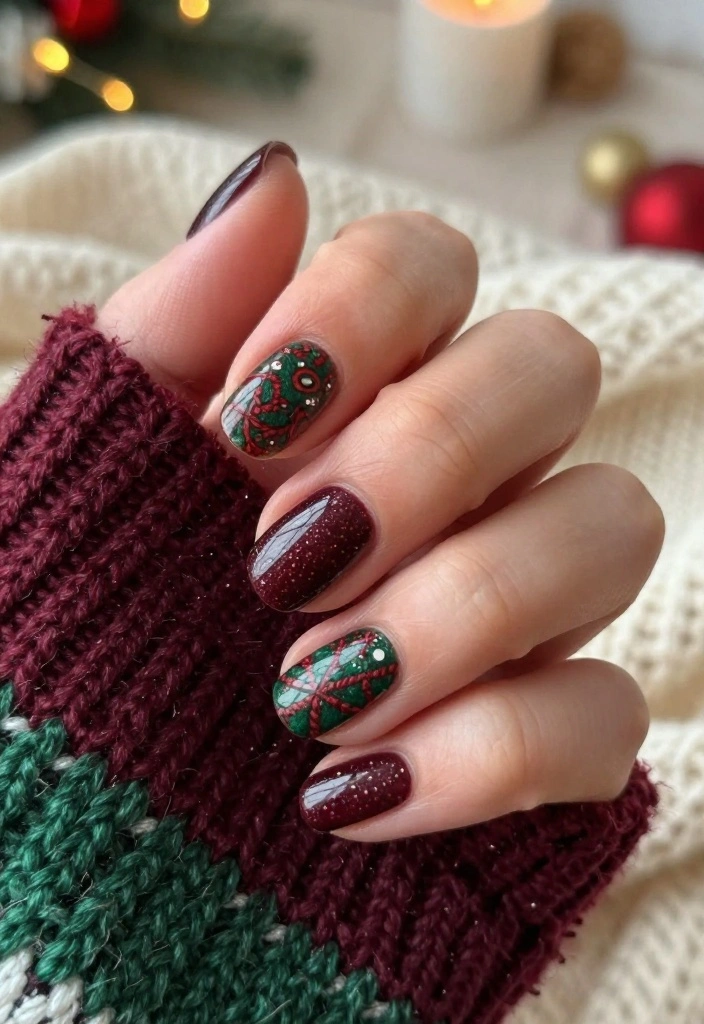
Embrace cozy vibes with a warm sweater knit design! This textured look adds a unique and inviting touch that’s perfect for chilly holiday nights. It’s a fantastic way to channel the warmth and comfort of the season.
Outfit Pieces:
– Warm nail color (burgundy or forest green)
– Textured polish or nail art brush for patterns
– Clear base coat and top coat
Styling Tips:
– Start with a base coat in a warm color for a cozy feel.
– Use a textured polish or nail art brush to create knit patterns.
– Finish with a top coat for a smooth finish.
This design captures the warmth of the holiday season and is sure to keep you feeling festive!
16. Holiday Paisley
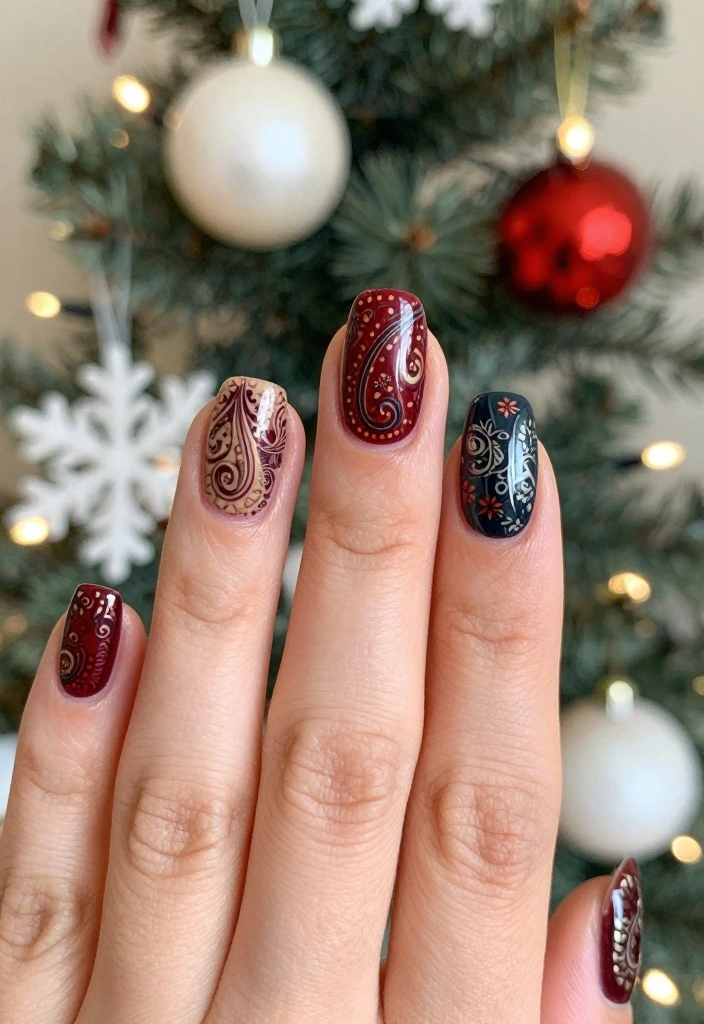
Upgrade your holiday nails with an intricate paisley pattern! While this design takes a bit more time, it’s still achievable in under ten minutes and adds a sophisticated touch to your festive look. Perfect for those who love detailed nail art.
Outfit Pieces:
– Base coat of your choice
– Contrasting polish for paisley details
– Clear top coat
Styling Tips:
– Start with a base coat in your favorite color.
– Use a fine brush to draw paisley shapes in a contrasting color.
– Fill in with small dots and lines for added detail.
– Seal with a clear top coat for shine.
This design brings a touch of sophistication to your holiday nail art!
17. Simple Starry Night
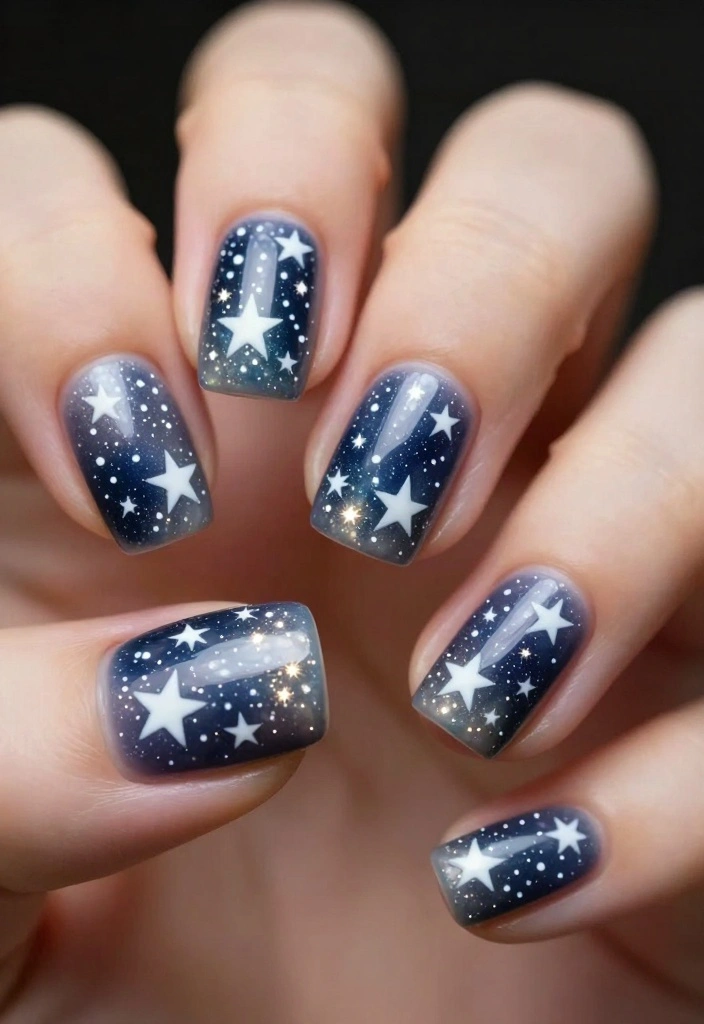
Capture the enchanting beauty of a starry night with a simple yet stunning nail design! This look can be customized in various colors, allowing you to express your style while embracing the holiday spirit.
Outfit Pieces:
– Dark base color (navy or black)
– White polish for stars
– Clear top coat
Styling Tips:
– Start with a dark base coat to create depth.
– Use white polish to create stars across your nails.
– Add small dots for extra sparkle and finish with a top coat.
This design adds a magical touch to your holiday look and is perfect for any festive occasion!
18. Simple Christmas Wreath
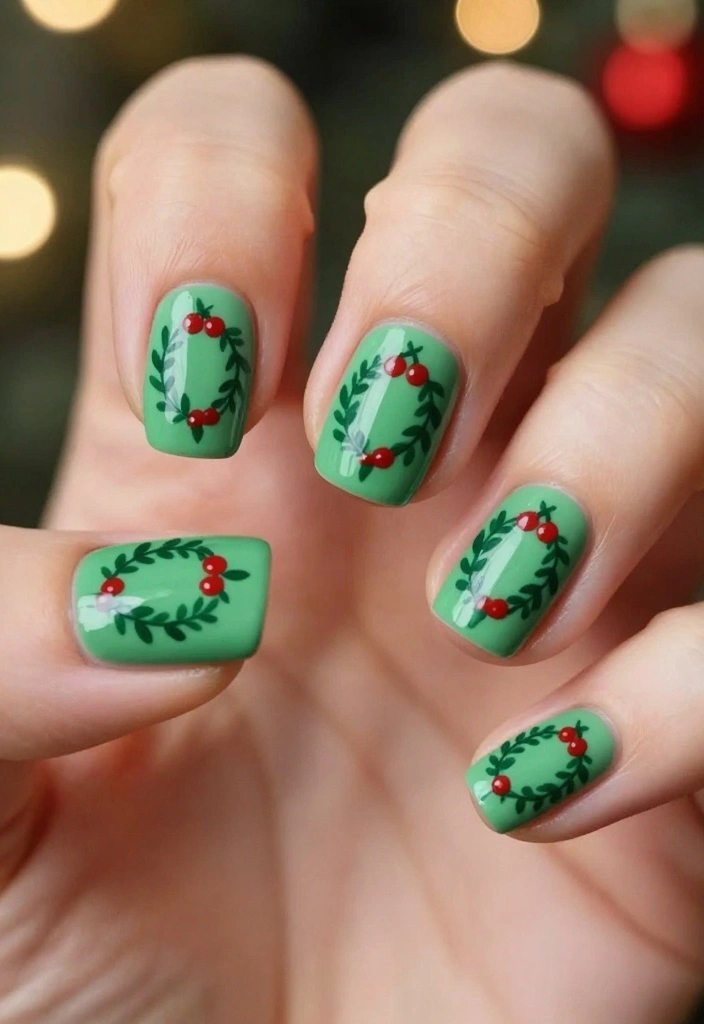
Showcase your holiday spirit with a charming Christmas wreath design! This simple yet festive look is perfect for capturing the cheerful essence of the season. It’s great for those who enjoy a cute and whimsical nail art idea.
Outfit Pieces:
– Solid base coat in red or green
– Green polish for the wreath
– Red polish for berries
– Clear top coat
Styling Tips:
– Start with a solid base coat for a bold background.
– Use a fine brush to create a circle for the wreath.
– Add tiny leaves and red dots for berries.
– Seal with a top coat for a glossy finish.
This design embodies the cheerful spirit of Christmas and is perfect for holiday gatherings!
19. Festive French Tip
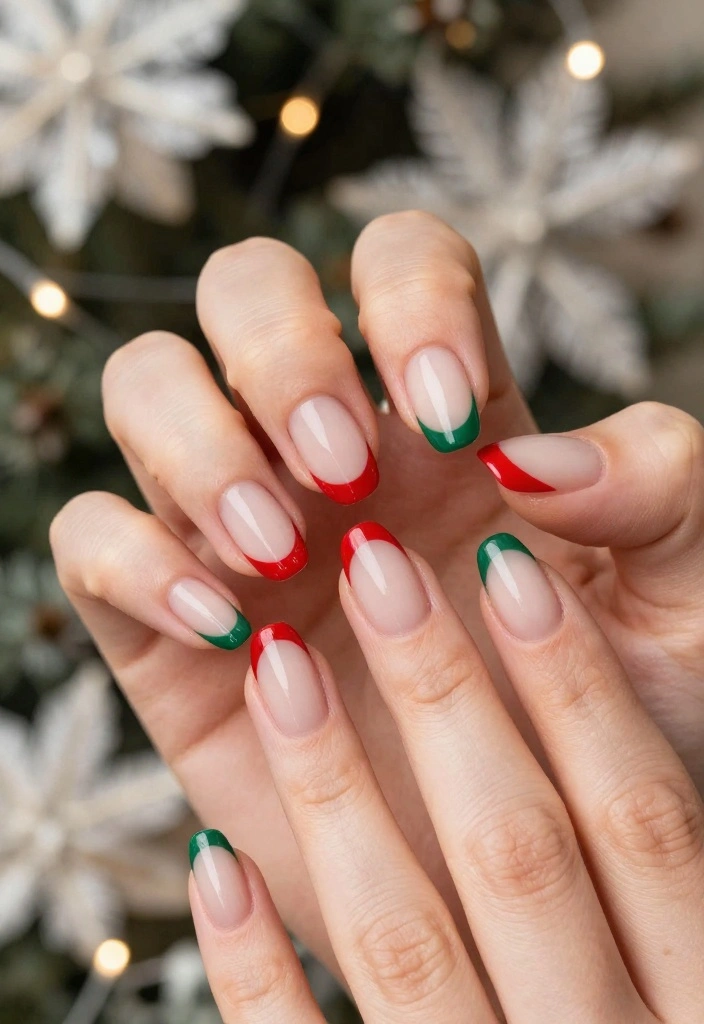
Put a festive twist on the classic French tip with vibrant holiday colors! This design keeps a classy look while adding a cheerful touch that’s perfect for the season. It’s suitable for both casual and formal events.
Outfit Pieces:
– Clear base coat
– Nude or light pink polish
– Red or green for the tips
– Sparkly top coat
Styling Tips:
– Start with a clear base coat for protection.
– Apply a nude or light pink base.
– Use a fine brush to paint the tips in red or green.
– Add a sparkly top coat for extra glam.
This design is perfect for anyone looking for a classic look with a festive flair!
Conclusion

These easy Christmas nail designs are perfect for getting into the festive spirit without spending hours on your nails. From classic reds and greens to playful snowflakes and whimsical reindeer, there’s something here for everyone.
No matter your style, these quick designs will have you holiday-ready in no time! Share your creations with friends and enjoy this wonderful season. Happy holidays!
Frequently Asked Questions
What are some quick and easy Christmas nail designs I can do in under 10 minutes?
These christmas nails easy designs can be done in under 10 minutes.
1) Candy cane stripe accent nail: paint nails white, apply red striping tape to create curved stripes, remove tape, and seal with a fast-drying top coat.
2) Snowflake accent: with a fine brush or toothpick, draw a tiny snowflake on two nails, then add a white dot at the center.
3) Red base with white dots: apply two coats of red, then use a dotting tool to add white dots for a snowy look.
4) Green tip with a glitter edge: paint a thin green tip using masking tape, then seal with a glitter top coat.
5) Minimal metallic accent: keep most nails simple and add a single gold or silver stripe or dot for festive shine.
Tip: start with a base coat and finish with a top coat to keep your manicure looking flawless and beautiful all day.
What tools and supplies do I need for effortless Christmas nails at home?
For effortless Christmas nails at home, gather these essentials: base coat, top coat, 2-3 nail colors (red, white, green), a fine nail art brush or toothpick, a dotting tool or bobby pin, striping tape, and a quick-dry top coat. If you don’t have fancy tools, you can improvise with a thin brush, a small piece of tape, or a toothpick for details. Don’t forget remover, cotton swabs, and cuticle oil.
Pro tip: stick to a small, cohesive color palette to keep it easy and beautiful.
Are there simple color combos that still look beautiful for holiday nails?
Absolutely. Classic red and white is timeless and beautiful without being complicated. Try red nails with a white accent, or a white base with red and green dot accents. Gold or silver accents add festive sparkle without extra time. For a truly easy look, keep most nails solid and reserve one nail for a simple design.
Want a chic twist? A sheer nude base with red and green details can read festive while staying quick and polished.
How can I prevent smudges and chipping when doing a quick Christmas manicure?
Prep well and pace yourself. Start with clean, dry nails and a solid base coat. Apply thin coats of color and wait 60-90 seconds between layers. Use a quick-dry top coat to seal the design and protect the finish. If you slip, simply fix with a tiny amount of remover and touch up. Finish with cuticle oil to keep nails healthy and hydrated.
Tip: avoid heavy hand use for the first couple hours to maintain that polished look longer.
How long do these quick Christmas nail designs last and how can I extend wear?
With proper care, these christmas nails easy designs can last 3-7 days or longer. Seal with a strong top coat and reapply every 2-3 days. Wear gloves for cleaning and avoid prolonged water exposure in the first day or two. Keep nails hydrated with cuticle oil and consider a single accent nail with glitter to cut down on overall wear and maintenance.
Smart tip: choose high-quality top coats and limit glitter on all nails to reduce chipping and maintain a beautiful finish longer.
Related Topics
christmas nails easy
quick nail designs
festive nail art
beginner friendly
10-minute nails
holiday nail ideas
easy nail techniques
beautiful nail styles
seasonal nail trends
minimalist christmas nails
DIY nail art
time-saving nail designs
These nail designs are so cute! I can’t believe I can do them in under 10 minutes. What’s your favorite one to try first?
I love how quick these designs are! I once tried to paint snowflakes and ended up with more of a snowstorm on my nails. Have you ever had a nail fail like that?
Did you know that the tradition of painting nails dates back to ancient Egypt? It’s amazing how something so simple can have such a long history!
I remember trying to do my nails before a holiday party and ended up with red glitter on my face instead! It was a sparkly disaster, but at least I was festive!