Blush pink nails have taken the fashion world by storm, and I couldn’t resist diving into this beautiful trend. With the arrival of spring, there’s no better time to embrace soft, feminine colors that inspire warmth and renewal. Whether you’re a nail art enthusiast or just starting to explore the realm of nail designs, this post is for you. I wanted to create a guide that not only showcases stunning blush pink nail designs but also inspires you to experiment with your own creativity.
If you love nail art and appreciate the delicate charm of blush pink, you’re in for a treat! This collection features 30 nail designs that are sure to make you swoon. From classic styles to trendy patterns, there’s something here for everyone. You’ll find ideas that are not only chic and stylish but also perfect for any occasion, whether it’s a casual outing or a special event. Get ready to discover your next favorite nail look!
So, grab your favorite nail polish and let’s explore these breathtaking blush pink designs together. Each style has its unique flair, and I can’t wait to share them with you. You might just find the perfect inspiration that makes you want to rush to your nearest nail salon—or even try a DIY at home!
Key Takeaways
– The post features 30 stunning blush pink nail designs, perfect for spring and various occasions.
– There are a variety of styles included, such as classic, ombre, and floral patterns, catering to different tastes.
– Each design is easy to replicate, making it ideal for both beginners and experienced nail art lovers.
– The guide encourages creativity, offering inspiration for unique combinations and personal flair.
– Blush pink nails can elevate your spring look and bring a soft, feminine touch to your overall style.
Contents
- 1. Classic Blush Pink
- 2. Ombre Effect
- 3. Blush Pink with Gold Accents
- 4. Floral Patterns
- 5. Glitter Gradient
- 6. Minimalist Stripes
- 7. Watercolor Effect
- 8. Blush Pink with Rhinestones
- 9. Blush Pink Chevron
- 10. Marble Effect
- 11. Blush Pink with Foil Accents
- 12. Blush Pink French Tips
- 13. Blush Pink Understated Elegance
- 14. Blush Pink with Lace Details
- 15. Blush Pink Geometric Patterns
- 16. Blush Pink with Neon Accents
- 17. Blush Pink with Animal Prints
- 18. Blush Pink with Pearls
- 19. Blush Pink with Color Blocking
- 20. Blush Pink with a Twist
- 21. Blush Pink with Abstract Art
- 22. Blush Pink with Tribal Prints
- 23. Blush Pink with Summer Vibes
- 24. Blush Pink with Abstract Faces
- 25. Blush Pink with Artistic Doodles
- 26. Blush Pink with Nature Elements
- 27. Blush Pink with Vintage Patterns
- 28. Blush Pink and Neon Splashes
- 29. Blush Pink with Dreamcatcher
- 30. Blush Pink with Whimsical Clouds
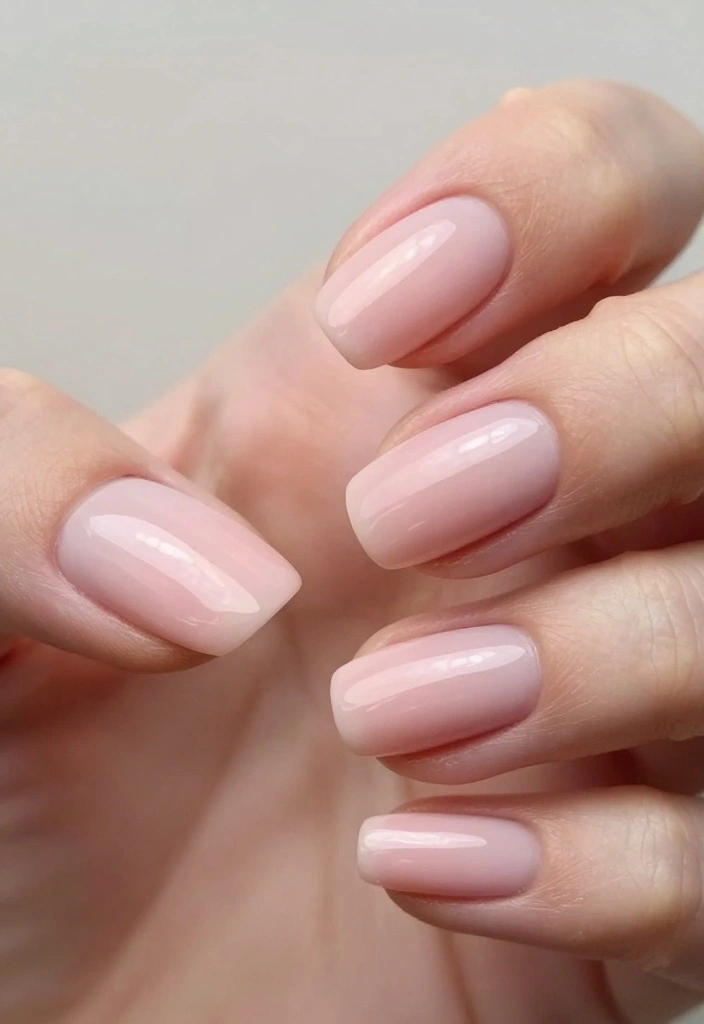
1. Classic Blush Pink
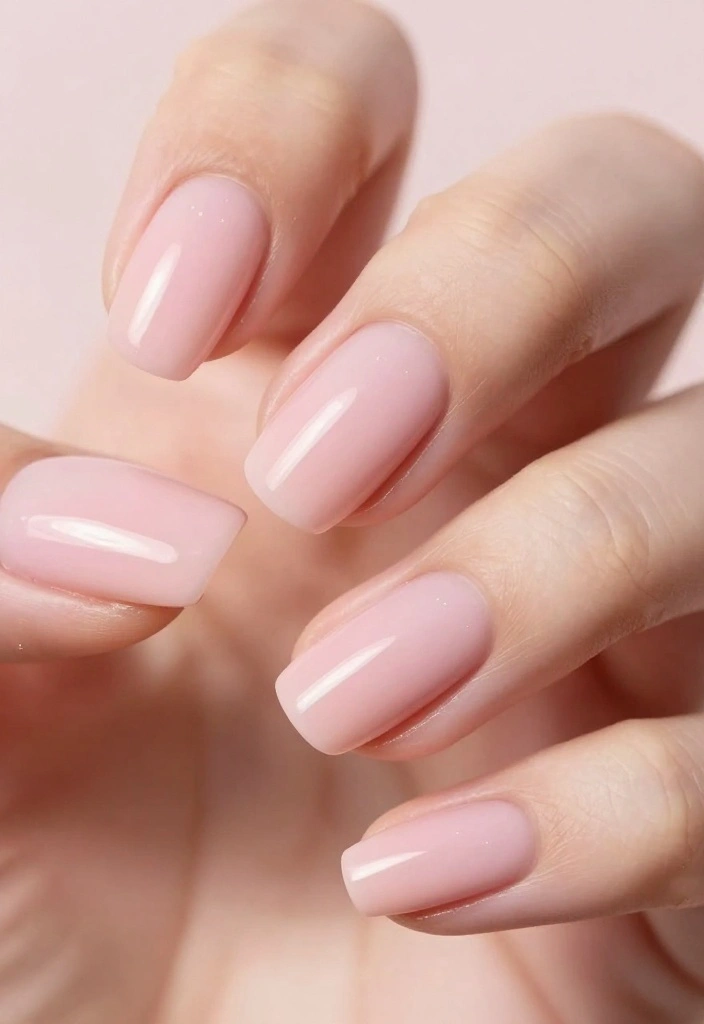
Less is definitely more when it comes to a classic blush pink manicure. This design celebrates the natural beauty of your nails, making it a go-to for any occasion. Its soft hue effortlessly complements both casual outfits and formal attire, adding a touch of elegance without being over the top.
For a timeless look, enhance the blush pink polish with a glossy top coat for shine or go for a matte finish to embrace modern vibes.
To achieve this look:
– Choose a quality blush pink nail polish.
– Start with a base coat to protect your nails.
– Apply two coats of the blush pink polish, allowing each coat to dry thoroughly.
– Finish with a glossy top coat for added shine.
Tips:
– Shape your nails well for a polished appearance.
– Use a clean brush to tidy up around the nail edges if needed.
💅 Nail Art Made Easy!
Transform your nails with quick tips from our DIY Nail Art Guide designed for busy moms—perfect for stunning designs!
2. Ombre Effect
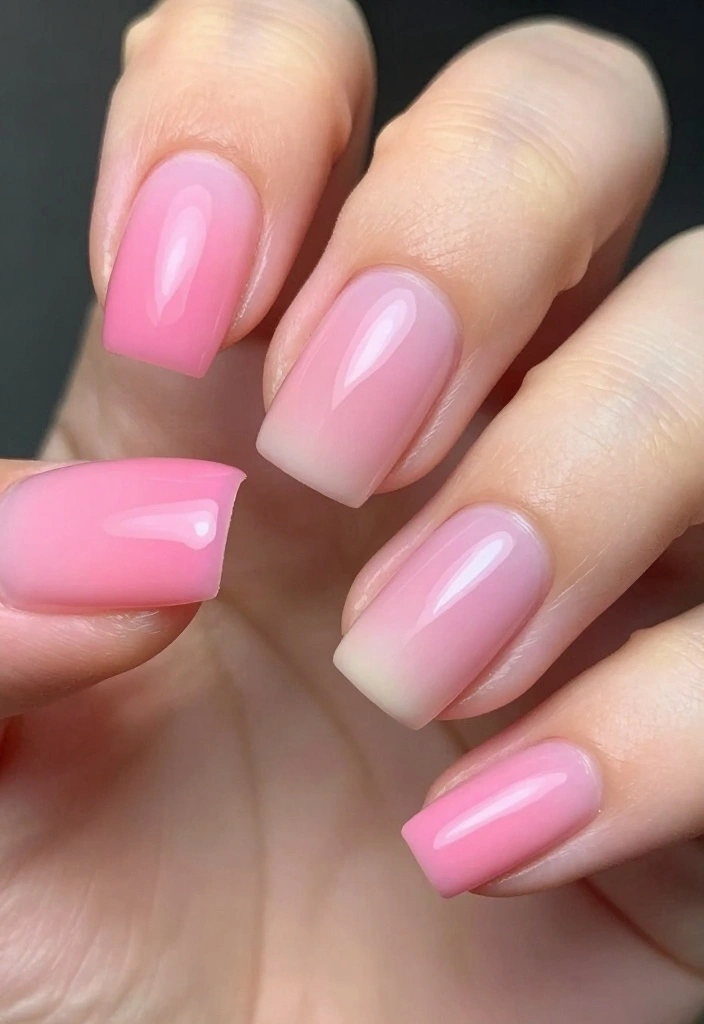
The ombre effect adds a breathtaking transition of colors to your nails. A blush pink ombre can seamlessly shift from a soft pink to a lighter shade or white, creating a soft and dreamy appearance. This design not only draws the eye but also adds depth, making your nails appear longer and more elegant.
To create your ombre nails:
– Choose two shades of blush pink and a white polish.
– Apply a base coat first.
– Using a makeup sponge, dab the darker blush pink on the sponge and then onto the tip of the nail, gradually blending towards the base.
– Follow with the lighter shade and white for a seamless transition.
– Seal it with topcoat for a smooth finish.
Tips:
– Practice on a piece of paper before applying directly to your nails.
– Be patient and allow each layer to dry before applying the next.
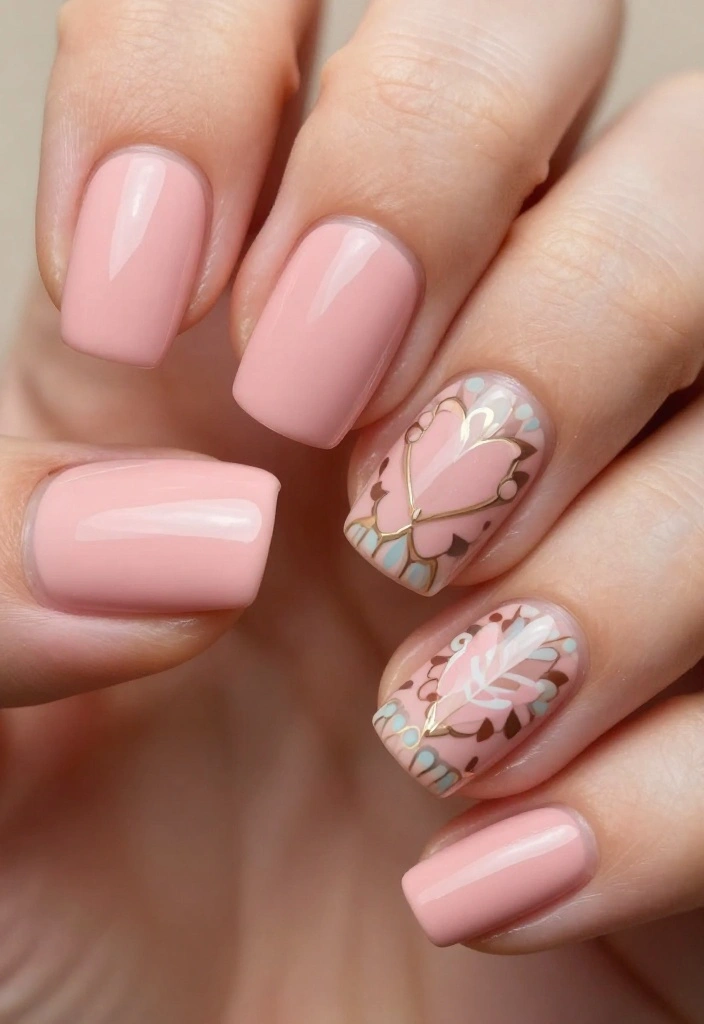
3. Blush Pink with Gold Accents
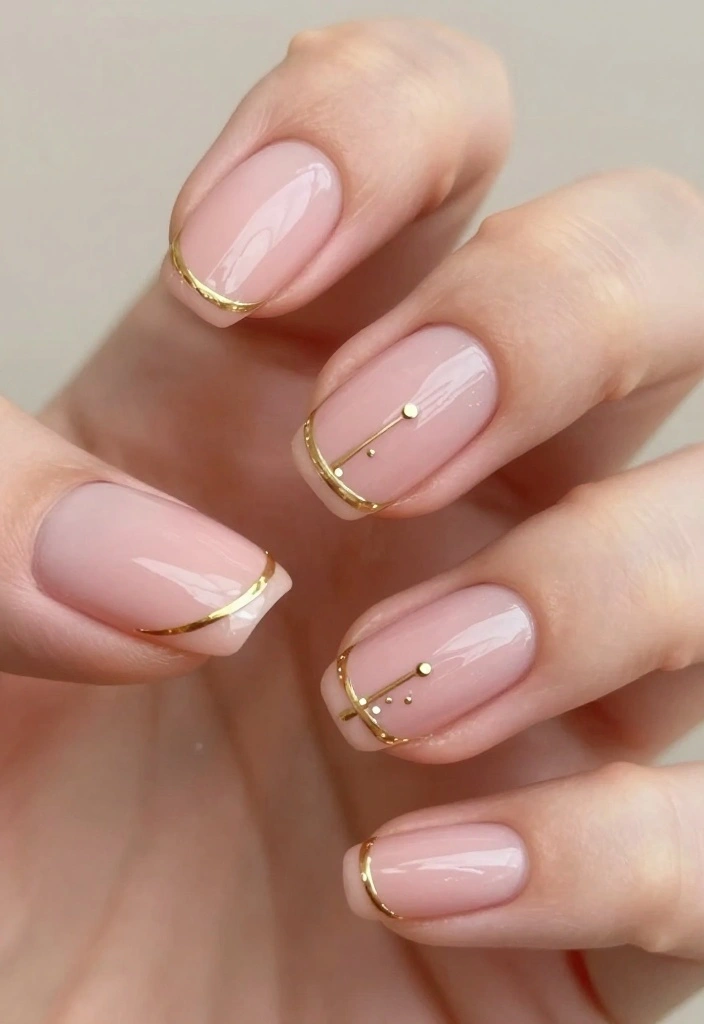
Gold accents can elevate a simple blush pink design into something truly luxurious. The combination of blush pink and gold radiates elegance, making it an ideal choice for weddings or special events. You can keep it subtle with simple gold stripes or go for intricate floral patterns for a more elaborate look.
To add gold accents:
– After applying your blush pink base, use a fine brush to paint gold stripes or dots.
– Alternatively, use gold nail tape for clean lines.
– Seal everything with a top coat for longevity.
Tips:
– Keep the gold accents minimal to maintain visual balance.
– Let the blush pink base dry completely before applying any gold accents to avoid smudging.
4. Floral Patterns
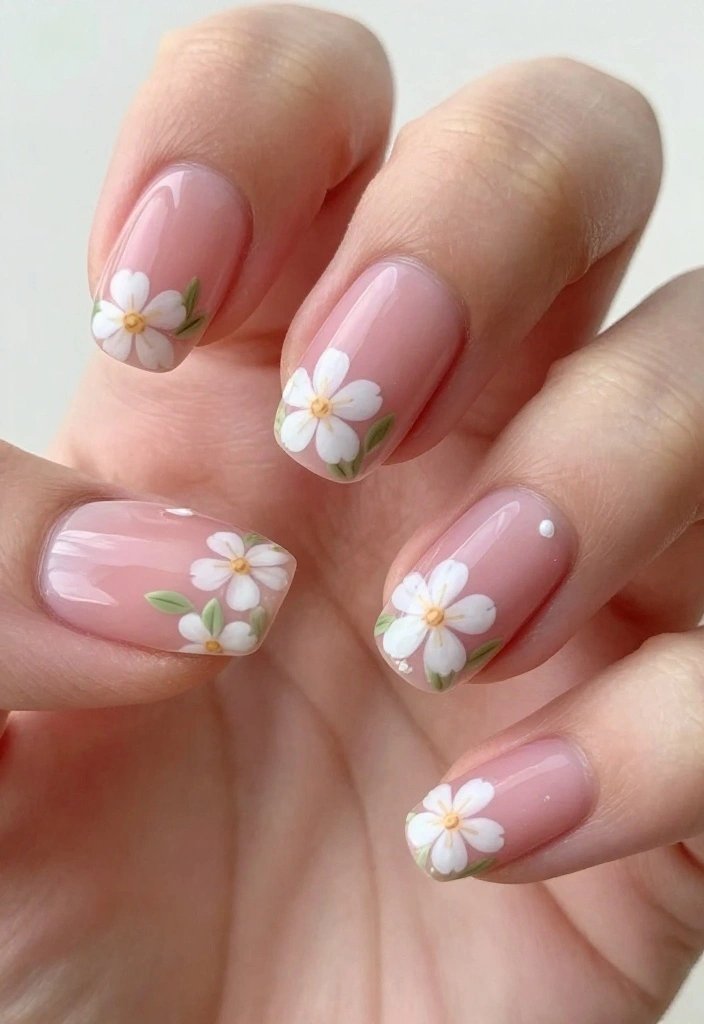
Floral patterns on blush pink nails bring a fresh, springtime vibe, allowing you to express your creativity. From delicate daisies to bold roses, floral designs can be customized to your liking, adding a playful twist to the classic blush pink base.
To create floral patterns:
– Start with a blush pink base.
– Use a fine brush to paint small flowers or leaves in white, green, or contrasting colors.
– Consider adding tiny beads or glitter for extra flair.
– Finish with a clear top coat to protect your design.
Tips:
– Use a stamping tool for quicker application of floral designs.
– Experiment with different flowers for various looks.
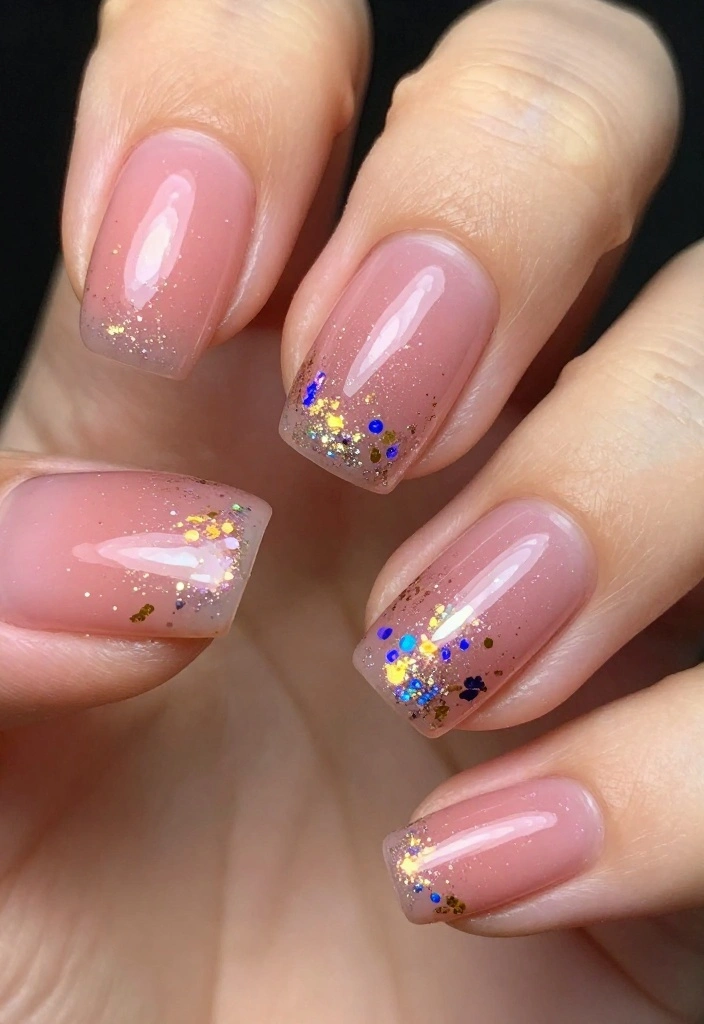
5. Glitter Gradient
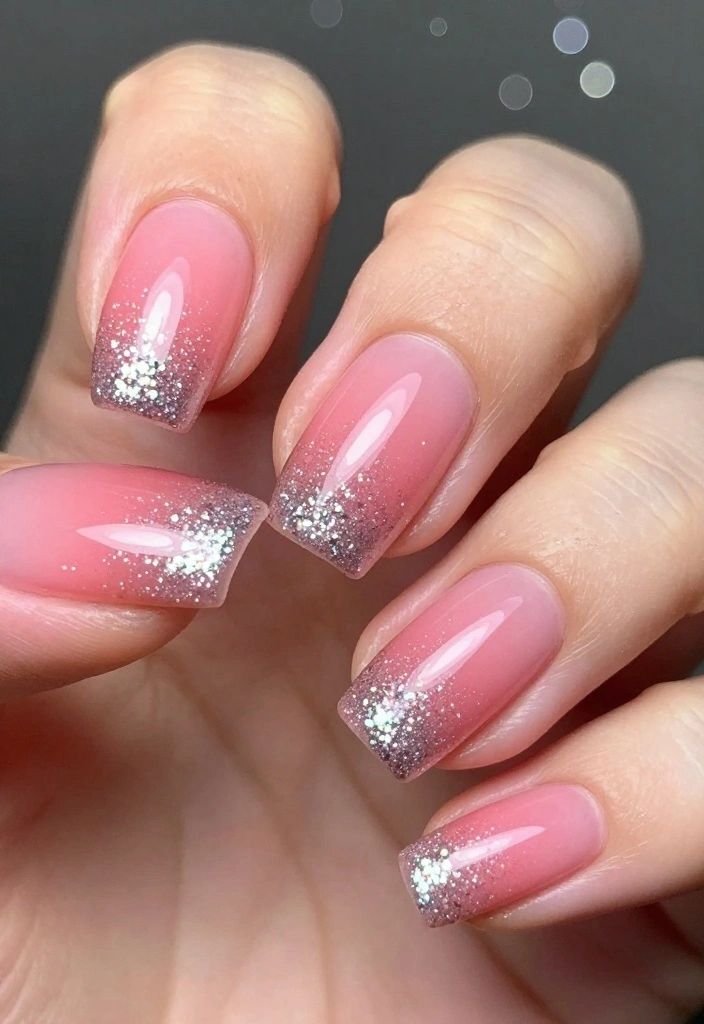
If you love sparkle, a glitter gradient on blush pink nails is a must-try. This design combines a soft blush base with shimmering glitter for a festive and glamorous effect, perfect for parties or nights out.
To achieve this look:
– Apply a blush pink base coat and let it dry.
– Starting at the tips, apply glitter polish and gradually blend it down toward the base.
– Use a makeup sponge for a softer blend.
– Seal with a top coat for durability.
Tips:
– Choose glitters that complement your blush base for a cohesive look.
– Layer the glitter for a more intense sparkle.
📹 Related Video: DOs & DON’Ts: Glitter Gradient Nails | how to do glitter gradient nails!
How To Choose the Right Blush Pink Nail Designs
Choosing the perfect blush pink nail design can feel overwhelming with so many options. Whether you’re preparing for spring nails or just want something fresh, here’s how to narrow it down to the designs that suit you best.
1. Consider Your Skin Tone
Your skin tone plays a crucial role in selecting the right blush pink shade. Warmer skin tones often look great with peachy blushes, while cooler skin tones shine with pinks that lean toward lavender. Test a few colors against your skin to see which ones enhance your natural glow.
2. Think About the Occasion
Different occasions call for different nail looks. For professional settings, a classic or minimalist design might be best. If you’re attending a wedding or a party, consider something more playful like a glitter gradient or floral pattern. Choose a design that complements the event, and you’ll feel confident showing off your nails.
3. Match Your Personal Style
Your personal style should guide your choice in nail designs. If you lean toward the bold side, consider geometric patterns or vibrant accents. If you prefer simplicity, go for understated elegance with minimalist stripes or a classic blush pink. Your nails should reflect who you are.
4. Evaluate Your Nail Length
The length of your nails can influence the design you choose. Longer nails can handle intricate designs like lace details or watercolor effects, while shorter nails might benefit from simpler patterns or solid colors. Keep your nail length in mind to find a design that works well with your shape.
5. Consider Your Lifestyle
Your daily activities will determine how much maintenance you’re willing to commit to your nail design. If you lead a busy lifestyle, opt for designs that are easy to maintain, like blush pink French tips or solid colors. On the other hand, if you enjoy changing your look often, feel free to explore elaborate designs like abstract art or animal prints.
6. Look for Inspiration
Don’t hesitate to look for inspiration before making your decision. Browse social media platforms, and nail art blogs, or even visit nail salons to see the latest trends. Create a mood board of designs that catch your eye, which can help clarify what you truly love.
Pro Tip: Once you’ve narrowed down your choices, consider doing a trial run. Apply the blush pink shade you like to a few nails first. This way, you can see how the color looks on you and how well it fits your lifestyle before committing to a full manicure.
With this guide, you’re well-equipped to choose the right blush pink nail design that suits your style, occasion, and lifestyle. Happy nail painting!
6. Minimalist Stripes
Minimalistic designs showcase a chic and effortless vibe, and blush pink nails shine with simple stripe accents. The interplay between the soft pink and bold stripes creates an eye-catching design without overwhelming your look.
To create minimalist stripes:
– After applying your blush pink base, use striping tape or a fine brush to paint straight lines in white or a contrasting color.
– Keep the design clean and sparse for maximum impact.
– Seal with a top coat to keep your design in place.
Tips:
– Use a nail art mat to practice your line work before applying it to your nails.
– Vary the width of the stripes for added interest.
7. Watercolor Effect
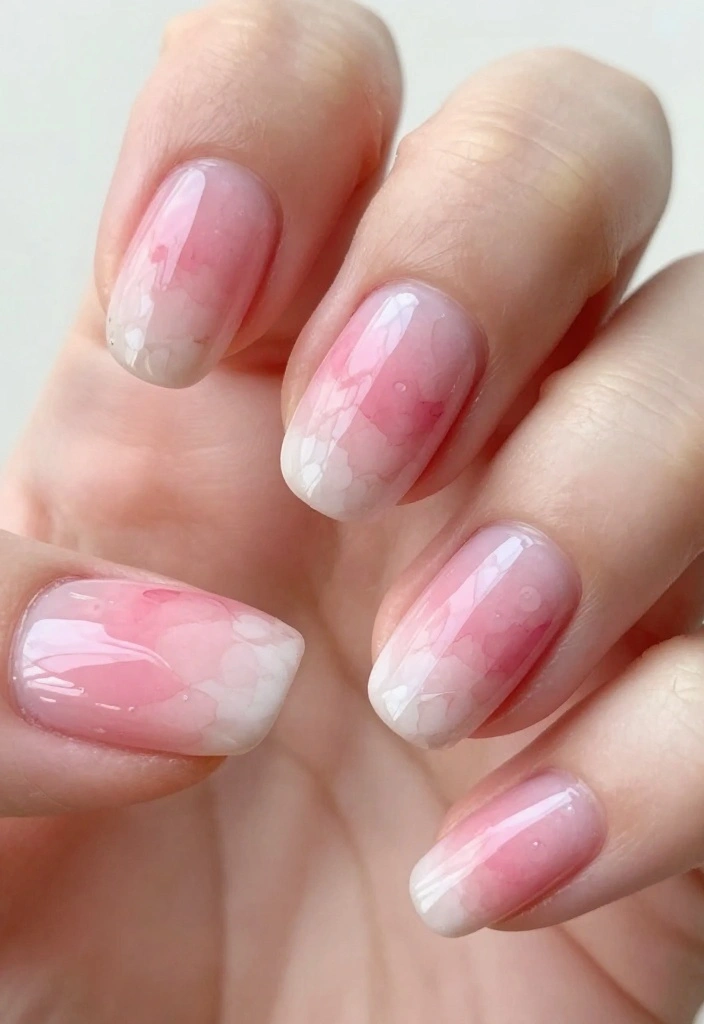
The watercolor effect on nails provides a beautiful showcase of blush pink shades. This artistic technique creates a soft, dreamy appearance that resembles a painting, perfect for those who appreciate expressive nail art.
To create a watercolor effect:
– Apply a base coat of blush pink.
– Use a small sponge to dab on different shades of pink and white, blending them together.
– Finish with a clear top coat to smooth out the surface.
Tips:
– Experiment with colors and amounts to achieve your desired effect.
– Ensure the base is fully dry before applying the watercolor to avoid smudging.
8. Blush Pink with Rhinestones
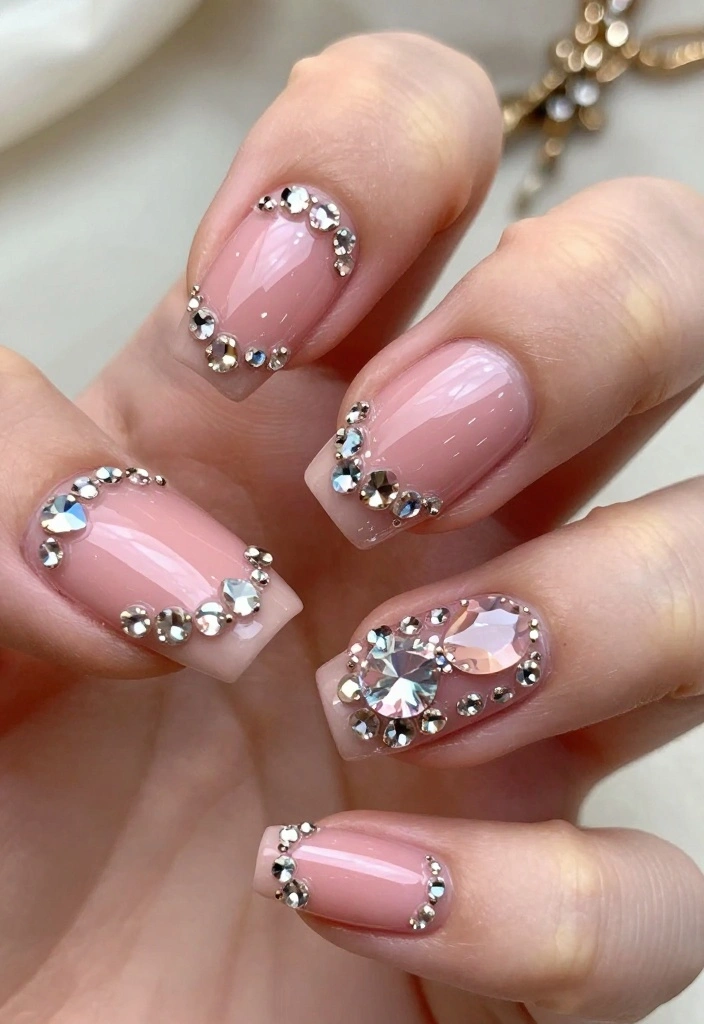
Rhinestones bring a glamorous sparkle to your blush pink nails, making them stand out effortlessly. This design is perfect for those who enjoy a little bling and want to draw attention to their manicure.
To incorporate rhinestones:
– After applying your blush pink base, use nail glue to adhere rhinestones to select nails.
– Create shapes or simply accentuate your manicure with a few stones.
– Finish with a top coat to secure the rhinestones.
Tips:
– Choose rhinestones in colors that complement your blush base for a cohesive look.
– Use sparingly; a little goes a long way.
9. Blush Pink Chevron
Chevron patterns introduce a playful and modern flair to your blush pink nails. This bold design can be customized with various colors, but sticking to blush pink with contrasting shades keeps it fresh and chic.
To create a chevron look:
– Apply a blush pink base and let it dry.
– Use striping tape to create chevron shapes, painting over with a contrasting color.
– Once dry, carefully remove the tape.
– Seal with a top coat for a polished finish.
Tips:
– Ensure the base is completely dry before applying tape to prevent peeling.
– Experiment with different color combinations for a unique look.
❝ Pro tip: Blush pink nails with a chevron twist are your shortcut to chic—simple shapes, big impact. Use striping tape to craft clean chevrons, then seal with top coat for long-lasting glam. ❞
10. Marble Effect
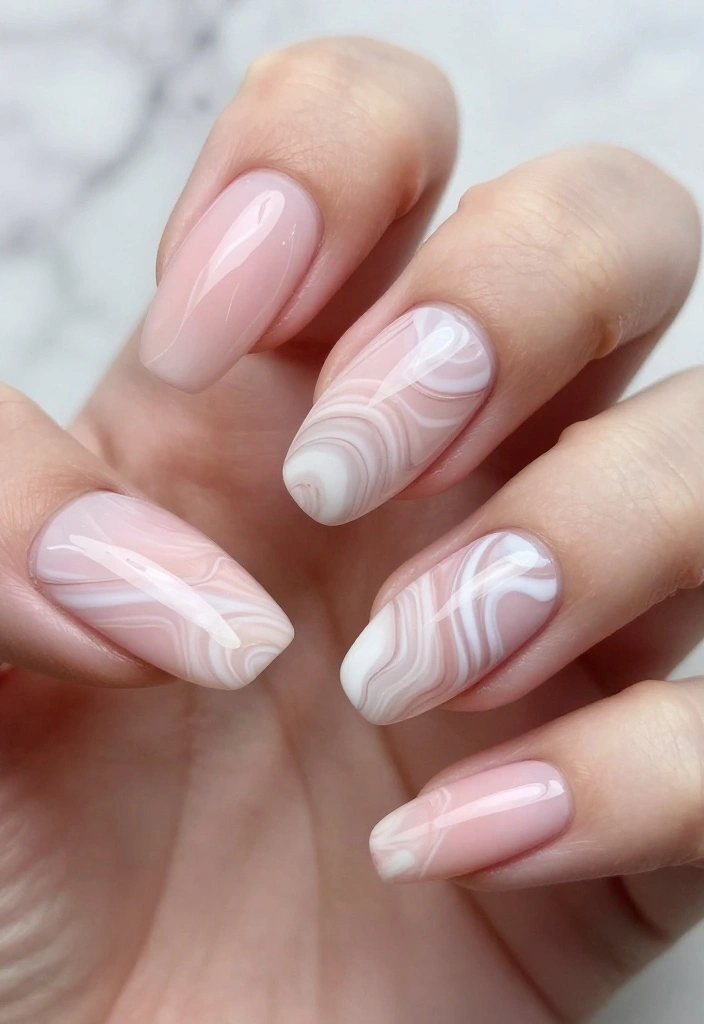
Marble nails are a trendy favorite that look stunning in blush pink hues. This design gives off a luxurious and sophisticated vibe, ideal for any occasion. The swirling effect mimics real marble and can be personalized by blending different colors.
To achieve the marble effect:
– Start with a blush pink base.
– Use a thin brush to swirl in darker shades of pink or white, creating a marbled look.
– Seal your design with a top coat for a smooth finish.
Tips:
– Practice the swirl technique on paper first for more control.
– Play around with various color combinations for unique results.
11. Blush Pink with Foil Accents
Foil accents introduce a sense of extravagance to your blush pink nails. The blend of soft pink and vibrant foil creates a striking contrast that stands out beautifully, making it perfect for special occasions or when you want to feel extra glamorous.
To add foil accents:
– Once your blush pink base is dry, tear small pieces of nail foil and apply them using nail glue.
– You can arrange them randomly or create a specific pattern.
– Finish with a top coat to secure the foil.
Tips:
– Choose foil that complements your blush pink base for a cohesive look.
– Work quickly when applying the foil to prevent the glue from drying.
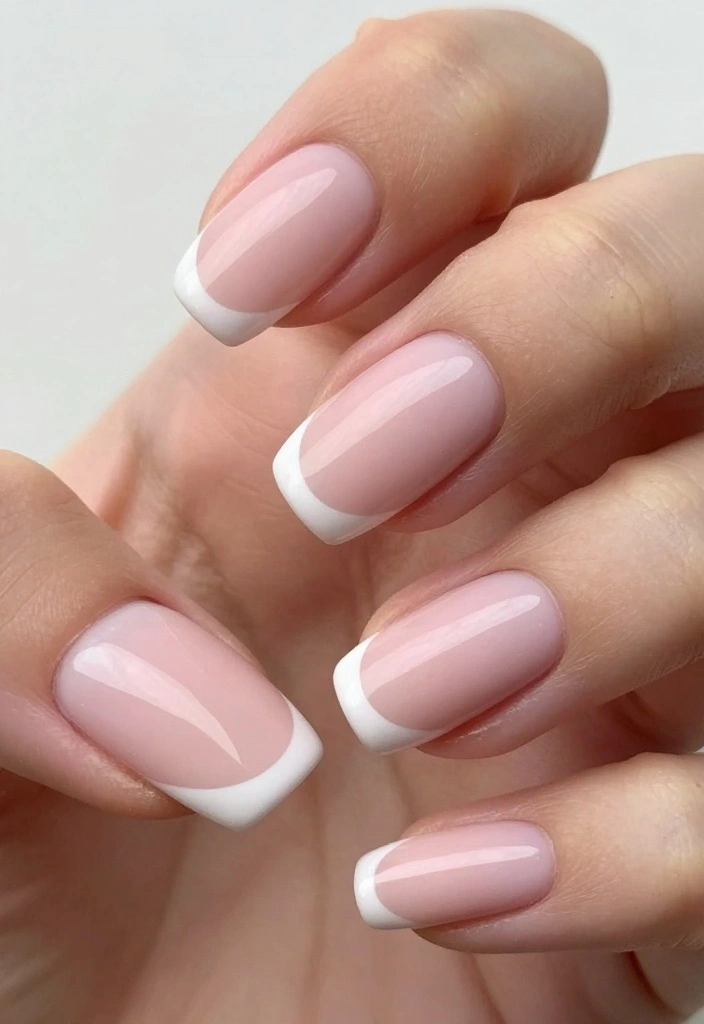
12. Blush Pink French Tips
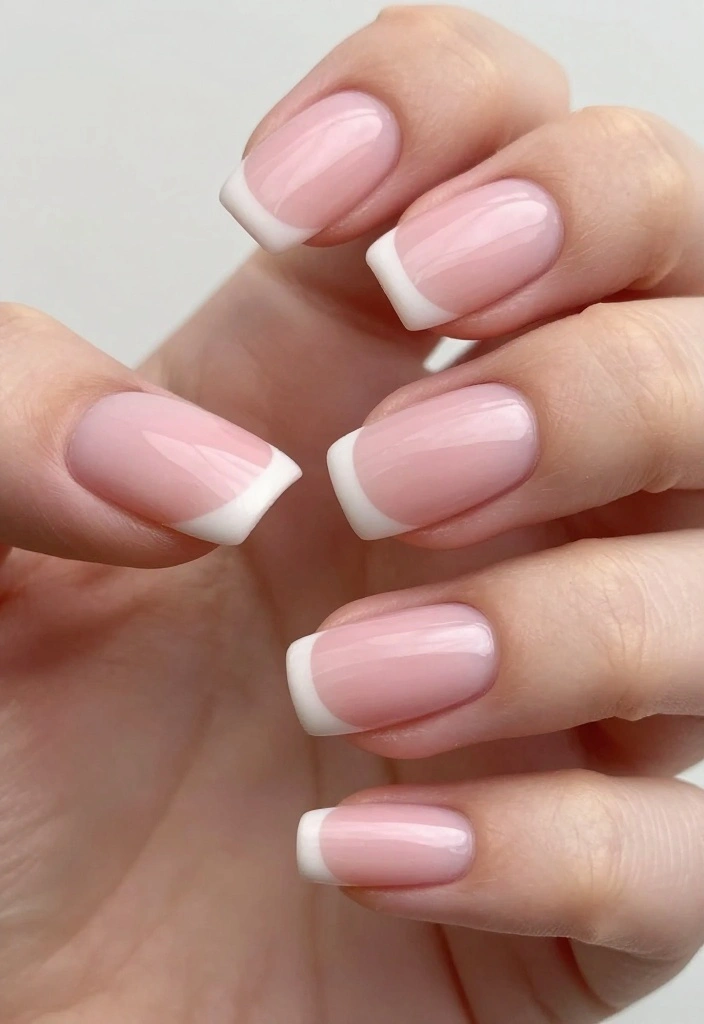
The classic French tip gets a modern twist with blush pink! This design softens the traditional stark white tips, producing a gentle and romantic vibe. Perfect for any occasion, these nails are effortlessly chic and can easily be dressed up or down.
To create blush pink French tips:
– Start with a blush pink base coat.
– Use a fine brush or nail tape to apply a white tip at the edges.
– Seal with a top coat for a smooth finish.
Tips:
– Apply a base coat first for better adhesion.
– For a playful twist, try colored tips or a gradient effect instead of solid white.
13. Blush Pink Understated Elegance
Understated elegance is about simplicity and sophistication. A soft blush pink base with a hint of shine creates a manicured look that speaks volumes without being loud. This style is perfect for office wear or any setting where you want to maintain a classy appearance.
To achieve this understated elegance:
– Apply a blush pink base coat and allow it to dry.
– Use a glossy top coat for a polished finish.
Tips:
– Keep nails neatly trimmed and shaped for the best effect.
– If you prefer a matte look, skip the top coat and let the base dry completely.
14. Blush Pink with Lace Details
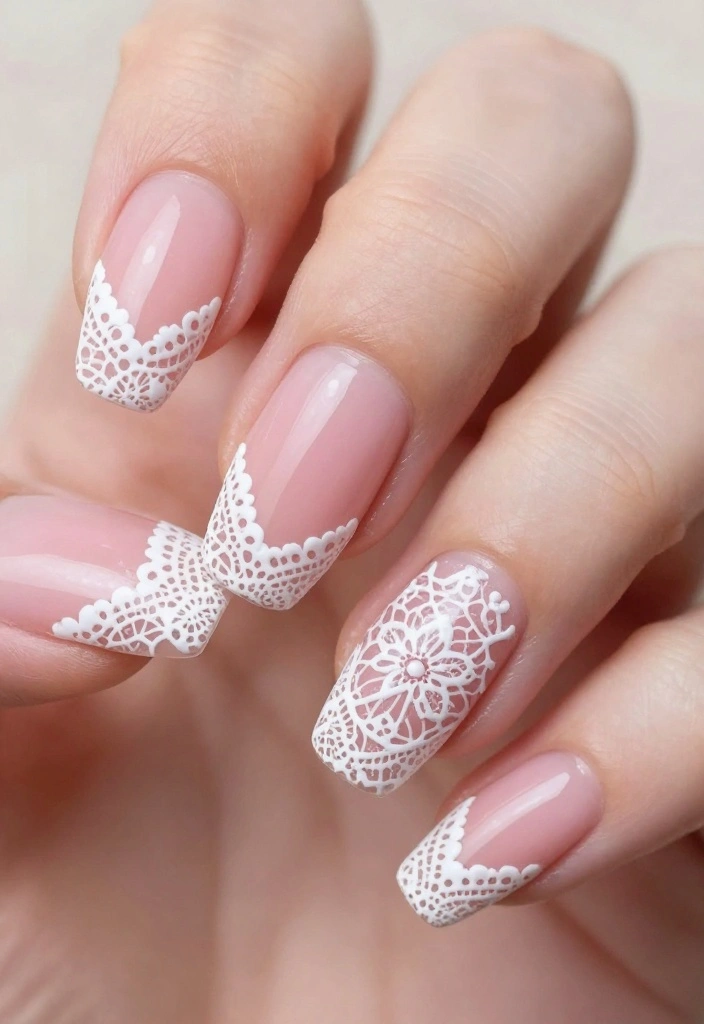
Lace details on blush pink nails add a romantic touch, making it an ideal choice for weddings or special occasions. This design can be as delicate or bold as you wish, showcasing your unique style while enhancing the beauty of the blush pink.
To create lace details:
– Start with a blush pink base coat.
– Use a fine brush to apply lace patterns with black or white nail polish.
– Seal it with a top coat for protection.
Tips:
– Consider using nail stamps for more precise lace designs.
– Keep the lace pattern balanced to maintain a chic look.
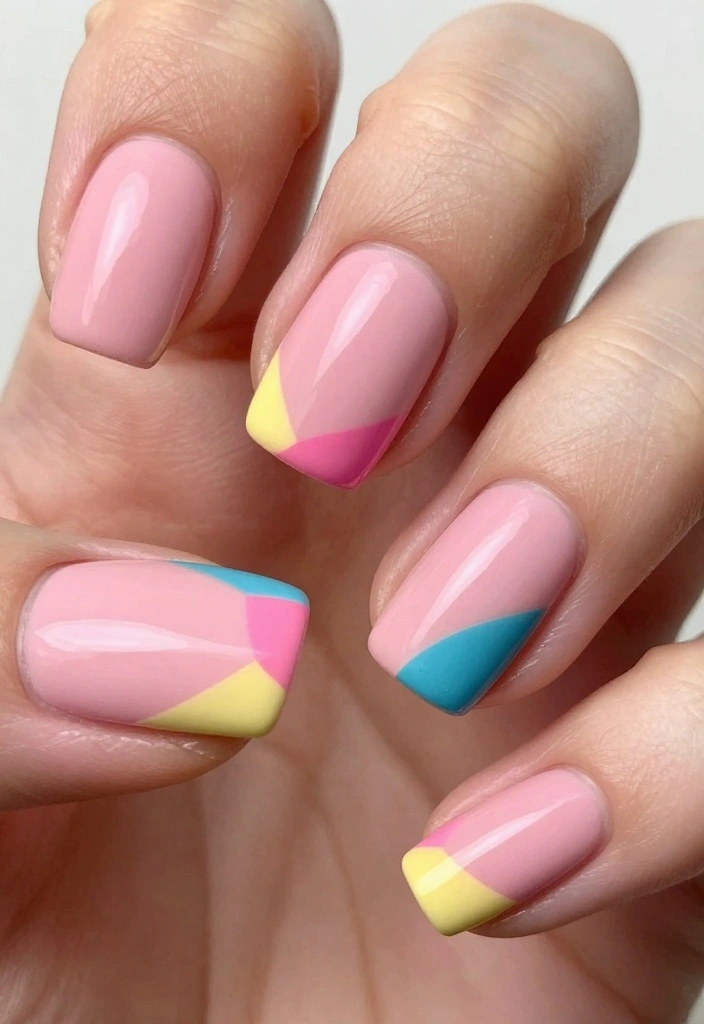
15. Blush Pink Geometric Patterns
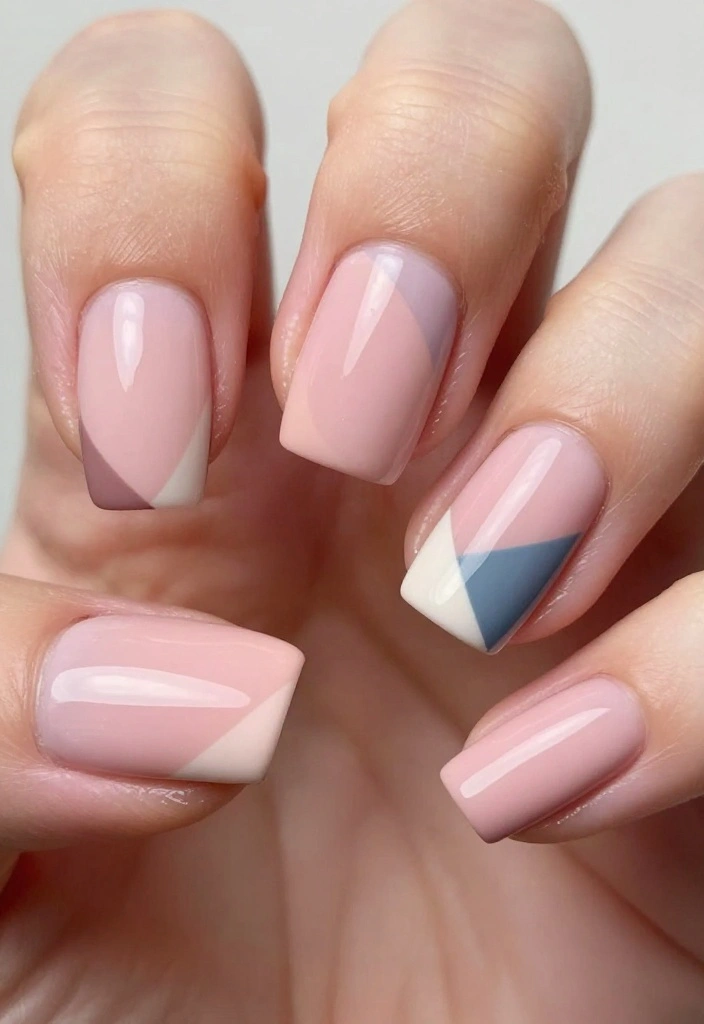
Geometric patterns infuse an artsy flair into your blush pink nails. This modern design can be customized to make a unique statement while maintaining the softness of the blush pink. It’s perfect for fashion-forward individuals.
To create geometric patterns:
– Start with a base coat of blush pink.
– Use striping tape to section off areas, applying different colors or leaving some sections bare.
– Finish with a top coat for a polished look.
Tips:
– Experiment with different shapes and sizes for a unique design.
– Be precise with your lines for a cleaner finish.
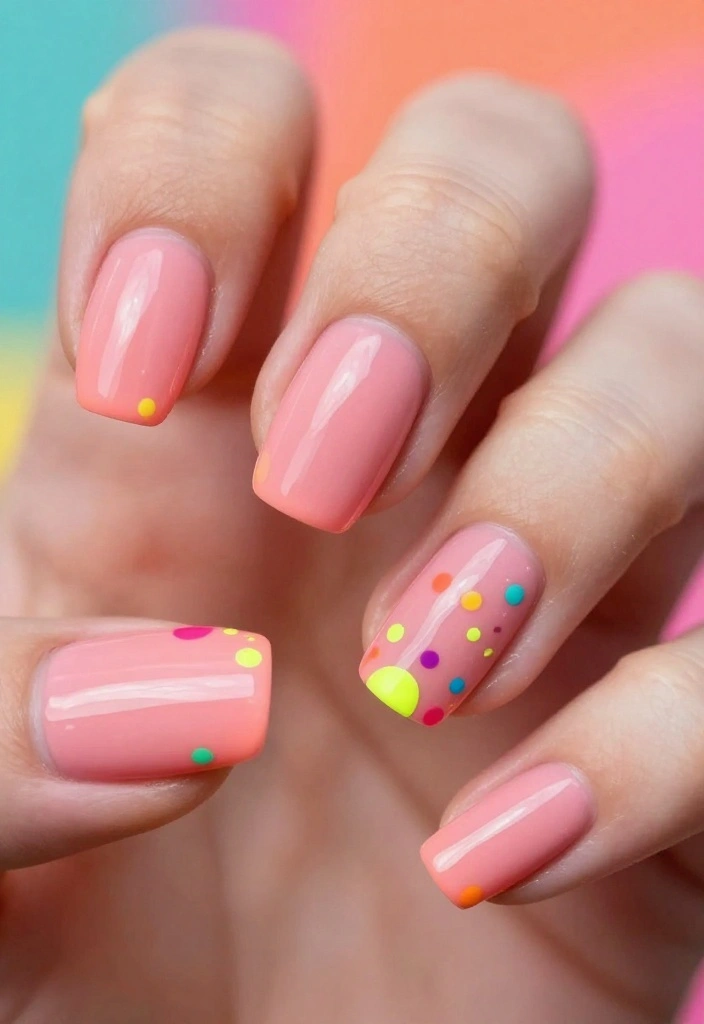
16. Blush Pink with Neon Accents
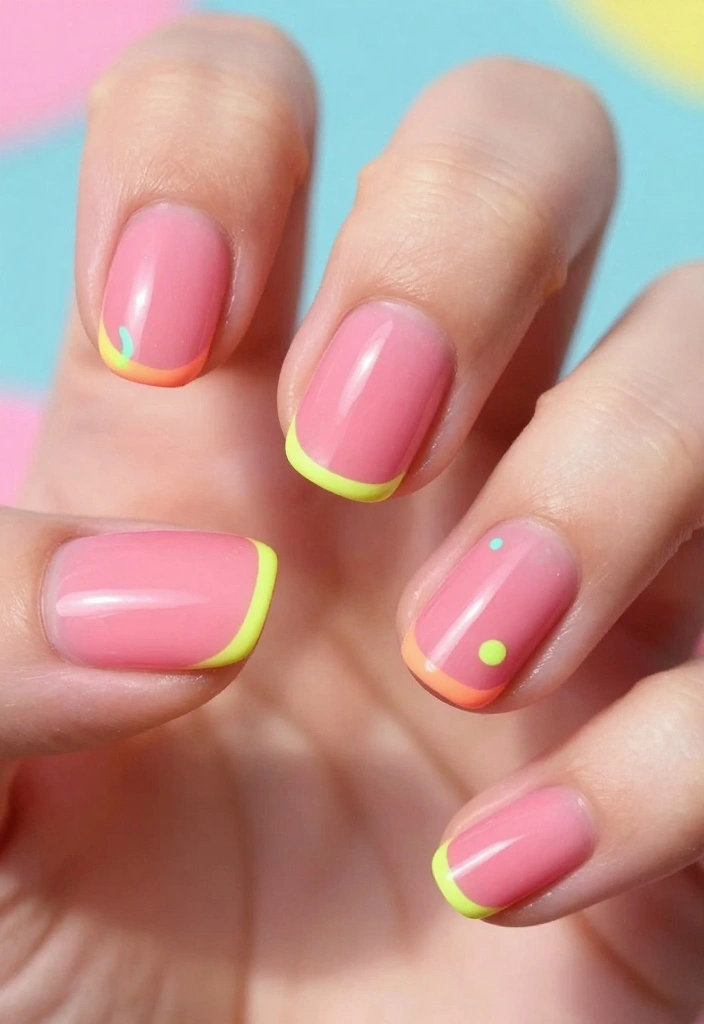
Add a burst of energy to your blush pink nails with neon accents! This design brings a fun twist, perfect for summer fun or festival vibes. Neon colors pop beautifully against the soft blush, making your nails eye-catching and playful.
To create this look:
– Apply a blush pink base coat.
– Use neon colors to add accents such as dots, stripes, or funky shapes.
– Seal with a top coat to lock in the design.
Tips:
– Keep the neon accents minimal to maintain balance.
– Experiment with different neon colors for playful combinations.
Fun fact: Neon accents on blush pink nails grab attention in about 3 seconds—use 2-3 bold shapes for balance. This simple trick makes your manicure pop instantly, perfect for summer vibes and festival fun.
17. Blush Pink with Animal Prints
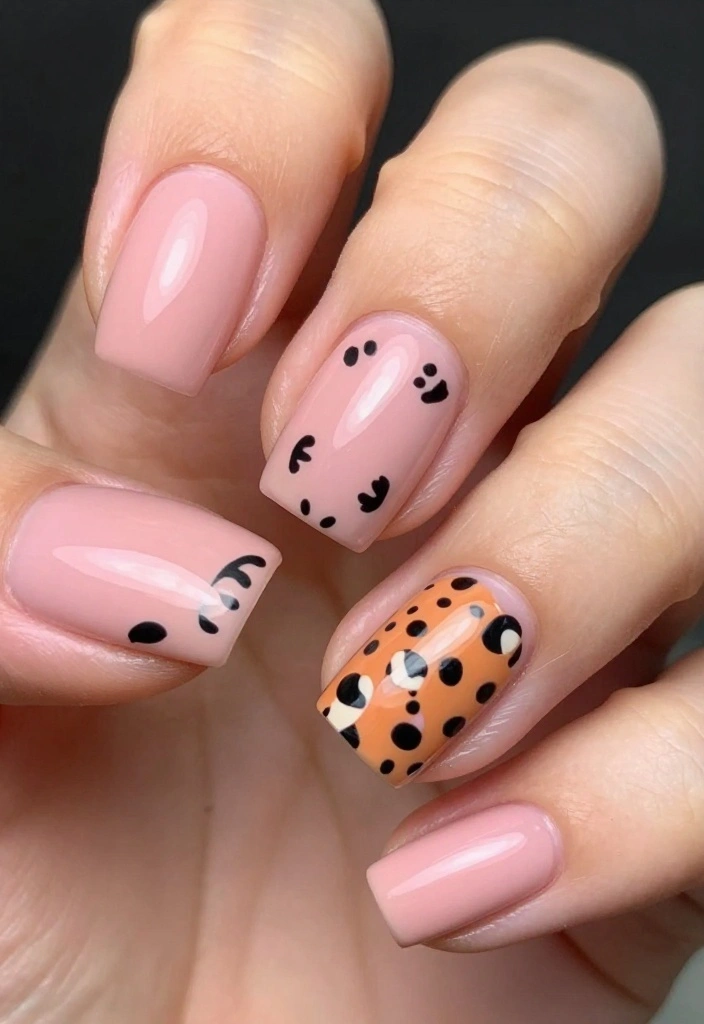
Animal prints are a bold choice that can be softened beautifully with blush pink. Whether you choose leopard spots or zebra stripes, these designs add a trendy edge while maintaining a chic appearance. This style is perfect for those wanting to show their wild side!
To create animal prints:
– Start with a blush pink base coat.
– Use a fine brush or stamping tool to apply your desired animal print in a contrasting color.
– Seal it with a top coat for durability.
Tips:
– Limit the prints to one or two nails to keep the look balanced.
– Select colors that complement the blush pink for a cohesive design.
18. Blush Pink with Pearls
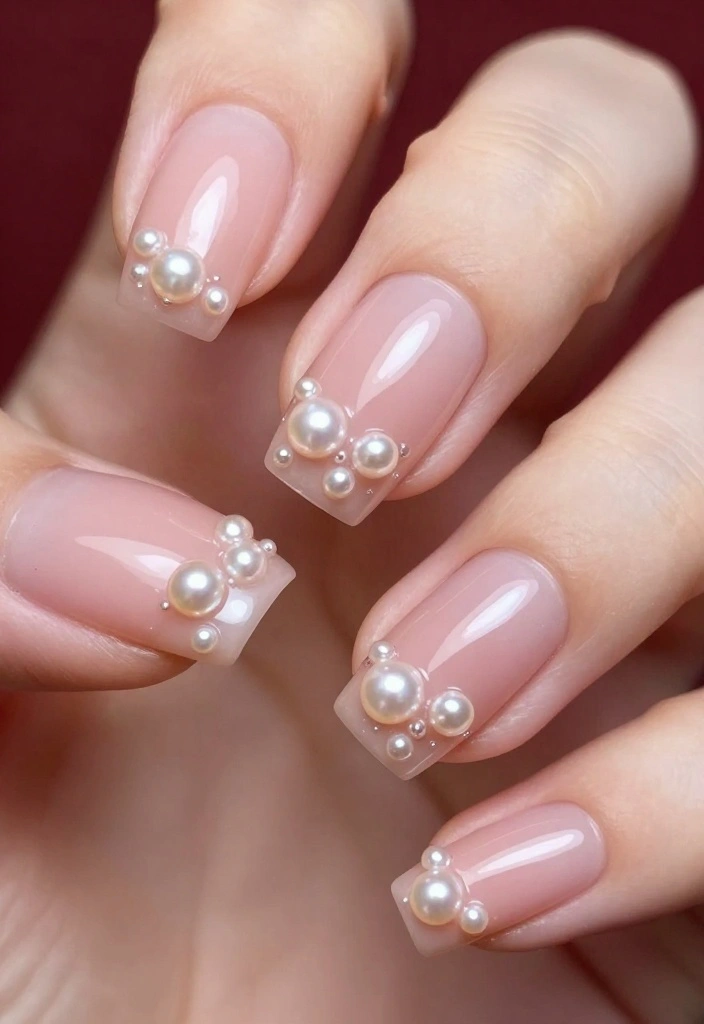
Incorporating pearls into your nail design instantly elevates your blush pink manicure. This classy embellishment is perfect for formal events or when you want to feel polished. The soft pink combined with shiny pearls creates a luxurious look.
To include pearls:
– After applying your blush pink base, strategically place small pearls on one or two nails using nail glue.
– Create patterns or leave them randomly placed.
– Finish with a top coat to secure the pearls.
Tips:
– Use different sizes of pearls for added interest.
– Allow the glue to dry properly to avoid losing any pearls.
Fun fact: Blush pink nails with tiny pearls feel instantly polished—pearl accents can boost your manicure’s luxe vibe by up to 30%. Put pearls on one or two nails, finish with a top coat, and you’re ready for any event.
19. Blush Pink with Color Blocking
Color blocking is a bold trend that can transform your blush pink nails into striking art. By combining blush pink with contrasting colors, you can create a modern, eye-catching look that stands out beautifully. This design is perfect for fashion-forward individuals looking to make a statement.
To create color-blocked nails:
– Start with a blush pink base.
– Use striping tape to section off areas for your contrasting colors.
– Once dry, carefully remove the tape and seal with a top coat.
Tips:
– Choose colors that complement and contrast well with blush pink.
– Be precise when applying tape to ensure clean lines.
20. Blush Pink with a Twist
For those who love unique designs, adding a twist to your blush pink nails can create something truly special. This can involve asymmetrical designs, unexpected patterns, or adventurous color choices that push the boundaries of nail art. It’s all about expressing your individuality!
To create a unique twist:
– Start with a blush pink base coat.
– Think outside the box with unexpected colors or patterns on different nails.
– Finish with a glossy top coat to tie it all together.
Tips:
– Let your creativity flow; don’t hesitate to experiment!
– Consider using nail stencils for more intricate designs.
21. Blush Pink with Abstract Art
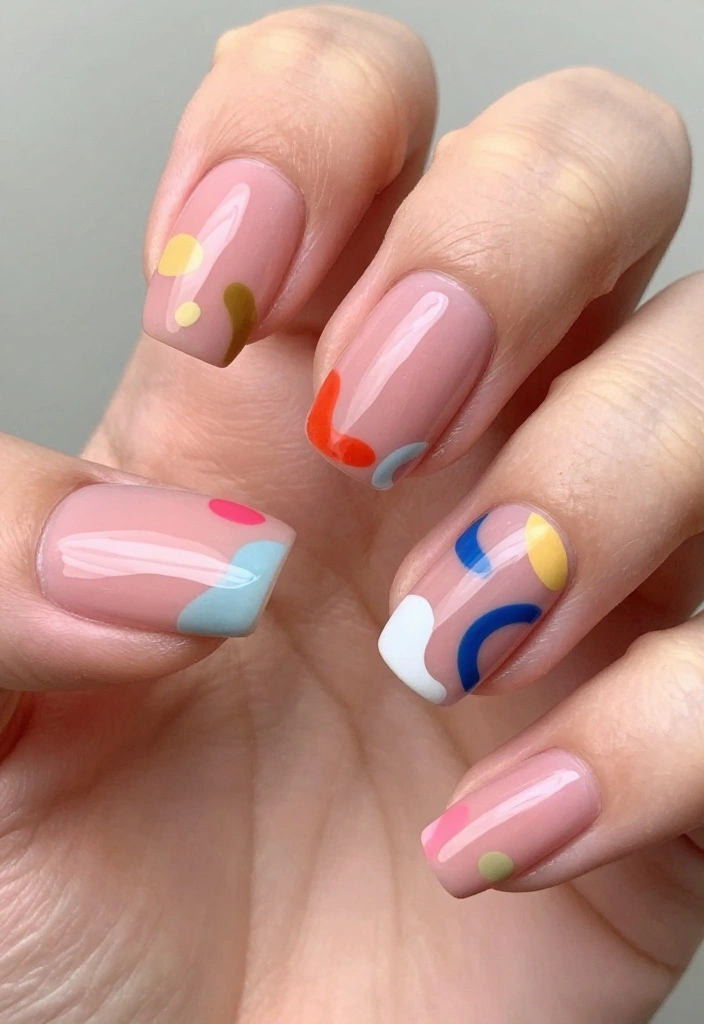
Abstract art on nails brings artistic expression to your blush pink manicure. Using bold colors and shapes, this look can transform your nails into mini canvases showcasing your creative side. It’s perfect for those who appreciate art and want to wear it!
To achieve abstract art:
– Start with a blush pink base coat.
– Use a fine brush or dotting tool to apply various shapes and colors randomly.
– Seal with a top coat to protect your art.
Tips:
– Let your creativity guide you; there are no limits with abstract designs.
– Consider contrasting colors to make the design pop.
22. Blush Pink with Tribal Prints
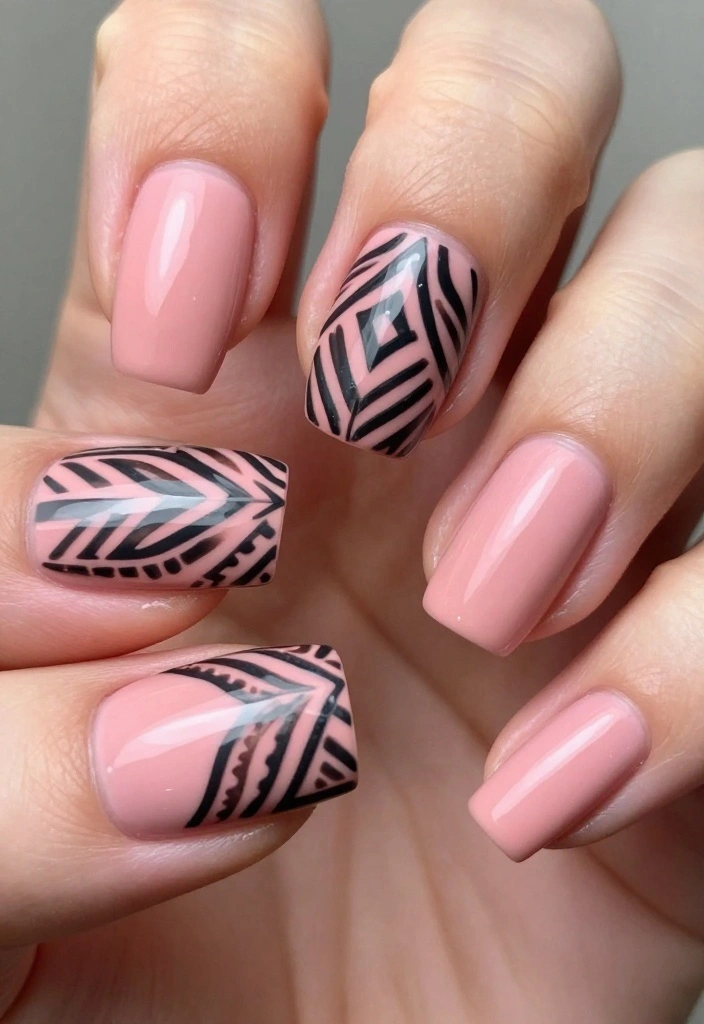
Tribal prints add a cultural and bohemian touch to your blush pink nails. These designs can vary from bold lines to intricate curves, allowing for a diverse range of expressions while maintaining the softness of the blush pink base. This design is perfect for free spirits who appreciate unique patterns.
To create tribal prints:
– After applying a blush pink base, use a fine brush to paint tribal patterns with black or dark brown polish.
– Stickers can be used for more complicated designs.
– Finish with a top coat for a lasting look.
Tips:
– Choose patterns meaningful to you for a personal touch.
– Keep the rest of the nails simple to emphasize the tribal design.
23. Blush Pink with Summer Vibes
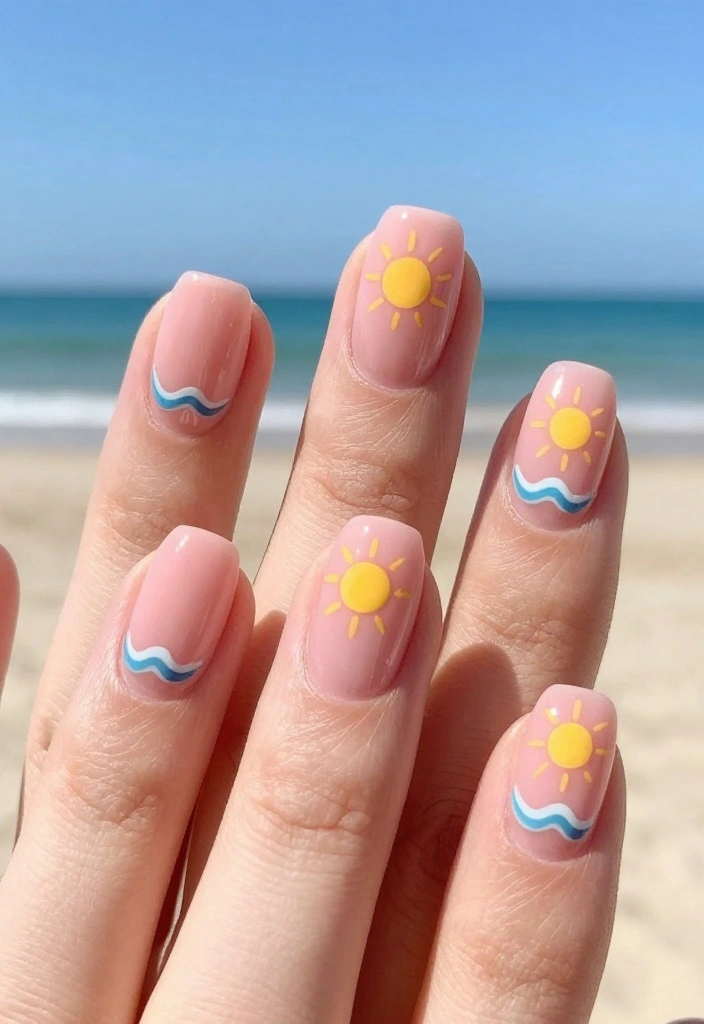
Summer calls for vibrant and fun nail designs! Blush pink nails adorned with summery elements like tiny suns, waves, or tropical motifs reflect the cheerful season. This design is perfect for beach vacations or sunny day outings.
To achieve summer vibes:
– Start with a blush pink base coat.
– Use a fine brush to paint summer elements in bright colors.
– Seal with a glossy top coat for durability.
Tips:
– Keep the designs lightweight and fun for a cheerful look.
– Experiment with small decals for easy application.
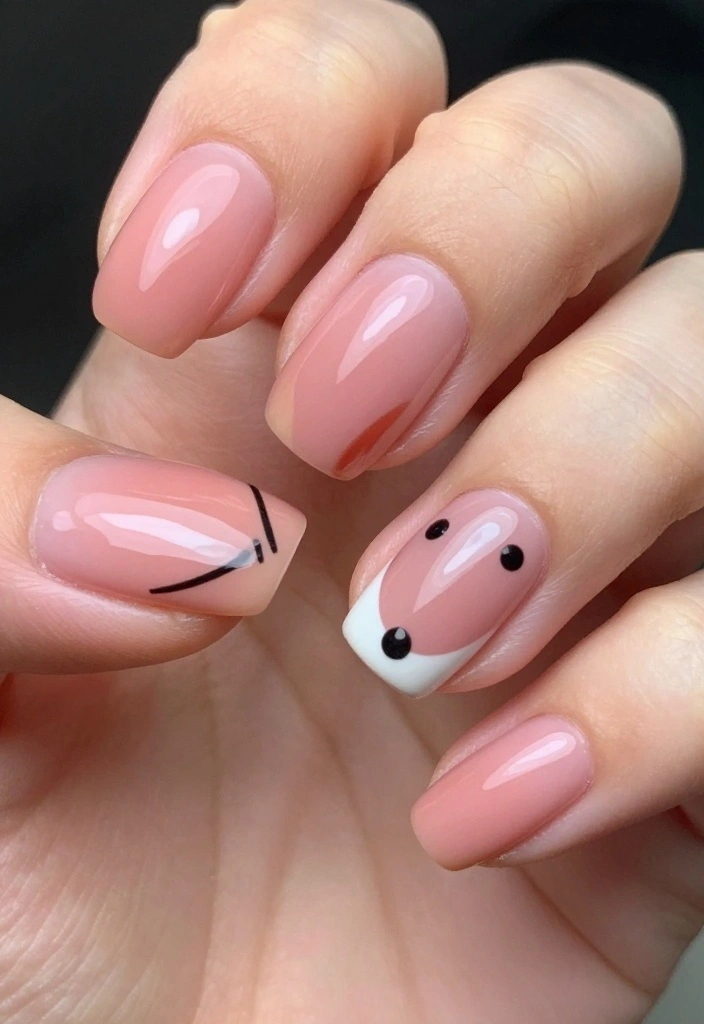
24. Blush Pink with Abstract Faces
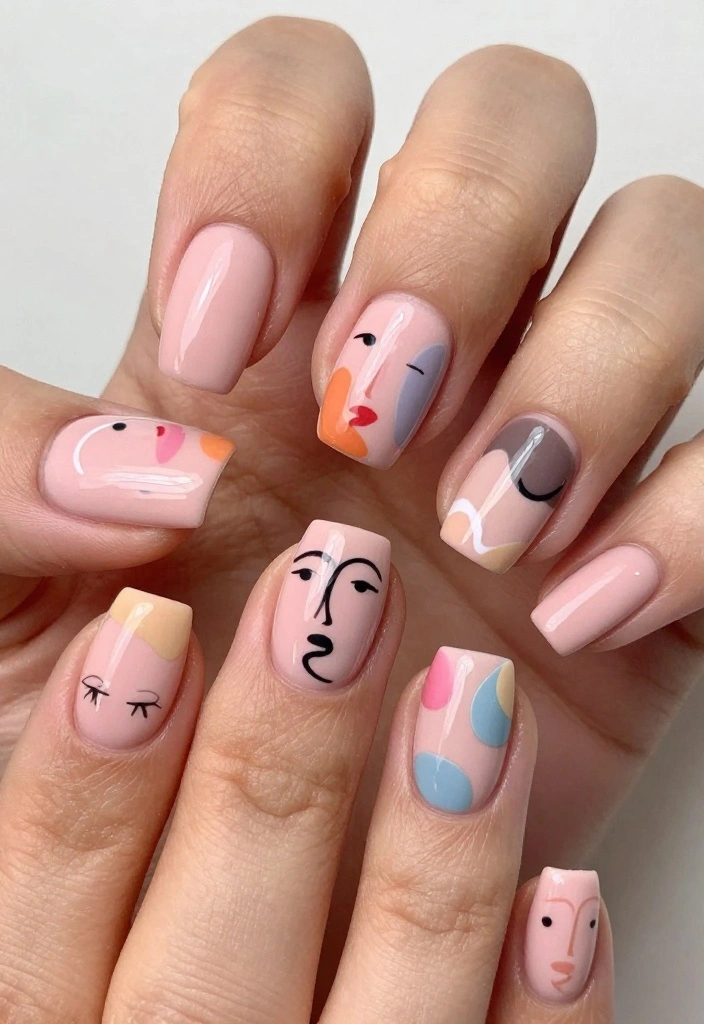
Abstract face designs add an artistic touch to your blush pink nails while making a bold statement. This trend blends simplicity with modern art, creating unique designs that express individuality. Perfect for those who want to wear art on their nails!
To create abstract faces:
– Start with a blush pink base coat.
– Use a fine brush to paint simple abstract face shapes with darker colors.
– Seal with a top coat to protect the design.
Tips:
– Keep the shapes simple for a cleaner look.
– Look for inspiration online to find unique designs.
25. Blush Pink with Artistic Doodles
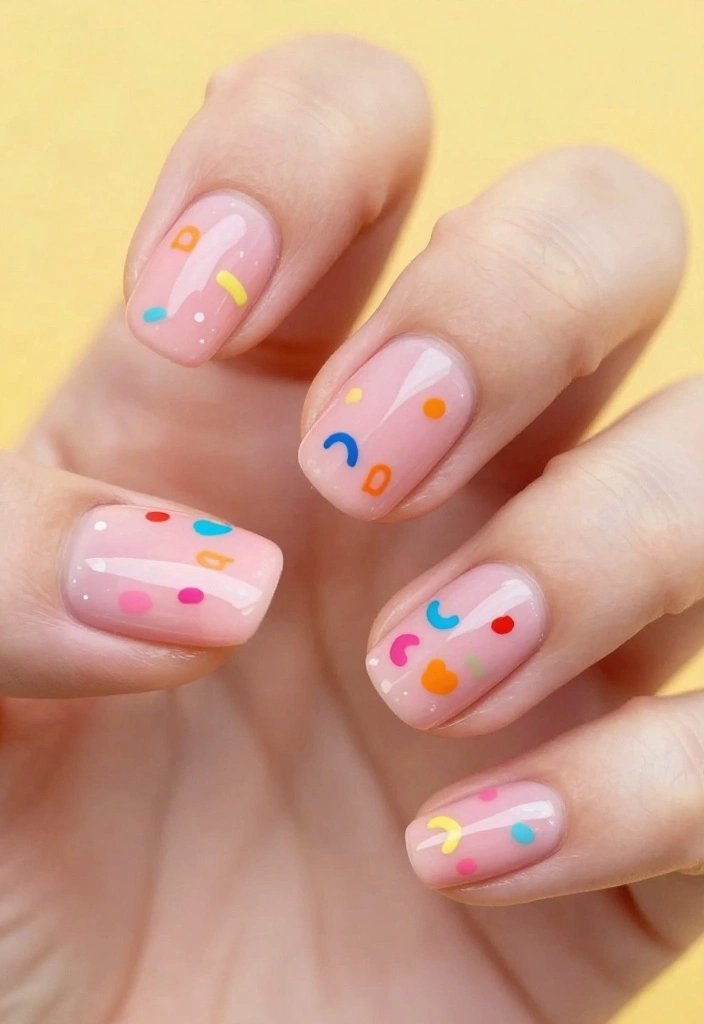
Doodle designs on blush pink nails create a fun and whimsical look. These playful patterns allow for creativity and personalization, making every set of nails unique. Perfect for casual outings or playful events, doodles reflect your personality!
To create doodle designs:
– Start with a blush pink base coat.
– Use a fine brush to create small doodles in contrasting colors.
– Seal with a top coat for protection.
Tips:
– Let your imagination run wild with different doodle styles.
– Keep the designs light and fun for a cheerful vibe.
26. Blush Pink with Nature Elements
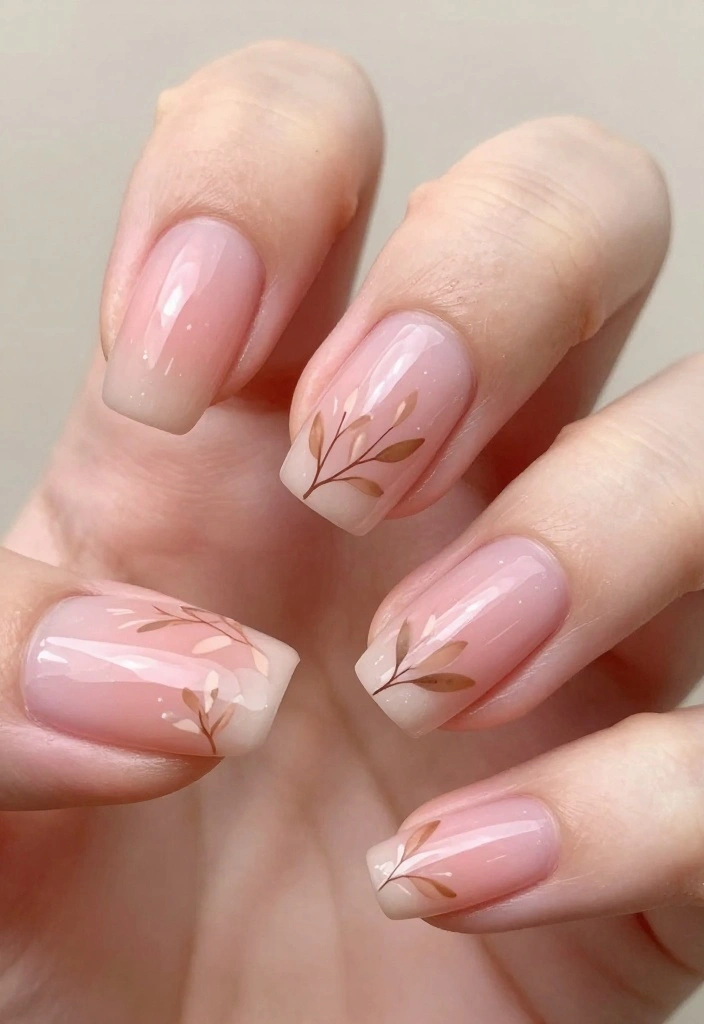
Incorporating nature elements like leaves or trees creates a fresh and serene look on blush pink nails. This design reflects a love for the outdoors, making it perfect for nature enthusiasts.
To create nature-themed designs:
– Start with a blush pink base coat.
– Use a fine brush to add leaf or tree designs in greens or browns.
– Seal with a glossy top coat for longevity.
Tips:
– Keep the design simple and manageable.
– Experiment with different types of leaves for variety.
27. Blush Pink with Vintage Patterns
Vintage patterns lend a classic and timeless appeal to your blush pink nails. These designs range from delicate lace to retro florals, perfect for those who appreciate nostalgia.
To achieve vintage patterns:
– Start with a blush pink base coat.
– Use a fine brush or stamping tool to apply vintage designs in contrasting colors.
– Seal with a top coat for protection.
Tips:
– Look for vintage pattern inspiration online or in magazines.
– Keep the designs light to maintain the soft elegance of blush pink.
28. Blush Pink and Neon Splashes
Combining blush pink with neon splashes creates a vibrant and energetic look. This playful design is perfect for those wanting to stand out while keeping a blush tone in their manicure.
To create this look:
– Start with a blush pink base coat.
– Use a fine brush to apply neon splashes or dots in various areas.
– Seal with a glossy top coat for durability.
Tips:
– Play with the size and placement of the splashes for a fun effect.
– Keep the neon colors bright to contrast with the soft blush.
29. Blush Pink with Dreamcatcher
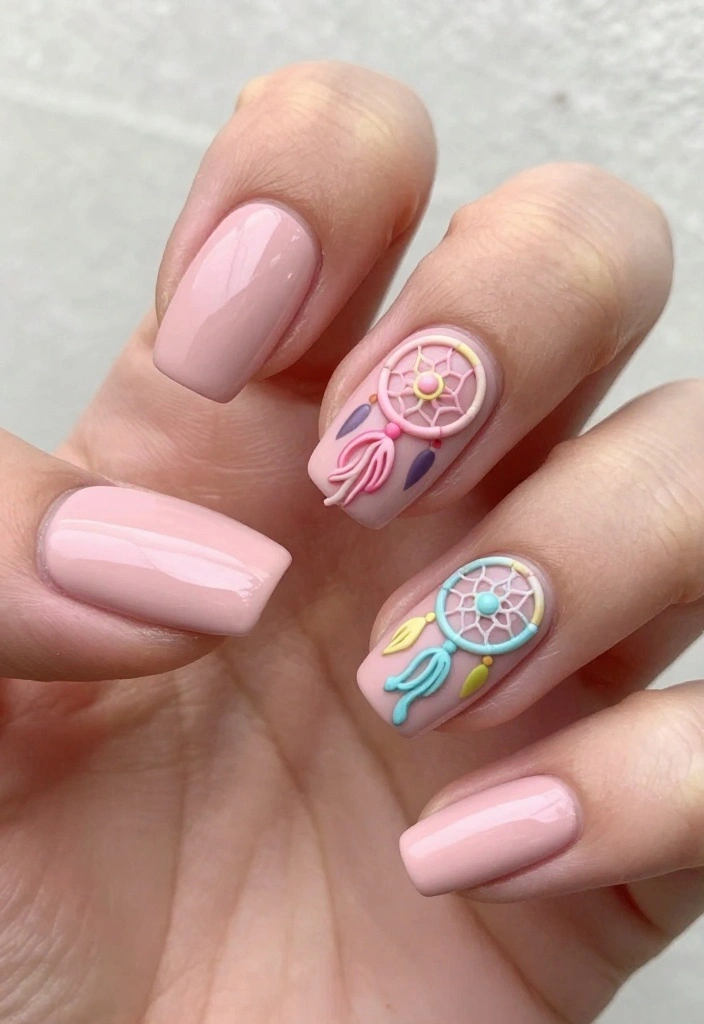
Dreamcatchers add a whimsical and spiritual element to your blush pink nails. This design is perfect for those who appreciate symbolism and artistic expression. The gentle colors combined with intricate details create a beautiful, meaningful look.
To create a dreamcatcher design:
– Start with a blush pink base coat.
– Use a fine brush to create the dreamcatcher design with contrasting colors.
– Seal with a top coat to protect your art.
Tips:
– Seek inspiration online for unique dreamcatcher designs.
– Keep the details sharp for a clean finish.
30. Blush Pink with Whimsical Clouds
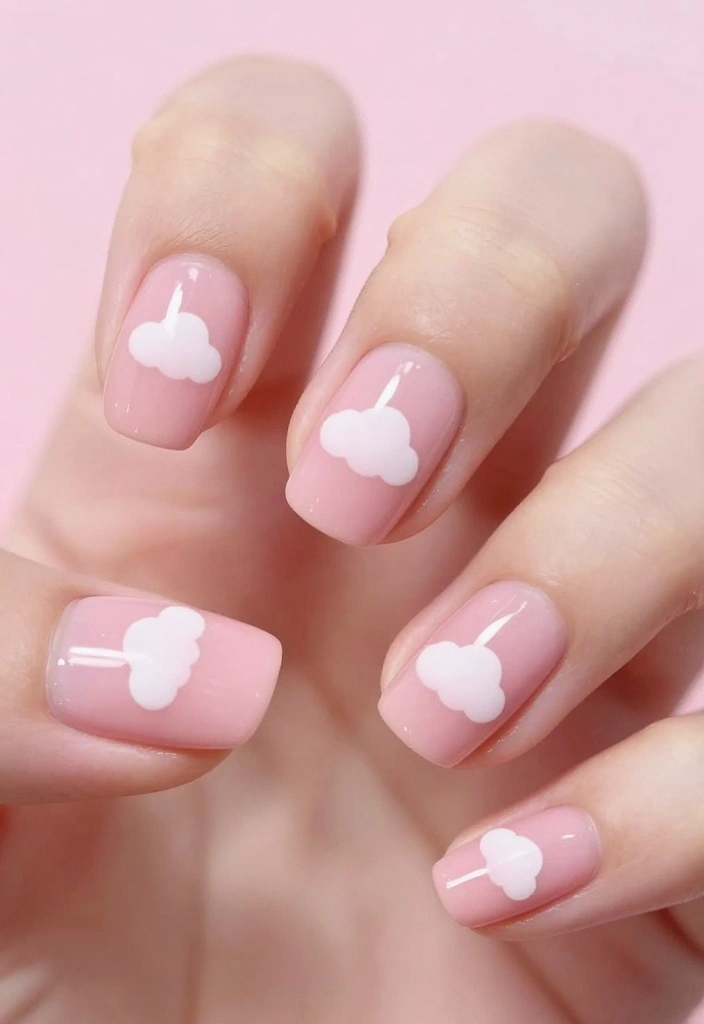
Whimsical cloud designs bring a dreamy aesthetic to your blush pink nails. This cute and fun look is perfect for anyone who loves a lighthearted style. Whether you opt for full clouds or just a few accents, this design can brighten your day!
To create whimsical clouds:
– Start with a blush pink base coat.
– Use a fine brush to create fluffy cloud shapes in white.
– Seal with a top coat for added protection.
Tips:
– Keep the cloud designs soft and fluffy for the best effect.
– Consider adding tiny stars or rainbows for added whimsy.
Conclusion
Blush pink nails are an endless canvas for creativity, offering a beautiful blend of elegance and style. From simple designs to intricate patterns, there’s a blush pink nail art idea for everyone. Experimenting with these ideas can inspire your next manicure, allowing you to express your unique personality and style.
Embrace the charm of blush pink nails and let your creativity shine!
Frequently Asked Questions
How do I choose the right blush pink nails shade for spring and my skin tone?
Choosing the perfect blush pink nails shade for spring starts with your skin tone and the finish you prefer. If you have cool undertones, lean toward softer, cooler pinks with a touch of mauve. If you have warm undertones, pick warmer blush pinks with peachy notes. For neutral undertones, you can experiment with both. For spring nails, decide between a sheer, everyday look or an opaque pastel for more pop. Practical steps: 1) swatch shades on a nail wheel or your nail to compare under natural light; 2) start with a sheer pink for a natural look, then layer a second coat to reach your desired opacity; 3) pick a finish: a glossy shine amplifies blush pink nails; a matte finish offers a chic twist. At-home application tips: prep nails with a good base coat, apply thin even layers, cap the free edge to prevent chipping, finish with a strong top coat, and let each layer dry fully. For spring nails, you can switch between solid blush pink nails and blush pink nails with delicate accents like a thin white line or tiny floral sticker for variety. Tools to have: base coat, top coat, blush pink nail polish, a striping brush or dotting tool for simple nail art, cuticle pusher and nail file.
What are some easy blush pink nail designs that look great in spring?
Here are a few crowd-pleasers you can try at home or in the salon: 1) Solid blush pink nails with a glossy finish; 2) Blush pink nails with a white French tip for a fresh spring twist; 3) Blush pink marble with soft white veining; 4) Blush pink nails with gold foil accents; 5) Blush pink nails with tiny floral decals or daisy stickers.
How to recreate: apply a base coat, two coats of blush pink, seal with a top coat. Use striping tape for clean lines or a dotting tool for tiny details. For added longevity, cap the free edge and use a long-wear top coat.
How can I recreate the look from #15 in the article without a pro manicure?
To recreate the standout blush pink nail design from #15 at home, start with a clean base, apply two coats of blush pink, then add a small accent with a thin line or dot near the cuticle or tip using a white or metallic shade. Use striping tape for precise lines, and finish with a high-gloss top coat or a matte finish if you prefer. If you’re using gel, cure under a lamp; otherwise let layers air-dry. Finish with cuticle oil for hydration.
How long do blush pink nail designs last and what’s the best top coat?
Durability depends on your polish type. Gel blush pink nails can last 2-3 weeks with minimal chipping; regular polish typically lasts 3-7 days with careful care. For longevity, choose a high-quality top coat designed for longevity and UV protection, reapply every 3-4 days, and avoid harsh acetone-based removers. Keep nails moisturized and wear gloves for cleaning to protect your blush pink nails. If you’re doing nail art, seal edges to prevent lifting.
What nail prep tips help prevent staining and ensure smooth blush pink nails?
Prep is everything for blush pink nails. Start by removing old polish and pushing back cuticles. Buff the nail surface lightly to create a smooth canvas, then wash and dry thoroughly. Apply a nourishing base coat to prevent staining from pigmented polish. If you’re concerned about staining from the pink shade, choose a stain-resistant base coat and work in thin layers. Finish with a top coat to lock in color and provide a smooth, glassy look for your spring nails. Shape nails and push back the cuticles; keep nails tidy and cuticles hydrated with oil.
Related Topics
blush pink nails
nail designs
spring nails
minimalist nail art
easy nail tutorials
trendy nail styles
floral designs
ombre nails
beginner friendly
gel polish
manicure ideas
nail art inspiration
I love blush pink nails! They give such a soft and elegant vibe. Which design from the list do you think would suit my wedding next month?
I tried to do a DIY blush pink manicure last week, and let’s just say my left hand looks great, but my right hand… well, it’s a masterpiece of chaos! 😂 Do you have any tips for keeping both hands even?
Did you know that the color pink is said to make you feel calm and relaxed? I definitely need that vibe when I’m in my nail salon! What’s your favorite color for nails?