Nail art has become a popular way to express personal style, but many beginners feel intimidated by the complexity of intricate designs. This post is here to help you dive into the world of nail art with confidence! If you’ve been craving a fun way to spruce up your look without spending hours at the salon, you’re in the right place. We’ve gathered 7 quick and stylish beginner nail designs that you can master in minutes, making sure you feel fabulous and empowered in the process.
This guide is perfect for anyone who loves fashion and wants to add a creative touch to their nails. Whether you’re preparing for a special occasion or just looking to brighten your everyday style, these designs are easy to follow and fun to create. With step-by-step instructions and tips for each design, you’ll walk away with fresh ideas that not only look stunning but also build your nail art skills.
Get ready to unleash your inner nail artist! You’ll find everything from classic styles to trendy designs that will leave you feeling chic. Let’s jump into these beginner-friendly nail art ideas that are guaranteed to impress and boost your confidence, all while keeping it simple and stylish!
Key Takeaways
– You can master beautiful nail designs quickly, even as a beginner, with the right techniques and tools.
– Each of the 7 designs offers a unique style, allowing you to express your personality.
– Simple materials and minimal steps make these creations accessible to everyone.
– Enjoy the process of creating your nail art; it’s a fun way to relax and unleash your creativity.
– With practice, you can elevate your nail art skills and experiment with various styles and colors!
Contents
- 1. Classic French Tips with a Twist
- 2. Dotted Delight
- 3. Geometric Glam
- 4. Ombre Effect
- 5. Marble Magic
- 6. Glitter Galore
- 7. Floral Fantasy
1. Classic French Tips with a Twist
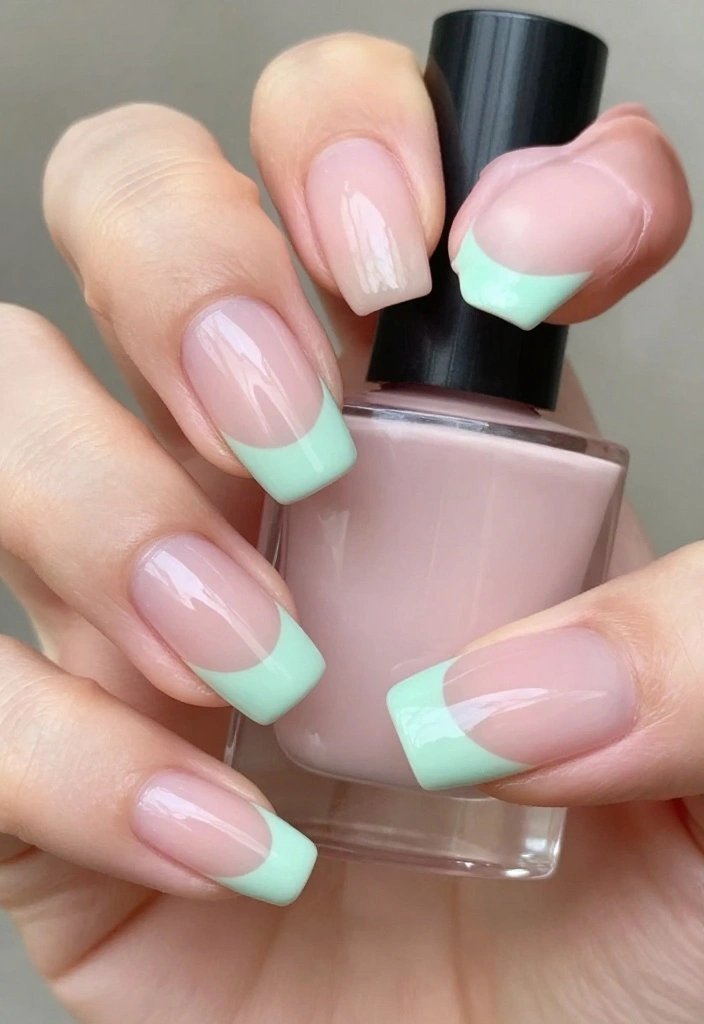
The French tip is a classic that never fades away. It’s chic and polished, perfect for keeping your nails looking effortlessly neat. By adding a splash of color, you can give this timeless design a fun twist that stands out.
This design works beautifully because it combines a clean base with a pop of color, allowing you to express your personality. It’s great for any occasion, from casual outings to formal events.
Outfit Pieces:
– Base coat
– Light pink or nude nail polish (for the base)
– Vibrant color for tips (like mint green or coral)
– Top coat
– Optional: tape for creating sharp lines
Styling Tips:
– Ensure your base color dries completely before adding tips.
– Use a thin nail brush for precision when painting tips.
– Experiment with colors to match your outfit or mood.
– Finish with a shiny top coat for durability and shine.
This design is versatile enough for any event, and you can easily switch colors to keep it fresh and exciting!
💅 Quick Nail Art Guide for Moms
Unlock stylish nail designs in minutes with our DIY guide, perfect for busy moms ready to shine.
2. Dotted Delight
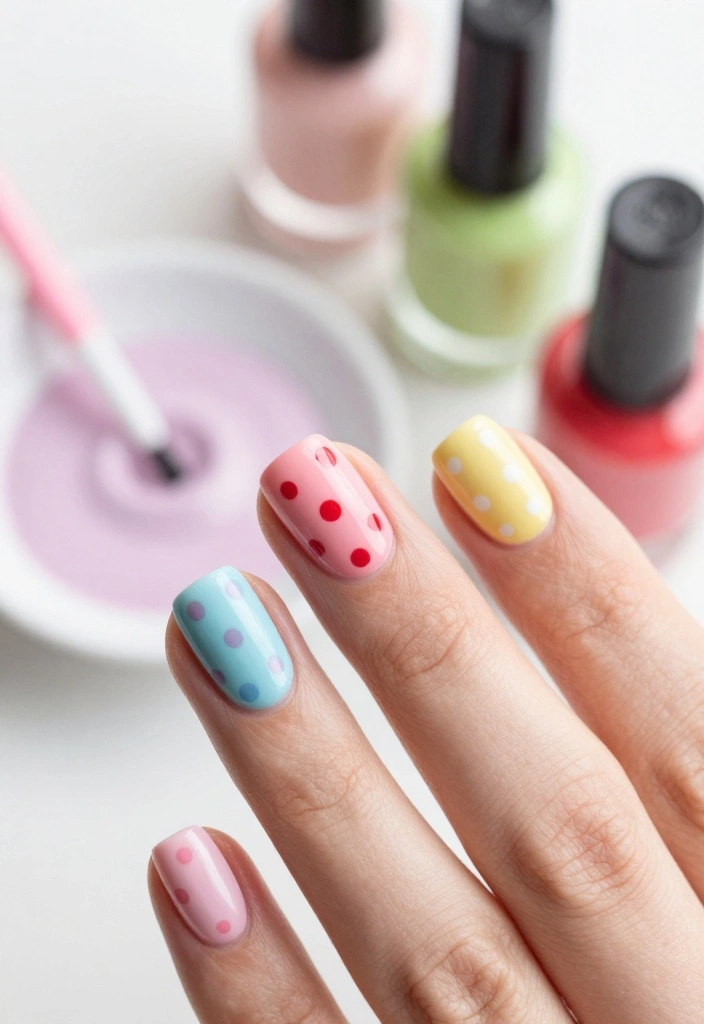
Dots are one of the simplest ways to create playful nail art. This design invites creativity, allowing you to mix and match colors for a whimsical effect.
It works because the dots add a fun texture and visual interest to your nails without being overwhelming. Perfect for any casual event, this style lets you show off your playful side.
Outfit Pieces:
– Base coat
– Your favorite base color (like soft lavender)
– Two or three contrasting colors for the dots (such as white and yellow)
– Dotting tool or bobby pin
Styling Tips:
– Use varying dot sizes for a more dynamic look.
– Practice dotting on paper to build confidence.
– Randomly place the dots for a fun, effortless vibe.
– Seal your design with a top coat for lasting wear.
This design is quick to create and perfect for using up those leftover polishes hiding in your collection!
Fun fact: a dotted nail design can take as little as 5 minutes per hand when you stick to 2-3 colors. It’s simple for beginner nail designs, affordable, and instantly playful. Perfect for busy mornings.
How To Choose The Right Beginner Nail Designs
Choosing the right beginner nail designs can make all the difference in your nail art journey. With so many options available, it’s essential to focus on a few key factors that can help you create stunning manicures with ease. Here’s what to consider:
1. Your Skill Level
Start by assessing your current skill level. Are you completely new to nail art, or do you have a bit of experience? For beginners, it’s best to start with simple designs that don’t require advanced techniques. Designs like the classic French tips or polka dots can help build your confidence and skills without overwhelming you.
2. Tools and Supplies
Different nail designs require different tools. Basic supplies include nail polish, a base coat, a top coat, and possibly some nail art brushes or dotting tools. Ensure you have the right materials for the design you choose. For instance, if you want to try an ombre effect, you’ll need a makeup sponge to blend colors effectively.
3. Colors and Themes
Think about the colors and themes that resonate with you. Are you drawn to vibrant colors or more subtle tones? For beginner designs, stick to 2-3 colors that complement each other. This will make your nails look polished without overwhelming your skills. Seasonal themes or solid colors can offer stylish options that are simple yet effective.
4. Time Commitment
Consider how much time you want to invest in your nail designs. Some techniques, like marbling or detailed floral designs, can take longer to master. If you’re short on time, opt for quick and easy designs that you can complete in under 30 minutes. Simple designs will keep you motivated and excited to try new styles.
5. Design Complexity
Evaluate the complexity of the designs you want to try. Simple patterns are ideal for beginners, while more intricate designs may lead to frustration. Focus on designs that involve straightforward techniques, such as dots or stripes. As you gain confidence, you can gradually move on to more complicated patterns.
6. Inspiration and Trends
Stay updated on current nail art trends for inspiration. Social media platforms like Instagram and Pinterest are excellent sources for finding beginner-friendly designs that are also stylish. Look for tutorials that match your skill level and desired aesthetic. This will help you create designs that are not only easy but also trendy.
Pro Tip: Don’t be afraid to experiment! Nail art is all about creativity. If a design doesn’t turn out as planned, remember that it’s all part of the learning process. Embrace imperfections, and you’ll improve over time. Start with one or two designs, and as you get comfortable, expand your repertoire!
3. Geometric Glam
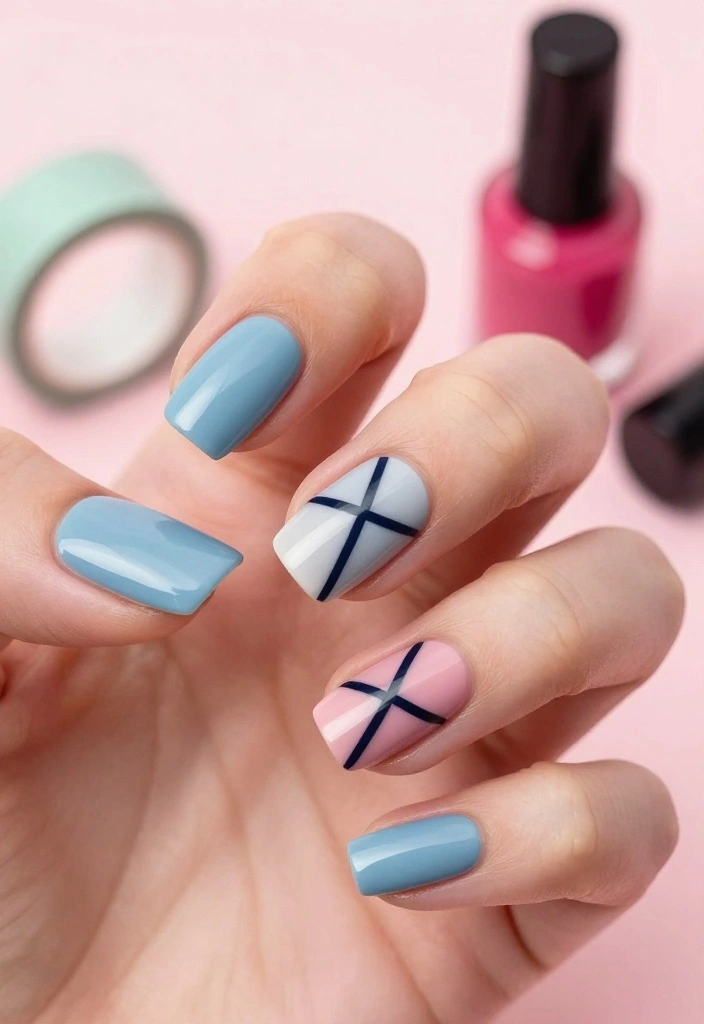
Geometric designs are trendy and super easy to achieve with a little tape. These designs can create sharp, eye-catching lines that elevate your nail art.
The clean shapes and patterns work because they bring structure to your nails while allowing room for creativity. This style is perfect for both casual and formal settings, making it a versatile choice.
Outfit Pieces:
– Base coat
– Two or three nail polish colors (like black, gold, and white)
– Tape for creating designs
– Top coat
Styling Tips:
– Use high-quality tape to ensure crisp lines.
– Allow each color layer to dry completely before adding the next.
– Experiment with different shapes to find your favorite look.
– Don’t forget a top coat to protect your hard work.
This design can be bold or subtle, depending on your color choices, making it suitable for any occasion!
4. Ombre Effect
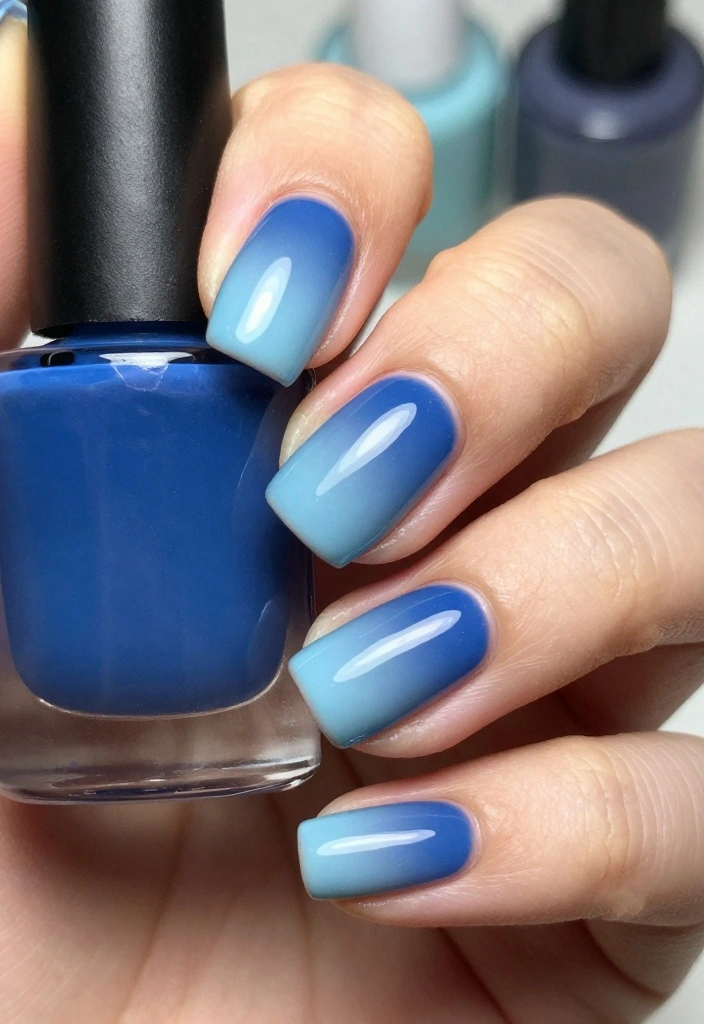
Ombre nails create a beautiful gradient of colors that looks stunning and sophisticated. This design may seem complex, but it can be mastered quickly with a few simple steps.
The ombre effect is versatile, allowing you to blend colors in any combination that suits your style. You can wear it for casual days or dress it up for special events.
Outfit Pieces:
– Base coat
– Two or three nail polish colors that blend well (like pink and purple)
– Makeup sponge
– Top coat
Styling Tips:
– Apply a base coat to protect your nails.
– Paint stripes of each color on the sponge for blending.
– Dab the sponge onto your nails to achieve the gradient effect.
– Seal your design with a top coat for a glossy finish.
This design looks intricate yet is beginner-friendly, making it a great choice for any occasion!
📹 Related Video: 4 WAYS TO OMBRÉ WITH GEL POLISH | Nailsbykamin
5. Marble Magic
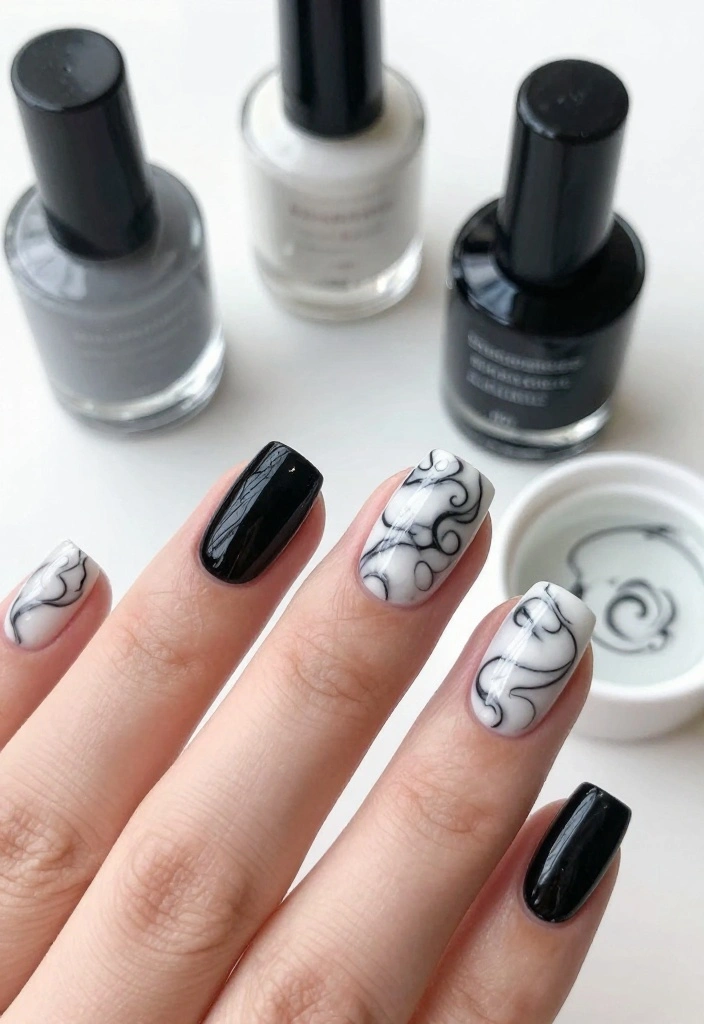
Marble nails exude elegance and sophistication, perfect for any occasion. Surprisingly, they can be created easily using water!
The contrasting colors in marble designs create a stunning visual effect, allowing you to showcase your creativity. Ideal for parties or casual outings, this design is sure to impress.
Outfit Pieces:
– Base coat
– Two nail polish colors (like white and black)
– Room temperature water
– Toothpick or skewer
– Top coat
Styling Tips:
– Use room-temperature water for the best marble effect.
– Experiment with color combinations to find what you love.
– Dip your nail gently to capture the design.
– Always finish with a top coat to protect your nails.
With practice, you will master this chic design, making it a fantastic addition to your nail art repertoire!
Fun fact: 4 out of 5 people trying beginner nail designs love water marble and nail a chic swirl after just 1 practice session. With a base coat and two polish colors, marble nails look flawless for any occasion.
6. Glitter Galore
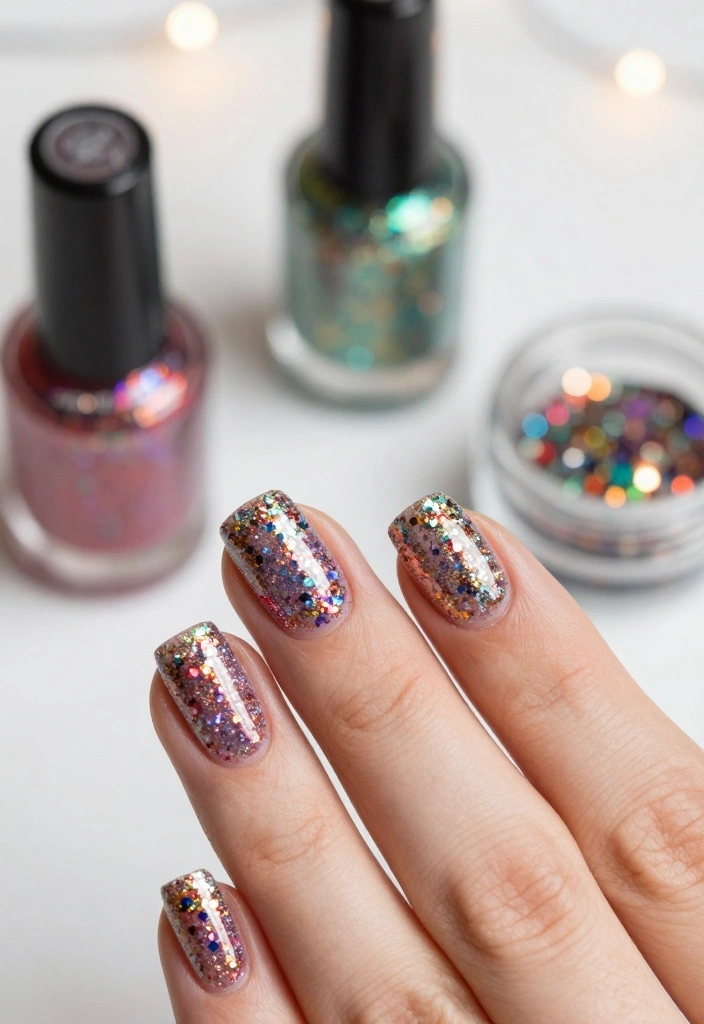
If you’re a fan of sparkle, glitter nails are a must-try! They can instantly glam up your look, whether for everyday wear or a night out.
You can layer glitter polish over a solid base or create an ombre effect for added flair. The shimmering finish brings fun and excitement to your nails.
Outfit Pieces:
– Base coat
– One solid color nail polish (like deep red)
– Glitter polish or loose glitter
– Top coat
Styling Tips:
– Apply a base coat for protection.
– Use one or two coats of your base color before adding glitter.
– For an ombre effect, use a makeup sponge to apply glitter on the tips.
– Seal your design with a top coat for a lasting shine.
Glitter nails can be adapted to any occasion, making them a fun and fabulous choice!
7. Floral Fantasy
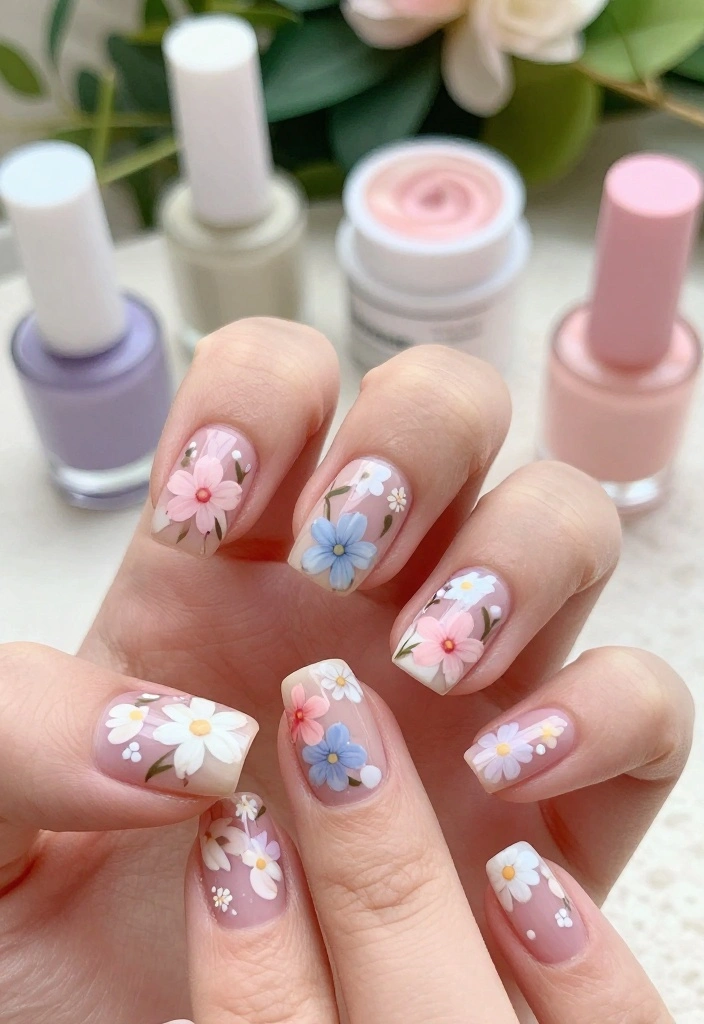
Floral designs are a classic way to bring a touch of nature to your nails. They’re easy to create, making them perfect for beginners who want to try their hand at nail art.
You can use dotting tools or stickers to create flowers, allowing for endless creativity. Choose colors that match your outfit or reflect the season for a cohesive look.
Outfit Pieces:
– Base coat
– One or two base color polishes (like soft pink)
– Nail art brushes or dotting tools
– Top coat
Styling Tips:
– Start with a light base color for flowers.
– Use darker shades for petals and leaves to create contrast.
– Practice flower shapes on paper first if needed.
– Finish with a top coat to protect your design.
These floral designs can be personalized with any color palette, making them a versatile and charming option for any occasion!
Fun fact: Floral nails can look intricate in minutes—perfect for beginner nail designs—using just 2 easy tools and 5 quick steps. With a dotting tool or stickers, nail art can bloom fast. Pick colors to match your outfit or season, and you’re ready to glow.
Conclusion

Mastering these beginner nail designs can add a splash of color and creativity to your life with very little effort.
From classic styles to modern twists, each design offers endless possibilities for personalization. You don’t need to be a pro to enjoy beautiful nails, so gather your supplies and start experimenting! Each design is a canvas of self-expression and a wonderful way to keep your style fresh and fun.
Frequently Asked Questions
What are the easiest beginner nail designs I can master in minutes?
Start with a few timeless options that fit into minutes: a solid color with a contrasting accent nail, simple polka dots, or a chic negative-space look. Here’s a quick plan for beginner nail designs you can master fast.
Step 1: Prep nails (file, buff, push back cuticles) and apply a thin base coat. Step 2: Apply 1 coat of your base color and let it dry. Step 3: For an accent, use a dotting tool or toothpick to place one bold dot on one nail, or paint a diagonal stripe with tape. Step 4: Finish with a fast-drying top coat. You can complete a full set in about 10 minutes.
Tip: choose 2-3 colors that complement each other for a cohesive but quick look.
What supplies do I need to start with quick and stylish beginner nail designs?
Getting started is easier than you think. For quick and stylish beginner nail designs, grab: base coat, top coat, 2-3 nail polishes (colors that go together), a dotting tool or toothpick, striping tape for tidy lines, a nail file, a buffer, and cuticle oil. Optional: cotton swabs and a remover pen for cleanups. Arrange your kit in a small tray so you can grab what you need in minutes. With these basics you can create dozens of beginner nail designs from home.
How can I do stylish nail designs quickly at home without fancy tools?
Even without fancy tools, you can achieve quick and stylish nail designs. Try these simple methods: 1) Solid color with a glossy top coat for a chic look. 2) Accent nail using tape to make clean lines. 3) Dots with a dotting tool or a bobby pin. 4) Minimal diagonal stripes with striping tape. 5) Negative-space nails by leaving part of the nail bare with tape masking. Each design takes 2-5 minutes once you’ve prepped your nails. Pro tip: keep your base coat and top coat ready; a quick-dry top coat helps you finish fast.
How can I make beginner nail designs last longer and resist chipping?
To keep your beginner nail designs looking fresh, prep is key: cleanse with alcohol, push back cuticles, and file edges. Apply a thin base coat, cap the free edge with each coat, and use 2 thin coats of color rather than one heavy layer. Seal with a sturdy top coat and re-apply top coat every couple of days. Avoid soaking hands in hot water for long and moisturize cuticles with oil. Quick maintenance keeps your nails stylish longer.
What are some quick nail design ideas I can master in under 5 minutes for daily wear?
Here are rapid-fire ideas you can master in minutes: 1) Glossy solid color for a timeless look. 2) One accent nail with a foil or sticker for a hint of flair. 3) Minimal white stripe across a color field using tape. 4) Half-moon using a circular sticker masking the cuticle area. Each idea can be done in 2-4 minutes once you’ve prepped the nails. For beginner nail designs, simplicity is your friend—stick to 2 colors max and a sturdy top coat for longevity.
Related Topics
beginner nail designs
quick nail art
stylish nails
easy techniques
nail design ideas
DIY nail art
minimalist nail design
trendy nail styles
5-minute nail designs
fashionable nails
nail art for beginners
quick tips
These nail designs are so cute and easy! I can’t wait to try the polka dots. Do you think glitter makes everything better, or is it just me?
I love how simple these designs are! I tried nail art once, and my cat thought my nails were toys—let’s just say it didn’t end well! 😂
Did you know that nail art has been around for thousands of years? Ancient Egyptians even used it to show their social status! How cool is that?
I remember trying to paint my nails while watching a movie, and I ended up with more polish on the couch than on my nails! Have you ever had a nail painting mishap?