If you’re looking to add a dash of fun to your weekend plans, you might be craving some creative ways to express yourself. Nail art is not just a beauty trend; it’s a form of self-expression that lets you showcase your unique style. This weekend, why not go all out and try some adorable Mickey Mouse nails? They are cheerful, playful, and perfect for fans of all ages. I created this post to help you master some easy Mickey Mouse nail styles that even beginners can pull off!
This guide is for anyone who loves a bit of whimsy in their life, whether you’re an avid Disney fan or just someone looking to try something new. If you enjoy experimenting with your nails but find intricate designs daunting, you’re in the right place. I’ve gathered together nine delightful ideas that are not only simple but also incredibly fun to create. From classic polka dots to festive holiday designs, you’ll find the perfect style to rock this weekend.
Get ready to have fun with your nails! You’ll learn how to create easy nail art that brings a smile to your face and maybe even sparks some nostalgia. Each style is designed to be straightforward and enjoyable, so grab your nail polish and let’s dive into these charming Mickey Mouse nail tutorials!
Key Takeaways
– You’ll discover 9 fun and easy Mickey Mouse nail styles that are perfect for beginners.
– Each tutorial includes simple steps that break down the process, making it easy for you to follow.
– You can express your creativity and love for Disney with nail designs that fit any occasion.
– The styles range from playful polka dots to festive holiday themes, catering to all tastes.
– Get ready to impress your friends with your new nail skills, no matter your experience level!
Contents
- 1. Classic Mickey Dots
- 2. Mickey on a Rainbow
- 3. Mickey Silhouette
- 4. Mickey Mouse Hands
- 5. Mickey with Hearts
- 6. Mickey Glitter Accents
- 7. Mickey Mouse & Friends
- 8. Mickey pattern nails
- 9. Mickey Mouse Holiday Nails
1. Classic Mickey Dots

Let’s dive into the nostalgic charm of Classic Mickey Dots! This design is straightforward yet captivating. Start with a bold base coat—consider a vibrant red or sleek black to embody Mickey’s signature look. Once that’s set, use a dotting tool or even a toothpick to create Mickey’s iconic features: two small black dots for ears and a larger red dot for his head. It’s a fantastic choice for those new to nail art, making your nails pop effortlessly.
Outfit Pieces:
– Bright red or classic black nail polish (choose a quick-dry formula)
– Dotting tool or toothpick
– Clear top coat (for extra shine)
Styling Tips:
– Ensure each layer is fully dry before applying the next to avoid smudging.
– A glossy top coat enhances the design’s vibrancy and longevity.
With a simple yet bold aesthetic, this design is perfect for casual outings or fun weekend gatherings. Feel free to swap colors for a fresh twist, making it a versatile choice for any occasion.
📹 Related Video: DISNEY MICKEY & MINNIE MOUSE NAIL ART! MICKEY NAILS, DOTS / BOWS / GLITTER ❤️
2. Mickey on a Rainbow
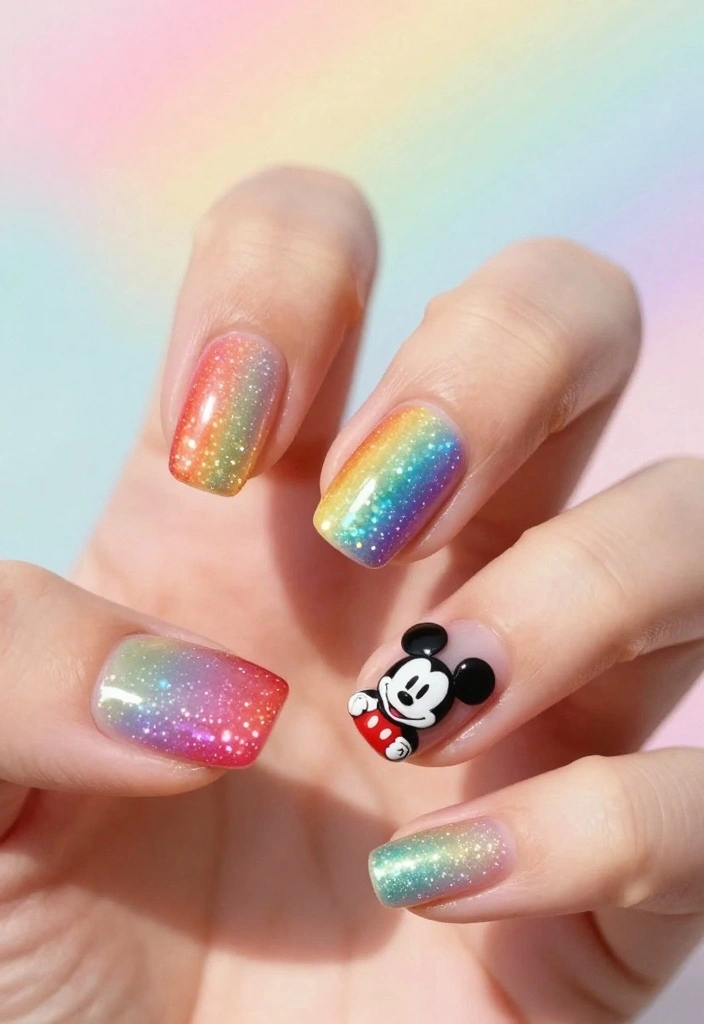
Brighten up your nails with the cheerful Mickey on a Rainbow design! This playful look combines vibrant colors in a gradient, with Mickey peeking out at the end. Start by applying a gradient effect using your favorite hues like blue, purple, pink, and sunny yellow. Once the base is dry, add a small Mickey sticker or paint his face at the rainbow’s tip. This design is all about expressing your colorful personality!
Outfit Pieces:
– Base coat (clear for protection)
– Nail polishes in blue, purple, pink, and yellow (quick-dry formulas recommended)
– Mickey sticker or fine brush for painting
– Shiny top coat
Styling Tips:
– Use a makeup sponge to blend colors smoothly for the gradient.
– Allow each color to dry completely before moving on to prevent smudges.
This vibrant design is perfect for festivals, parties, or any casual outing where you want to add a splash of fun. Mix and match colors based on your mood for endless variations!
Fun fact: 8 out of 10 nail-art lovers say rainbow gradients with mickey mouse nails spark more compliments on weekends. Try a quick gradient, then place a tiny Mickey at the rainbow’s tip for instant whimsy.
3. Mickey Silhouette
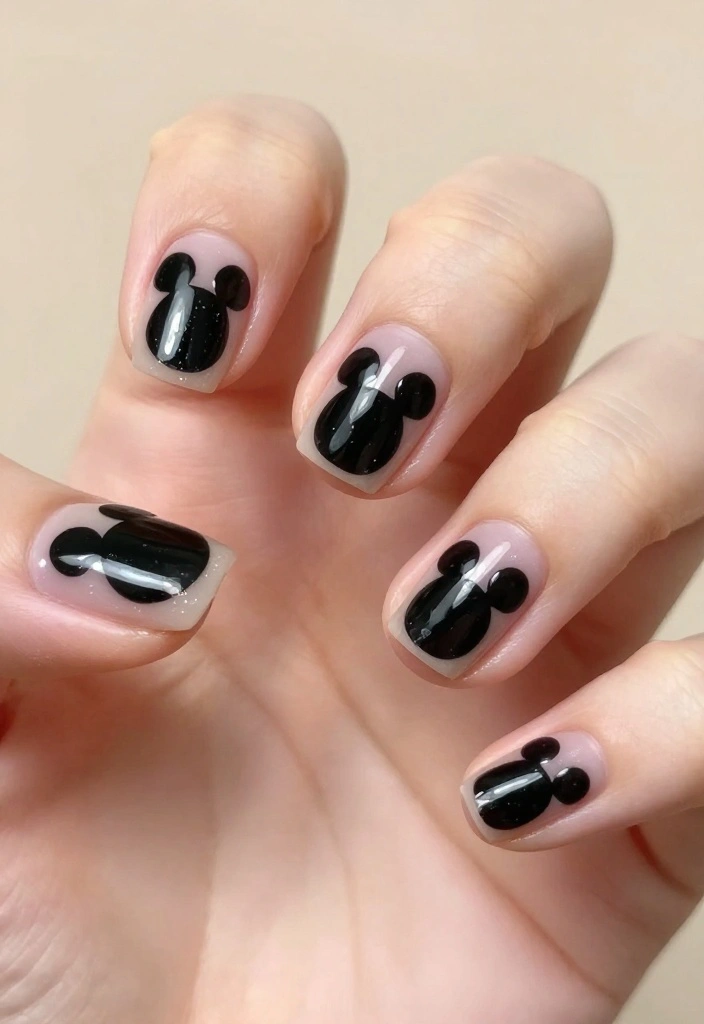
Elevate your nail art game with the chic Mickey Silhouette design! This style merges minimalism with fun, making it a perfect choice for a classy yet playful look. Start with a solid base color of your choice, ensuring it dries completely. Then, using a fine brush or sticker, create Mickey’s head and ears on one or two nails. Add a sprinkle of glitter around the edges for that extra sparkle!
Outfit Pieces:
– Base coat (your favorite solid color)
– Fine nail brush or Mickey silhouette stickers
– Glitter (optional for extra glamour)
– Clear top coat
Styling Tips:
– If painting the silhouette feels tricky, stickers can save time and effort.
– Choose a color that contrasts well with your base for a striking silhouette.
This design is great for any event, from casual coffee dates to elegant evenings. Personalize it further by experimenting with different colors for a unique look!
💅 Nail Art Made Easy!
Transform your nail game with our DIY guide, perfect for busy moms looking to create stunning designs effortlessly.
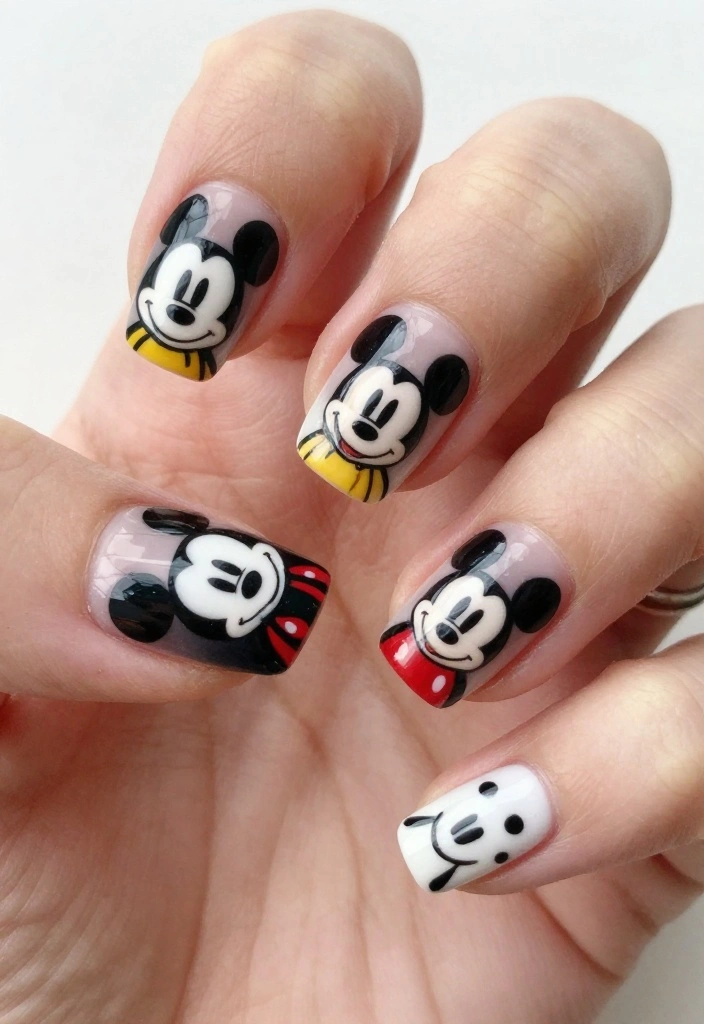
4. Mickey Mouse Hands
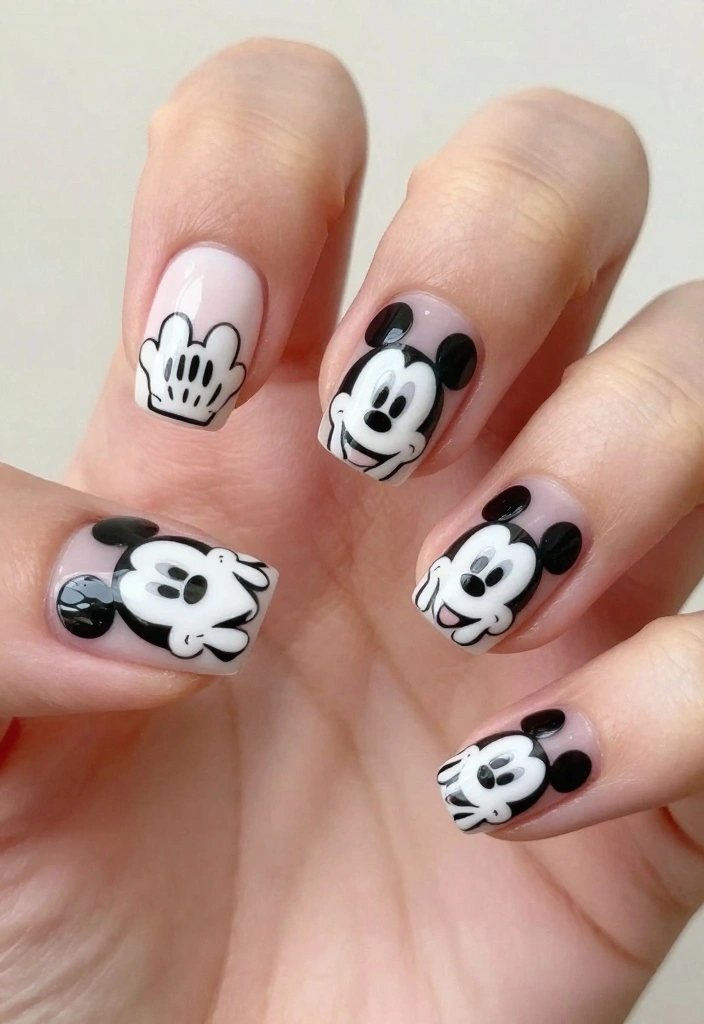
Bring a whimsical touch to your nails with the Mickey Mouse Hands design! This fun and playful look is perfect for Disney enthusiasts. Start with a clean white base coat to mimic Mickey’s glove. After it dries, use black polish to create two fingers on one side and outline the glove, adding a small dot for the thumb. It’s a quirky design that’s sure to catch eyes!
Outfit Pieces:
– White nail polish (quick-drying)
– Black nail polish (for the glove design)
– Clear top coat
Styling Tips:
– Keep a small brush handy for precise detailing.
– Practice your design on a piece of paper if you’re unsure about the placement.
This playful style is fantastic for casual outings, themed parties, or when you just want to add a bit of fun to your look. Feel free to mix it up by incorporating color variations!
5. Mickey with Hearts
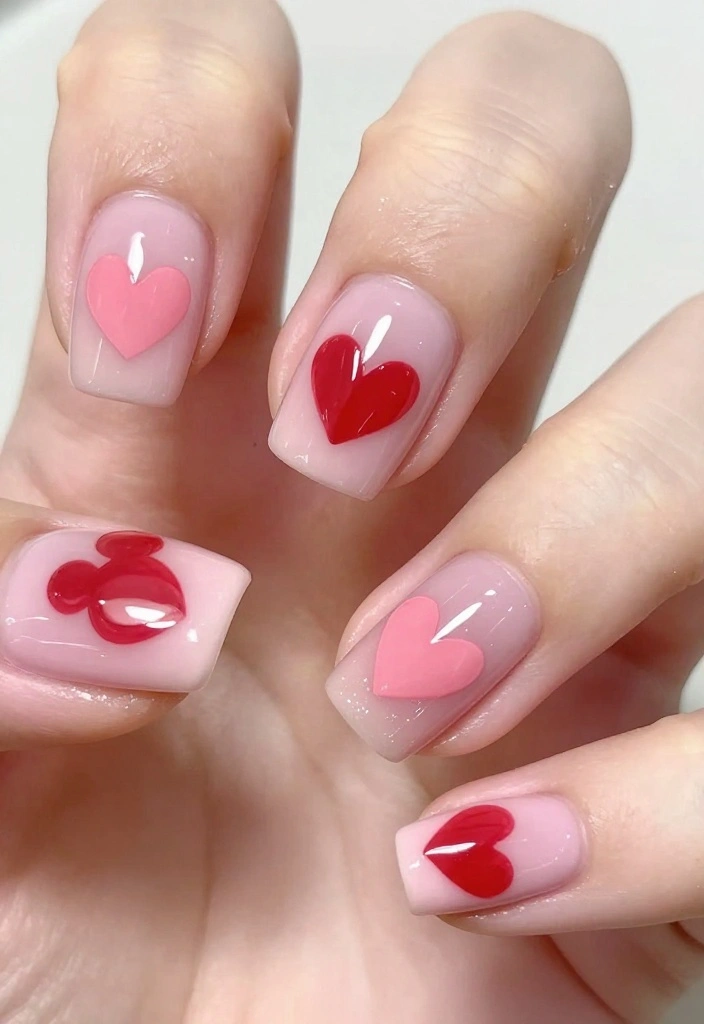
Show your love with the adorable Mickey with Hearts design! This romantic style is ideal for those who want a sweet touch to their nails. Start with a gentle pink or red base coat. After it dries, create cute little hearts alongside Mickey using paint or heart-shaped stickers for a quick update. It’s a lighthearted design that’s easy to achieve!
Outfit Pieces:
– Soft pink or red nail polish (choose a quick-dry option)
– Heart-shaped stickers or fine nail brush
– Clear top coat
Styling Tips:
– Use a toothpick to make small heart shapes if painting them.
– Experiment with different colors for the hearts to match your mood.
Perfect for date nights or fun outings with friends, this design allows for plenty of creativity. Switch up colors or heart sizes to keep things fresh!
6. Mickey Glitter Accents

Add some sparkle to your style with the Mickey Glitter Accents! This design begins with your favorite base color, setting the stage for glam. Once dry, apply glitter to the tips of your nails or around Mickey’s design. The added shimmer elevates the look, making it perfect for a night out! You can alternate between glitter and solid colors for a fun twist.
Outfit Pieces:
– Base color of your choice (quick-dry nail polish)
– Glitter (fine for a more polished look)
– Clear top coat
Styling Tips:
– Use a makeup sponge for cleaner glitter application.
– Seal with a top coat to prevent glitter from chipping off.
This design shines at parties, celebrations, or any occasion where you want to stand out. Feel free to mix glitter colors for a personalized sparkle!
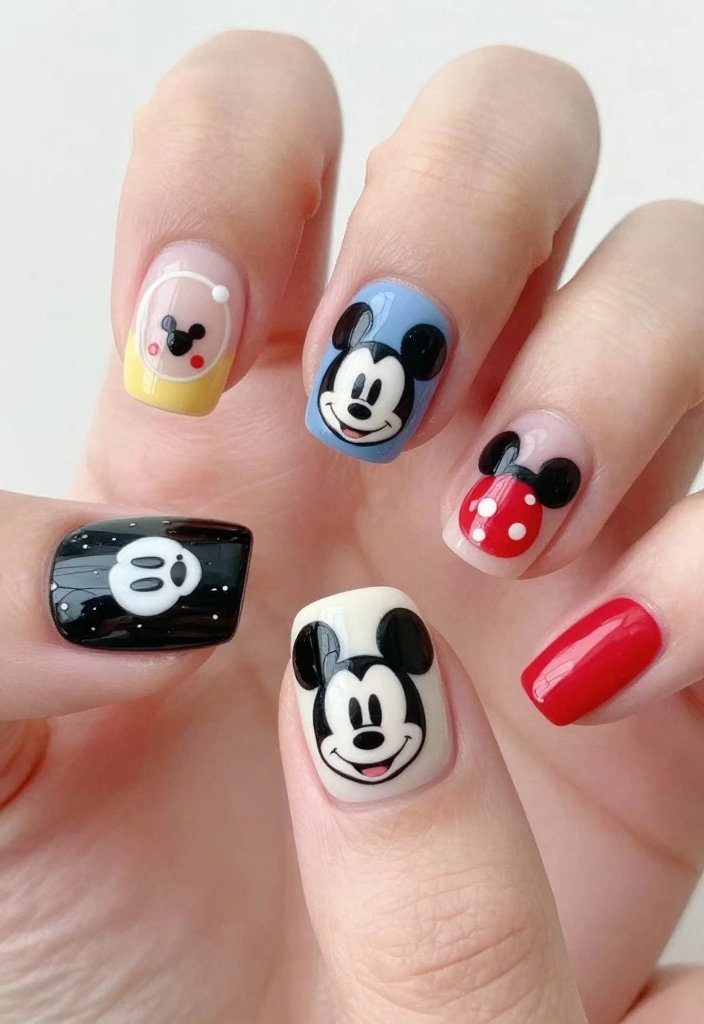
7. Mickey Mouse & Friends

Why limit your creativity to just Mickey when you can celebrate Mickey Mouse & Friends? This fun design showcases Mickey, Minnie, Donald, and Goofy all together! Begin with a soft pastel base for a fresh canvas. Using tiny brushes or dotting tools, paint each character on individual nails or use character stickers for a quicker option. This design is perfect for showcasing your Disney love!
Outfit Pieces:
– Pastel nail polish (your choice of colors)
– Fine detail brushes or character stickers
– Clear top coat
Styling Tips:
– Practice each character on paper before painting to get the details right.
– Mix and match colors for a vibrant look that pops.
This lively design is ideal for casual outings, Disney events, or whenever you want to spread some cheer. Personalize it by choosing your favorite characters!
Channel your inner Disney stylist with Mickey Mouse & Friends—pastel nails that stay cute all weekend. Start with a soft pastel base, then use tiny brushes or dotting tools (or stickers) to bring each character to life. Beginner-friendly and perfectly shareable!
How To Choose the Right Mickey Mouse Nail Designs
Choosing the perfect Mickey Mouse nail designs can seem overwhelming, especially with so many fun options available. Whether you want something simple or a little more intricate, there are a few key factors to consider before starting your nail art journey. Follow these tips to find the perfect Mickey Mouse nail style for you!
1. Skill Level
Before diving into nail art, consider your skill level. If you’re a beginner, starting with easy nail art styles like Classic Mickey Dots or Mickey Silhouette is a great choice. These designs require minimal tools and fewer steps. As you become more confident, you can try more complex styles like Mickey on a Rainbow or Mickey Mouse & Friends.
2. Nail Length
Your natural nail length can affect how certain designs will look. If you have longer nails, you might opt for intricate designs that span the entire nail, like Mickey with Hearts or Mickey Glitter Accents. If your nails are shorter, go for simpler patterns that won’t overwhelm your nails, such as Mickey pattern nails or Mickey Mouse Hands.
3. Color Palette
Choosing the right colors is crucial for a fun Mickey Mouse theme. Traditional red, black, and yellow are classic colors that resonate with Mickey Mouse. However, feel free to experiment with pastel colors or even glitter for a twist. Make sure the colors you choose complement each other and fit your personal style!
4. The Occasion
Think about where you plan to wear your Mickey Mouse nails. For a casual day out, you might rock Mickey pattern nails or simple Mickey dots. If you’re heading to a themed event or party, consider going bold with Mickey Mouse Holiday Nails or Mickey Mouse & Friends designs. The occasion can significantly influence your design choice.
5. Tools and Materials
Having the right tools can make a big difference in your nail art experience. Basic supplies include nail polish, a dotting tool or toothpick for small designs, and nail tape for clean lines. For more detailed designs, you might want to invest in nail brushes or nail art pens. Make sure you have everything ready before you start to avoid any interruptions.
6. Time Commitment
Consider how much time you’re willing to spend on your nails. Some designs, like Mickey with Hearts or Mickey Glitter Accents, may take longer due to multiple steps. If you’re short on time, stick to quicker designs that are easier to execute without sacrificing style.
Pro Tip: If you’re new to nail art, practice on a piece of paper or a practice nail before moving to your actual nails. This will help you build confidence and perfect your technique!
By keeping these factors in mind, you can choose a Mickey Mouse nail style that suits your personal taste and skill level. Enjoy experimenting with different designs, and don’t forget to have fun while creating your unique Mickey Mouse nails!
8. Mickey pattern nails
For those who love patterns, Mickey pattern nails are a must-try! This style features a solid base color, enhanced by nail tape to create a fun pattern with Mickey’s face peeking through. Opt for contrasting colors for a standout look that truly grabs attention. You can alternate between bright colors or stick with classic black and white for a timeless vibe.
Outfit Pieces:
– Solid color nail polish (your choice)
– Nail tape (for creating patterns)
– Clear top coat
Styling Tips:
– Allow each color to dry completely before using tape to avoid smudging.
– Plan your pattern ahead of time to keep the design neat and organized.
This intricate design is perfect for fashion-forward events, allowing you to showcase your creativity. Alternate colors or patterns to keep it fresh and exciting!
Fun fact: Mickey pattern nails can look pro with a solid base and nail tape—61% of beginners report standout results. Your mickey mouse nails stay bold with contrasting colors, and the pattern peeks through for a playful, weekend-ready vibe.
9. Mickey Mouse Holiday Nails
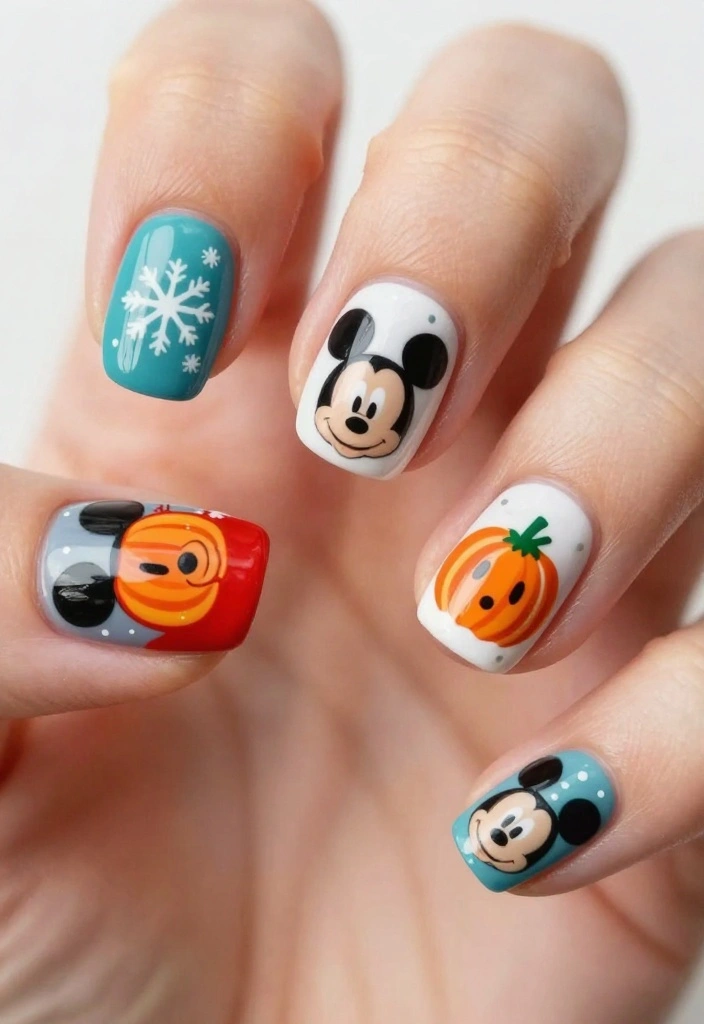
Embrace the festive spirit with Mickey Mouse Holiday Nails! Whether it’s Halloween, Christmas, or any celebration, you can tailor Mickey’s look to fit the season. Start by painting your nails in colors that reflect the holiday theme, then add fun elements like pumpkins, snowflakes, or hearts around Mickey. This design invites your creativity to shine!
Outfit Pieces:
– Seasonal color nail polish (specific to the holiday)
– Fine brush for detailing or stickers
– Clear top coat
Styling Tips:
– Use a small brush for intricate details.
– Don’t hesitate to experiment with your designs to make them uniquely yours.
Ideal for holiday gatherings, parties, or just adding a festive touch to your everyday look, this design offers endless possibilities for creativity!
Conclusion
From classic designs to whimsical patterns, Mickey Mouse nails bring joy and creativity to your fingertips!
Whether you’re a novice or a nail art pro, these ideas are simple, fun, and perfect for a weekend makeover.
So grab your nail polish, gather your friends, and get ready to show off these fabulous Mickey-inspired designs that are guaranteed to turn heads!
Frequently Asked Questions
What makes Mickey Mouse nails beginner-friendly and how should I start this weekend?
Mickey Mouse nails are a great entry point for easy nail art because most designs rely on a couple of simple shapes: round ears and clean color blocks. For this weekend, start with a clear base, pick two classic colors (black and white, or red and black), and practice the ears with a dotting tool or a steady brush. Try a classic black base with white ears near the cuticle and a tiny red bow on an accent nail for a Minnie vibe. Keep it simple—practice on one hand first, then mirror it on the other. If you want more ideas, there are plenty of nail tutorials you can follow.
What tools and supplies do I need to recreate Mickey Mouse nails at home?
To recreate mickey mouse nails at home, you really only need a small starter kit: a base coat and a top coat, black, white, and red nail polish (or gel), a dotting tool or a thin pin/bobby pin, a fine nail art brush or toothpick, striping tape for clean lines, a nail file, clippers, cotton swabs, and remover. Optional extras: a nail art pen or rhinestones for Minnie bows. This setup is perfect for easy nail art and the nail tutorials in the article will show you how to use these tools on each Mickey Mouse style.
Do you have step-by-step nail tutorials for each Mickey Mouse style?
Absolutely. The guide includes 9 Mickey Mouse nail styles with simple, actionable steps. A typical step-by-step looks like: Step 1: Prep nails with base coat. Step 2: Paint the main color. Step 3: Create the ears using two black dots near the cuticle. Step 4: Add a Minnie bow or a white dot on the accent nail. Step 5: Finish with a top coat. Adjust thickness and size to fit your nail shape, and mirror the same steps on the other hand. For more detail, follow the linked nail tutorials in the article.
How can I customize Mickey Mouse nails to match my outfit or occasion?
Want to customize Mickey Mouse nails for a specific outfit or occasion? Try color-switching: swap the classic black for a nail color that matches your look, or use a glitter gradient on the accent nail. You can keep the ears in black and white but change the bow from red to gold or pink for a different vibe. Matte finishes, rhinestones, or minimal negative-space ears are also stylish options. With these tweaks, your mickey mouse nails stay on trend while staying true to the easy nail art spirit.
How long will Mickey Mouse nails last and how should I care for them after a weekend manicure?
For weekend-ready mickey mouse nails, durability depends on your method. Regular polish will last a few days with a good top coat; reapply the top coat after 2-3 days and avoid soaking hands for long periods. If you’re using gel or extensions, follow your tech’s care instructions. Between wears, keep nails dry, apply cuticle oil, and use a non-acetone remover when you remove polish. When you’re ready for a refresh, you can try new nail tutorials to switch up the look.
Related Topics
mickey mouse nails
easy nail art
nail tutorials
beginner friendly
fun designs
Disney nails
weekend style
quick nail art
simple techniques
trendy nail styles
themed nail art
hand-painted nails
These Mickey Mouse nail styles look super fun! I can’t wait to give the polka dot design a try this weekend. Have you ever had a nail disaster while trying to do cute designs?
I love how easy these designs are! I once tried to do a Minnie Mouse look and ended up looking like I had a paint fight with my cat. 😂 What’s the funniest nail fail you’ve had?
Did you know that nail art has been around for thousands of years? Ancient Egyptians used to paint their nails with henna! It’s amazing how styles have changed since then.
I remember trying to do nail art for the first time, and I ended up with more polish on my fingers than on my nails! It took forever to clean up, but I laughed the whole time. Have you had a similar experience?