Nail art has taken the beauty world by storm, and if you’ve been scrolling through social media lately, you’ve probably seen the vibrant hues and playful designs that catch your eye. One trend that stands out is confetti nails. They’re a fun and festive way to express your personality, add a pop of color, and show off your creativity. I created this guide because I believe everyone should have the chance to rock this joyful nail art style, no matter their skill level.
If you’re a beginner looking to add some flair to your nails, this post is perfect for you. Whether you’re preparing for a special occasion or just want to brighten your day, there’s something magical about confetti nails. You might care about creating unique looks without spending hours at a salon or breaking the bank on nail art supplies. Here, you’ll discover 15 simple and eye-catching ideas that will help you jump-start your nail art journey.
These nail designs are easy to achieve and ideal for anyone who wants to experiment with beginner nail art. From classic rainbow confetti to minimalist chic styles, you’ll find designs that suit every mood and occasion. Let’s dive into these fun ideas so you can start showing off your colorful, confetti-covered nails in no time!
Key Takeaways
– Variety of Designs: Explore 15 unique confetti nail ideas that cater to different tastes, from classic rainbow styles to minimalist looks.
– Beginner-Friendly Techniques: Each design is easy to replicate, making them perfect for those new to nail art.
– Materials Needed: Understand the basic materials required for these designs, ensuring you have everything you need to get started.
– Step-by-Step Instructions: Follow clear instructions for each nail art idea, allowing you to create stunning looks without confusion.
– Personal Expression: Use these designs as a canvas for your creativity, giving you the freedom to mix colors and styles to make them your own.
Contents
- 1. Classic Rainbow Confetti
- 2. Pastel Dream
- 3. Metallic Confetti
- 4. Glitter Confetti Explosion
- 5. Tropical Fiesta
- 6. Simple Dot Confetti
- 7. Confetti French Tips
- 8. Ombre Confetti
- 9. Mood Ring Confetti
- 10. Earthy Autumn Confetti
- 11. Neon Party Confetti
- 12. Watercolor Confetti
- 13. Starry Night Confetti
- 14. Simple Stripes and Confetti
- 15. Minimalist Chic Confetti
1. Classic Rainbow Confetti
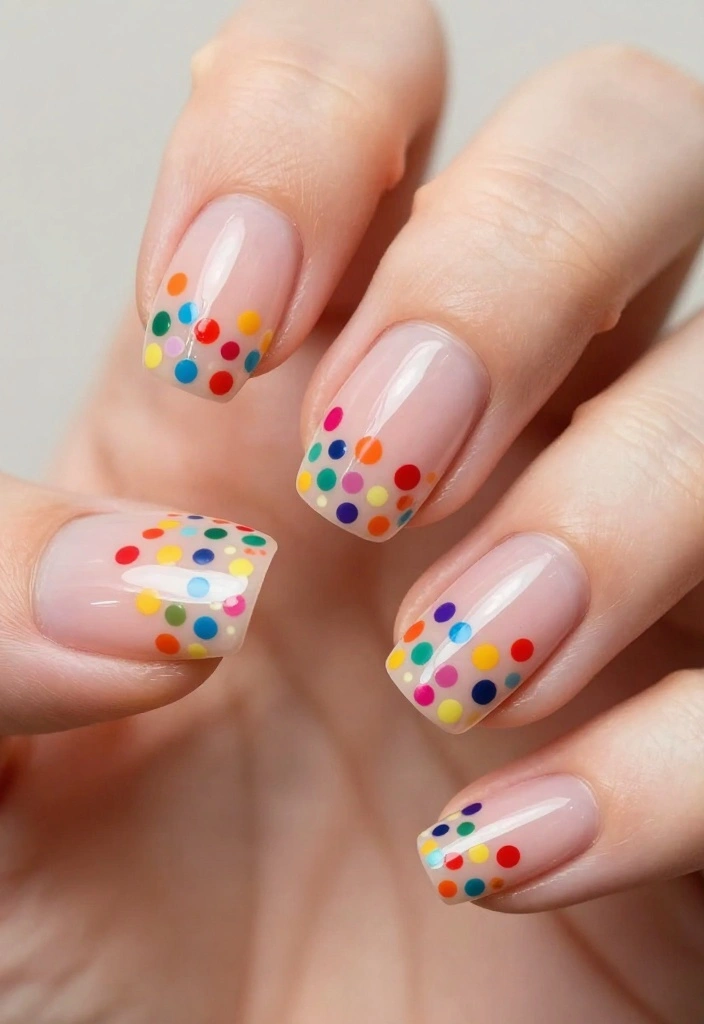
Start your nail art journey with a classic rainbow confetti design that radiates joy! By blending vibrant nail polishes, you can create a look that lifts your spirits. This playful style is versatile enough for a casual outing or a lively celebration, ensuring your nails are always the center of attention.
Outfit Pieces:
– Clear base coat for a smooth foundation
– Bright nail polishes (red, blue, yellow, green, and purple)
– Dotting tool or bobby pin for applying dots
– Optional: Glittery topcoat for added sparkle
Styling Tips:
– Allow each layer to dry thoroughly to prevent smudging.
– Use a matte topcoat for a chic twist on the finish.
– Focus on evenly spaced dots for a polished look.
This design guarantees that your nails will bring smiles, perfect for any occasion!
2. Pastel Dream
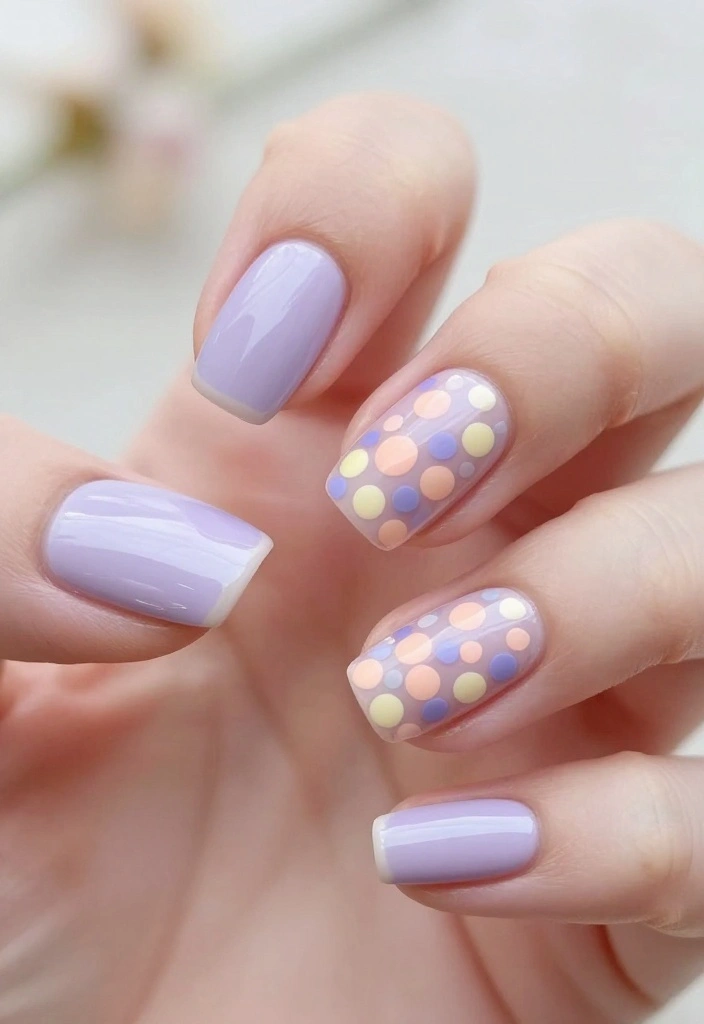
Pastel colors are trendy, and adding confetti makes them even cuter! This design is ideal for springtime or whenever you want a soft, feminine touch. Start by painting your nails in a light pastel shade, such as mint green or baby pink, for a dreamy base.
After the base dries, you can use a thin brush to add delicate dots in contrasting pastel shades like lavender, peach, or soft yellow. Finish with a glossy topcoat to unify the look beautifully.
Outfit Pieces:
– Light pastel nail polish (mint green or baby pink)
– Additional pastel shades (lavender, peach, soft yellow)
– Thin nail brush for dot application
– Glossy topcoat for a polished finish
Styling Tips:
– Blend two pastel colors as a base for an ombre effect.
– Experiment with various pastel combinations to discover your unique style.
– Keep the dots consistent in size for a cohesive appearance.
These nails will evoke feelings of spring blossoms and sweet treats!
Fun fact: 78% of nail-art fans say pastel confetti nails boost mood and spark creativity. For beginners, start with a soft mint or baby pink base, then sprinkle tiny lavender or peach dots. Seal with a glossy topcoat for long-lasting, salon-worthy confetti nails.
3. Metallic Confetti
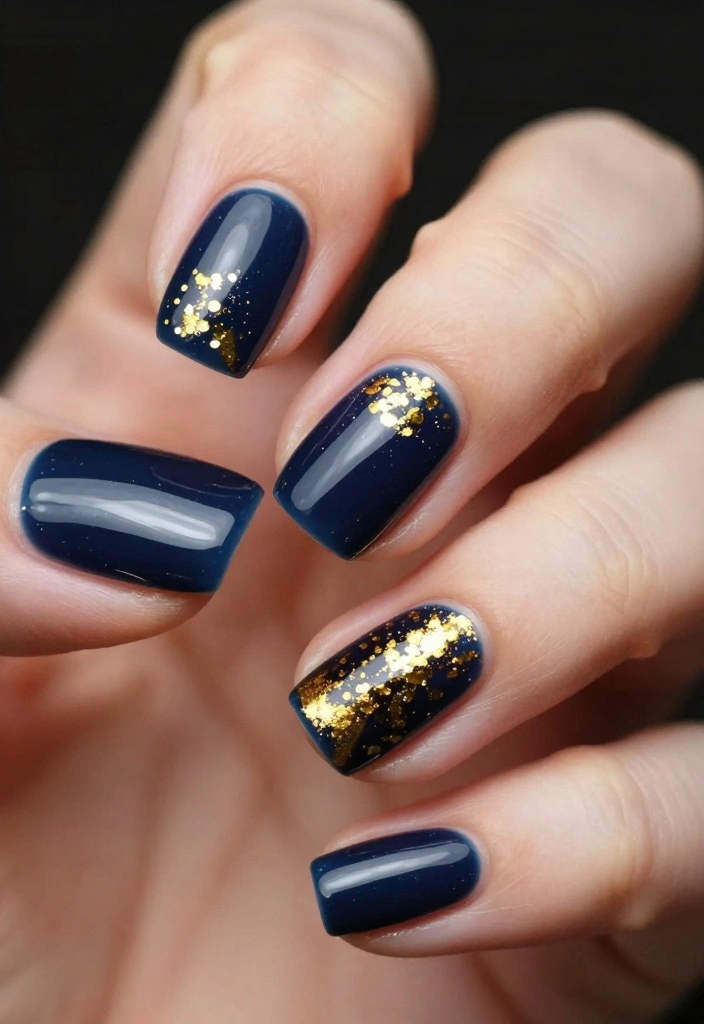
If glam is your style, metallic confetti nails are an excellent choice! Begin with a solid color base, like deep navy or classic black, for a dramatic backdrop. Once dry, use metallic polish in gold or silver to create stunning confetti shapes.
You can add petite triangles, dots, or stripes with a fine brush for a chic finish. This eye-catching design is perfect for a night out or special events!
Outfit Pieces:
– Dark base coat (navy or black)
– Metallic nail polish (gold or silver)
– Thin nail brush for detailed designs
Styling Tips:
– Apply each layer gently and allow it to dry completely.
– A matte topcoat can elevate the sophistication.
– Mix shapes for a playful yet polished look.
With this design, your nails will certainly stand out and be conversation starters!
📹 Related Video: Sistaco Application of Lavender & Confetti Metallic
💅 Nail Art Made Simple!
Unlock your creativity with our DIY Nail Art Guide, perfect for busy moms wanting stunning nails effortlessly.
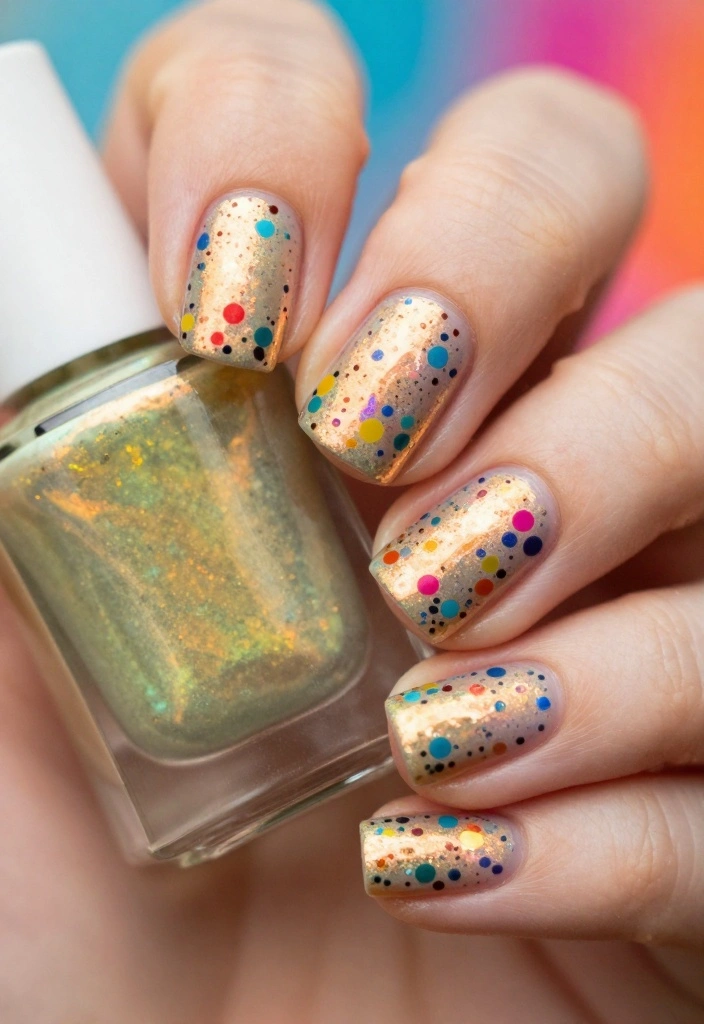
4. Glitter Confetti Explosion
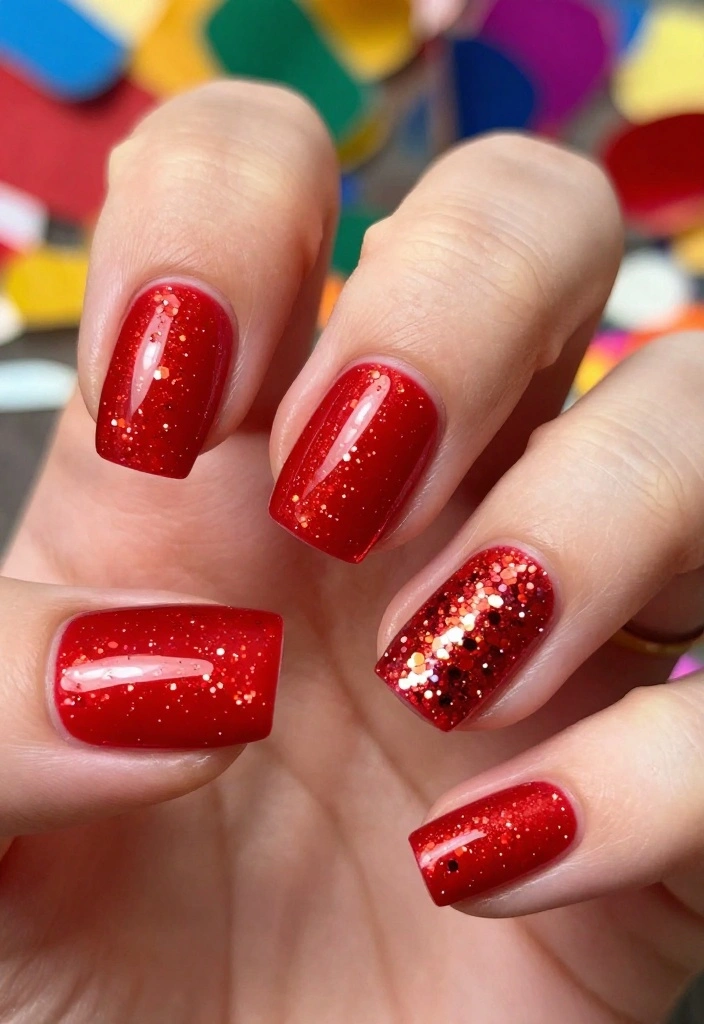
For a bold statement, a glitter confetti explosion is the way to go! Paint your nails with a vibrant base color like bright red or electric blue. Once the base dries, generously apply a glitter topcoat for maximum sparkle.
You can also sprinkle fine glitter or confetti pieces onto your nails while the topcoat is still wet for a stunning 3D effect. This lively design is perfect for celebrations and parties!
Outfit Pieces:
– Bright base color (red or electric blue)
– Glitter topcoat for sparkle
– Extra fine glitter or confetti pieces
– Clear topcoat to seal the look
Styling Tips:
– Use high-quality glitter polish to minimize fallout.
– Consider a soaking method for easy glitter removal.
– Apply with a light hand for an even finish.
Your nails will shine bright, ensuring all eyes are on you!
5. Tropical Fiesta
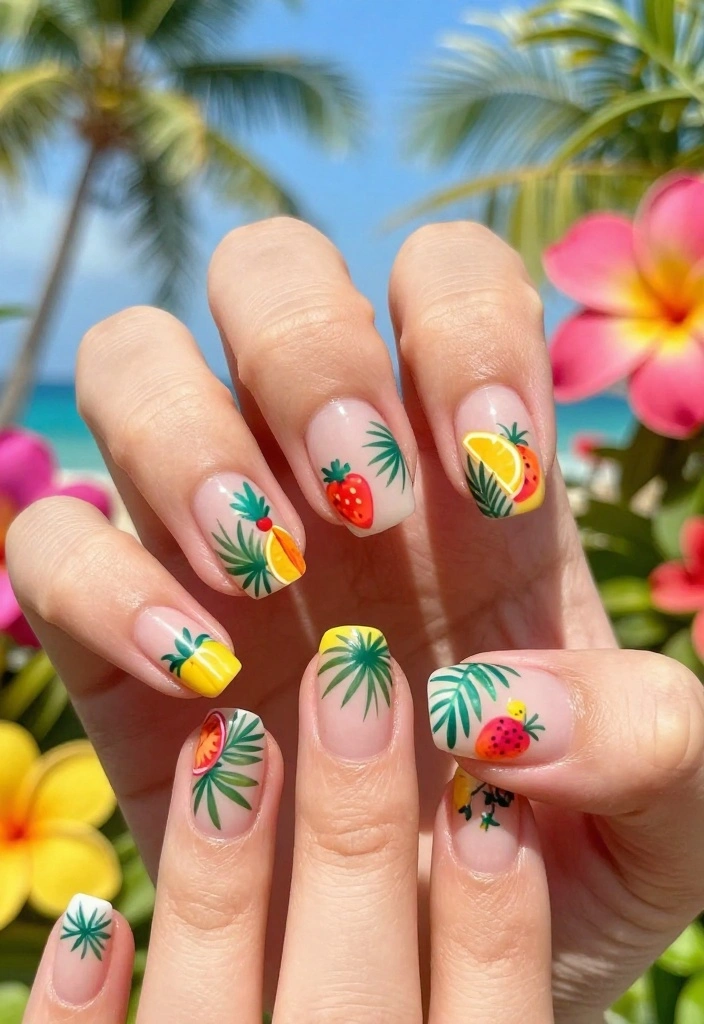
Transport yourself to a tropical paradise with a vibrant tropical fiesta design! Start with a nude base coat for a clean slate. Once dry, use bright colors like lime green, hot pink, and sunny yellow to paint fun shapes that evoke summer vibes and fruity designs.
Think palm leaves, pineapples, or cheerful flowers. Finish with a glossy topcoat for a refreshing look that’s perfect for summer!
Outfit Pieces:
– Nude base coat for a natural look
– Bright nail polishes (lime green, hot pink, sunny yellow)
– Thin brush for detailed shapes
– Glossy topcoat for shine
Styling Tips:
– Use nail stencils for accuracy in designs.
– A matte finish can give an interesting summer vibe.
– Keep shapes simple for an effortless look.
With these nails, you’ll feel like you’re enjoying a beach vacation every time you glance at your hands!
6. Simple Dot Confetti
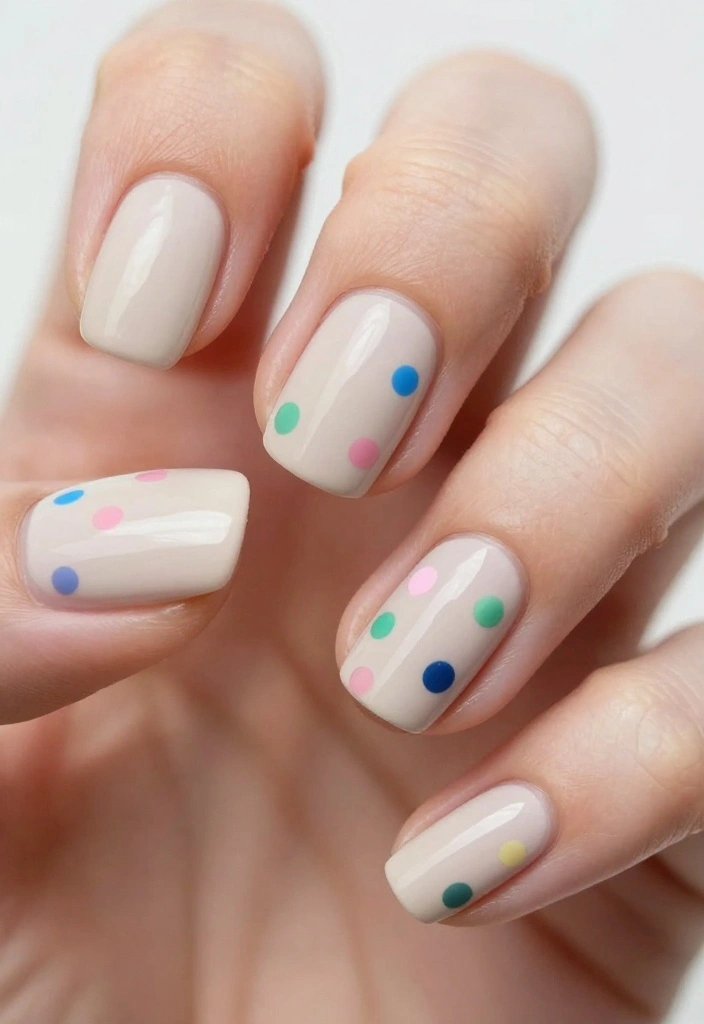
Sometimes simplicity is key! A simple dot confetti design offers elegance with minimal effort. Start with a neutral base color, such as beige or light gray. Once dry, use a dotting tool to create clusters of tiny dots in three different colors for a chic and playful appearance.
This understated design is suitable for any occasion, adding a touch of fun to your polished look.
Outfit Pieces:
– Neutral base coat (beige or light gray)
– Dotting tool for applying dots
– Three contrasting colors for dots
– Topcoat to seal the design
Styling Tips:
– Maintain consistent dot sizes for a tidy look.
– Stick to a monochrome palette for a sleek finish.
– Space clusters evenly for a balanced appearance.
This design is perfect for those who appreciate a refined yet playful nail art style!
7. Confetti French Tips
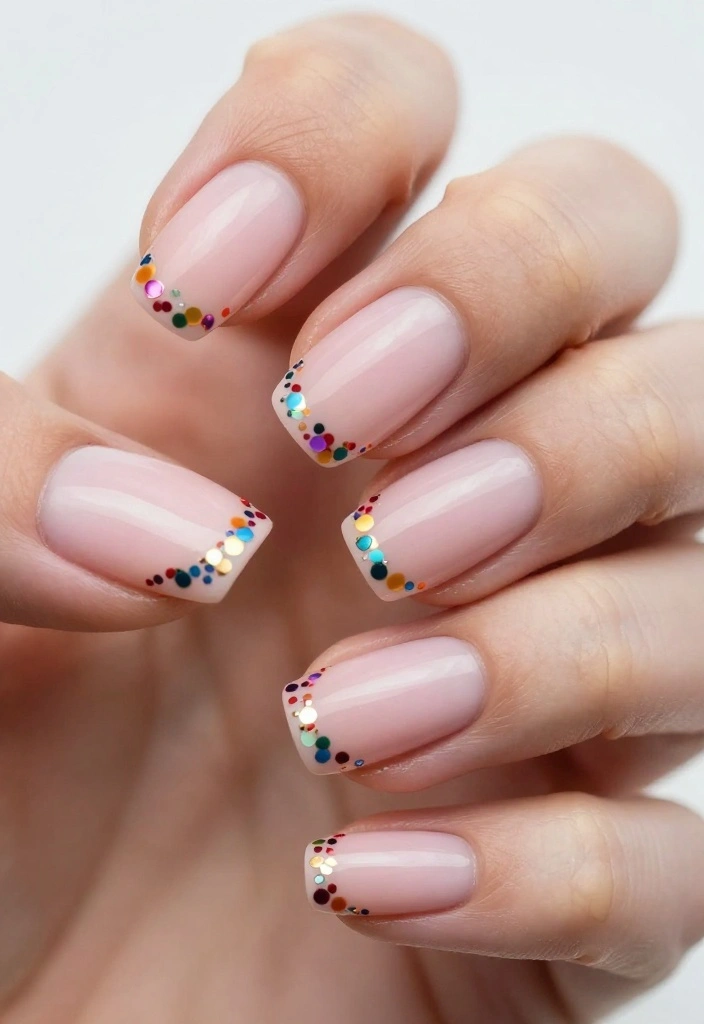
Elevate the classic French manicure with a fun confetti twist! Start with a pale pink base for that timeless French look. Instead of the traditional white tips, use colorful confetti accents along the tips for a fresh take.
You can mix and match colors for a playful vibe or opt for shades that are more cohesive. This design shines for weddings or special occasions!
Outfit Pieces:
– Pale pink base coat for a classic touch
– Colorful confetti polishes for tips
– Tape for clean lines
– Clear topcoat for finishing touch
Styling Tips:
– Use tape to achieve sharp lines on the tips.
– Ensure the base is completely dry before adding confetti.
– Keep confetti evenly spaced for a polished look.
Your nails will blend chicness and fun, making them a perfect accessory!
8. Ombre Confetti
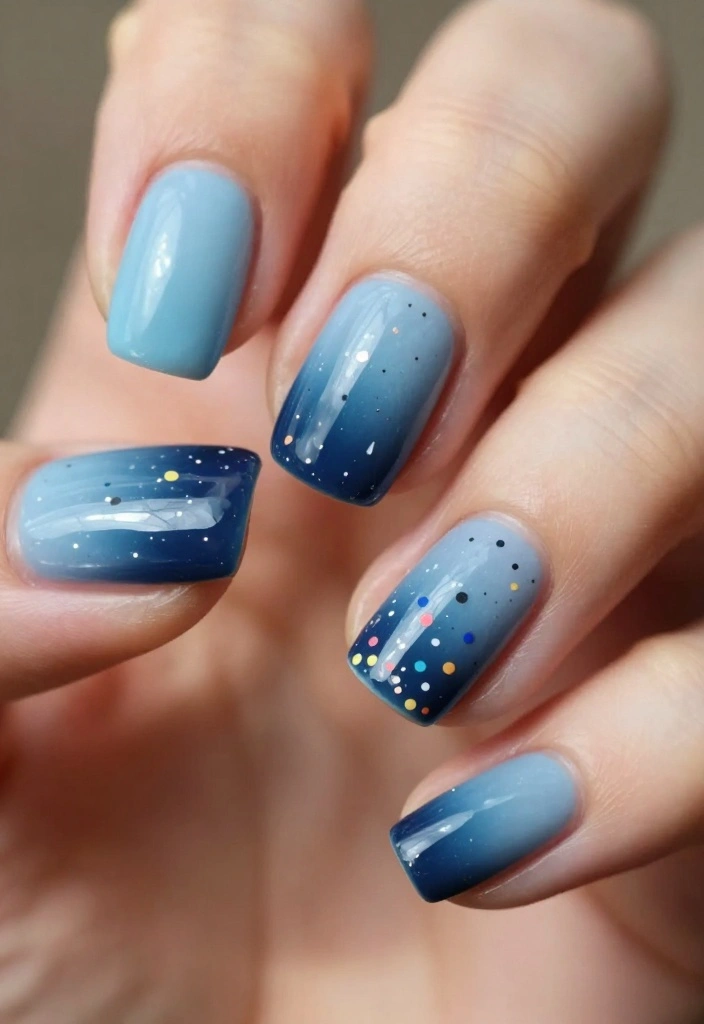
Get creative with an ombre confetti design! Start with a base color that transitions from light to dark, like a gradient from light blue to navy. Once your ombre base is dry, scatter colorful confetti dots across your nails for a whimsical touch.
This design beautifully combines two popular nail art styles for a stunning effect!
Outfit Pieces:
– Gradual ombre base colors (light blue to navy)
– Various colors for confetti dots
– Sponge or brush for blending
– Topcoat to seal the design
Styling Tips:
– A makeup sponge helps create a perfect ombre effect.
– Choose contrasting colors for confetti to make it pop.
– Ensure the ombre base is fully dry before adding dots.
You’ll adore how the colors blend, making each nail a delightful work of art!
9. Mood Ring Confetti
Express your feelings with a mood ring confetti design! Start with a color-changing nail polish that shifts with your temperature as the base. Once dry, layer colorful confetti dots or shapes on top for a fun and dynamic look.
This creative design not only looks fantastic but also reflects your current mood!
Outfit Pieces:
– Color-changing nail polish for a unique base
– Colorful confetti for layering
– Clear topcoat for sealing
Styling Tips:
– Ensure the base is fully dry to avoid smudging.
– Choose confetti colors that contrast with your base.
– Space out confetti for a balanced design.
Your nails will not only dazzle but also shift with your vibe throughout the day!
Confetti nails let your mood show up in color—Mood Ring Confetti, literally. Start with a temperature-changing base, then sprinkle playful confetti dots for a dynamic look that shifts with you. It’s cute, easy to layer, and totally shareable.
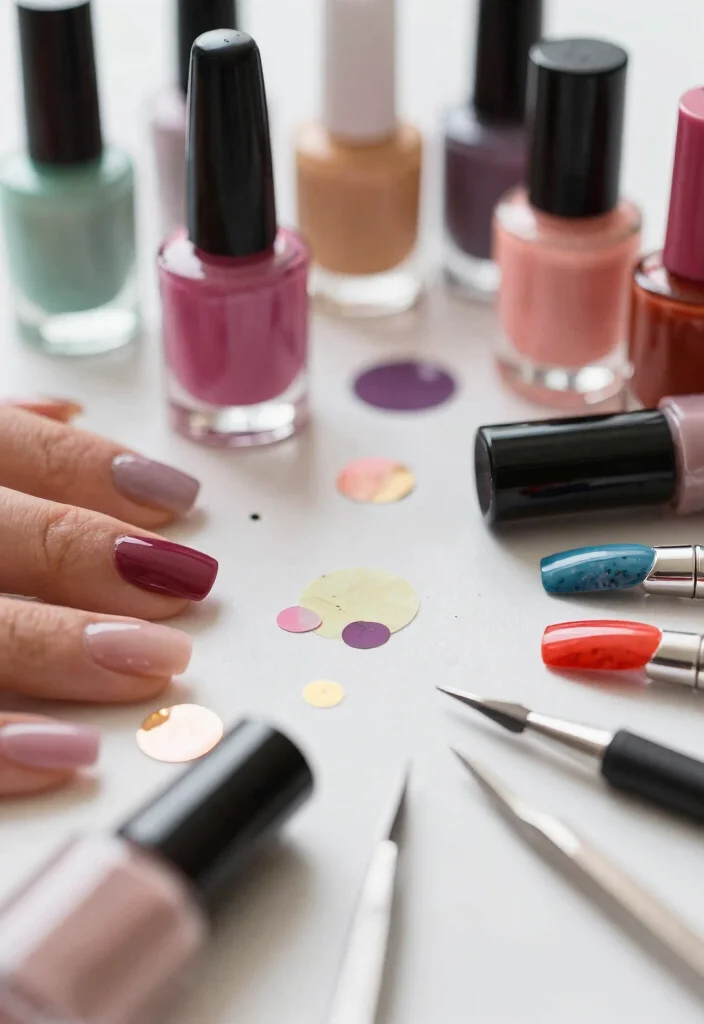
How To Create Confetti Nails
Tools You’ll Need:
– Nail polish (base color, confetti colors, and top coat)
– Dotting tool or toothpick
– Small sponge (optional)
– Nail tape (optional)
– Clear nail polish (for sealing)
– Nail file and buffer
– Cuticle stick or pusher
Step 1: Prep Your Nails
Before you start painting, take a moment to prepare your nails. Begin by trimming and shaping them to your desired length. Use a nail buffer to smooth out any rough edges. Clean your nails with a gentle nail polish remover to ensure no oils or residues interfere with your nail art.
✔ Push back cuticles gently using a cuticle stick.
✔ Wash your hands and dry them thoroughly.
Step 2: Apply Base Color
Choose a base color for your confetti nails. This color will serve as the canvas for your artwork. Apply a base coat to protect your nails, followed by two coats of your chosen polish. Allow each coat to dry completely. Lighter colors work well for vibrant confetti, while darker shades can create a stunning contrast.
✔ Apply a thin layer of polish, allowing it to dry before applying the next layer.
✔ Choose a color that complements your confetti design.
Step 3: Create Confetti Design
Now it’s time to add the confetti! Pick two to three colors that you want for the confetti. Using a dotting tool or a toothpick, dip it into your chosen nail polish and gently dot it onto your nails. You can create random patterns or clusters for a fun look. For a more unique design, consider using a small sponge to dab on the colors.
✔ Experiment with different sizes of dots to create depth.
✔ Use glittery nail polish for an extra pop!
Step 4: Seal Your Design
Once your confetti design is complete, it’s essential to seal it in. Apply a clear top coat over your nails to protect your design and add shine. This coat helps to prevent chipping and keeps your nails looking fresh for longer. Allow sufficient drying time after applying the top coat to avoid smudging your design.
✔ Use a quick-dry top coat if you’re in a hurry!
✔ Apply a second coat of top coat for extra durability.
Step 5: Clean Up Edges
After everything is dry, check for any nail polish that may have gotten onto your skin or cuticles. Use a small brush dipped in nail polish remover to carefully clean up these areas. This step will ensure that your confetti nails look neat and tidy.
✔ Keep a steady hand while cleaning to avoid damaging your design.
✔ Allow the remover to dry before showing off your nails!
Step 6: Show Off Your Confetti Nails!
You’ve created stunning confetti nails! Now it’s time to show them off. Take photos, flaunt them at parties, or wear them casually. The best part about confetti nails is that they can be as unique as you are, so feel free to mix and match colors and designs for every occasion.
✔ Share your nail art on social media to inspire others!
✔ Don’t be afraid to try different styles and themes for every season.
⏱ Time: ~30-45 minutes | 💡 Tip: Use nail tape for clean lines if you decide to create a more structured confetti design. Experiment with different shapes and sizes of confetti for a personalized look!
10. Earthy Autumn Confetti
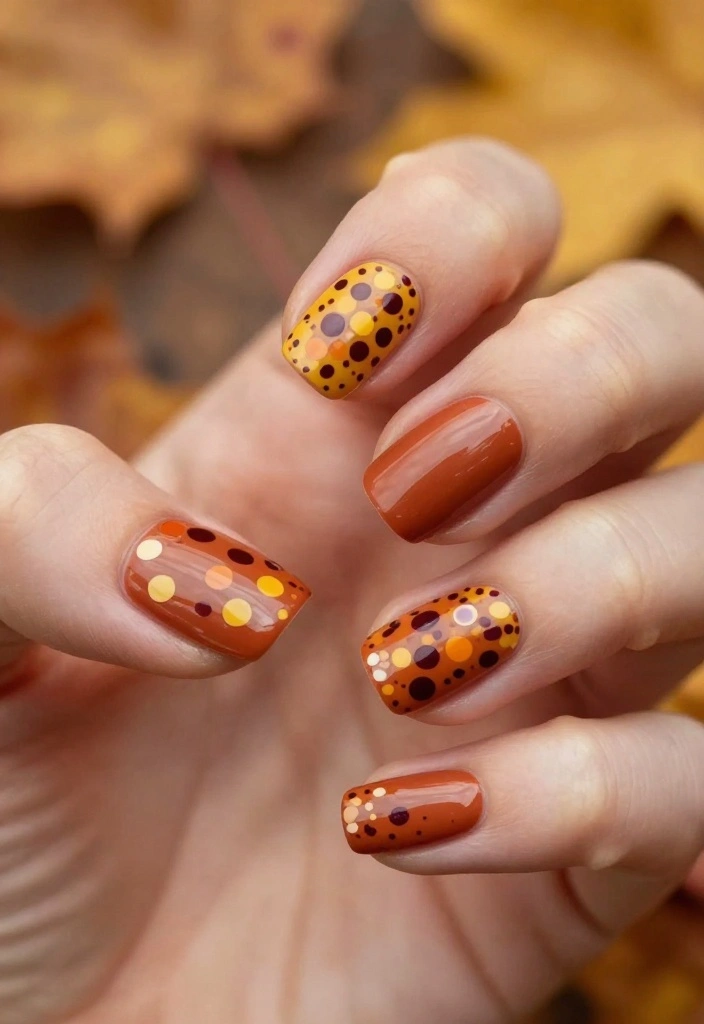
Celebrate the cozy vibes of autumn with an earthy confetti design! Start with a warm base color like terracotta or olive green. Once dry, use earthy tones such as mustard yellow, burnt orange, and deep burgundy for confetti dots.
This design captures the warmth and colors of nature, making it perfect for the fall season.
Outfit Pieces:
– Warm base color (terracotta or olive green)
– Earthy tones for confetti dots
– Dotting tool for application
– Matte topcoat for a seasonal finish
Styling Tips:
– Add leaf shapes for a festive touch.
– A matte topcoat enhances the autumn feel beautifully.
– Keep confetti evenly spaced for a harmonious look.
These nails will bring all the cozy autumn feelings right to your fingertips!
11. Neon Party Confetti
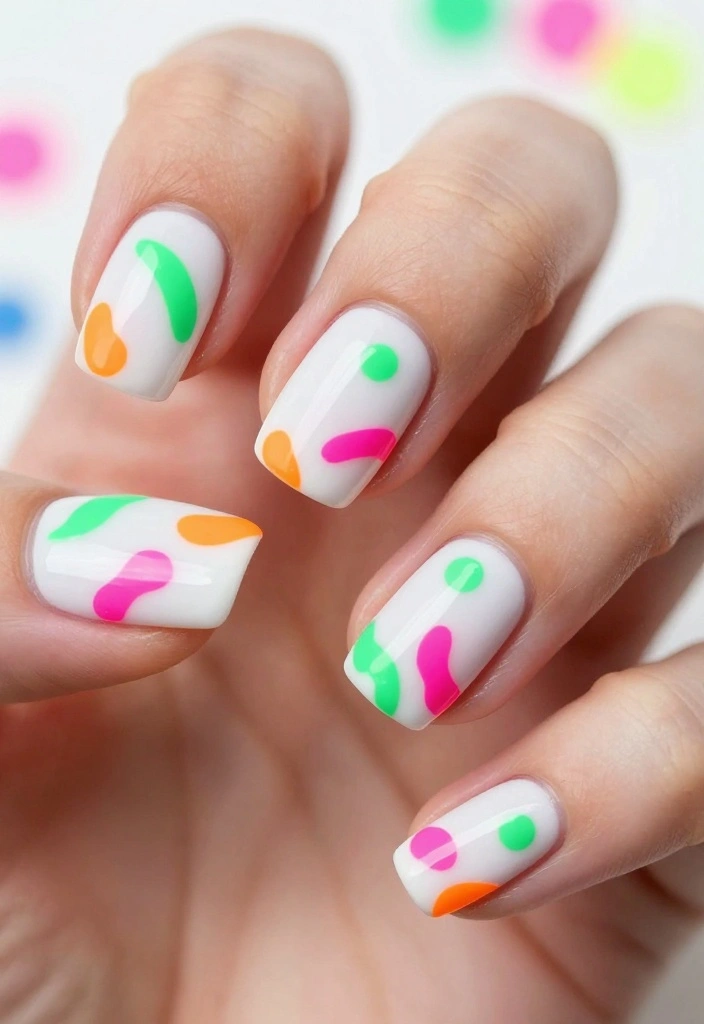
Get ready to hit the party scene with neon confetti nails! Start with a bright white or black base to make those neon colors really pop. Once the base is dry, use vibrant neon polishes like pink, green, and orange to create playful confetti shapes.
This lively design is energetic and perfect for a night out or a festival vibe!
Outfit Pieces:
– Bright base coat (white or black)
– Neon nail polishes (pink, green, and orange)
– Thin brush for applying confetti
– Glossy topcoat to finish
Styling Tips:
– A white base helps neon colors stand out.
– A matte finish can add an edgy touch.
– Space out confetti for a fun yet organized look.
Your nails will radiate positivity and excitement, perfect for any adventure!
Fun fact: Neon confetti nails glow brighter on a white or black base, so your party look pops under UV lights. Start with a crisp base, then dot neon pink, green, and orange for a wearable, crowd-pleasing design.
12. Watercolor Confetti
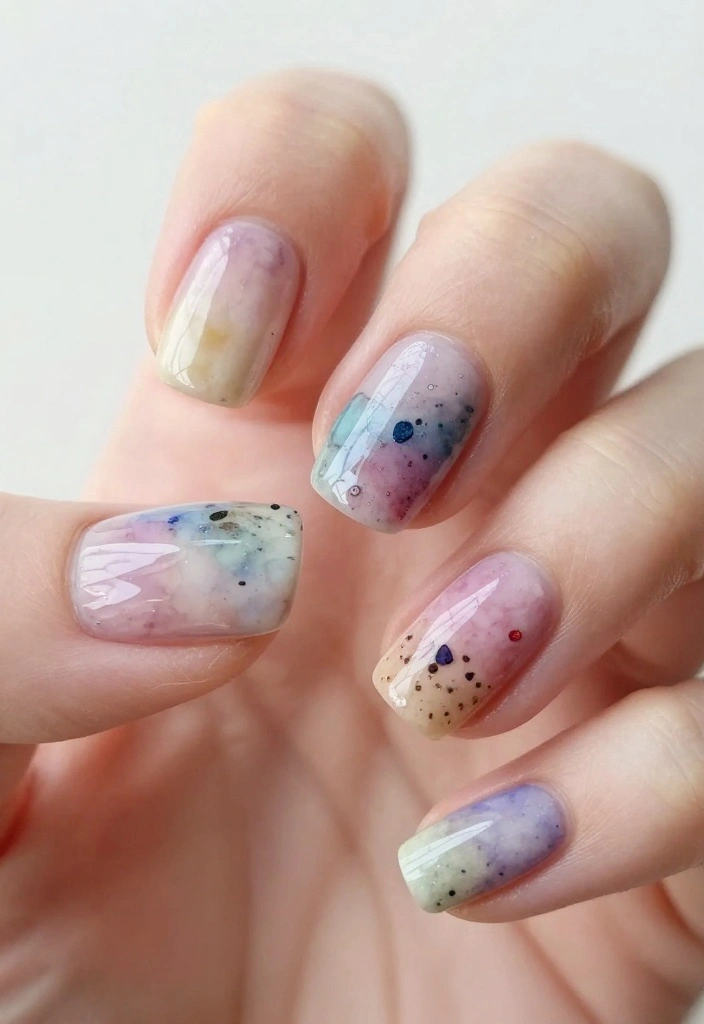
Create a whimsical watercolor effect with confetti! Start with a light, water-based polish as your base. Once dry, use a small brush or sponge to dab in soft colors, blending to mimic a watercolor painting.
Then, add small bits of confetti in contrasting colors for a fun twist. This design is perfect for those who love a soft, artistic look!
Outfit Pieces:
– Light water-based polish for the base
– Soft colors for watercolor effect
– Small brush or sponge for blending
– Topcoat to seal the design
Styling Tips:
– Use a clean brush to blend colors seamlessly.
– A clear gel topcoat helps maintain the watercolor feel.
– Allow each layer to dry completely before adding confetti.
These nails will showcase your artistic flair and are sure to turn heads!
13. Starry Night Confetti
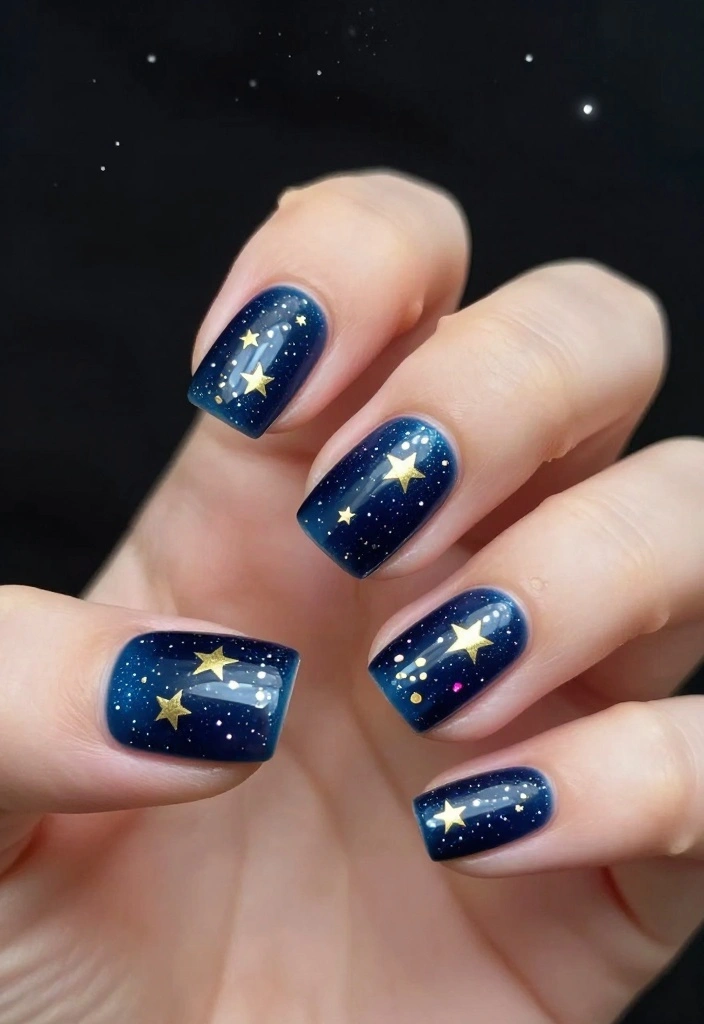
Capture the enchantment of a night sky with a starry night confetti design! Start with a deep navy or black base for a dramatic effect. Use tiny gold or silver dots to represent stars and add colorful confetti for shooting stars or planets.
This dreamy design is perfect for any occasion, giving your nails an ethereal glow.
Outfit Pieces:
– Deep base color (navy or black)
– Gold or silver polish for stars
– Colorful confetti for added flair
– Topcoat to finish the look
Styling Tips:
– Consider using glow-in-the-dark polish for an extra magical touch.
– A matte topcoat creates a galaxy-like finish.
– Use a dotting tool for precise star placement.
Your nails will embody the beauty of the night sky, adding a touch of magic to your style!
14. Simple Stripes and Confetti
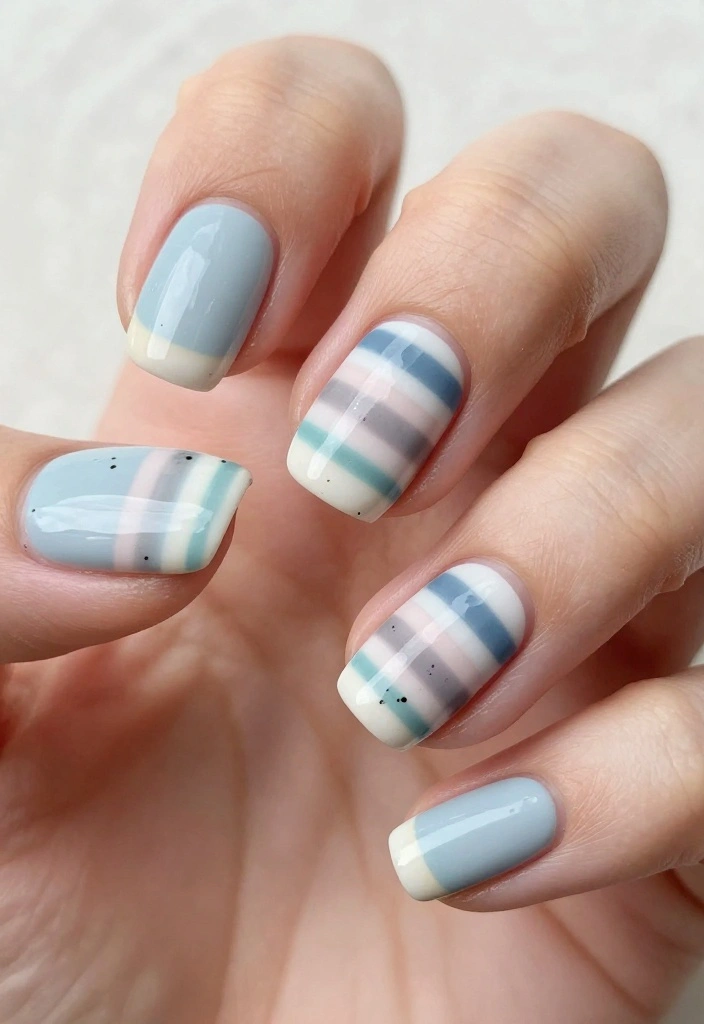
Sometimes, a simple stripe is all you need! Start with a soft base color, then add horizontal or vertical stripes using a thin brush in contrasting colors. Sprinkle some confetti around for added interest.
This design blends structure and fun, making it perfect for any casual day out!
Outfit Pieces:
– Soft base color for the foundation
– Contrasting polish for stripes
– Thin brush for applying stripes
– Confetti for added flair
Styling Tips:
– Use tape for cleaner, sharper stripes.
– Make sure the base color is completely dry before adding stripes.
– Space confetti evenly for a balanced look.
You’ll appreciate how easy and stylish these nails can be!
15. Minimalist Chic Confetti
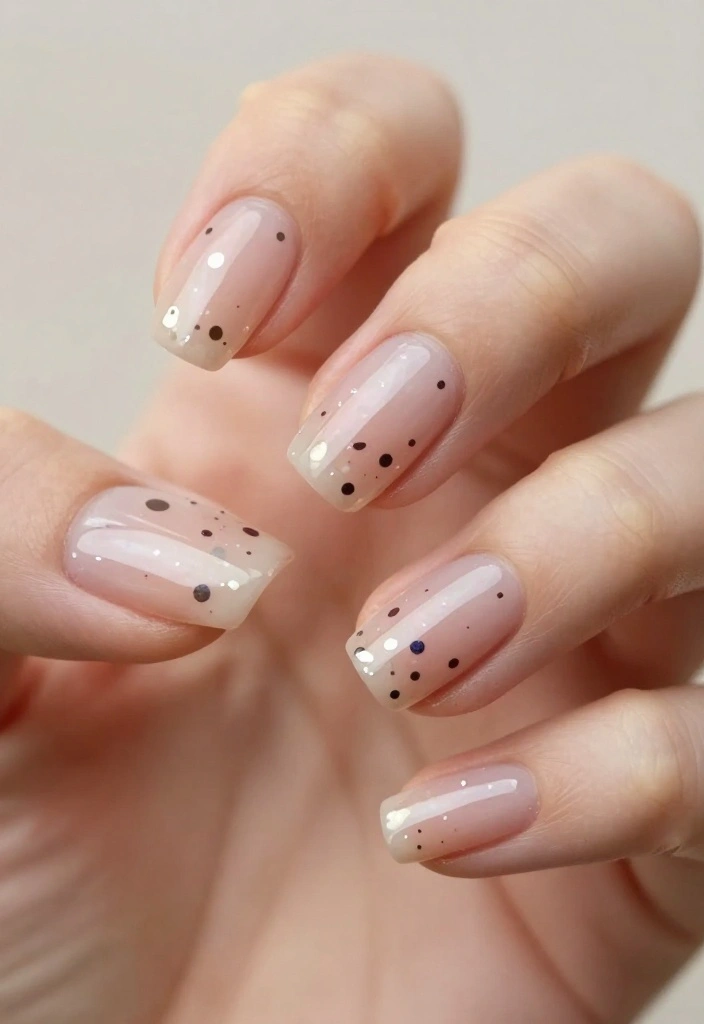
For those who love minimalism, minimalist chic confetti nails are ideal! Start with a clear or nude base coat, then add just a few strategically placed confetti dots in muted or metallic tones.
This design is perfect for work or any setting where you want to keep it stylish yet subtle.
Outfit Pieces:
– Clear or nude base coat for a fresh look
– Muted or metallic colors for confetti dots
– Dotting tool for precise application
– Topcoat to seal the design
Styling Tips:
– Keep confetti sparse for a true minimalist style.
– A matte finish can enhance the chic vibe.
– Focus on placement for a well-balanced look.
These nails will showcase your sophisticated style while still being playful!
Conclusion
Confetti nails are a fun, creative way to express yourself and add some sparkle to your look! Whether you opt for bright colors, pastels, or chic metallics, the options are endless.
These simple designs are perfect for beginners, encouraging you to experiment and find your unique style. So grab your nail polish and let your creativity shine! Don’t forget to share your confetti nail adventures with friends or on social media. Happy nail painting! 🎨
Frequently Asked Questions
What exactly are confetti nails and why are they great for beginner nail art?
Confetti nails are nails decorated with tiny glitter, foil, or microconfetti pieces layered over a solid base to resemble festive confetti. They’re perfect for beginner nail art because you can control the look without advanced freehand designs. How to do a quick version: prep your nails and apply a base color, wait for it to dry to a light tack, place confetti pieces with tweezers or a dotting tool, press gently to set, and seal with a generous top coat. For durability, add a second top coat after the first dries.
Tip: choose a color palette that matches your outfit to make your confetti nails pop.
What supplies do I need to create confetti nails at home as a beginner?
To get started, stock up on these essentials: base coat, a couple of simple nail designs color options, top coat, and confetti bits (glitter, foil fragments, or microbeads). Add a small pair of tweezers or a toothpick, a dotting tool or orange stick, cleanup brushes or cotton buds, nail polish remover, and optional tools like striping tape for clean edges. Steps: prep nails, apply base coat and color, while the polish is still wet place confetti pieces, press to set, clean up edges, finish with top coat. Let dry. Great for beginner nail art projects.
Which simple nail designs pair well with confetti nails for a cohesive look?
Pair confetti nails with these easy combos: 1) a solid color on all nails with one accent nail featuring confetti, 2) negative-space base where confetti is applied on a cut-out area, 3) a classic French tip with confetti at the tip, 4) a subtle gradient base color with scattered confetti, or 5) confetti on all nails but vary the base colors for a coordinated party vibe. To execute: pick a limited color palette, apply base color, add confetti to chosen nails while the color is tacky, seal with a top coat, and keep edges neat for a polished look.
These ideas are simple nail designs that highlight the confetti without overcomplicating the art.
How can I make confetti nails last longer and prevent chipping?
Treat confetti nails like a mini manicure win: start with clean, shaped nails and push back cuticles, then apply thin base coats. Use a strong top coat and seal the free edges to prevent wear. Allow adequate drying time between layers, and consider capping with a second layer of top coat for durability. Limit exposure to water and harsh detergents for the first 24 hours, and refresh the top coat every 2–3 days to keep the look intact. This approach makes confetti nails last longer while still looking fresh.
How do I safely remove confetti nails and fix mistakes without damaging my nails?
If you notice a misfit confetti piece, you can reposition it with tweezers before the top coat fully sets. For removal, the easiest method is the acetone foil wrap: soak a cotton ball in acetone, place on the nail, wrap with foil for 10–15 minutes, then gently lift off the old polish and confetti. Gently push off any remaining pieces with an orange stick and moisturize afterward. If you want to fix a small mistake, you can reapply a thin layer of base color and press fresh confetti, then seal with top coat. This keeps your nails healthy while still letting you experiment with simple nail designs.
Related Topics
confetti nails
beginner nail art
simple nail designs
nail art tutorial
easy nail techniques
festive nail art
quick nail ideas
colorful nails
DIY nail designs
nail art for beginners
fun nails
seasonal nail trends
These confetti nails look amazing! I tried a similar design for my friend’s birthday party, and it turned out to be a hit. What’s your favorite color combo for confetti nails?
I love how easy these look! I once tried to do confetti nails and ended up getting glitter all over my house. My cat looked like a disco ball for weeks! 😂
Did you know that nail art goes back to ancient Egypt? They used natural dyes to decorate their nails! It’s cool to think about how styles have changed, right?
I remember the first time I tried nail art. I got so excited that I spilled the polish all over my white carpet! Lesson learned—always have a backup plan. Have you ever had a nail mishap?